Note
Access to this page requires authorization. You can try signing in or changing directories.
Access to this page requires authorization. You can try changing directories.
In this quickstart, you create an AI Manager with a managed AKS cluster, add a namespace, deploy a supported model from the regional catalog, and send a chat completion request.
Important
AKS preview features are available on a self-service, opt-in basis. Previews are provided "as is" and "as available," and they're excluded from the service-level agreements and limited warranty. AKS previews are partially covered by customer support on a best-effort basis. As such, these features aren't meant for production use. For more information, see the following support articles:
Before you begin
- If you don't have an Azure account, create a free account before you begin.
Use the Bash environment in Azure Cloud Shell. For more information, see Get started with Azure Cloud Shell.

If you prefer to run CLI reference commands locally, install the Azure CLI. If you're running on Windows or macOS, consider running Azure CLI in a Docker container. For more information, see How to run the Azure CLI in a Docker container.
If you're using a local installation, sign in to the Azure CLI by using the az login command. To finish the authentication process, follow the steps displayed in your terminal. For other sign-in options, see Authenticate to Azure using Azure CLI.
When you're prompted, install the Azure CLI extension on first use. For more information about extensions, see Use and manage extensions with the Azure CLI.
Run az version to find the version and dependent libraries that are installed. To upgrade to the latest version, run az upgrade.
A location supported by the AI Manager public preview.
If you have multiple Azure subscriptions, select the subscription to use by using the
az account setcommand.curl, to send an inference request. Azure Cloud Shell includescurl.The permissions in the following table.
Task Role or permission Notes Register preview features and resource providers Contributor or Owner at the subscription scope These roles include the required permissions. Create an AI Manager and its child resources A role that can create these resources For role choices and scopes, see Grant access to AI Manager. Read model catalog entries and calculate deployment costs Azure AIManager Model User Assign the role at the subscription scope or another applicable parent scope. Create and delete the dedicated resource group Permission to create and delete resource groups The resource group is used only for this quickstart.
Install the AI Manager CLI extension
Install the aimanager Azure CLI extension, or update it to the latest version, by using the az extension add command. All published versions of the extension are previews, so include --allow-preview true.
az extension add --name aimanager --upgrade --allow-preview true
Register the AI Manager preview feature
Register the AIManagerPreview feature flag by using the az feature register command.
az feature register --namespace Microsoft.ContainerService --name AIManagerPreview
Verify the registration status by using the az feature show command. It takes a few minutes for the status to show Registered. If the status is Pending, the preview requires approval. Don't continue until the status is Registered.
az feature show --namespace Microsoft.ContainerService --name AIManagerPreview --query properties.state --output tsv
When the status reflects Registered, refresh the registration of the Microsoft.ContainerService resource provider by using the az provider register command.
az provider register --namespace Microsoft.ContainerService
Note
If a later az aimanager create command reports that the AIManagerPreview feature flag isn't registered, wait a few minutes for the resource provider registration to finish, and then try again.
Define environment variables
Define the following environment variables for use throughout this quickstart. Replace <supported-region> with a location supported by the AI Manager public preview.
export RANDOM_STRING=$(printf '%05d%05d' "$RANDOM" "$RANDOM")
export SUBSCRIPTION_ID=$(az account show --query id --output tsv)
export LOCATION="<supported-region>"
export RESOURCE_GROUP="myAIManagerResourceGroup$RANDOM_STRING"
export MANAGER_NAME="myaimanager$RANDOM_STRING"
export NAMESPACE_NAME="quickstart"
export DEPLOYMENT_NAME="demo-model"
The RANDOM_STRING variable stores a random 10-digit string. The RESOURCE_GROUP and MANAGER_NAME values include it to create unique names. The SUBSCRIPTION_ID variable stores the ID of your current subscription. AI Manager, namespace, and model deployment names can contain only lowercase letters, numbers, and hyphens.
Choose a model
List the catalog models that are available in your location by using the az aimanager model list command.
az aimanager model list --location "$LOCATION" --output table
Choose a model by its readable ModelId. Store its matching Name value, which is the model's ARM resource name, in the MODEL_NAME variable.
export MODEL_NAME="<name-from-the-list>"
Choose a GPU VM size
Compare GPU plans for the model by using the az aimanager model calculate-cost command. The calculator estimates VM cost per model replica, not the full deployment cost. For more information about GPU plans, quota, and what the estimate includes, see Choose a model and estimate deployment cost.
az aimanager model calculate-cost --location "$LOCATION" --name "$MODEL_NAME" --output table
Choose a plan where Feasible is True, and store its VmSize value in the VM_SIZE variable.
export VM_SIZE="<vm-size-from-a-feasible-plan>"
Create a resource group
Create a resource group by using the az group create command.
az group create --name "$RESOURCE_GROUP" --location "$LOCATION"
Create an AI Manager
Create an AI Manager by using the az aimanager create command. The AI Manager provisions and manages an AKS cluster for your model deployments, so the command can take several minutes to finish.
az aimanager create --resource-group "$RESOURCE_GROUP" --name "$MANAGER_NAME" --location "$LOCATION"
Create a namespace
Create a namespace in the AI Manager by using the az aimanager namespace create command.
az aimanager namespace create --resource-group "$RESOURCE_GROUP" --aimanager "$MANAGER_NAME" --name "$NAMESPACE_NAME"
Deploy a model
Create a model deployment that runs one replica by using the az aimanager namespace modeldeployment create command. The command waits until the deployment is ready, which can take several minutes or longer.
az aimanager namespace modeldeployment create \
  --resource-group "$RESOURCE_GROUP" \
  --aimanager "$MANAGER_NAME" \
  --namespace "$NAMESPACE_NAME" \
  --name "$DEPLOYMENT_NAME" \
  --model-resource-id "/subscriptions/$SUBSCRIPTION_ID/providers/Microsoft.ContainerService/locations/$LOCATION/aiModels/$MODEL_NAME" \
  --vm-size "$VM_SIZE" \
  --replicas 1
Verify the deployment by using the az aimanager namespace modeldeployment show command. The deployment is ready when ProvisioningState is Succeeded and Replicas is 1/1. If the state is Failed or Canceled, run the command without --output table to inspect the full resource.
az aimanager namespace modeldeployment show \
  --resource-group "$RESOURCE_GROUP" \
  --aimanager "$MANAGER_NAME" \
  --namespace "$NAMESPACE_NAME" \
  --name "$DEPLOYMENT_NAME" \
  --output table
Send an inference request
Use the RESOURCE_GROUP, MANAGER_NAME, NAMESPACE_NAME, and DEPLOYMENT_NAME variables from the previous sections.
Get the namespace endpoint and the primary namespace API key (
primaryKey). Keep the key secret.export ENDPOINT="$(az aimanager namespace list-accesskeys \ --resource-group "$RESOURCE_GROUP" \ --aimanager "$MANAGER_NAME" \ --name "$NAMESPACE_NAME" \ --query endpoint \ --output tsv)" export API_KEY="$(az aimanager namespace list-accesskeys \ --resource-group "$RESOURCE_GROUP" \ --aimanager "$MANAGER_NAME" \ --name "$NAMESPACE_NAME" \ --query primaryKey \ --output tsv)"Confirm that both values are set. The command prints a message only if neither value is empty.
test -n "$ENDPOINT" && test -n "$API_KEY" && echo "Endpoint and key retrieved."Send a chat completion request. The
modelvalue is the model deployment name (DEPLOYMENT_NAME), not the catalog model ID.curl "$ENDPOINT/chat/completions" \ --header "Authorization: Bearer $API_KEY" \ --json @- <<EOF { "model": "$DEPLOYMENT_NAME", "messages": [ { "role": "user", "content": "What does Kubernetes do?" } ] } EOFA successful request returns a JSON chat completion with a response under
choices[0].message.content. The response text varies by model. For an OpenAI-compatible Python client, see Connect an application to a model endpoint.
Clean up resources
When you no longer need the resources, delete the resource group by using the az group delete command. Deleting the resource group deletes the AI Manager, its namespace and model deployment, and the AKS cluster that the AI Manager manages.
az group delete --name "$RESOURCE_GROUP" --yes --no-wait
Browse model catalog
Browse available models in your location by navigating to the Kubernetes center > AI workloads > AI/ML. You can filter models by collection, inference task, and provider.

You can preview model details such as provider, capability, and context length by selecting any model card in the catalog. Select Deploy to proceed.
Select GPU VM size and deploy model
Under Project details, choose a subscription, resource group, and region to deploy your model in. Under Deployment profile, select whether to create a new AI Manager or use an existing one. You can also bring your own cluster for your AI Manager deployment.
Note
To be eligible for AI Manager deployments, existing clusters must run in the same region as your AI Manager deployment and use Kubernetes role-based access control (RBAC), system-assigned managed identity, and Cilium network dataplane.
A default recommended GPU VM size is based on the model you select. Choose Select SKU to compare different GPU VM sizes based on cost, available quota, and estimated performance.
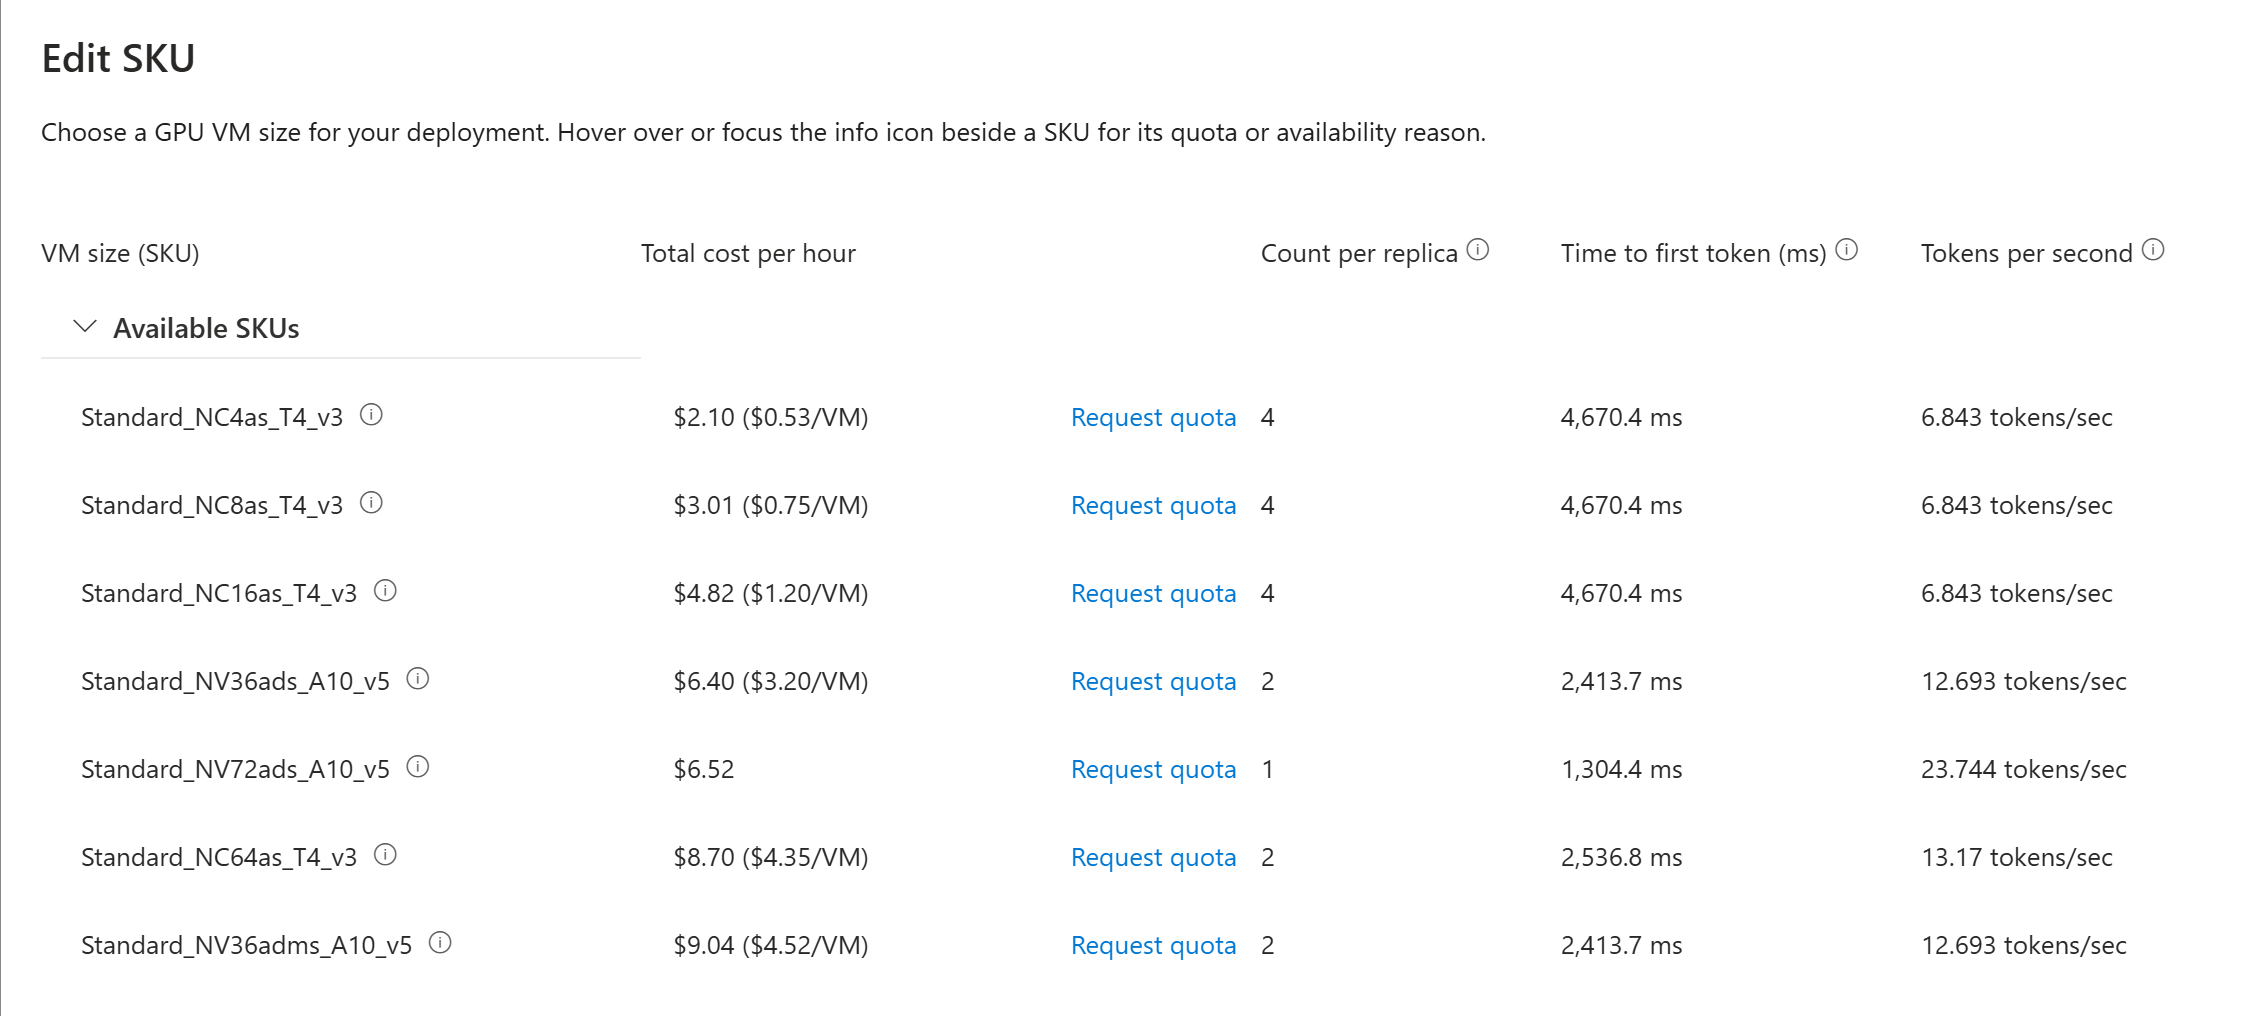
For more information about GPU plans, quota, and what the estimate includes, see Choose a model and estimate deployment cost.
After you deploy, monitor the provisioning status of your deployment by going to AI/ML > Deployments. When your provisioning status is Succeeded, you can verify current endpoint and inference status by selecting Check status, as shown in the following image.

Test model
After your model is successfully provisioned, test its output by selecting the model and choosing Test model in the toolbar.

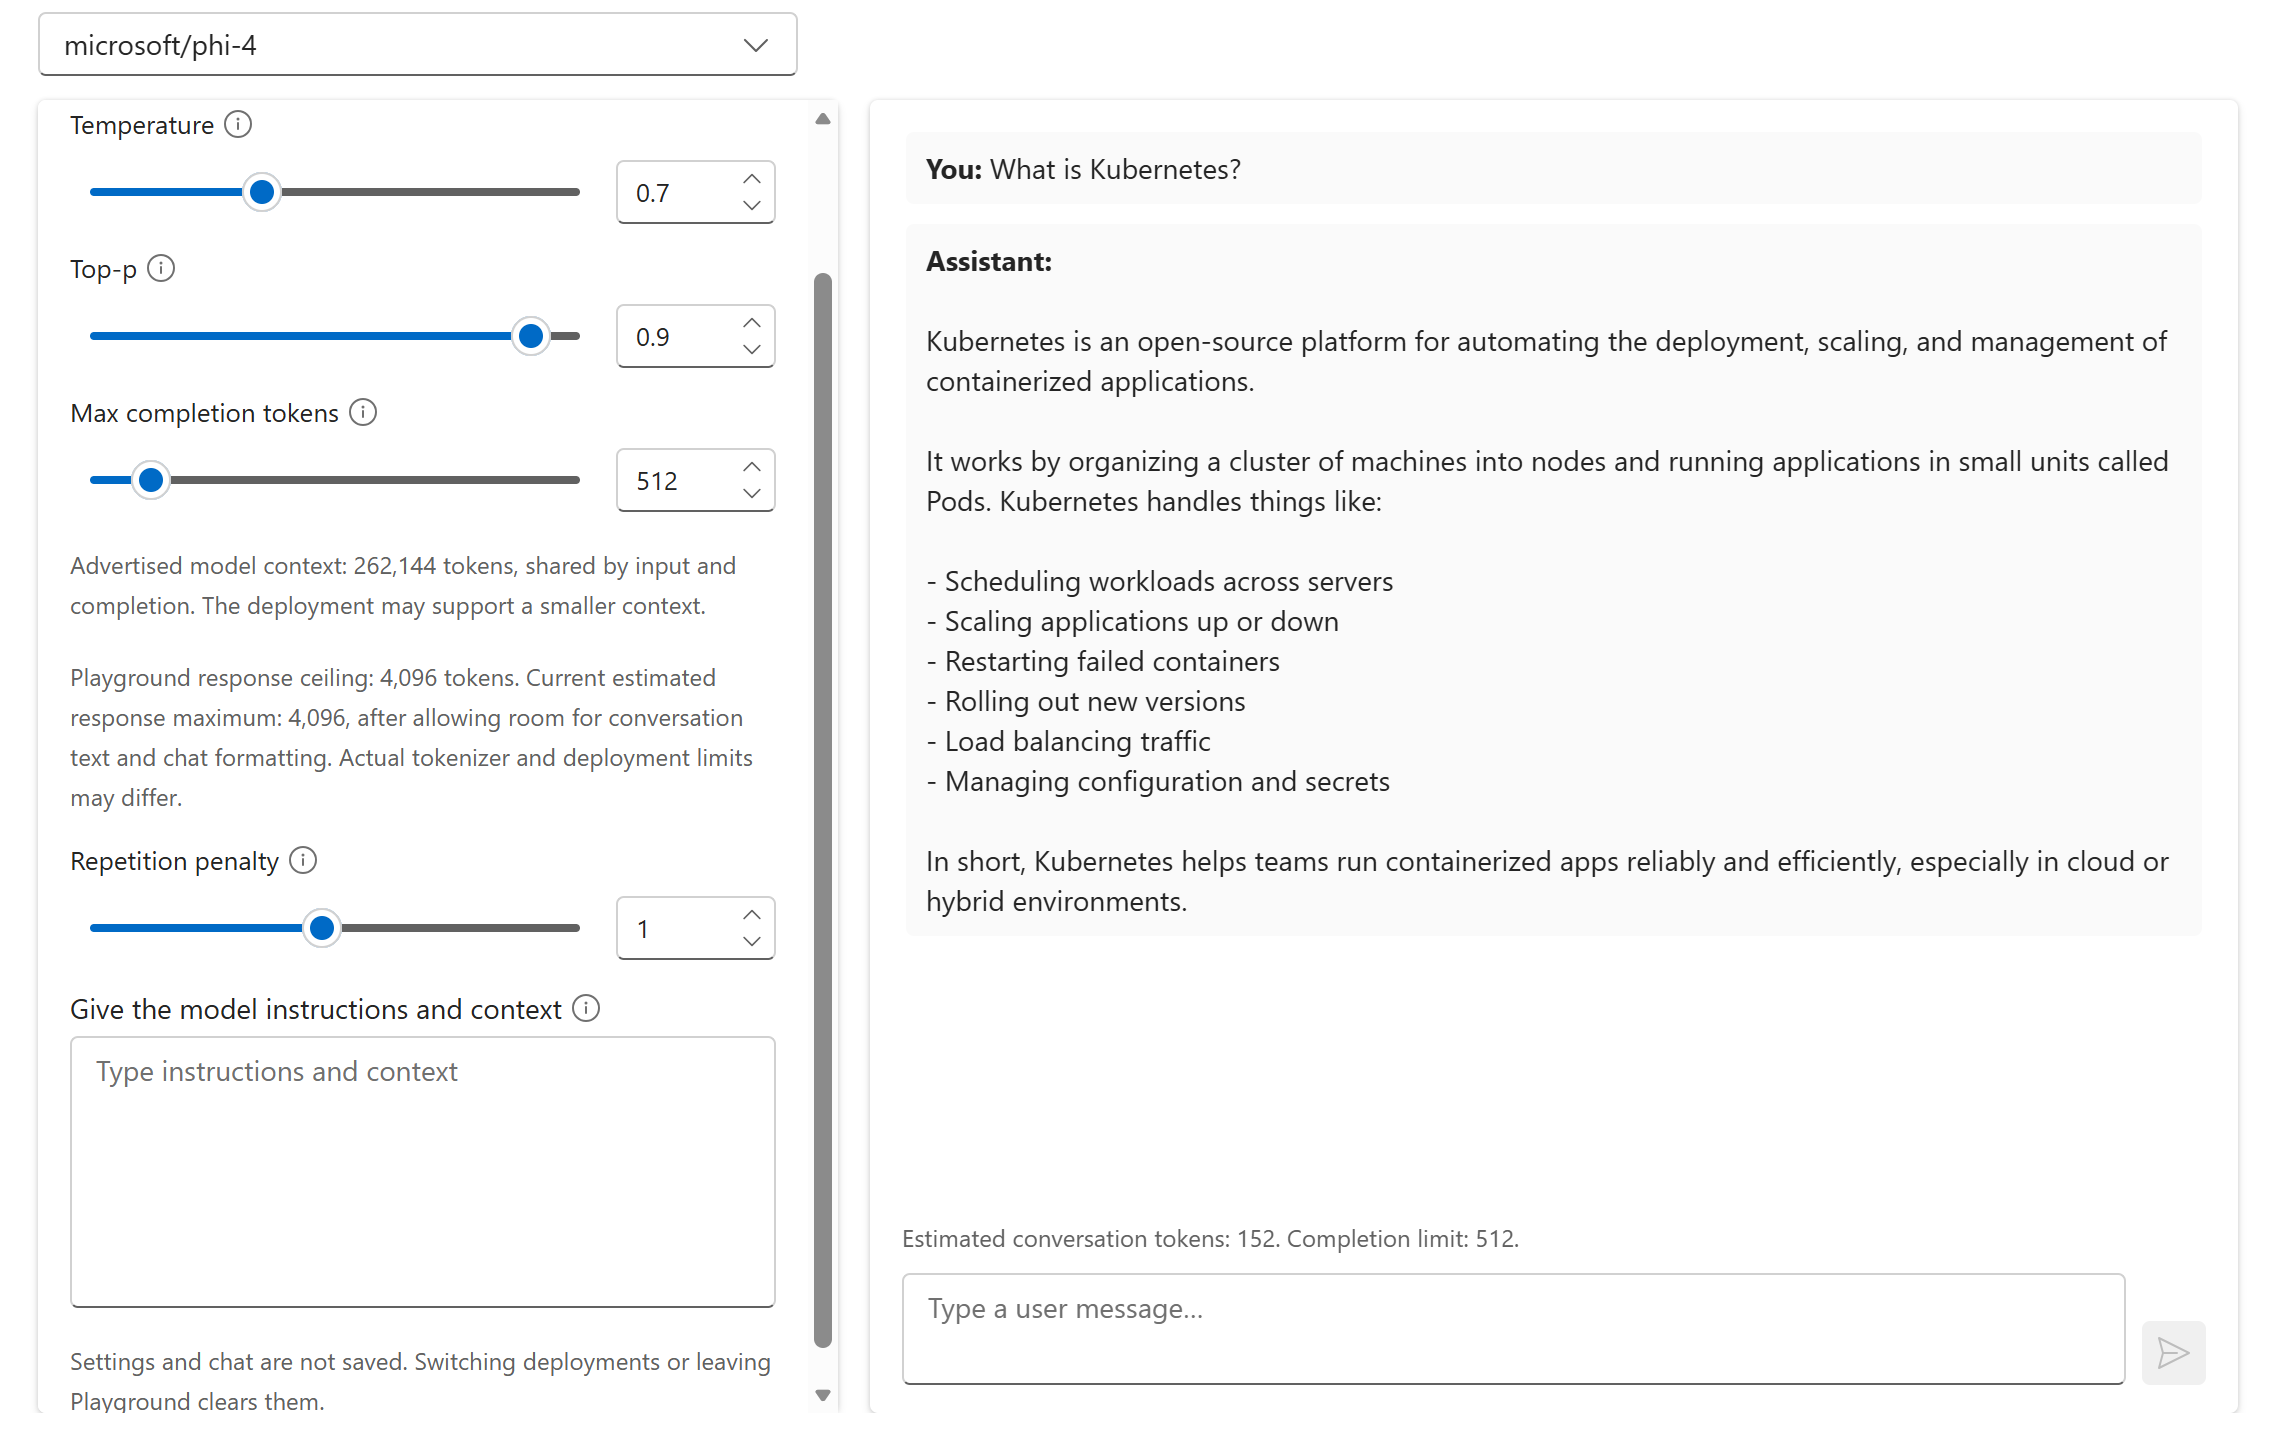
This action opens the Developer playground, where you can experiment with your model output by adjusting vLLM parameters such as temperature and completion tokens.
Note
Any parameter adjustments you make in the Developer playground are temporary and aren't saved.
Send an inference request
Select your model deployment and go to Overview > Authentication to view your namespace API keys.

Go to Get started to view code samples for a chat-completion request. Select Open in VS Code Web to directly edit or apply files in VS Code. Remember to replace the placeholder
api-keywith your primary namespace API key from the previous step.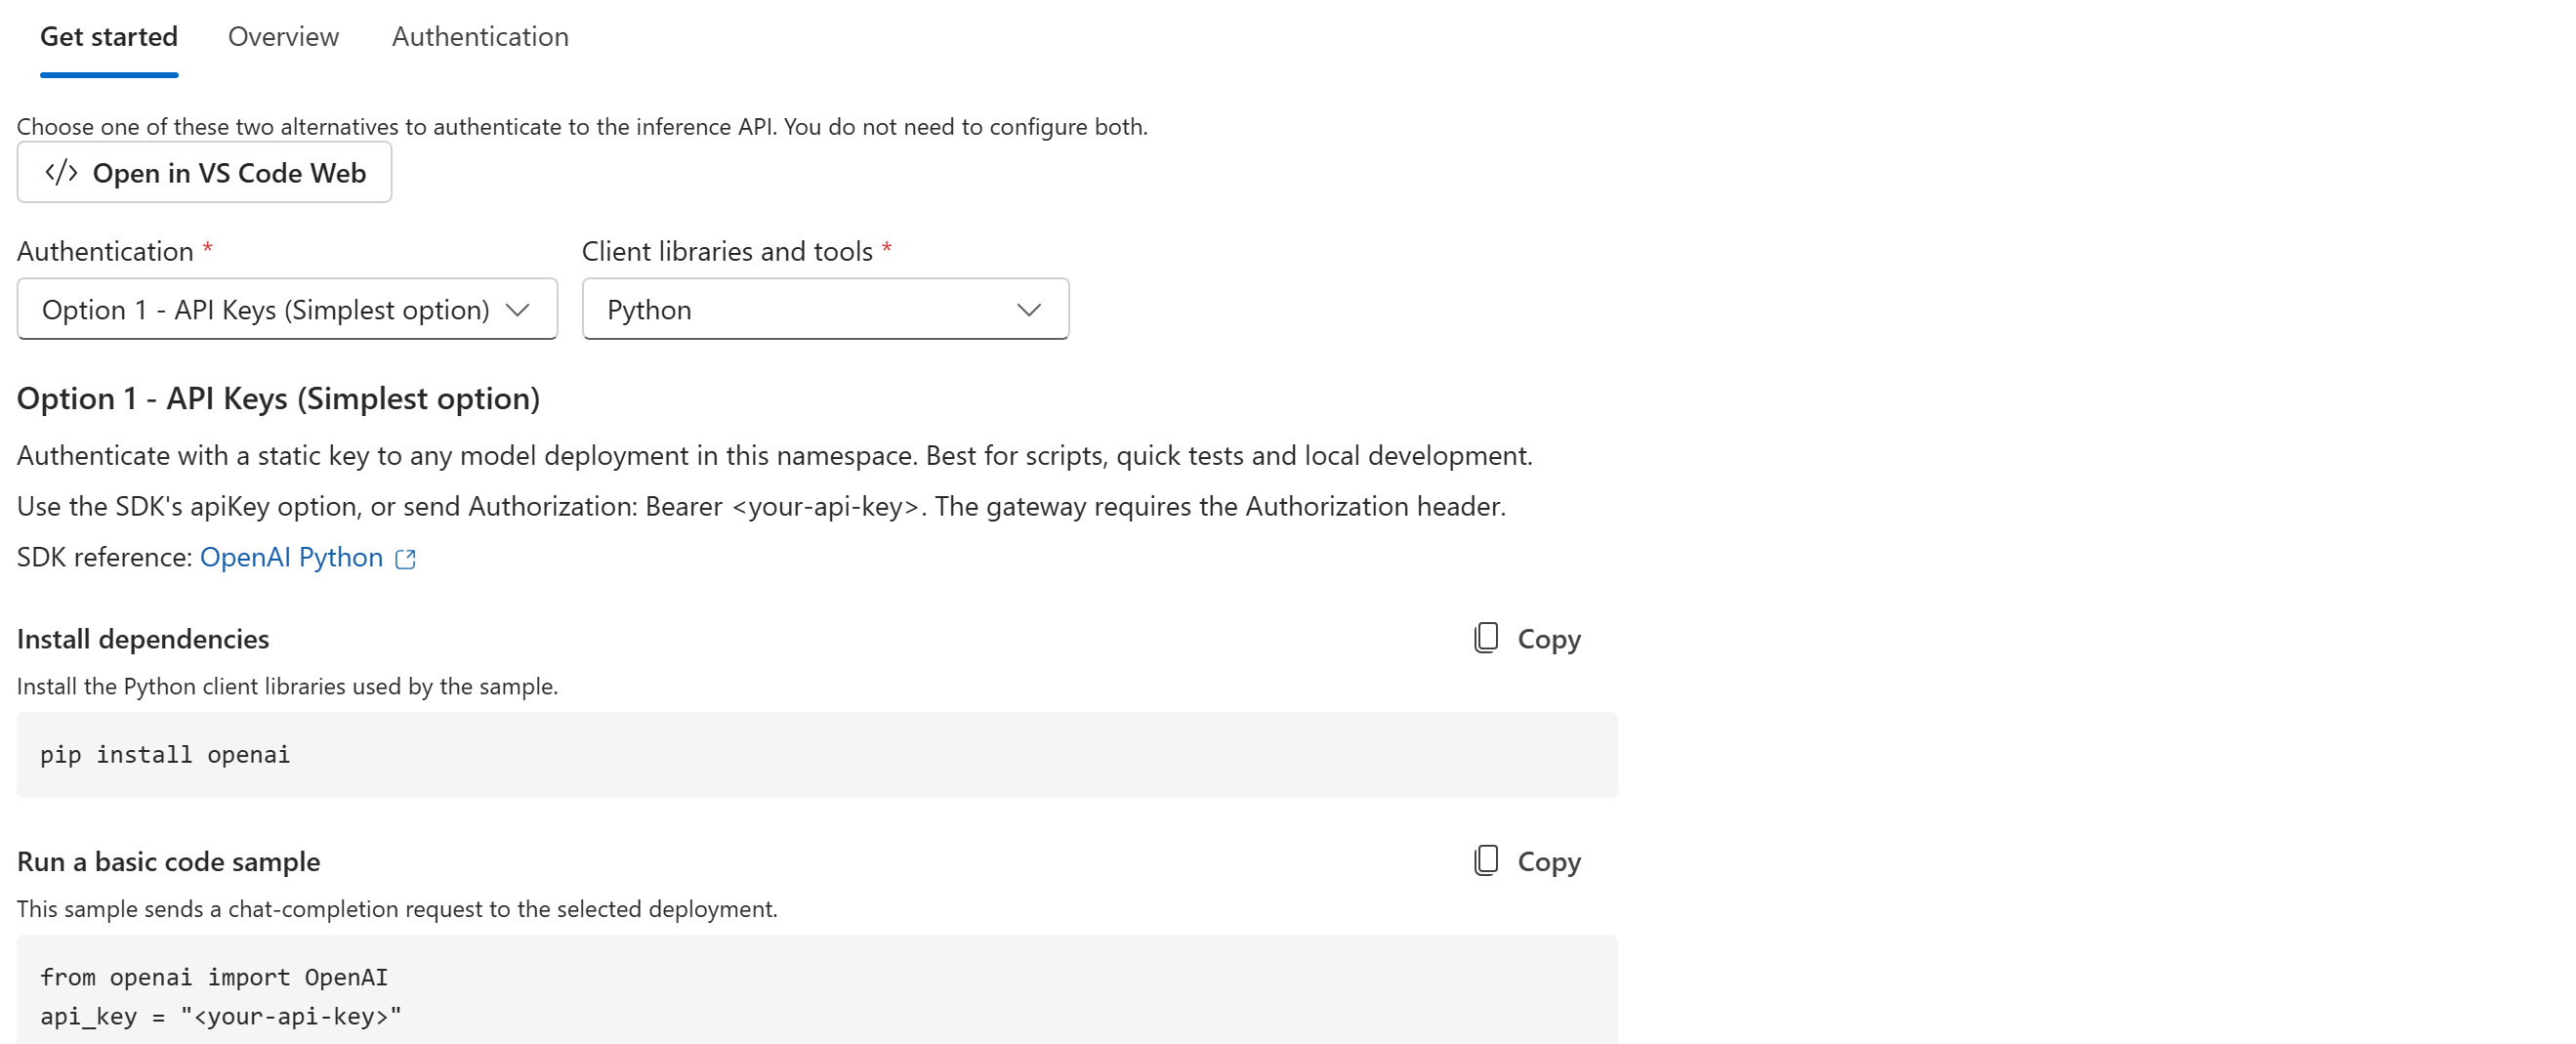
Clean up resources
When you no longer need the resources, go to AI/ML > Deployments and select the AI Manager that you want to delete. Select Delete AI Manager in the toolbar to proceed. You receive a summary of the resources to delete before confirming.