Note
Access to this page requires authorization. You can try signing in or changing directories.
Access to this page requires authorization. You can try changing directories.
High availability and fault tolerance are key components of a well-architected solution. A robust configuration includes an emergency plan for unexpected failures, to reduce downtime and keep systems running automatically.
When you deploy an app to the cloud, you choose a region in that cloud for the app infrastructure base. If you deploy an app to a single region only, and that region becomes unavailable, the app is also unavailable. The lack of availability might be unacceptable under the terms of the app's service level agreement (SLA). To ensure availability, deploy the app and its services across multiple regions in the cloud.
This tutorial describes how to deploy a highly available multi-region web app. The procedure implements a simple scenario that consists of a web app and Azure Front Door. You can expand the concepts to support other infrastructure patterns. For example, if your app connects to an Azure database offering or storage account, see Active geo-replication for SQL databases and Azure Storage redundancy. For a reference architecture for a more detailed scenario, see the Reliable web app pattern for .NET.
In this tutorial, you:
- Create identical App Service apps in separate regions
- Create Azure Front Door with access restrictions to block public access to App Service
Prerequisites
If you don't have an Azure account, create a free account before you begin.
To complete this tutorial:
Use the Bash environment in Azure Cloud Shell. For more information, see Get started with Azure Cloud Shell.

If you prefer to run CLI reference commands locally, install the Azure CLI. If you're running on Windows or macOS, consider running Azure CLI in a Docker container. For more information, see How to run the Azure CLI in a Docker container.
If you're using a local installation, sign in to the Azure CLI by using the az login command. To finish the authentication process, follow the steps displayed in your terminal. For other sign-in options, see Authenticate to Azure using Azure CLI.
When you're prompted, install the Azure CLI extension on first use. For more information about extensions, see Use and manage extensions with the Azure CLI.
Run az version to find the version and dependent libraries that are installed. To upgrade to the latest version, run az upgrade.
Review the scenario architecture
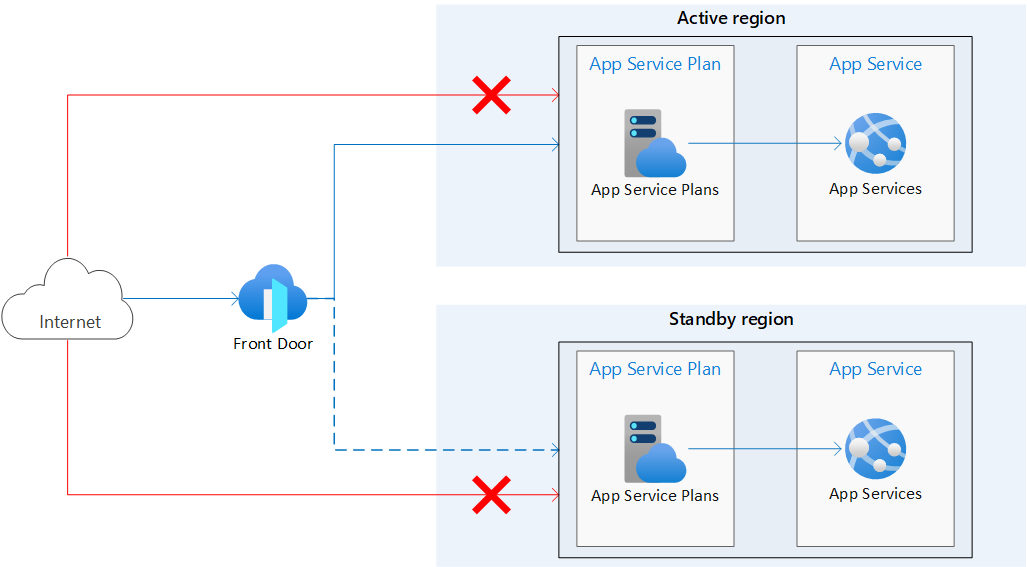
The following architecture diagram shows the infrastructure you create in this tutorial. It consists of two identical App Service apps in separate regions. The first web app is in the active region. It's the primary app responsible for processing incoming traffic. The second app is in the standby region and waits on the availability of the primary app. Azure Front Door attempts to route traffic to the primary web app. When the primary region is unavailable, traffic routes to the standby web. In the diagram, the dotted line represents traffic routing based on region status. Access restrictions are configured so block direct access to the apps from the internet.
Azure provides various options for load balancing and traffic routing. Azure Front Door is selected for this tutorial because it involves internet-facing web apps hosted on Azure App Service deployed in multiple regions. If your configuration differs from the example in this tutorial, see Choose a load balancing solution for your scenario.
The scenario in this tutorial provides the following behavior:
- Identical App Service apps are deployed in two separate regions.
- Public traffic sent directly to the web apps is blocked.
- Azure Front Door routes traffic to the active app in the primary region.
- The standby app in the secondary region is available to serve traffic, as needed.
Create a resource group
You need two instances of a web app that run in different Azure regions for this tutorial.
Review the available region pairs and select two paired regions for your web apps.
In this tutorial, the two regions are referred to as the
<primary-region>(eastus) and<standby-region>(westus).Create a resource group for all resources you configure in this tutorial. This tutorial creates the resource group in the
<primary-region>location.az group create --name <resource-group> --location <primary-region>Replace the following
<placeholder>parameter values with the information for your own resources:Parameter Value Description Example --name<resource-group>The resource group that contains the resources created in this tutorial. zava-resource-group--location<primary-region>The region location for the resource group. This tutorial uses the same region location for the resource group and the primary web app. eastusIn an actual implementation, use separate resource groups for each region/resource. The separation allows for isolation of resources in a disaster recovery situation.
For more information, see the az group create command reference.
Create two App Service plans
Create two App Service plans, one for each web app. Create each plan in the region location where you expect to create the corresponding app.
For this command, you use the region pair you selected earlier. Use the active region for the primary web app and the passive region for the standby web app.
Run the following command to create the App Service plan for the primary web app, and run the command again to create the plan for the standby app.
az appservice plan create --name <app-service-plan> --resource-group <resource-group> --is-linux --location `<region>`
Replace the following <placeholder> parameter values with the information for your own resources:
| Parameter | Value | Description | Example |
|---|---|---|---|
--name |
<app-service-plan> |
The name of the app service plan for the web app. Each plan instance must have a unique name. | zava-primary-planzava-standby-plan |
--resource-group |
<resource-group> |
The resource group that contains the resources created in this tutorial. | zava-resource-group |
--location |
<region> |
The region location for the web app. | - Primary web app, active region eastus - Standby web app, passive region westus |
For more information, see the az appservice plan create command reference.
Create two applications
Create two App Service web apps. Place each app in a corresponding App Service plan and region location.
Identify the
--runtimelanguage version for the web apps.You can run the following command for the list of available runtimes:
az webapp list-runtimesIf you plan on using the sample Node.js app described in this tutorial, set the
<language-version>value toNODE:24-lts.Create two web apps. Run the following command to create the primary web app, and run the command again to create the standby app.
az webapp create --name <web-app-name> --resource-group <resource-group> --plan <app-service-plan> --runtime <language-version>Replace the following
<placeholder>parameter values with the information for your own resources:Parameter Value Description Example --name<web-app-name>The name of the web app. Each app must have a globally unique name. The valid characters are a-z,0-9, and-.zava-primary-appzava-standby-app--resource-group<resource-group>The resource group that contains the resources created in this tutorial. zava-resource-group--name<app-service-plan>The name of the app service plan for the web app. zava-primary-planzava-standby-plan--runtime<language-version>The runtime language version for the web app. NODE:24-ltsFor more information, see the az webapp create command reference.
Identify the
defaultHostNamevalue for each web app. The host name format is<web-app-name>.azurewebsites.net.Scan the command output for each web app and locate the value, or run the following command for each web app:
az webapp show --name <web-app-name> --resource-group <resource-group> --query "hostNames"Replace the following
<placeholder>parameter values with the information for your own resources:Parameter Value Description Example --name<web-app-name>The name of the web app. zava-primary-appzava-standby-app--resource-group<resource-group>The resource group that contains the resources created in this tutorial. zava-resource-groupIn the Azure portal, the host name for each app is visible on the web app Overview page.
Record the host name values for later. You use the host names to define the backend addresses for Azure Front Door deployment.
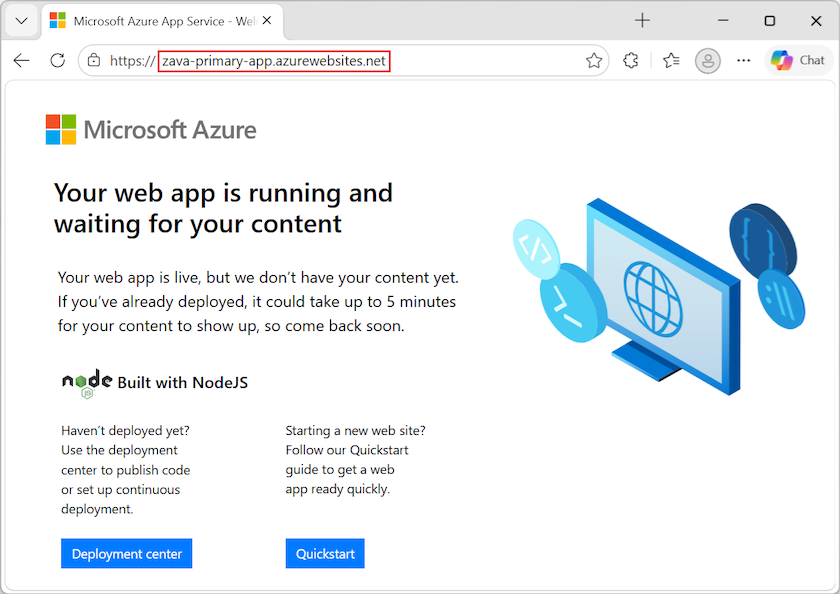
Confirm you can access the new web apps.
In a browser, enter the hostname for the primary web app, such as
zava-primary-app.azurewebsites.net.When the connection succeeds, you see the following message:
Repeat the test with the hostname for your standby web app.
Configure Azure Front Door
A multi-region deployment can use an active-active or active-passive configuration. The primary region is active and the standby region is passive.
- An active-active configuration distributes requests across multiple active regions.
- An active-passive configuration keeps running instances in the standby (passive) region, but doesn't send traffic there unless the primary (active) region fails.
Azure Front Door allows you to enable both configurations. For more information on designing apps for high availability and fault tolerance, see Design review checklist for reliability.
Create a profile
Create an instance of Azure Front Door Premium for routing traffic to your web apps.
Review the Azure Front Door tier comparison and select the tier for your deployment.
This tutorial uses Azure Front Door Premium (
Premium_AzureFrontDoor).If you prefer to deploy Azure Front Door Standard, keep in mind that the Standard tier doesn't support deployment of managed rules with WAF Policy.
Run the following command to create the profile:
az afd profile create --profile-name <front-door-profile> --resource-group <resource-group> --sku <front-door-tier>Replace the following
<placeholder>parameter values with the information for your own resources:Parameter Value Description Example --profile-name<front-door-profile>The name for the Azure Front Door profile. The name must be unique within the resource group. zava-profile--resource-group<resource-group>The resource group that contains the resources created in this tutorial. zava-resource-group--sku<front-door-tier>The tier sku of Azure Front Door for the deployment. Premium_AzureFrontDoor(recommended)
Standard_AzureFrontDoorFor more information, see the az afd profile create command reference.
Add an endpoint
Create an endpoint in your profile. After you create the first endpoint, you can create multiple endpoints in your profile.
az afd endpoint create --resource-group <resource-group> --endpoint-name <front-door-endpoint> --profile-name <front-door-profile> --enabled-state Enabled
Replace the following <placeholder> parameter values with the information for your own resources:
| Parameter | Value | Description | Example |
|---|---|---|---|
--resource-group |
<resource-group> |
The resource group that contains the resources created in this tutorial. | zava-resource-group |
--endpoint-name |
<front-door-endpoint> |
The name of the endpoint under the Azure Front Door profile. The name must be globally unique. | zava-endpoint |
--profile-name |
<front-door-profile> |
The name of your Azure Front Door profile. | zava-profile |
For more information, see the az afd endpoint create command reference.
Create an origin group
When you deploy to Azure Front Door, you need an origin to serve as the endpoint for your web app backend. For more information, see Origins and origin groups in Azure Front Door. The origins are stored in an origin group.
Create an origin group in your Azure Front Door profile to contain origins for your two web apps.
az afd origin-group create --resource-group <resource-group> --origin-group-name <front-door-origin-group> --profile-name <front-door-profile> \
   --probe-request-type <probe-request> \
   --probe-protocol <probe-protocol> \
   --probe-interval-in-seconds <probe-interval> \
   --probe-path <probe-path> \
   --sample-size <sample-size> \
   --successful-samples-required <required-samples> \
   --additional-latency-in-milliseconds <extra-latency>
Replace the following <placeholder> parameter values with the information for your own resources:
| Parameter | Value | Description | Example |
|---|---|---|---|
--resource-group |
<resource-group> |
The resource group that contains the resources created in this tutorial. | zava-resource-group |
--origin-group-name |
<front-door-origin-group> |
The name of the Azure Front Door origin group. The name must be globally unique. | zava-origin-group |
--profile-name |
<front-door-profile> |
The name of your Azure Front Door profile. | zava-profile |
--probe-request-type |
<probe-request> |
The health probe request type. | GET |
--probe-protocol |
<probe-protocol> |
The protocol to use for the health probe. | Http |
--probe-interval-in-seconds |
<probe-interval> |
The number of seconds between health probes. | 60 |
--probe-path |
<probe-path> |
The path relative to the origin, which is used to determine the health of the origin. | / (backslash) |
--sample-size |
<sample-size> |
The number of samples to consider for load balancing decisions. | 4 |
--successful-samples-required |
<required-samples> |
The number of samples within the sample period that must succeed. | 3 |
--additional-latency-in-milliseconds |
<extra-latency> |
The extra latency in milliseconds for probes to fall into the lowest latency bucket. | 50 |
For more information, see the az afd origin-group create command reference.
Add origins to the origin group
Add an origin for each of your web apps to your Azure Front Door origin group.
Add an origin for the primary web app. Set the
--priorityparameter to1, which informs Azure Front Door that this app is the primary receiver for traffic.az afd origin create --resource-group <resource-group> --host-name <web-app-name>.azurewebsites.net --profile-name <front-door-profile> \ --origin-group-name <front-door-origin-group> \ --origin-name <web-app-origin-name> \ --origin-host-header <web-app-name>.azurewebsites.net \ --priority <origin-priority> --weight <origin-weight> --enabled-state <origin-state> \ --http-port <origin-port> --https-port <origin-secure-port>Replace the following
<placeholder>parameter values with the information for your own resources:Parameter Value Description Example --resource-group<resource-group>The resource group that contains the resources created in this tutorial. zava-resource-group--host-name<web-app-name>.azurewebsites.netThe hostname for your primary web app. The host name combines the web app name, such as zava-primary-appwith the host identifier,azurewebsites.net.zava-primary-app.azurewebsites.net--profile-name<front-door-profile>The name of your Azure Front Door profile. zava-profile--origin-group-name<front-door-origin-group>The name of the Azure Front Door origin group. zava-origin-group--origin-name<web-app-origin-name>The name of the origin for the primary web app. The name must be unique within the origin group. primary-origin--origin-host-header<web-app-name>.azurewebsites.netThe host header to send for requests to the primary web app origin. If you don't specify a value, the request hostname determines this value. Azure CDN origins, such as Web Apps, Blob Storage, and Cloud Services require this host header value to match the origin hostname by default. zava-primary-app.azurewebsites.net--priority<origin-priority>The priority for this origin within the origin group. For the primary web app, set the priority to 1. Azure Front Door uses the priority values for load balancing across origins and active regions. The value must be between 1 and 5. 1 --weight<origin-weight>The weight of the origin within the origin group for load balancing. The value must be between 1 and 1000. 1000 --enabled-state<origin-state>Indicate whether to enable this origin to receive traffic. Enabled--http-port<origin-port>The port used for HTTP requests to the origin. 80 --https-port<origin-secure-port>The port used for secure HTTPS requests to the origin. 443 For more information, see the az afd origin create command reference.
Run the command again and add an origin for the standby web app. The command uses the same parameters, but with the following unique parameter values:
Parameter Value Description Example --host-name<web-app-name>.azurewebsites.netThe hostname for your standby web app. zava-standby-app.azurewebsites.net--origin-name<web-app-origin-name>The name of the origin for the standby web app. standby-origin--origin-host-header<web-app-name>.azurewebsites.netThe host header to send for requests to the standby web app origin. zava-standby-app.azurewebsites.net--priority<origin-priority>The priority for this origin within the origin group. For the standby web app, set the priority to 2. Azure Front Door attempts to direct all traffic to the primary origin. When the primary origin is unavailable, traffic routes to the standby origin. 2
Add a route rule
Add a routing rule to map the Azure Front Door endpoint to the origin group. The route forwards requests from the endpoint to your origin group.
Create a route rule to map the Azure Front Door endpoint to the origin group:
az afd route create --resource-group <resource-group> --profile-name <front-door-profile> --endpoint-name <front-door-endpoint> `
   --forwarding-protocol <protocol-type> --route-name <route-rule-name> --https-redirect <secure-redirect> `
   --origin-group <front-door-origin-group> --supported-protocols <protocol-list> --link-to-default-domain <domain-link>
Replace the following
<placeholder>parameter values with the information for your own resources:Parameter Value Description Example --resource-group<resource-group>The resource group that contains the resources created in this tutorial. zava-resource-group--profile-name<front-door-profile>The name of your Azure Front Door profile. zava-profile--endpoint-name<front-door-endpoint>The name of the endpoint under your Azure Front Door profile. zava-endpoint--forwarding-protocol<protocol-type>The protocol used by this route rule when forwarding traffic to the backend apps. MatchRequest--route-name<route-rule-name>The name of the route rule. Must be unique within the Azure Front Door profile. zava-route-rule--https-redirect<secure-redirect>Indicates whether to automatically redirect HTTP traffic to HTTPS traffic. Enabled--origin-group-name<front-door-origin-group>The name of the Azure Front Door origin group. zava-origin-group--supported-protocols<protocol-list>The list of supported protocols for this route rule. Use a space to separate the protocol types. Http Https--link-to-default-domain<domain-link>Indicate whether this route is linked to the default endpoint domain. EnabledFor more information, see the az afd route create command reference.
Allow about 15 minutes for deployment to complete. It can take some time for the changes to propagate globally.
Restrict access through Azure Front Door only
You can currently access your web apps directly by entering their host names in a browser. If you set access restrictions on your apps, you can ensure traffic reaches your apps only through Azure Front Door.
Azure Front Door features work best when traffic flows only through the service. It's a best practice to configure your web app origins to block traffic that isn't sent through Azure Front Door. Otherwise, traffic might bypass the Azure Front Door web application firewall, DDoS protection, and other security features.
Traffic from Azure Front Door to your apps originates from a well known set of IP ranges defined in the AzureFrontDoor.Backend service tag. By using a service tag restriction rule, you can restrict traffic to only originate from Azure Front Door.
Get the identifier for your Azure Front Door profile.
You need the profile ID to ensure traffic only originates from your specific Azure Front Door instance. The access restriction further filters the incoming requests based on the unique HTTP header sent from your Azure Front Door profile.
az afd profile show --resource-group <resource-group> --profile-name <front-door-profile> --query "frontDoorId"Replace the following
<placeholder>parameter values with the information for your own resources:Parameter Value Description Example --resource-group<resource-group>The resource group that contains the resources created in this tutorial. zava-resource-group--profile-name<front-door-profile>The name of your Azure Front Door profile. zava-profileThe command output displays the profile ID (32-digit alphanumeric value):
"0000aaaa-1b1b-2c2c-3d3d-444444eeeeee"In the next step, you use the profile ID for the
<profile-identifier>value.Run the following command to set access restrictions on your primary web app, and run the command again to set restrictions on the standby app.
az webapp config access-restriction add --resource-group <resource-group> --name <web-app-name> `
   --priority <access-priority> --service-tag <tag-name> --http-header x-azure-fdid=<front-door-id>
Replace the following
<placeholder>parameter values with the information for your own resources:Parameter Value Description Example --resource-group<resource-group>The resource group that contains the resources created in this tutorial. zava-resource-group--name<web-app-name>The name of the web app for which you're setting access restrictions. zava-primary-appzava-standby-app--priority<access-priority>Specify the priority of the access restriction rule across all rules defined for the profile. A lower value equates to a higher priority. 100 --service-tag<tag-name>A service tag name recognized by Azure Front Door. The access restrictions apply to the IP range indicated by the service tag. AzureFrontDoor.Backend--http-headerx-azure-fdid=<profile-identifier>Specify one or more unique HTTP headers for extra filtering of incoming traffic. The access restrictions filter the incoming requests based on the unique HTTP header sent from your Azure Front Door profile. The header combines the Azure Front Door prefix and the profile identifier for your Azure Front Door instance. x-azure-fdid=0000aaaa-1b1b-2c2c-3d3d-444444eeeeeeFor more information, see the az webapp config access-restriction add command reference.
Test access restrictions
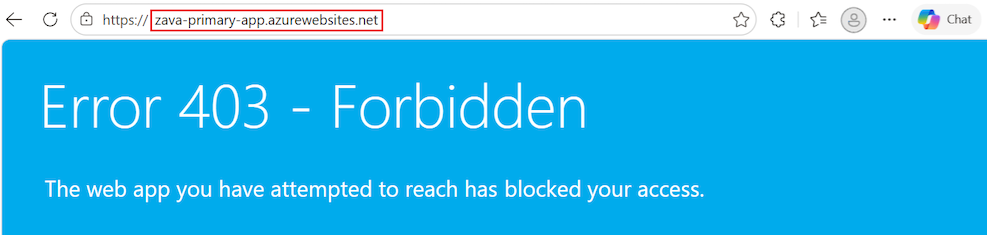
Confirm your access restrictions prevent direct access to your apps.
In a browser, enter the hostname for the primary web app, such as
zava-primary-app.azurewebsites.net.The connection should fail with the following message:
Repeat the test with the hostname for your standby web app, such as
zava-standby-app.azurewebsites.net.
Test Azure Front Door deployment
When you create the Azure Front Door Standard or Premium profile, it can take some time for the configuration to deploy globally. After deployment completes, you can access the frontend host.
Get the hostname of your Azure Front Door endpoint:
az afd endpoint show --resource-group <resource-group> --profile-name <front-door-profile> --endpoint-name <front-door-endpoint> --query "hostName"Replace the following
<placeholder>parameter values with the information for your own resources:Parameter Value Description Example --resource-group<resource-group>The resource group that contains the resources created in this tutorial. zava-resource-group--profile-name<front-door-profile>The name of your Azure Front Door profile. zava-profile--endpoint-name<front-door-endpoint>The name of the endpoint under your Azure Front Door profile. zava-endpointThe command output displays the endpoint hostname:
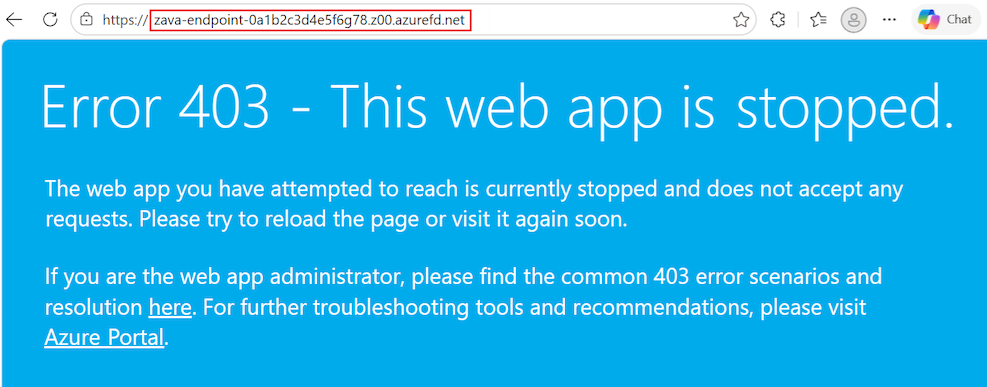
"zava-endpoint-0a1b2c3d4e5f6g78.z00.azurefd.net"The hostname consists of the endpoint name, a unique alphanumeric hash, an identifier, and the Azure Front Door suffix. In the next step, you use the endpoint hostname.
For more information, see the az afd endpoint show command reference.
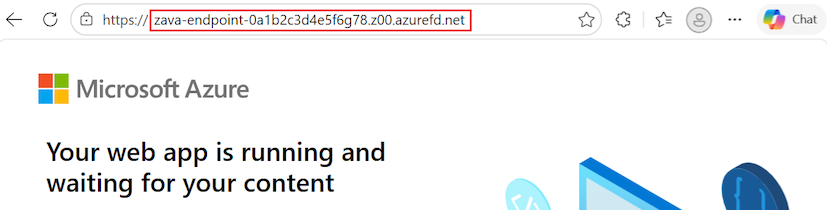
In a browser, enter the endpoint hostname, such as
zava-endpoint-0a1b2c3d4e5f6g78.z00.azurefd.net.Your request should automatically route to your primary app in the active region.
When the connection succeeds, you see the following message:
Test instant global failover between the apps in the paired regions.
In a browser, enter the endpoint hostname, such as
zava-endpoint-0a1b2c3d4e5f6g78.z00.azurefd.net.Stop the primary app by running the az webapp stop command.
Replace the following
<placeholder>parameter values with the information for your own resources:az webapp stop --name <primary-web-app> --resource-group <resource-group>Refresh your browser.
If traffic correctly redirects to the standby app in the other region, you should see the same page and message.
Tip
You might need to refresh the page a few times for the failover to complete.
You can confirm Azure Front Door is redirecting to the standby app by checking the status of the web apps in the Azure portal. On the Overview page for the primary web app, the Start option should be available (not grayed). On the Overview page for the standby web app, the Start option shouldn't be available (grayed).
Run the
az webapp stopcommand again and stop your standby app.Replace the following
<placeholder>parameter values with the information for your own resources:az webapp stop --name <standby-web-app> --resource-group <resource-group>Refresh your browser again.
If the standby app also stops, all traffic routing should stop. This time, you should see an error message:
Run the
az webapp startcommand and restart your standby app.Replace the following
<placeholder>parameter values with the information for your own resources:az webapp start --name <standby-web-app> --resource-group <resource-group>Refresh your browser and you should see a successful app connection.
Validation confirms you now can access your apps through Azure Front Door and failover functions as intended.
If you're done with failover testing, restart your primary app.
Clean up resources
In the preceding steps, you created Azure resources in a resource group. If you don't expect to need these resources in the future, delete the resource group by running the following command in the Cloud Shell.
Replace the <placeholder> parameter value with the information for your own resource:
az group delete --name <resource-group>
This command might take a few minutes to run.
Deploy from ARM or Bicep
The resources you created in this tutorial can be deployed by using an Azure Resource Manager template (ARM template) or Bicep template. You can start with the highly available multi-region web app Bicep file on GitHub. This template helps you create a secure, highly available, multi-region end-to-end solution with two web apps in different regions behind Azure Front Door.
To learn how to deploy ARM and Bicep templates, see Deploy Bicep files with the Azure CLI.
Frequently asked questions
In this tutorial, you deployed a baseline infrastructure to enable a multi-region web app. App Service provides features that can help you ensure you're running applications that follow security best practices and recommendations.
This section contains answers to frequently asked questions that can help you further secure your apps and deploy and manage your resources according to best practices.
Manage and deploy infrastructure and Azure resources
For this tutorial, you used the Azure CLI to deploy your infrastructure resources. Consider configuring a continuous deployment mechanism to manage your application infrastructure. Because you're deploying resources in different regions, you need to independently manage those resources across the regions. To ensure the resources are identical across each region, infrastructure as code (IaC) such as an ARM template or Terraform should be used with deployment pipelines such as Azure Pipelines or GitHub Actions. When you set up this configuration appropriately, any change to resources triggers updates across all deployment regions. For more information, see Configure continuous deployment to Azure App Service.
Use staging slots for safe deployment to production
Deploying application code directly to production apps and slots isn't recommended. It's important to have a safe place to test your apps and validate changes before pushing to production. Use a combination of staging slots and slot swap to move code from the testing environment to production.
In this tutorial, you created the baseline infrastructure that supports the use of staging slots. You can create deployment slots for each instance of your web app and configure continuous deployment to these staging slots with GitHub Actions. As with infrastructure management, configuring continuous deployment for your application source code is also recommended to ensure changes across regions remain in sync. If you don't configure continuous deployment, you need to manually update each app in each region every time there's a code change.
To use staging slots, follow this procedure:
For this procedure, you need an app that's ready to deploy to your App Service app.
If you completed the tutorial, you can use your primary web app and standby web app. However, you need an App Service plan that supports sufficient deployment slots. For more information, see Azure subscription and service limits, quotas, and constraints.
If you don't have an app, you can start with the Node.js Hello World sample app. Fork the GitHub repository so you have your own copy to make changes.
Configure the App Service stack settings for your web apps.
Stack settings refer to the language version or runtime used for your app.
You can configure the settings in the Azure portal or use the
az webapp config setcommand. If you use the Node.js sample, set the stack settings toNode 24 LTS.In the Azure portal, go to your primary web app.
In the left menu, select Settings > Configuration.
In the Stack settings tab, configure the following settings:
Select the Stack value, such as Node.
Select the Version value, such as Node 24 LTS.
Select Apply.
Repeat the process to configure the App Service stack settings for your standby web app.
Set up continuous deployment in the Azure portal. For detailed guidance on how to configure continuous deployment with providers such as GitHub Actions, see Configure continuous deployment to Azure App Service.
Run the following command to create a staging slot named
stagefor your primary web app.az webapp deployment slot create --resource-group <resource-group> --name <web-app-name> --slot stage --configuration-source <web-app-name>Run the
az webapp deployment slot createcommand again and create a staging slot namedstagefor the standby web app.Configure continuous deployment with GitHub Actions for each staging slot:
In the Azure portal, go to your primary web app.
In the left menu, select Deployment > Deployment slots.
Locate the stage slot in the list, and select the slot to open the details pane.
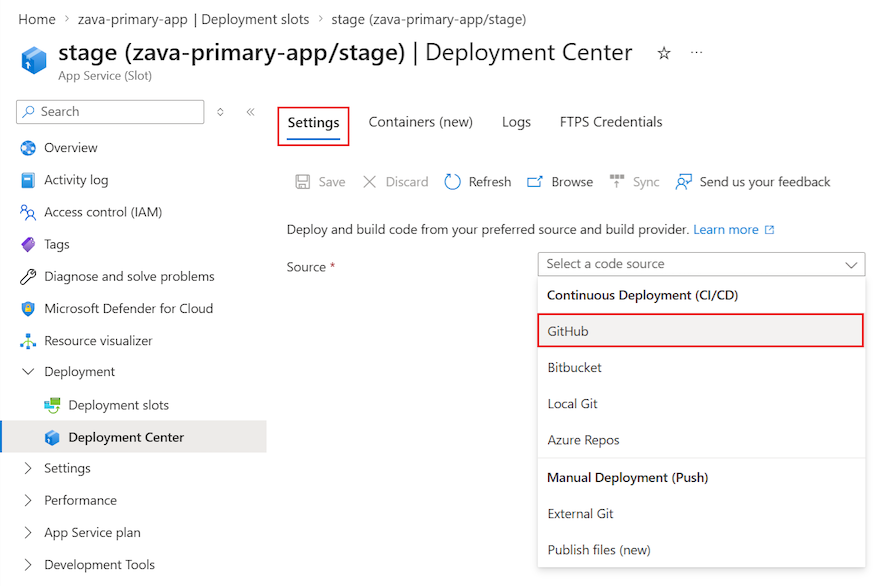
In the left menu, select Deployment > Deployment center.
In the Settings tab, set the Source option to GitHub:
If you're deploying from GitHub for the first time, select Authorize and follow the authorization prompts. If you want to deploy from a different user's repository, select Change Account.
After you authorize your Azure account with GitHub, select the Organization, Repository, and Branch to configure CI/CD for. If you can’t find an organization or repository, you might need to enable more permissions on GitHub. For more information, see Manage user access to your organization's repositories.
If you're using the Node.js sample app, use the following settings.
Setting Value Organization <your-GitHub-organization>Repository nodejs-docs-hello-world Branch main Select Save.
New commits in the selected repository and branch now deploy continuously into your App Service app slot. You can track the commits and deployments on the Logs tab.
A default workflow file that uses a publish profile to authenticate to App Service is added to your GitHub repository. You can view this file by going to the <repo-name>/.github/workflows/ directory.
Disable basic authentication on App Service
You can limit access to the FTP and SCM endpoints to users backed by Microsoft Entra ID by disabling basic authentication.
If you use a continuous deployment tool to deploy your application source code, disabling basic authentication requires extra steps to configure continuous deployment. For example, you can't use a publish profile because it doesn't use Microsoft Entra credentials. Instead, you need to use either a service principal or OpenID Connect credential.
The following commands disable basic authentication for the App Service primary web app and staging slot, and the standby web app and staging slot. Replace the following <placeholder> parameter values with the information for your own resources.
Disable FTP access for the production sites and staging slots for your primary web app:
az resource update --resource-group <resource-group> --name ftp --namespace Microsoft.Web --resource-type basicPublishingCredentialsPolicies \
   --parent sites/<web-app-name> --set properties.allow=false

az resource update --resource-group <resource-group> --name ftp --namespace Microsoft.Web --resource-type basicPublishingCredentialsPolicies \
   --parent sites/<web-app-name>/slots/stage --set properties.allow=false
Run the commands again for your standby web app.
Disable basic authentication access to the WebDeploy port and SCM site for the production sites and staging slots for your primary web app:
az resource update --resource-group <resource-group> --name scm --namespace Microsoft.Web --resource-type basicPublishingCredentialsPolicies \
   --parent sites/<primary-web-app> --set properties.allow=false

az resource update --resource-group <resource-group> --name scm --namespace Microsoft.Web --resource-type basicPublishingCredentialsPolicies \
   --parent sites/<primary-web-app>/slots/stage --set properties.allow=false
Run the commands again for your standby web app.
For more information on disabling basic authentication, including how to test and monitor sign-ins, see Disable basic authentication in App Service deployments.
Use continuous deployment when basic authentication disabled
If you choose to allow basic authentication on your App Service apps, you can use any of the available deployment methods on App Service. For example, you can use the publish profile you configured in the staging slots section.
If you disable basic authentication for your App Service apps, continuous deployment requires a service principal or OpenID Connect for authentication. If you use GitHub Actions as your code repository, see the Deploy to Azure App Service by using GitHub Actions. The tutorial provides step-by-step instructions to create a service principal or OpenID Connect to deploy to App Service by using GitHub Actions. You can also complete the process by following the procedure in the next section.
Create service principal and credentials with GitHub Actions
Configure continuous deployment with GitHub Actions and a service principal:
Create the service principal for your primary web app and standby web app:
Replace the following
<placeholder>parameter values with the information for your own resources.az ad sp create-for-rbac --name <service-principal-name> --role contributor --scopes \ /subscriptions/<subscription-ID>/resourceGroups/<resource-group>/providers/Microsoft.Web/sites/<primary-web-app> \ /subscriptions/<subscription-ID>/resourceGroups/<resource-group>/providers/Microsoft.Web/sites/<standby-web-app>The output is a JSON object with the role assignment credentials that provide access to your App Service apps.
{
  "clientId": "00001111-aaaa-2222-bbbb-3333cccc4444",
  "clientSecret": "ffffffff-5a5a-6b6b-7c7c-888888888888",
  "subscriptionId": "cccc2c2c-dd3d-ee4e-ff5f-aaaaaa6a6a6a",
  "tenantId": "aaaabbbb-6666-cccc-7777-dddd8888eeee",
  "activeDirectoryEndpointUrl": "https://login.microsoftonline.com",
  "resourceManagerEndpointUrl": "https://management.azure.com/",
  "activeDirectoryGraphResourceId": "https://graph.windows.net/",
  "sqlManagementEndpointUrl": "https://management.core.windows.net:8443/",
  "galleryEndpointUrl": "https://gallery.azure.com/",
  "managementEndpointUrl": "https://management.core.windows.net/"
}
The JSON includes your client secret, which is visible only at this time.
Tip
It's a good practice to grant minimum access. In this example, the scope is limited to just the apps, not the entire resource group.
Copy the JSON object so you have a record of your client secret.
Provide your service principal credentials to the Azure sign in operation as part of your GitHub Action workflow.
You can provide the values directly in the workflow or store them as GitHub secrets that are referenced in your workflow. Saving the values as GitHub secrets is the more secure option.
Open the GitHub repository for your app.
Go to Settings > Security > Secrets and variables > Actions.
Select New repository secret and create a secret for each of the following settings. Use the values from your JSON output.
Setting Value Example AZURE_APP_ID <application/client-id>00001111-aaaa-2222-bbbb-3333cccc4444AZURE_PASSWORD <client-secret>ffffffff-5a5a-6b6b-7c7c-888888888888AZURE_TENANT_ID <tenant-id>aaaabbbb-6666-cccc-7777-dddd8888eeeeAZURE_SUBSCRIPTION_ID <subscription-id>cccc2c2c-dd3d-ee4e-ff5f-aaaaaa6a6a6a
Create GitHub Actions workflow
After you have a service principal that can access your App Service apps, edit the default workflows for your apps. These workflows are autogenerated when you configure continuous deployment.
Authentication must be done by using your service principal instead of the publish profile. For sample workflows, see the Service principal tab in Add the workflow file to your GitHub repository. The following sample workflow can be used for the Node.js sample app.
Open the GitHub repository for your app.
Go to the
<repo-name>/.github/workflows/directory. You should see the autogenerated workflows.For each workflow file, select Edit (pencil).
Replace the contents of the workflow file with the following content. The code assumes you already created the GitHub secrets for your credential.
In the
envsection, configure the following settings:AZURE_WEBAPP_NAME: Replace the<web-app-name>placeholder with the name of your web app.NODE_VERSION: Specify the node version to use. For the Node.js sample, the value is'24.x'.AZURE_WEBAPP_PACKAGE_PATH: Specify the path to your web app project. The default is the repository root,'.'.AZURE_WEBAPP_SLOT_NAME: Specify your application slot name. The common name isstage.
 name: Build and deploy Node.js app to Azure Web App

 on:
   push:
     branches:
       - main
   workflow_dispatch:

 env:
   AZURE_WEBAPP_NAME: <web-app-name>   # Your application name
   NODE_VERSION: '24.x'                # Node version to use
   AZURE_WEBAPP_PACKAGE_PATH: '.'      # Path to your web app project
   AZURE_WEBAPP_SLOT_NAME: stage       # Application slot name

 jobs:
   build:
     runs-on: ubuntu-latest

     steps:
       - uses: actions/checkout@v4

       - name: Set up Node.js version
         uses: actions/setup-node@v4
         with:
           node-version: ${{ env.NODE_VERSION }}

       - name: npm install, build
         run: |
           npm install
           npm run build --if-present

       - name: Upload artifact for deployment job
         uses: actions/upload-artifact@v4
         with:
           name: node-app
           path: .

   deploy:
     runs-on: ubuntu-latest
     needs: build
     environment:
       name: 'stage'
       url: ${{ steps.deploy-to-webapp.outputs.webapp-url }}

     steps:
       - name: Download artifact from build job
         uses: actions/download-artifact@v4
         with:
           name: node-app

       - uses: azure/login@v2
         with:
           creds: |
             {
               "clientId": "${{ secrets.AZURE_APP_ID }}",
               "clientSecret":  "${{ secrets.AZURE_PASSWORD }}",
               "subscriptionId": "${{ secrets.AZURE_SUBSCRIPTION_ID }}",
               "tenantId": "${{ secrets.AZURE_TENANT_ID }}"
             }

       - name: 'Deploy to Azure Web App'
         id: deploy-to-webapp
         uses: azure/webapps-deploy@v3
         with:
           app-name: ${{ env.AZURE_WEBAPP_NAME }}
           slot-name: ${{ env.AZURE_WEBAPP_SLOT_NAME }}
           package: ${{ env.AZURE_WEBAPP_PACKAGE_PATH }}

       - name: logout
         run: |
           az logout
Save and commit the workflow file changes directly to the main branch of your repository.
The commit triggers the GitHub Action to run again and deploy your code. This time, the service principal is used to authenticate.
Test app updates by using slot traffic routing
Traffic routing with slots allows you to direct a predefined portion of your user traffic to each slot. Initially, 100% of traffic is directed to the production site. However, you can send 10% of your traffic to your staging slot. This approach to slot traffic routing automatically sends 10% of users who attempt access to the staging slot. The approach requires no changes to your Azure Front Door instance. To learn more about slot swaps and staging environments in App Service, see Set up staging environments in Azure App Service.
Move code from staging slot to production slot
After you finish testing and validating in your staging slots, you can perform a slot swap from your staging slot to your production site. You complete the swap for all instances of your app in each region. During a slot swap, the App Service platform ensures the target slot doesn't experience downtime.
Perform the swap for your primary web app:
az webapp deployment slot swap --resource-group <resource-group> -name <primary-web-app-name> --slot stage --target-slot productionPerform the swap for your standby web app:
az webapp deployment slot swap --resource-group <resource-group> -name <standby-web-app-name> --slot stage --target-slot productionAfter a few minutes, go to your Azure Front Door endpoint n the Azure portal, and validate the slot swap succeeded.
At this point, your apps are up and running, and any changes you make to your application source code automatically trigger an update to both of your staging slots. You can then repeat the slot swap process when you're ready to move that code into production.
Avoid disruptions and continuity issues by using multi-region deployments
You can avoid potential disruptions or issues with continuity across regions by temporarily removing a site that's undergoing the slot swap from your Azure Front Door origin group. This action helps prevent customers from seeing different versions of your app at the same time. It's also useful when you're making significant changes to your apps. The temporary removal causes all traffic to redirect to the other origin.
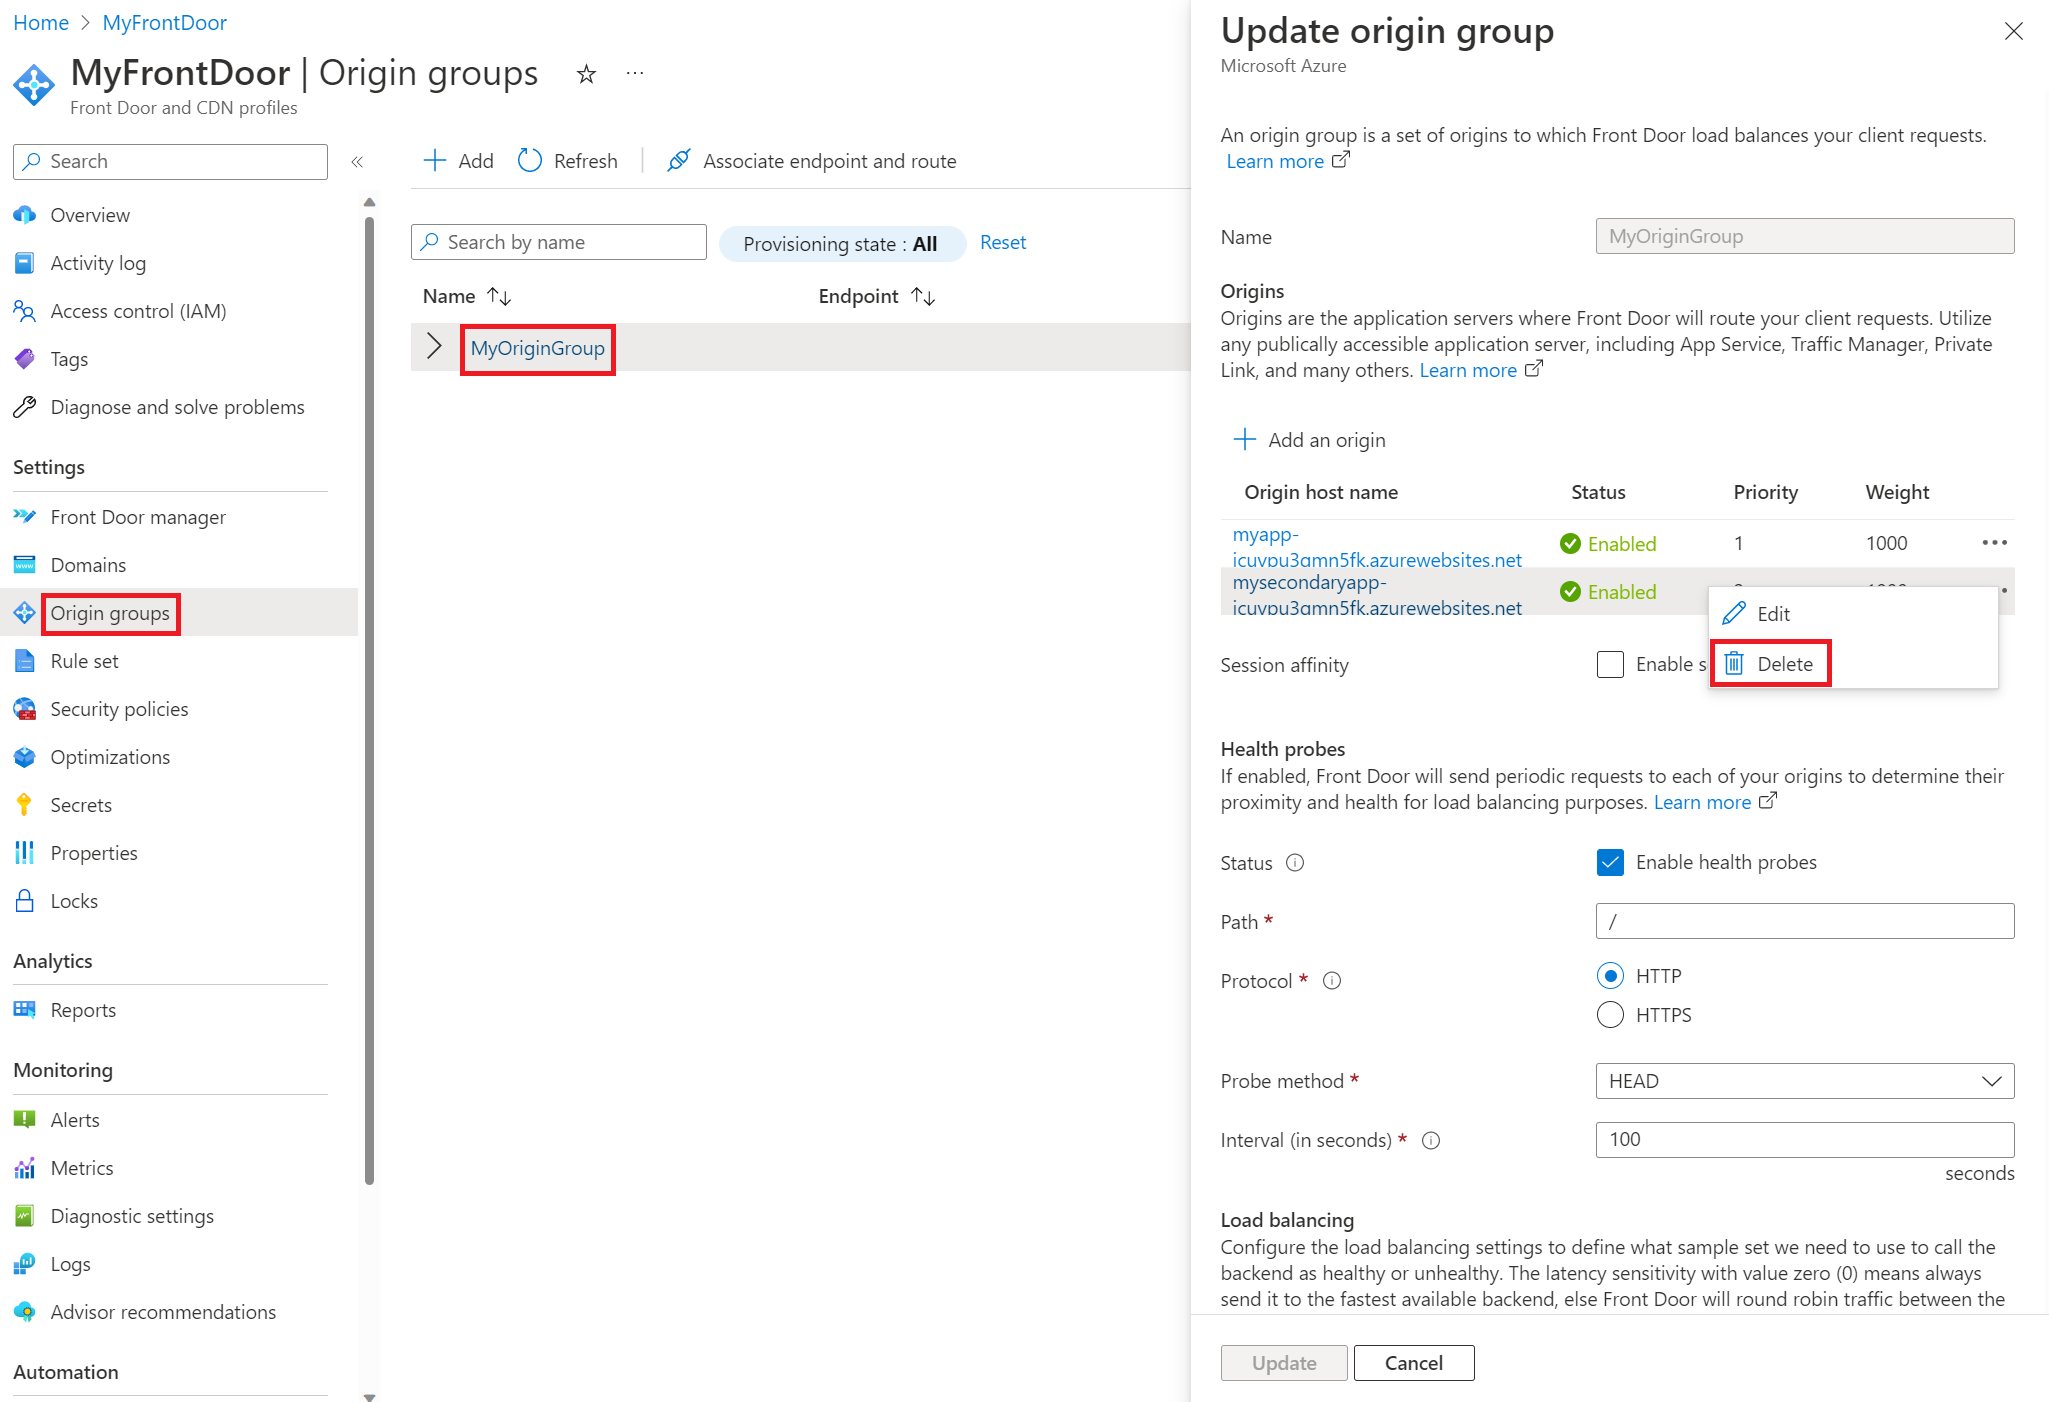
In the Azure portal, go to your Azure Front Door instance.
In the left menu, select Settings > Origin groups.
In the list of origin groups, select the origin group that contains the slot you want to temporarily remove.
In the Update origin group pane, locate the slot to remove in the Origin host name list.
Select More actions (...) > Delete, and then select Update.
It can take several minutes to apply the change.
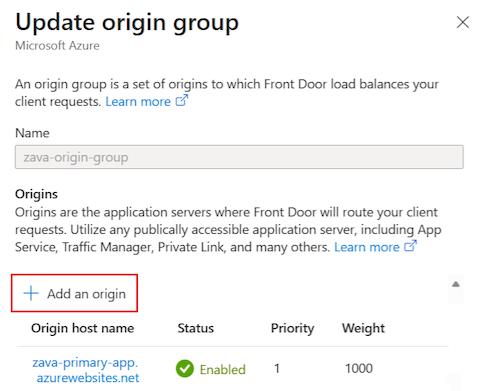
When you're ready to allow traffic to the removed slot, return to the Update origin group pane.
At the top, select + Add an origin to readd the origin slot back to the origin group.
Create extra origin groups and change route associations
If you'd rather not delete and readd origins, you can create extra origin groups for your Azure Front Door instance. You can then associate the route to the origin group that points to the intended origin.
For example, you can create two extra origin groups, one for your primary (active) region, and one for your standby (passive) region. If your primary region is undergoing a change, associate the route with your standby region. If your standby region is undergoing a change, associate the route with your primary region. When all changes are complete, you can associate the route with your original origin group that contains both regions. This method works because a route can only be associated with one origin group at a time.
Consider a configuration with three origin groups:
- The
Main-Origingroup contains both the primary and standby web apps, each in their respective regions. - The
Primary-Origingroup contains only the primary web app in the active region. - The
Standby-Origingroup contains only the standby web app in the passive region.
Suppose the primary web app is undergoing a change. Before the changes start, the route association for the Main-Origin group is changed to the Secondary-Origin group. This action ensures all traffic routes to the standby web app in its respective region while the primary web app in its respective region is undergoing a change.
Follow these steps to change the route association for an origin group:
In the Azure portal, go to your Azure Front Door instance.
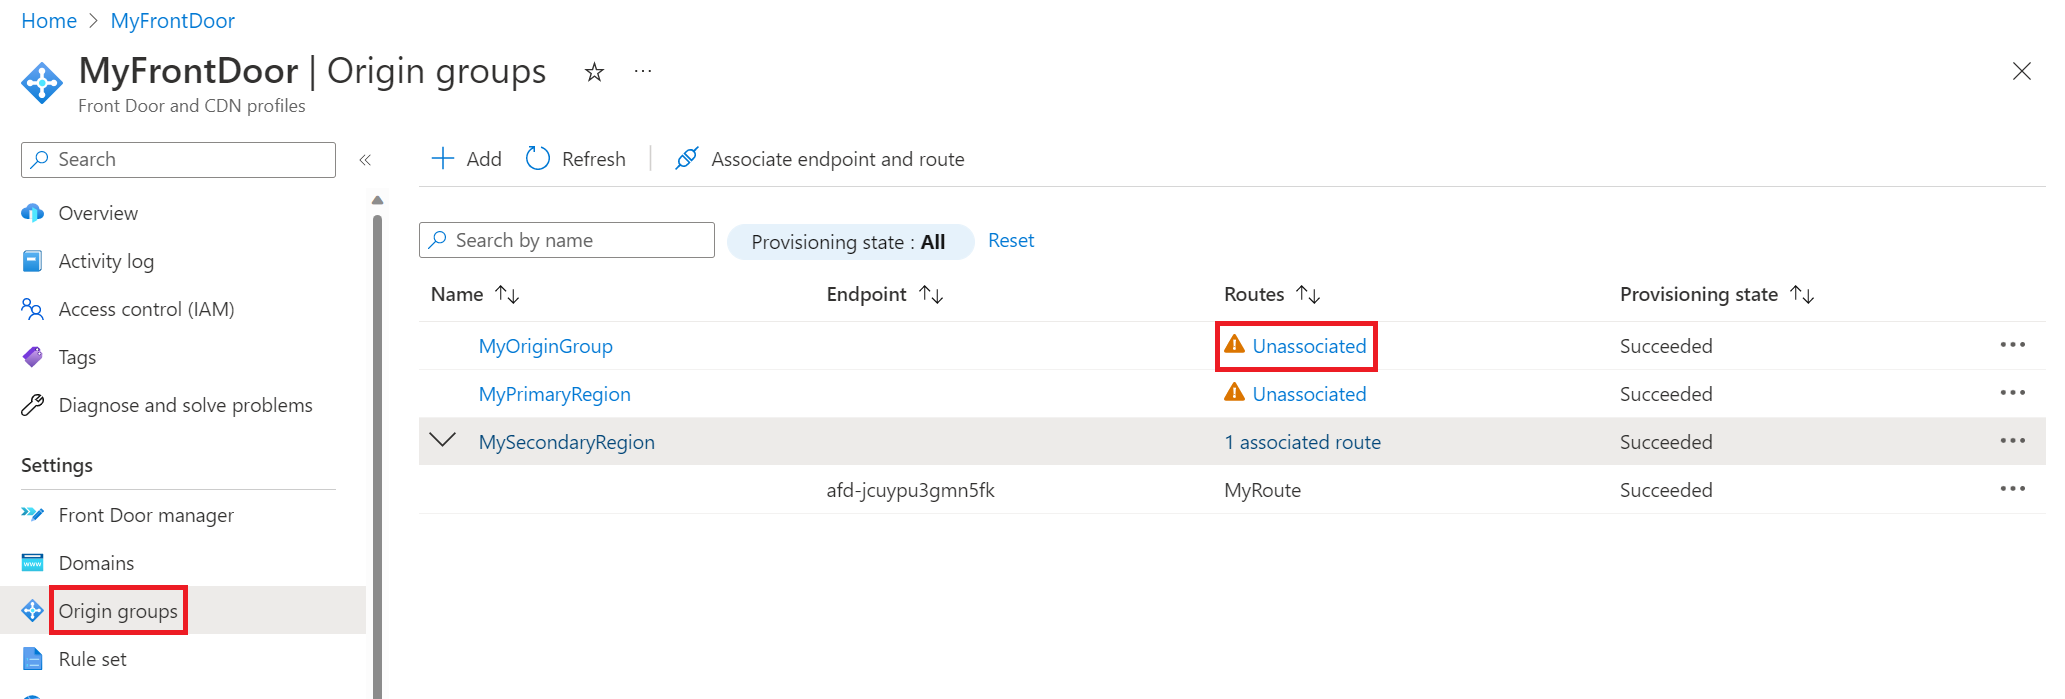
In the left menu, select Settings > Origin groups.
In the list of origin groups, locate an origin group that shows the Unassociated indicator in the Routes column.
Select More actions (...) > Associate endpoint and route.
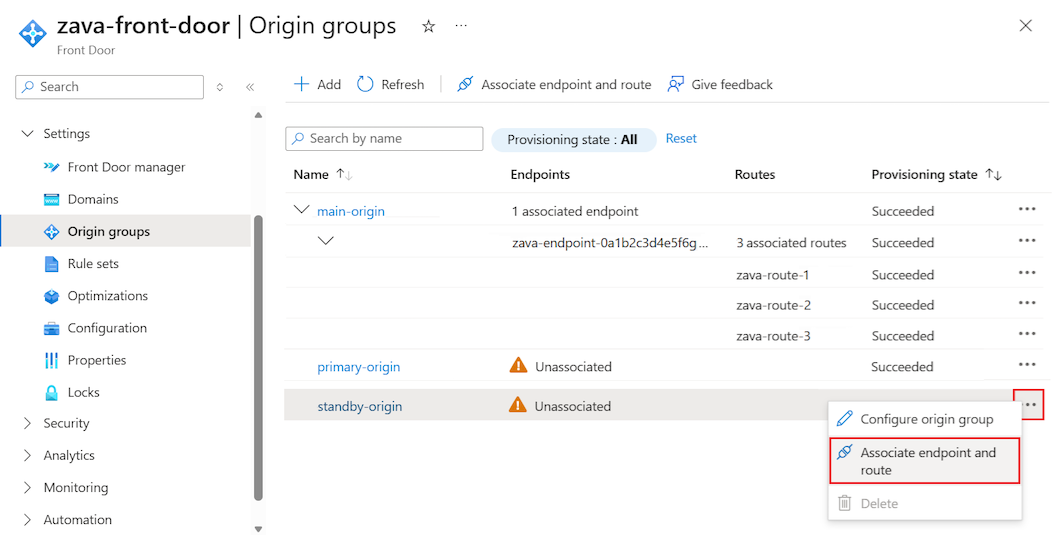
In the Associate routes pane, select one or more routes to associate with the origin group, and then select Associate.
Restrict access to advanced tools site
With Azure App service, the SCM/advanced tools site is used to manage your apps and deploy application source code. Consider locking down the SCM/advanced tools site since this site most likely doesn't need to be reached through Front Door. For example, you can set up access restrictions that only allow you to conduct your testing and enable continuous deployment from your tool of choice. If you're using deployment slots, for production slots specifically, you can deny almost all access to the SCM site since your testing and validation is done with your staging slots.