Note
Access to this page requires authorization. You can try signing in or changing directories.
Access to this page requires authorization. You can try changing directories.
Creating a capacity pool enables you to create volumes within it.
Before you begin
- You need a NetApp account.
- If you're using Azure CLI, ensure that you're using the latest version. For more information, see How to update the Azure CLI.
- To enable cool access, ensure you are registered to use cool access.
- If you're using PowerShell, ensure that you're using the latest version of the Az.NetAppFiles module. To update to the latest version, use the 'Update-Module Az.NetAppFiles' command. For more information, see Update-Module.
- If you're using the Azure REST API, ensure that you specify the latest version.
Important
To create a 1-TiB capacity pool with a tag, you must use API versions
2023-07-01_previewto2024-01-01_previewor stable releases from2024-01-01. - The Standard, Premium, and Ultra service levels are generally available (GA). No registration is required.
Considerations
- If you're using the Flexible service level:
- The Flexible service level is only available for manual QoS capacity pools.
- The Flexible service level is only available on newly created capacity pools. You can't convert an existing capacity pool to use the Flexible service level.
- Flexible service level capacity pools can't be converted to the Standard, Premium, or Ultra service level.
- The minimum throughput for Flexible service level capacity pools is 128 MiB/second. Maximum throughput is calculated based on the size of the capacity pool using the formula 5 x 128 MiB/second/TiB x capacity pool size in TiB. If your capacity pool is 1 TiB, the maximum is 640 MiB/second (5 x 128 x 1). For more examples, see Service levels for Azure NetApp Files.
- You can increase the throughput of a Flexible service level pool at any time. Decreases to throughput on Flexible service level capacity pools can only occur following a 24-hour cool-down period. The 24-hour cool-down period initiates after any change to the throughput of the Flexible service level capacity pool.
- Only single encryption is currently supported for Flexible service level capacity pools.
- Volumes in Flexible service level capacity pools can't be moved to another capacity pool. You also can't move volumes into a Flexible service level capacity pool.
Steps
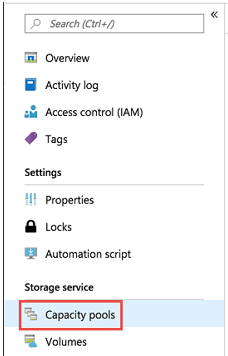
In the Azure portal, go to your NetApp account. From the navigation pane, select Capacity pools.
Select + Add pools to create a new capacity pool.
The New Capacity Pool window appears.Provide the following information for the new capacity pool:
Name
Specify the name for the capacity pool.
The capacity pool name must be unique for each NetApp account.Service level
This field shows the target performance for the capacity pool.
Specify the service level for the capacity pool: Ultra, Premium, Standard, or Flexible.
Note
The Flexible service level is only supported for manual QoS capacity pools.
- Size
Specify the size of the capacity pool that you're purchasing.
The minimum capacity pool size is 1 TiB. You can change the size of a capacity pool in 1-TiB increments.
Note
You can only take advantage of the 1-TiB minimum if all the volumes in the capacity pool are using Standard network features. 1-TiB capacity pools are generally available. If any volume is using Basic network features, the minimum size is 4 TiB.
Throughput This option is only available for Flexible service level capacity pools. The minimum value is 128 MiB/second. Maximum throughput depends on the size of the capacity pool. For calculation details, see Considerations.
Enable cool access This option specifies whether volumes in the capacity pool support cool access. For details about using this option, see Manage Azure NetApp Files storage with cool access.
QoS
Specify whether the capacity pool should use the Manual or Auto QoS type. See Storage Hierarchy and Performance Considerations to understand the QoS types.Important
Setting QoS type to Manual is permanent. You cannot convert a manual QoS capacity pool to use auto QoS. However, you can convert an auto QoS capacity pool to use manual QoS. See Change a capacity pool to use manual QoS.
Encryption type
Specify whether you want the volumes in this capacity pool to use single or double encryption. See Azure NetApp Files double encryption at rest for details.Important
Azure NetApp Files double encryption at rest supports Standard network features, but not Basic network features. See considerations for using Azure NetApp Files double encryption at rest.
After the capacity pool is created, you can’t modify the encryption type.
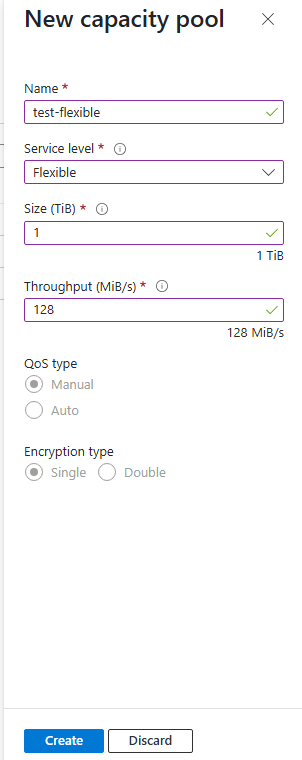
Select Create.
The Capacity pools page shows the configurations for the capacity pool.