Note
Access to this page requires authorization. You can try signing in or changing directories.
Access to this page requires authorization. You can try changing directories.
This article describes how to manage a capacity pool that uses the manual QoS type.
See Storage hierarchy of Azure NetApp Files and Performance considerations for Azure NetApp Files to understand the considerations about QoS types.
Set up a new manual QoS capacity pool
To create a new capacity pool using the manual QoS type:
Follow steps in Create a capacity pool.
In the New Capacity Pool window, select the Manual QoS type.
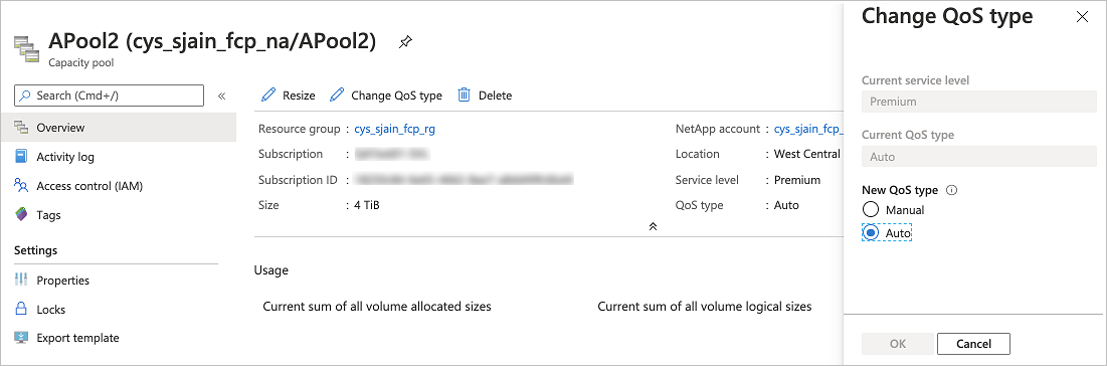
Change a capacity pool to use manual QoS
You can change a capacity pool that currently uses the auto QoS type to use the manual QoS type.
Important
Setting the capacity type to manual QoS is a permanent change. You cannot convert a manual QoS type capacity tool to an auto QoS capacity pool.
At conversion time, throughput levels might be capped to conform to the throughput limits for volumes of the manual QoS type. See Resource limits for Azure NetApp Files.
From the management blade for your NetApp account, select Capacity pools to display existing capacity pools.
Select the capacity pool that you want to change to using manual QoS.
Select Change QoS type. Then set New QoS Type to Manual. Select OK.
Monitor the throughput of a manual QoS capacity pool
Metrics are available to help you monitor the read and write throughput of a volume. See Metrics for Azure NetApp Files.
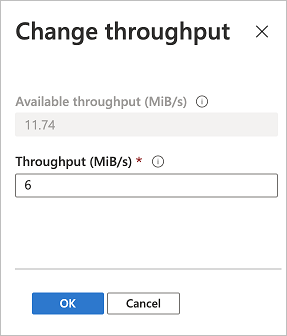
Modify the allotted throughput of a manual QoS volume
If a volume is contained in a manual QoS capacity pool, you can modify the allotted volume throughput as needed.
From the Volumes page, select the volume whose throughput you want to modify.
Select Change throughput. Specify the Throughput (MiB/S) that you want. Select OK.
Modify the throughput of a Flexible service level capacity pool
With the Flexible service level, you can adjust the throughput of the capacity pool as needed. You can increase the throughput of a Flexible service level pool at any time. Decreases to throughput on Flexible service level capacity pools can only occur following a 24-hour cool-down period. The 24-hour cool-down period initiates after any change to the throughput of the Flexible service level capacity pool.
From your NetApp account, select Capacity pools to display existing capacity pools.
Right-click the capacity pool whose throughput you want to modify then select Change throughput.
Enter a value between 128 and 2560 MiB/s.
Select OK.
Next steps
- Create a capacity pool
- Metrics for Azure NetApp Files
- Performance considerations for Azure NetApp Files
- Troubleshoot capacity pool issues
- Storage hierarchy of Azure NetApp Files
- Service levels for Azure NetApp Files
- Cost model for Azure NetApp Files
- Resource limits for Azure NetApp Files
- Create an NFS volume
- Create an SMB volume
- Create a dual-protocol volume