Note
Access to this page requires authorization. You can try signing in or changing directories.
Access to this page requires authorization. You can try changing directories.
In this tutorial, you create your own managed application with custom actions and resources. The managed application contains a custom action on the Overview page, a custom resource type displayed as a separate menu item in Table of Content and a custom context action on the custom resource page.
This tutorial includes the following steps:
- Author user interface definition file for creating a managed application instance
- Author deployment template with Azure Custom Provider, Azure Storage Account and Azure Function
- Author view definition artifact with custom actions and resources
- Deploy a managed application definition
- Deploy an instance of managed application
- Perform custom actions and create custom resources
Prerequisites
To complete this tutorial, you need to know:
- How to Create and publish a managed application definition.
- How to Deploy Service Catalog app through Azure portal.
- How to Create Azure portal user interface for your managed application.
- View definition artifact capabilities.
- Azure Custom Provider capabilities.
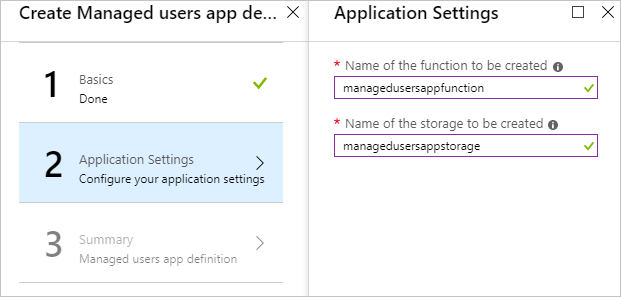
User interface definition
In this tutorial, you create a managed application and its managed resource group contains custom provider instance, storage account, and function. The Azure Function used in this example implements an API that handles custom provider operations for actions and resources. Azure Storage Account is used as basic storage for your custom provider resources.
The user interface definition for creating a managed application instance includes funcname and storagename input elements. Storage account name and function name must be globally unique. By default, function files are deployed from sample function package, but you can change it by adding an input element for a package link in createUiDefinition.json:
{
  "name": "funcname",
  "type": "Microsoft.Common.TextBox",
  "label": "Name of the function to be created",
  "toolTip": "Name of the function to be created",
  "visible": true,
  "constraints": {
    "required": true
  }
},
{
  "name": "storagename",
  "type": "Microsoft.Common.TextBox",
  "label": "Name of the storage to be created",
  "toolTip": "Name of the storage to be created",
  "visible": true,
  "constraints": {
    "required": true
  }
},
{
  "name": "zipFileBlobUri",
  "type": "Microsoft.Common.TextBox",
  "defaultValue": "https://github.com/Azure/azure-quickstart-templates/tree/master/quickstarts/microsoft.customproviders/custom-rp-with-function/artifacts/functionzip/functionpackage.zip",
  "label": "The Uri to the uploaded function zip file",
  "toolTip": "The Uri to the uploaded function zip file",
  "visible": true
}
And output in createUiDefinition.json:
"funcname": "[steps('applicationSettings').funcname]",
"storageName": "[steps('applicationSettings').storagename]",
"zipFileBlobUri": "[steps('applicationSettings').zipFileBlobUri]"
The complete createUiDefinition.json sample can be found at Reference: User interface elements artifacts.
Template with custom provider
To create a managed application instance with custom provider, you need to define custom provider resource with name public and type Microsoft.CustomProviders/resourceProviders in your mainTemplate.json. In that resource, you define the resource types and actions for your service. To deploy Azure Function and Azure Storage Account instances define resources of type Microsoft.Web/sites and Microsoft.Storage/storageAccounts respectively.
In this tutorial, you create one users resource type, ping custom action, and users/contextAction custom action that is performed in a context of a users custom resource. For each resource type and action, provide an endpoint pointing to the function with name provided in createUiDefinition.json. Specify the routingType as Proxy,Cache for resource types and Proxy for actions:
{
  "apiVersion": "[variables('customrpApiversion')]",
  "type": "Microsoft.CustomProviders/resourceProviders",
  "name": "[variables('customProviderName')]",
  "location": "[parameters('location')]",
  "properties": {
    "actions": [
      {
        "name": "ping",
        "routingType": "Proxy",
        "endpoint": "[listSecrets(resourceId('Microsoft.Web/sites/functions', parameters('funcname'), 'HttpTrigger1'), '2018-02-01').trigger_url]"
      },
      {
        "name": "users/contextAction",
        "routingType": "Proxy",
        "endpoint": "[listSecrets(resourceId('Microsoft.Web/sites/functions', parameters('funcname'), 'HttpTrigger1'), '2018-02-01').trigger_url]"
      }
    ],
    "resourceTypes": [
      {
        "name": "users",
        "routingType": "Proxy,Cache",
        "endpoint": "[listSecrets(resourceId('Microsoft.Web/sites/functions', parameters('funcname'), 'HttpTrigger1'), '2018-02-01').trigger_url]"
      }
    ]
  },
  "dependsOn": [
    "[concat('Microsoft.Web/sites/',parameters('funcname'))]"
  ]
}
The complete mainTemplate.json sample can be found at Reference: Deployment template artifact.
View definition artifact
To define user interface that includes custom actions and custom resources in your managed application, you need to author viewDefinition.json artifact. For more information about view definition artifact, see View definition artifact in Azure Managed Applications.
In this tutorial, you define:
- An Overview page with toolbar button that represents a custom action
TestActionwith basic text input. - A Users page that represents a custom resource type
users. - A custom resource action
users/contextActionin Users page that will be performed in a context of custom resource of typeusers.
The following example shows view configuration for an "Overview" page:
{
  "kind": "Overview",
  "properties": {
    "header": "Welcome to your Demo Azure Managed Application",
    "description": "This Managed application with Custom Provider is for demo purposes only.",
    "commands": [
      {
        "displayName": "Ping Action",
        "path": "/customping",
        "icon": "LaunchCurrent"
      }
    ]
  }
}
The following example includes Users resources page configuration with custom resource action:
{
  "kind": "CustomResources",
  "properties": {
    "displayName": "Users",
    "version": "1.0.0.0",
    "resourceType": "users",
    "createUIDefinition": {},
    "commands": [
      {
        "displayName": "Custom Context Action",
        "path": "users/contextAction",
        "icon": "Start"
      }
    ],
    "columns": [
      {
        "key": "properties.FullName",
        "displayName": "Full Name"
      },
      {
        "key": "properties.Location",
        "displayName": "Location",
        "optional": true
      }
    ]
  }
}
The complete viewDefinition.json sample can be found at Reference: View definition artifact.
Managed application definition
Package the following managed application artifacts to zip archive and upload it to storage:
- createUiDefinition.json
- mainTemplate.json
- viewDefinition.json
All files must be at root level. The package with artifacts can be stored in any storage, for example GitHub blob or Azure Storage Account blob. Here's a script to upload the application package to storage account:
$resourceGroup="appResourcesGroup"
$storageName="mystorageaccount$RANDOM"

# Sign in to your Azure subscription
Connect-AzAccount
# Create resource group for managed application definition and application package
New-AzResourceGroup -Name $resourceGroup -Location eastus

# Create storage account for a package with application artifacts
$storageAccount=New-AzStorageAccount `
  -ResourceGroupName $resourceGroup `
  -Name $storageName `
  -SkuName Standard_LRS `
  -Location eastus `
$ctx=$storageAccount.Context

# Create storage container and upload zip to blob
New-AzStorageContainer -Name appcontainer -Context $ctx -Permission blob
Set-AzStorageBlobContent `
  -File "path_to_your_zip_package" `
  -Container appcontainer `
  -Blob app.zip `
  -Context $ctx

# Get blob absolute uri
$blobUri=(Get-AzureStorageBlob -Container appcontainer -Blob app.zip -Context $ctx).ICloudBlob.uri.AbsoluteUri
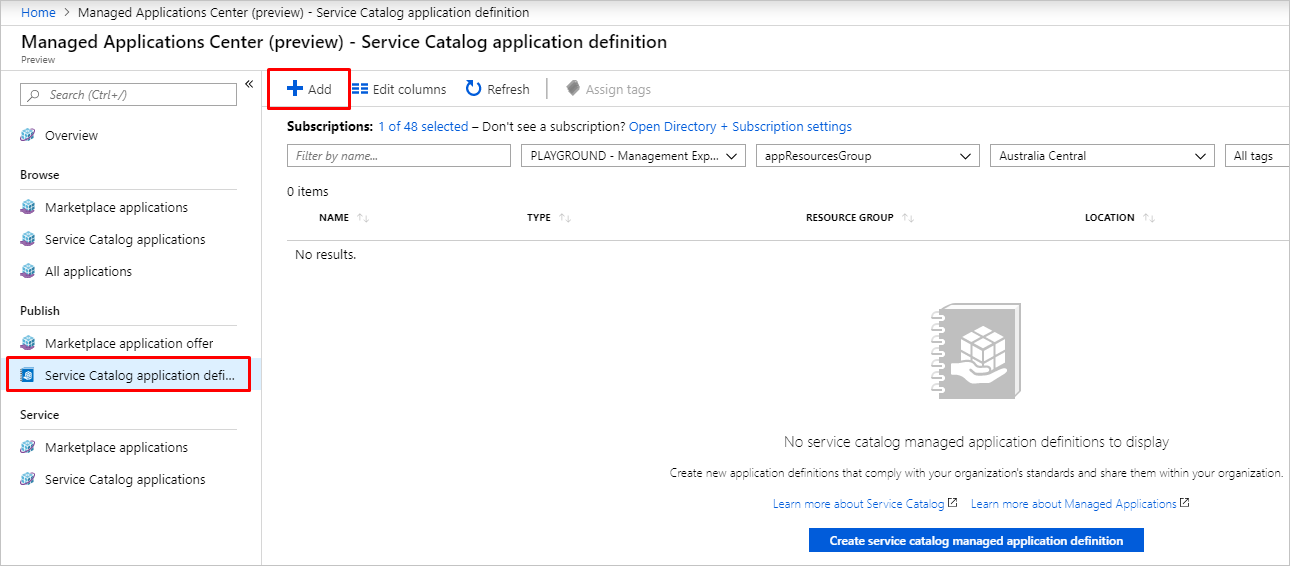
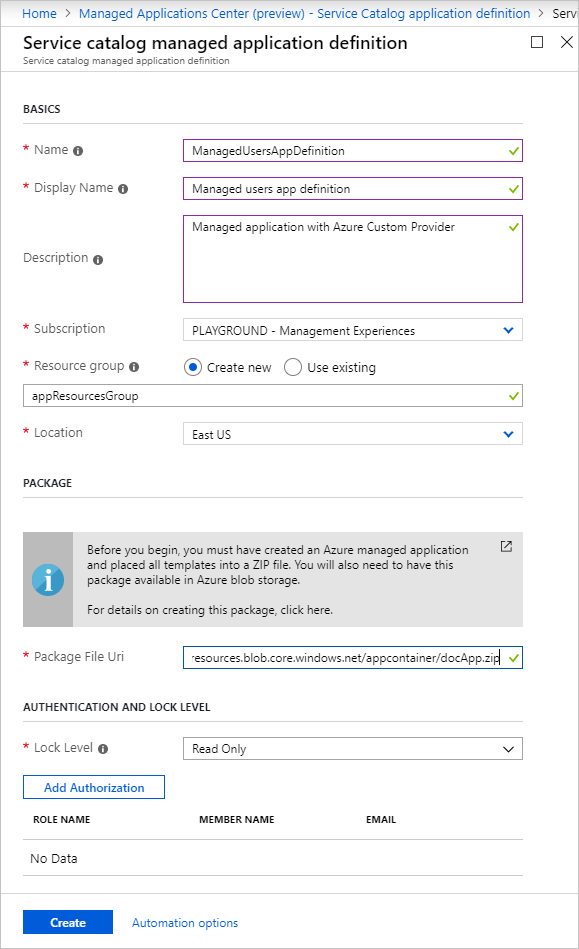
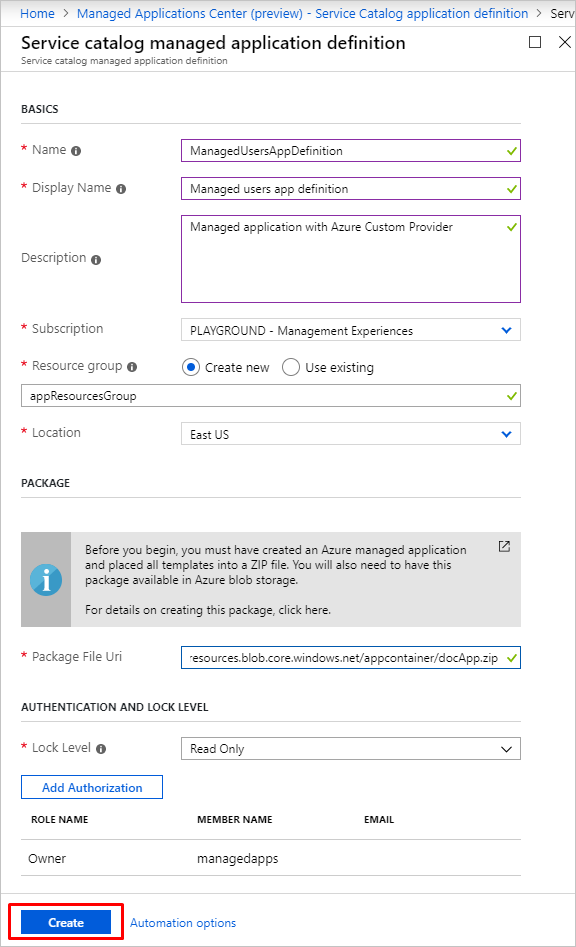
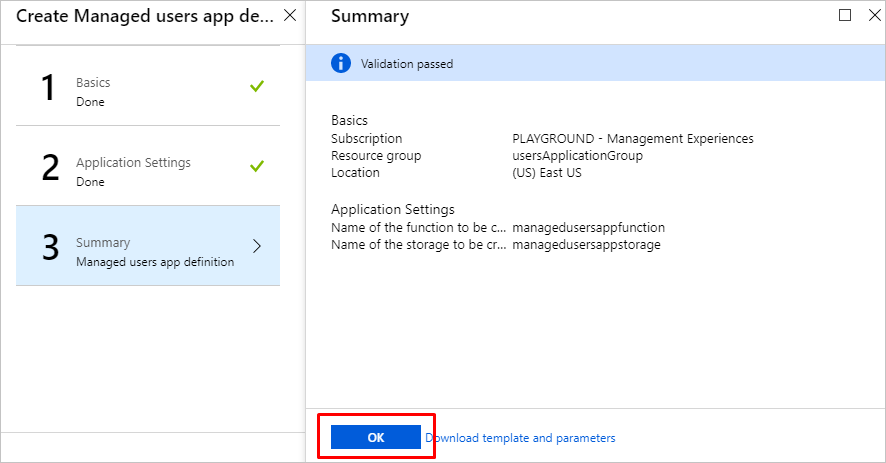
Run the following Azure CLI script or follow the steps in Azure portal to deploy a Service Catalog managed application definition:
To run this sample, install the latest version of the Azure CLI. To start, run az login to create a connection with Azure.
Samples for the Azure CLI are written for the bash shell. To run this sample in Windows PowerShell or Command Prompt, you may need to change
elements of the script.
resourceGroup="appResourcesGroup"
# Select subscription and create resource group (if you have not created yet)
az account set --subscription <subscriptionID>
az group create --name $resourceGroup --location eastus
# Get object ID of your identity
userid=$(az ad user list --upn example@contoso.org --query [0].id --output tsv)
# Get role definition ID for the Owner role
roleid=$(az role definition list --name Owner --query [].name --output tsv)
# Create managed application definition resource
az managedapp definition create \
--name "ManagedUsersAppDefinition" \
--location "eastus" \
--resource-group $resourceGroup \
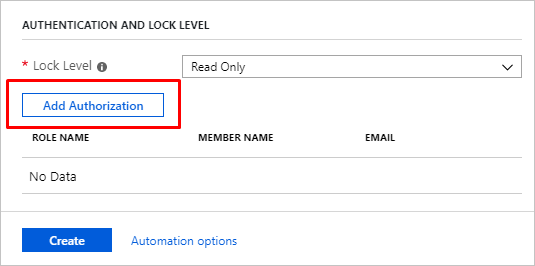
--lock-level ReadOnly \
--display-name "Managed users app definition" \
--description "Managed application with Azure Custom Provider" \
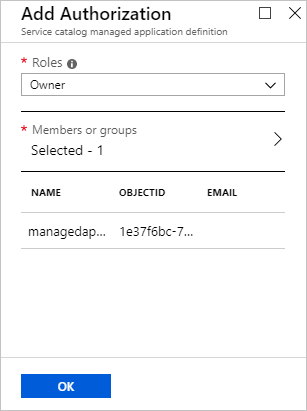
--authorizations "$userid:$roleid" \
--package-file-uri "path to your app.zip package"
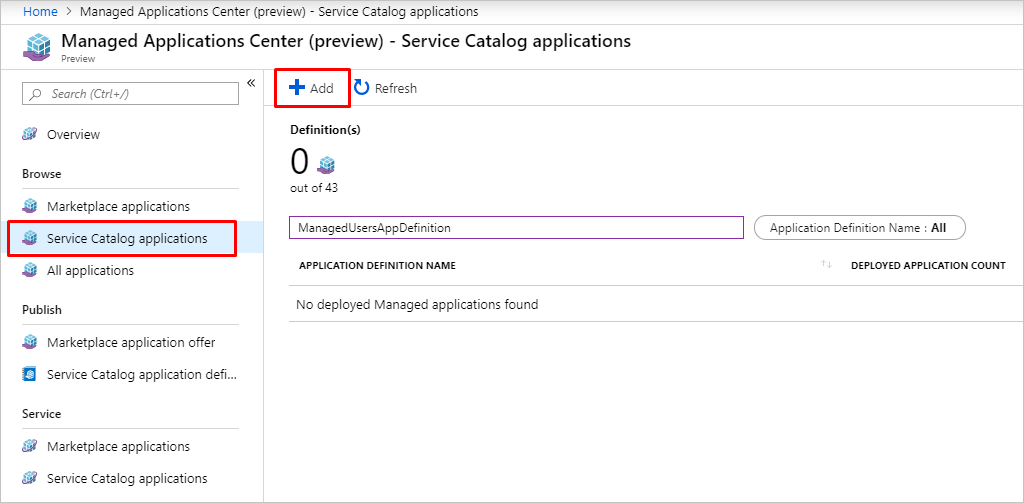
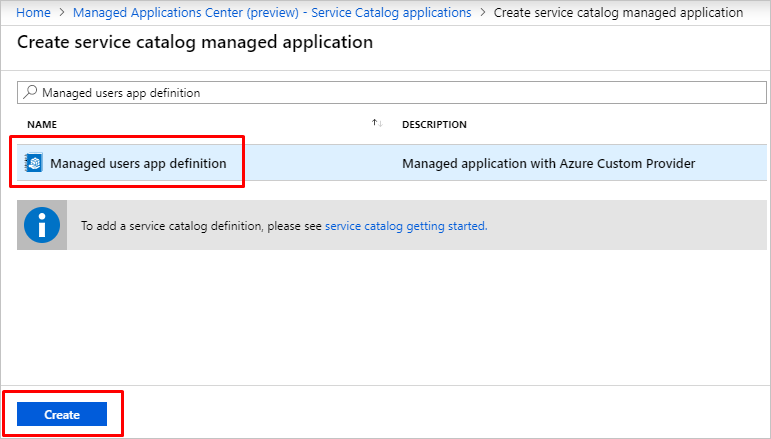
Managed application instance
When managed application definition is deployed, run the following script or follow the steps in Azure portal to deploy your managed application instance with custom provider:
appResourcesGroup="appResourcesGroup"
applicationGroup="usersApplicationGroup"

# Create resource group for managed application instance
az group create --name $applicationGroup --location eastus

# Get ID of managed application definition
appid=$(az managedapp definition show --name ManagedUsersAppDefinition --resource-group $appResourcesGroup --query id --output tsv)

# Create the managed application
az managedapp create \
  --name ManagedUsersApp \
  --location "eastus" \
  --kind "Servicecatalog" \
  --resource-group $applicationGroup \
  --managedapp-definition-id $appid \
  --managed-rg-id "managedResourcesGroup" \
  --parameters "{\"funcname\": {\"value\": \"managedusersappfunction\"}, \"storageName\": {\"value\": \"managedusersappstorage\"}}"
Custom actions and resources
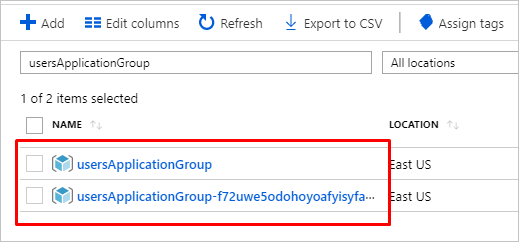
After the service catalog application instance is deployed, you have two new resource groups. The resource group applicationGroup contains an instance of the managed application and resource group managedResourceGroup holds the resources for the managed application, including custom provider.
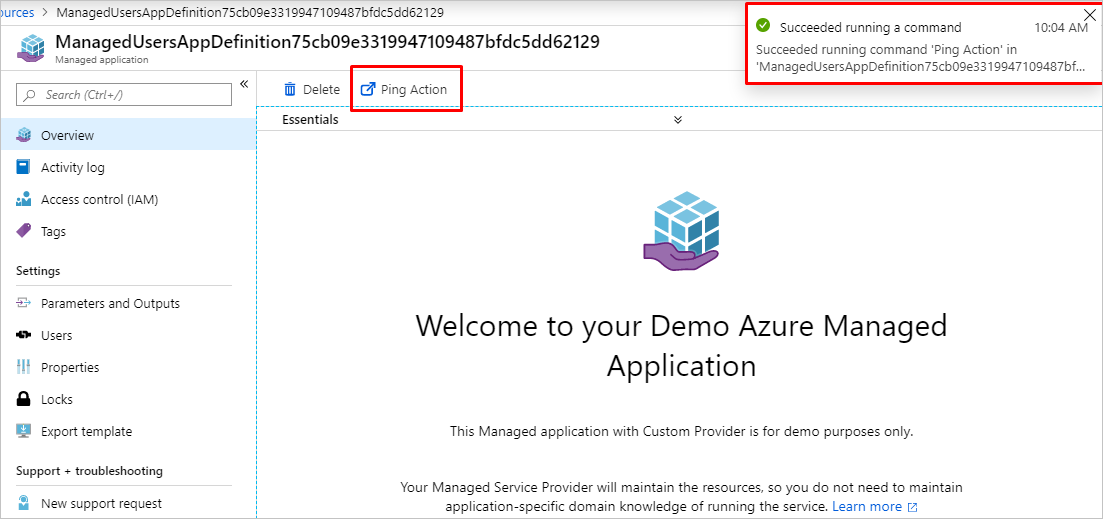
You can go to managed application instance and perform custom action in "Overview" page, create users custom resource in "Users" page and run custom context action on custom resource.
- Go to Overview and select Ping Action:
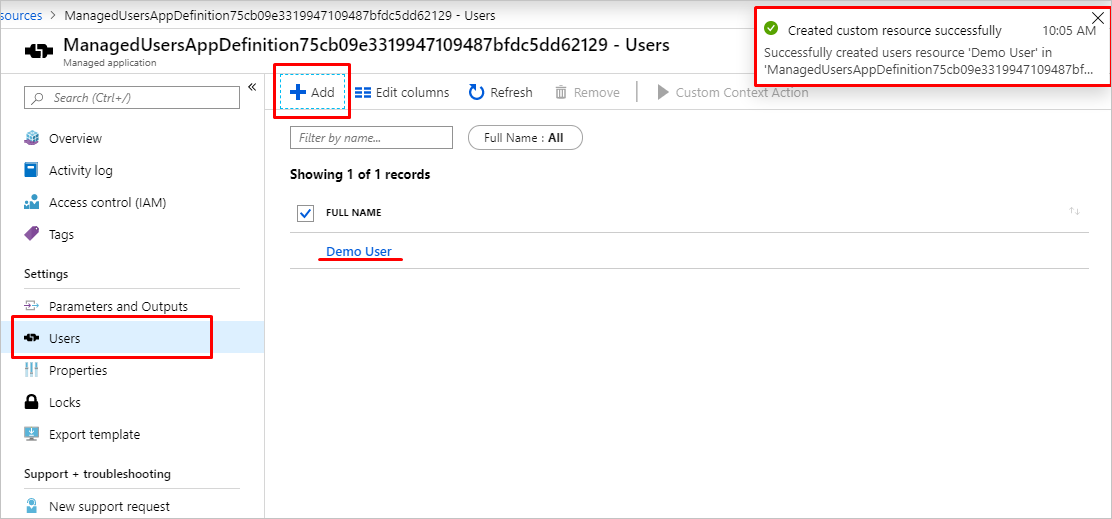
- Go to Users and select Add. Provide inputs for creating a resource and submit the form:
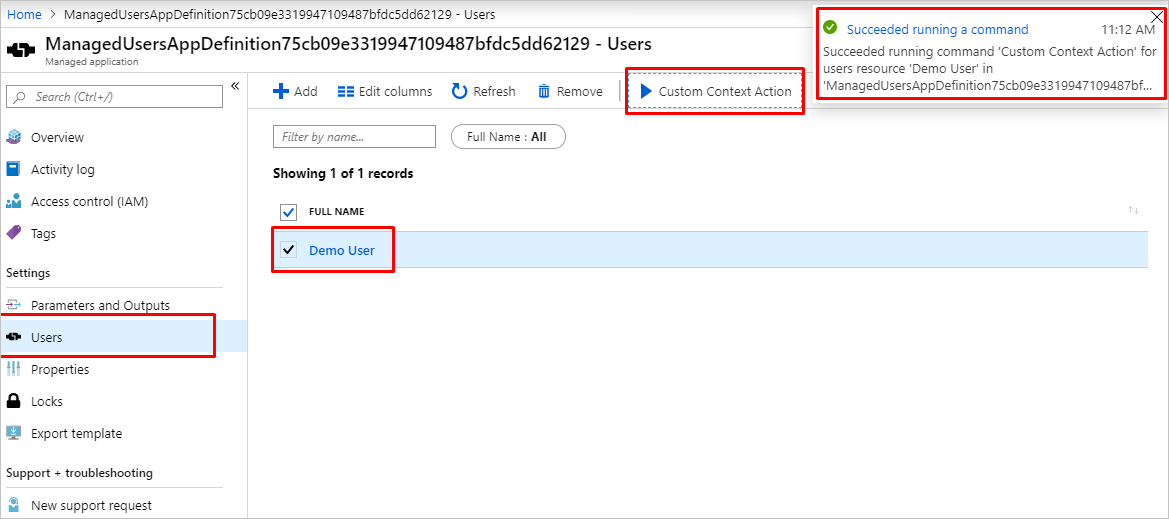
- Go to Users and select a users resource and select Custom Context Action:
Clean up resources
In the preceding steps, you created Azure resources in a resource group. If you don't expect to need these resources in the future, you can delete them by deleting the resource group:
From the Azure portal menu or home page, select Resource groups > myResourceGroup.
On the myResourceGroup pane, make sure that the listed resources are the ones you want to delete.
Select Delete resource group. Type myResourceGroup in the text box to confirm, and then select Delete.
Looking for help
If you have questions or need an answer about Azure Managed Applications, you can post a question on Stack Overflow with tag azure-managed-app or Microsoft Q&A with tag azure-managed-application.
Next steps
To publish your managed application to the Azure Marketplace, see Azure managed applications in the Marketplace.
Learn more about Azure Custom Providers.