Connect to and query Azure SQL Database using Python and the pyodbc driver
Applies to: ![]() Azure SQL Database
Azure SQL Database
This quickstart describes how to connect an application to a database in Azure SQL Database and perform queries using Python and the Python SQL Driver - pyodbc. This quickstart follows the recommended passwordless approach to connect to the database. You can learn more about passwordless connections on the passwordless hub.
Prerequisites
- An Azure subscription.
- An Azure SQL database configured with Microsoft Entra authentication. You can create one using the Create database quickstart.
- The latest version of the Azure CLI.
- Visual Studio Code with the Python extension.
- Python 3.8 or later. If you're using a Linux client machine, see Install the ODBC driver.
Configure the database
Secure, passwordless connections to Azure SQL Database require certain database configurations. Verify the following settings on your logical server in Azure to properly connect to Azure SQL Database in both local and hosted environments:
For local development connections, make sure your logical server is configured to allow your local machine IP address and other Azure services to connect:
Navigate to the Networking page of your server.
Toggle the Selected networks radio button to show additional configuration options.
Select Add your client IPv4 address(xx.xx.xx.xx) to add a firewall rule that will enable connections from your local machine IPv4 address. Alternatively, you can also select + Add a firewall rule to enter a specific IP address of your choice.
Make sure the Allow Azure services and resources to access this server checkbox is selected.

Warning
Enabling the Allow Azure services and resources to access this server setting is not a recommended security practice for production scenarios. Real applications should implement more secure approaches, such as stronger firewall restrictions or virtual network configurations.
You can read more about database security configurations on the following resources:
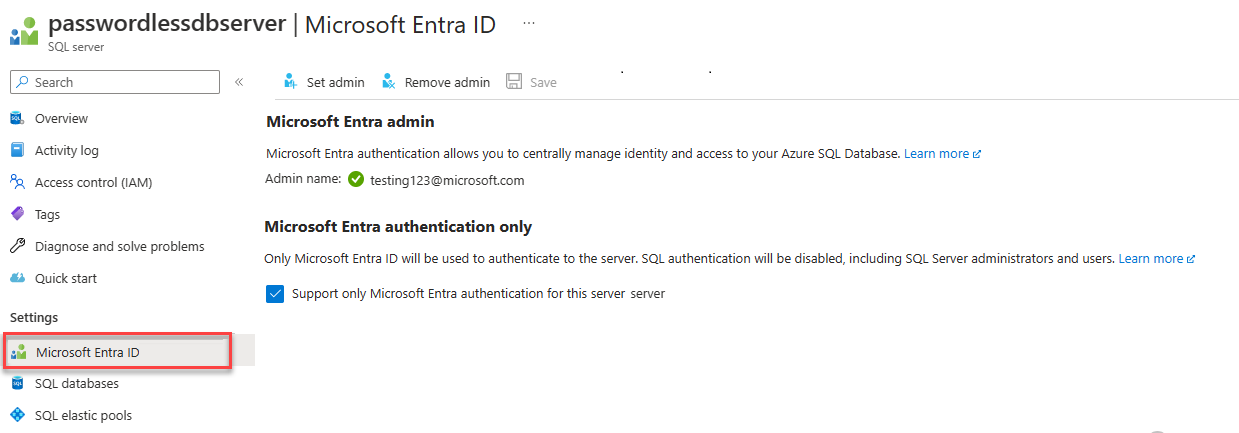
The server must also have Microsoft Entra authentication enabled and have a Microsoft Entra admin account assigned. For local development connections, the Microsoft Entra admin account should be an account you can also log into Visual Studio or the Azure CLI with locally. You can verify whether your server has Microsoft Entra authentication enabled on the Microsoft Entra ID page of your logical server.
If you're using a personal Azure account, make sure you have Microsoft Entra setup and configured for Azure SQL Database in order to assign your account as a server admin. If you're using a corporate account, Microsoft Entra ID will most likely already be configured for you.


Create the project
Create a new Python project using Visual Studio Code.
Open Visual Studio Code and create a new folder for your project and change directory into it.
mkdir python-sql-azure
cd python-sql-azure
Create a virtual environment for the app.
py -m venv .venv .venv\scripts\activateCreate a new Python file called
app.py.
Install the pyodbc driver
To connect to Azure SQL Database using Python, install the pyodbc driver. This package acts as a data provider for connecting to databases, executing commands, and retrieving results. In this quickstart, you also install flask, uvicorn, and pydantic packages to create and run an API.
For details and specific instructions for installing the pyodbc driver on all operating systems, see Configure development environment for pyodbc Python development.
Create a requirements.txt file with the following lines:
pyodbc
fastapi
uvicorn[standard]
pydantic
azure-identity
Install the requirements.
pip install -r requirements.txt
Configure the local connection string
For local development and connecting to Azure SQL Database, add the following AZURE_SQL_CONNECTIONSTRING environment variable. Replace the <database-server-name> and <database-name> placeholders with your own values. Example environment variables are shown for the Bash shell.
Interactive authentication provides a passwordless option when you're running locally.
In Windows, Microsoft Entra Interactive Authentication can use Microsoft Entra multifactor authentication technology to set up connection. In this mode, by providing the sign in ID, an Azure Authentication dialog is triggered and allows the user to input the password to complete the connection.
export AZURE_SQL_CONNECTIONSTRING='Driver={ODBC Driver 18 for SQL Server};Server=tcp:<database-server-name>.database.windows.net,1433;Database=<database-name>;Encrypt=yes;TrustServerCertificate=no;Connection Timeout=30'
For more information, see Using Microsoft Entra ID with the ODBC Driver. If you use this option, look for the window that prompts you for credentials.
You can get the details to create your connection string from the Azure portal:
Go to the Azure SQL Server, select the SQL databases page to find your database name, and select the database.
On the database, go to the Connection strings page to get connection string information. Look under the ODBC tab.
Note
If you've installed Azure Arc and associated it with your Azure subscription, you can also use the managed identity approach shown for the app deployed to App Service.
Add code to connect to Azure SQL Database
In the project folder, create an app.py file and add the sample code. This code creates an API that:
- Retrieves an Azure SQL Database connection string from an environment variable.
- Creates a
Personstable in the database during startup (for testing scenarios only). - Defines a function to retrieve all
Personrecords from the database. - Defines a function to retrieve one
Personrecord from the database. - Defines a function to add new
Personrecords to the database.
import os
import pyodbc, struct
from azure import identity

from typing import Union
from fastapi import FastAPI
from pydantic import BaseModel

class Person(BaseModel):
    first_name: str
    last_name: Union[str, None] = None

connection_string = os.environ["AZURE_SQL_CONNECTIONSTRING"]

app = FastAPI()

@app.get("/")
def root():
    print("Root of Person API")
    try:
        conn = get_conn()
        cursor = conn.cursor()

        # Table should be created ahead of time in production app.
        cursor.execute("""
            CREATE TABLE Persons (
                ID int NOT NULL PRIMARY KEY IDENTITY,
                FirstName varchar(255),
                LastName varchar(255)
            );
        """)

        conn.commit()
    except Exception as e:
        # Table may already exist
        print(e)
    return "Person API"

@app.get("/all")
def get_persons():
    rows = []
    with get_conn() as conn:
        cursor = conn.cursor()
        cursor.execute("SELECT * FROM Persons")

        for row in cursor.fetchall():
            print(row.FirstName, row.LastName)
            rows.append(f"{row.ID}, {row.FirstName}, {row.LastName}")
    return rows

@app.get("/person/{person_id}")
def get_person(person_id: int):
    with get_conn() as conn:
        cursor = conn.cursor()
        cursor.execute("SELECT * FROM Persons WHERE ID = ?", person_id)

        row = cursor.fetchone()
        return f"{row.ID}, {row.FirstName}, {row.LastName}"

@app.post("/person")
def create_person(item: Person):
    with get_conn() as conn:
        cursor = conn.cursor()
        cursor.execute(f"INSERT INTO Persons (FirstName, LastName) VALUES (?, ?)", item.first_name, item.last_name)
        conn.commit()

    return item

def get_conn():
    credential = identity.DefaultAzureCredential(exclude_interactive_browser_credential=False)
    token_bytes = credential.get_token("https://database.windows.net/.default").token.encode("UTF-16-LE")
    token_struct = struct.pack(f'<I{len(token_bytes)}s', len(token_bytes), token_bytes)
    SQL_COPT_SS_ACCESS_TOKEN = 1256  # This connection option is defined by microsoft in msodbcsql.h
    conn = pyodbc.connect(connection_string, attrs_before={SQL_COPT_SS_ACCESS_TOKEN: token_struct})
    return conn
Warning
The sample code shows raw SQL statements, which shouldn't be used in production code. Instead, use an Object Relational Mapper (ORM) package like SqlAlchemy that generates a more secure object layer to access your database.
Run and test the app locally
The app is ready to be tested locally.
Run the
app.pyfile in Visual Studio Code.uvicorn app:app --reloadOn the Swagger UI page for the app http://127.0.0.1:8000/docs, expand the POST method and select Try it out.
You can also use try /redoc to see another form of generated documentation for the API.
Modify the sample JSON to include values for the first and last name. Select Execute to add a new record to the database. The API returns a successful response.
Expand the GET method on the Swagger UI page and select Try it. Choose Execute, and the person you just created is returned.
Deploy to Azure App Service
The app is ready to be deployed to Azure.
Create a start.sh file so that gunicorn in Azure App Service can run uvicorn. The start.sh has one line:
gunicorn -w 4 -k uvicorn.workers.UvicornWorker app:appUse the az webapp up to deploy the code to App Service. (You can use the option
-dryrunto see what the command does without creating the resource.)az webapp up \ --resource-group <resource-group-name> \ --name <web-app-name>Use the az webapp config set command to configure App Service to use the start.sh file.
az webapp config set \
    --resource-group <resource-group-name> \
    --name <web-app-name> \
    --startup-file start.sh
Use the az webapp identity assign command to enable a system-assigned managed identity for the App Service.
az webapp identity assign \
    --resource-group <resource-group-name> \
    --name <web-app-name>
In this quickstart, a system-assigned managed identity is used for demonstration. A user-assigned managed identity is more efficient in a broader range of scenarios. For more information, see Managed identity best practice recommendations. For an example of using a user-assigned managed identity with pyodbc, see Migrate a Python application to use passwordless connections with Azure SQL Database.
Connect the App Service to Azure SQL Database
In the Configure the database section, you configured networking and Microsoft Entra authentication for the Azure SQL database server. In this section, you complete the database configuration and configure the App Service with a connection string to access the database server.
To run these commands you can use any tool or IDE that can connect to Azure SQL Database, including SQL Server Management Studio (SSMS), Azure Data Studio, and Visual Studio Code with the SQL server mssql extension. As well, you can use the Azure portal as described in Quickstart: Use the Azure portal query editor to query Azure SQL Database.
Add a user to the Azure SQL Database with SQL commands to create a user and role for passwordless access.
CREATE USER [<web-app-name>] FROM EXTERNAL PROVIDER
ALTER ROLE db_datareader ADD MEMBER [<web-app-name>]
ALTER ROLE db_datawriter ADD MEMBER [<web-app-name>]
For more information, see Contained Database Users - Making Your Database Portable. For an example that shows the same principle but applied to Azure VM, see Tutorial: Use a Windows VM system-assigned managed identity to access Azure SQL. For more information about the roles assigned, see Fixed-database Roles.
If you disable and then enable the App Service system-assigned managed identity, then drop the user and recreate it. Run
DROP USER [<web-app-name>]and rerun theCREATEandALTERcommands. To see users, useSELECT * FROM sys.database_principals.Use the az webapp config appsettings set command to add an app setting for the connection string.
az webapp config appsettings set \
    --resource-group <resource-group-name> \
    --name <web-app-name> \
    --settings AZURE_SQL_CONNECTIONSTRING="<connection-string>"
For the deployed app, the connection string should resemble:
Driver={ODBC Driver 18 for SQL Server};Server=tcp:<database-server-name>.database.windows.net,1433;Database=<database-name>;Encrypt=yes;TrustServerCertificate=no;Connection Timeout=30Fill in the
<dabaser-server-name>and<database-name>with your values.The passwordless connection string doesn't contain a user name or password. Instead, when the app runs in Azure, the code uses
DefaultAzureCredentialfrom the Azure Identity library to get a token to use withpyodbc.
Test the deployed application
Browse to the URL of the app to test that the connection to Azure SQL Database is working. You can locate the URL of your app on the App Service overview page.
https://<web-app-name>.azurewebsites.net
Append /docs to the URL to see the Swagger UI and test the API methods.
Congratulations! Your application is now connected to Azure SQL Database in both local and hosted environments.
Related content
Feedback
Coming soon: Throughout 2024 we will be phasing out GitHub Issues as the feedback mechanism for content and replacing it with a new feedback system. For more information see: https://aka.ms/ContentUserFeedback.
Submit and view feedback for