Note
Access to this page requires authorization. You can try signing in or changing directories.
Access to this page requires authorization. You can try changing directories.
Applies to: ![]() Azure SQL Database
Azure SQL Database
Azure SQL Database is a relational database-as-a-service (DBaaS) in the Microsoft Azure. In this tutorial, you learn how to:
- Connect to the database
- Create tables with T-SQL commands
- Bulk load data with BCP
- Query data with T-SQL commands
Note
For the purpose of this tutorial, we are using Azure SQL Database. You could also use a pooled database in an elastic pool or a SQL Managed Instance. For connectivity to a SQL Managed Instance, see these SQL Managed Instance quickstarts: Quickstart: Configure an Azure VM to connect to Azure SQL Managed Instance and Quickstart: Configure a point-to-site connection to Azure SQL Managed Instance from on-premises.
Prerequisites
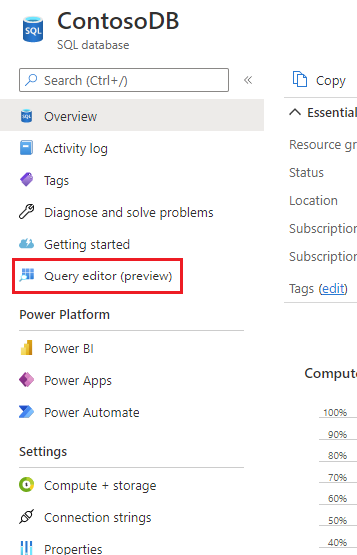
- Use SQL Server Management Studio (latest version) or the Azure portal query editor for Azure SQL Database.
- BCP and SQLCMD (latest version).
- If you don't have an Azure subscription, create a free account before you begin.
- If you don't already have an Azure SQL Database created, visit Quickstart: Create a single database - Azure SQL Database. Look for the option to use your offer to Deploy Azure SQL Database for free.
Sign in to the Azure portal
Sign in to the Azure portal.
Create a server-level IP firewall rule
Azure SQL Database creates an IP firewall at the server-level. This firewall prevents external applications and tools from connecting to the server and any databases on the server unless a firewall rule allows their IP through the firewall. To enable external connectivity to your database, you must first add an IP firewall rule for your IP address (or IP address range). Follow these steps to create a server-level IP firewall rule.
Important
Azure SQL Database communicates over port 1433. If you're trying to connect to this service from within a corporate network, outbound traffic over port 1433 might not be allowed by your network's firewall. If so, you can't connect to your database unless your administrator opens port 1433.
After the deployment completes, go to your new resource, or visit the Azure SQL hub at aka.ms/azuresqlhub.
In the resource menu, expand Azure SQL Database and select SQL databases.
Select yourDatabase on the SQL databases page. The overview page for your database opens, showing you the fully qualified Server name (such as
contosodatabaseserver01.database.windows.net) and provides options for further configuration.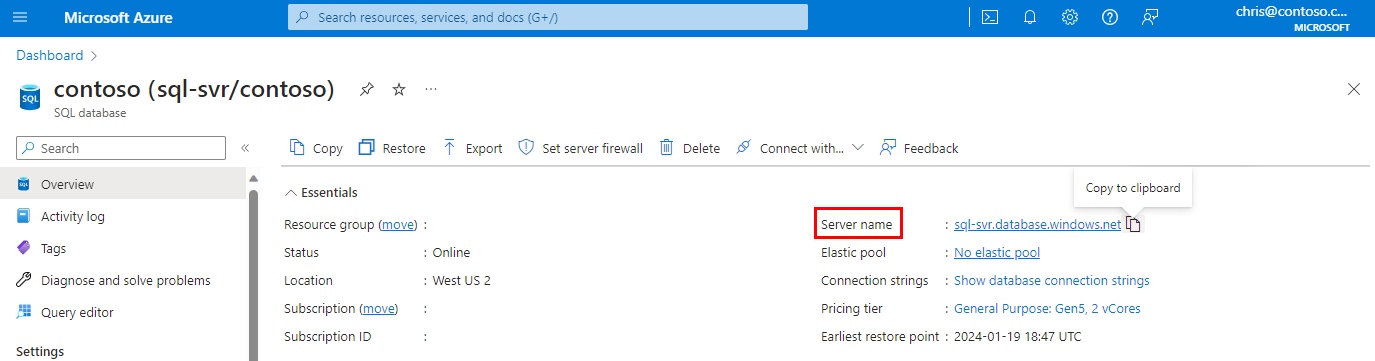
Copy this fully qualified server name for use to connect to your server and databases from SQL Server Management Studio.
Select Networking under Settings. Choose the Public Access tab, and then select Selected networks under Public network access to display the Firewall rules section.
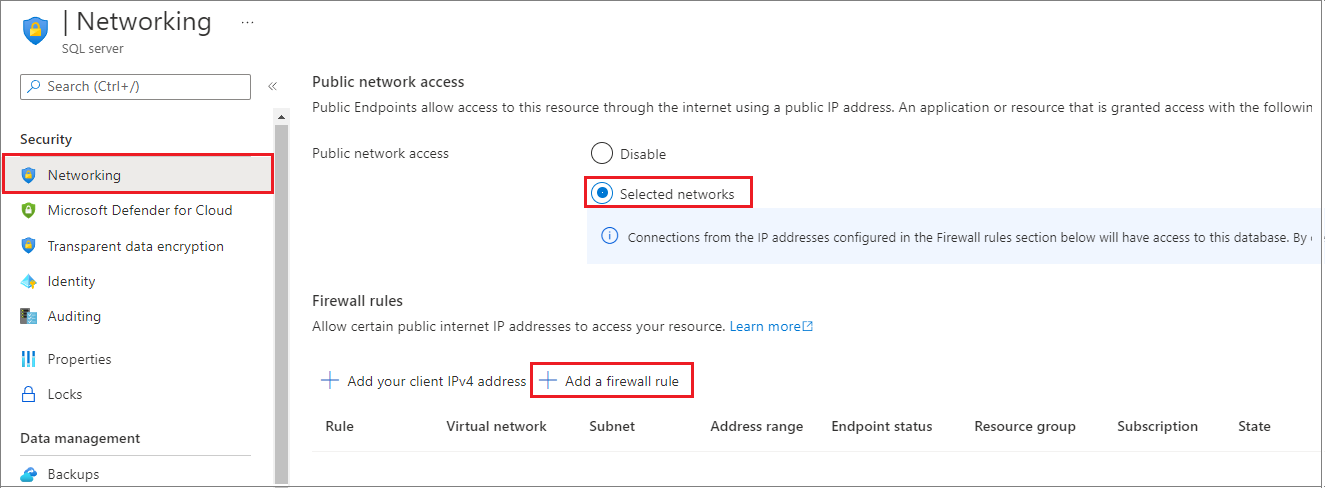
Select Add your client IPv4 on the toolbar to add your current IP address to a new IP firewall rule. An IP firewall rule can open port 1433 for a single IP address or a range of IP addresses.
Select Save. A server-level IP firewall rule is created for your current IP address opening port 1433 on the server.
Select OK and then close the Firewall settings page.


Your IP address can now pass through the IP firewall. You can now connect to your database using SQL Server Management Studio or another tool of your choice. Be sure to use the server admin account you created previously.
Important
By default, access through the SQL Database IP firewall is enabled for all Azure services. Select OFF on this page to disable for all Azure services.
Connect to the database
Azure SQL databases exist inside logical SQL servers. Can connect to the logical SQL server's master using a login, then connect to your database. Or, using a contained user, you can connect directly to your Azure SQL database.
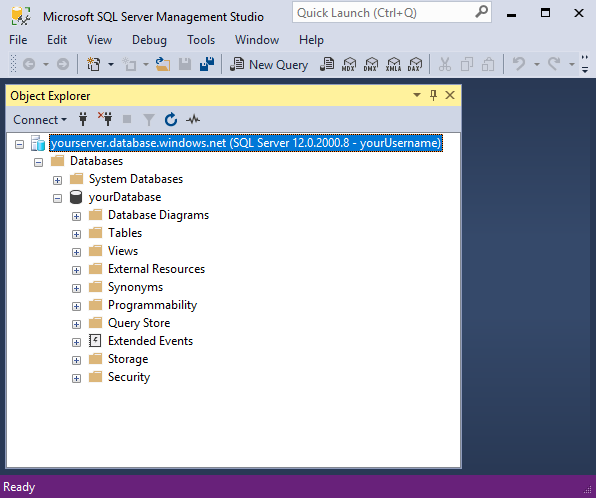
Use SQL Server Management Studio to connect to your Azure SQL database.
Open SQL Server Management Studio.
In the Connect to Server dialog box, enter the following information. Leave other options as default.
Setting Suggested value Description Server type Database engine This value is required. Server name The fully qualified Azure SQL Database logical server name For example, your_logical_azure_sql_server.database.windows.net.Authentication SQL Server Authentication Use SQL Server Authentication to enter a user name and password. Microsoft Entra authentication To connect using Microsoft Entra ID, if you're the Microsoft Entra server admin, choose Microsoft Entra MFA. For more information, see Configure and manage Microsoft Entra authentication with Azure SQL. Login The server admin account If using SQL Server Authentication, the account that you specified when you created the server. Password The password for your server admin account If using SQL Server Authentication, the password that you specified when you created the server. 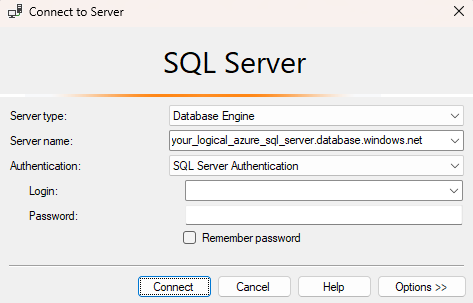
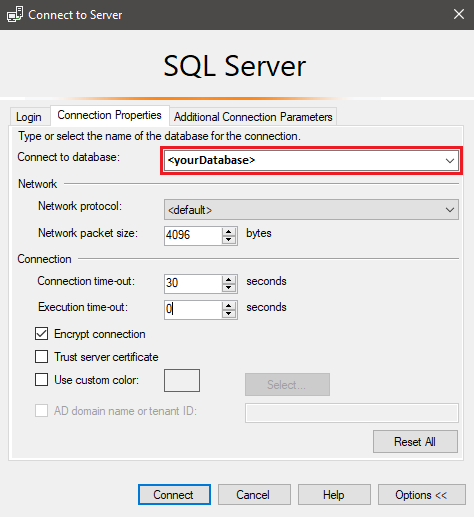
Select Options in the Connect to server dialog box. In the Connect to database section, enter yourDatabase to connect to this database.
Select Connect. The Object Explorer window opens in SSMS.
In Object Explorer, expand Databases and then expand yourDatabase to view the objects in the sample database.
In Object Explorer, right-click yourDatabase and select New Query. A blank query window opens that is connected to your database.


Create tables in your database
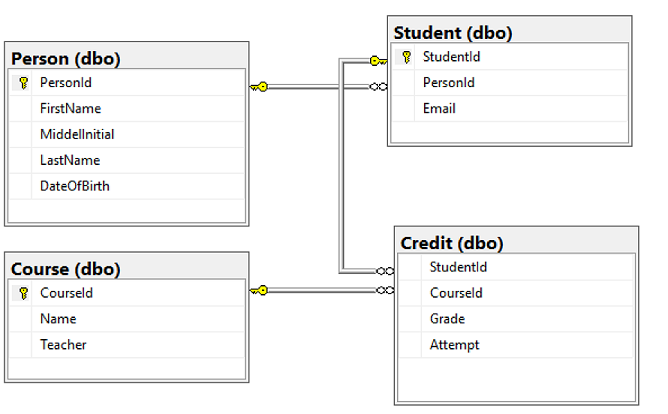
Create four tables that model a student management system for universities using Transact-SQL:
PersonCourseStudentCredit
The following diagram shows how these tables are related to each other. Some of these tables reference columns in other tables. For example, the Student table references the PersonId column of the Person table. Study the diagram to understand how the tables in this tutorial are related to one another. For an in-depth look at how to create effective normalized database tables, see Designing a Normalized Database. For information about choosing data types, see Data types. By default, tables are created in the default dbo schema, meaning the two-part name of a table will be dbo.Person, for example.
Note
You can also use the table designer in SQL Server Management Studio to create and design your tables.
In the query window, execute the following T-SQL query to create four tables in your database:
-- Create Person table
CREATE TABLE Person
(
    PersonId INT IDENTITY PRIMARY KEY,
    FirstName NVARCHAR (128) NOT NULL,
    MiddleInitial NVARCHAR (10),
    LastName NVARCHAR (128) NOT NULL,
    DateOfBirth DATE NOT NULL
);

-- Create Student table
CREATE TABLE Student
(
    StudentId INT IDENTITY PRIMARY KEY,
    PersonId INT FOREIGN KEY REFERENCES Person (PersonId),
    Email NVARCHAR (256)
);

-- Create Course table
CREATE TABLE Course
(
    CourseId INT IDENTITY PRIMARY KEY,
    Name NVARCHAR (50) NOT NULL,
    Teacher NVARCHAR (256) NOT NULL
);

-- Create Credit table
CREATE TABLE Credit
(
    StudentId INT FOREIGN KEY REFERENCES Student (StudentId),
    CourseId INT FOREIGN KEY REFERENCES Course (CourseId),
    Grade DECIMAL (5, 2) CHECK (Grade <= 100.00),
    Attempt TINYINT,
    CONSTRAINT [UQ_studentgrades]
        UNIQUE CLUSTERED (StudentId, CourseId, Grade, Attempt)
);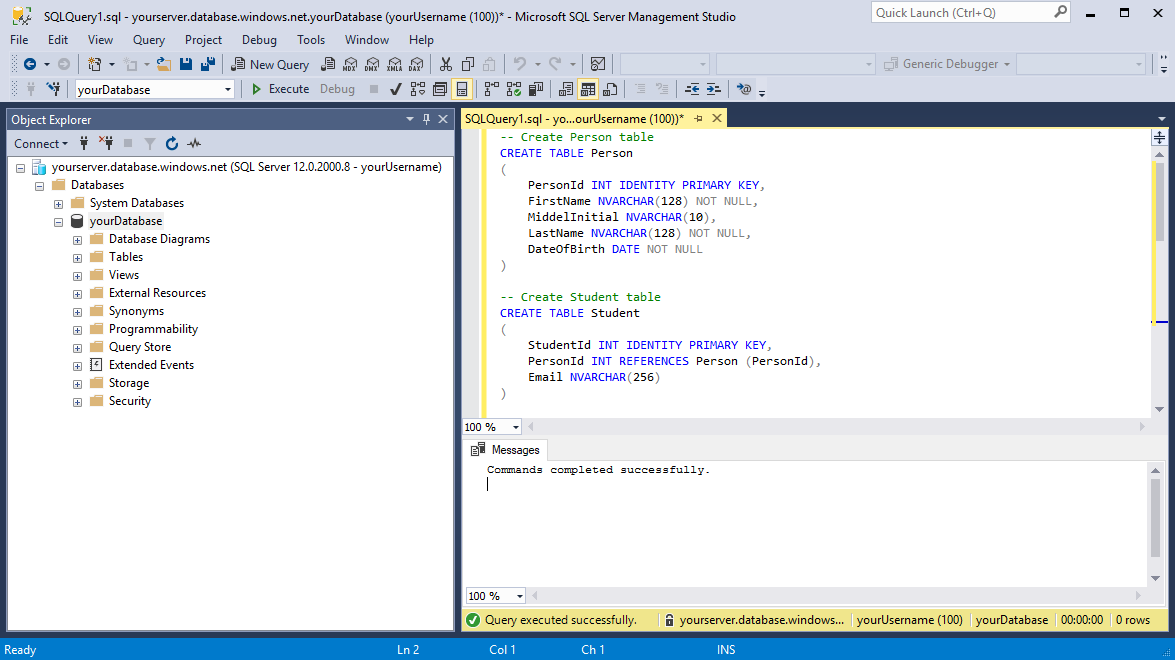
Expand the Tables node under yourDatabase in the Object Explorer to see the four new tables you created.

Load data into the tables
Create a folder called sampleData in your local workstation Downloads folder to store sample data for your database. For example,
c:\Users\<your user name>\Downloads.Right-click the following links and save them into the sampleData folder.
Open a new Windows command prompt window and navigate to the sampleData folder. For example,
cd c:\Users\<your user name>\Downloads.Execute the following
bcpcommands to insert sample data into the tables replacing the values for server, database, user, and password with the values for your environment.bcp Course in SampleCourseData -S <server>.database.windows.net -d <database> -U <user> -P <password> -q -c -t "," bcp Person in SamplePersonData -S <server>.database.windows.net -d <database> -U <user> -P <password> -q -c -t "," bcp Student in SampleStudentData -S <server>.database.windows.net -d <database> -U <user> -P <password> -q -c -t "," bcp Credit in SampleCreditData -S <server>.database.windows.net -d <database> -U <user> -P <password> -q -c -t ","
You have now loaded sample data into the tables you created earlier.
Query data
Execute the following T-SQL queries to retrieve information from the database tables.
This first query joins all four tables to find the students taught by 'Dominick Pope' who have a grade higher than 75%. In a query window, execute the following T-SQL query:
-- Find the students taught by Dominick Pope who have a grade higher than 75%
SELECT person.FirstName,
       person.LastName,
       course.Name,
       credit.Grade
FROM Person AS person
     INNER JOIN Student AS student
         ON person.PersonId = student.PersonId
     INNER JOIN Credit AS credit
         ON student.StudentId = credit.StudentId
     INNER JOIN Course AS course
         ON credit.CourseId = course.courseId
WHERE course.Teacher = 'Dominick Pope'
      AND Grade > 75;
This query joins all four tables and finds the courses in which 'Noe Coleman' has ever enrolled. In a query window, execute the following T-SQL query:
-- Find all the courses in which Noe Coleman has ever enrolled
SELECT course.Name,
       course.Teacher,
       credit.Grade
FROM Course AS course
     INNER JOIN Credit AS credit
         ON credit.CourseId = course.CourseId
     INNER JOIN Student AS student
         ON student.StudentId = credit.StudentId
     INNER JOIN Person AS person
         ON person.PersonId = student.PersonId
WHERE person.FirstName = 'Noe'
      AND person.LastName = 'Coleman';
Tip
To learn more about writing SQL queries, visit Tutorial: Write Transact-SQL statements.