Note
Access to this page requires authorization. You can try signing in or changing directories.
Access to this page requires authorization. You can try changing directories.
Applies to: ![]() Azure SQL Managed Instance
Azure SQL Managed Instance
This article teaches how to create an instance pool for Azure SQL Managed Instance by using the Azure portal, PowerShell, or the Azure CLI, as well as how to move instances in and out of the pool by using PowerShell, or the Azure CLI.
Instance pools make it possible to deploy multiple instances with shared resources to a single virtual machine, which provides a convenient and cost-effective infrastructure to migrate multiple SQL Server instances without having to consolidate smaller and less compute-intensive workloads onto a larger SQL Managed Instance.
Prerequisites
To create an instance pool, you should have:
- An existing virtual network with an appropriately sized subnet range.
- The latest Az.SQL module for the current version of PowerShell or the latest version of the Azure CLI.
- Reviewed Instance and pool properties.
Subnet size considerations
Carefully plan the size of your subnet when you use an instance pool. Refer to Determine required subnet size & range for subnet sizing guidelines.
Use the following formula when calculating the number of IP addresses required by one instance pool that contains multiple General Purpose instances:
2 * (5 + (3 * # of MIs)) + 5
The # of MIs refers to the maximum potential number of instances you plan to provision. The maximum possible number of instances in a pool is 40.
Create instance pool
You can create an instance pool by using the Azure portal, PowerShell or the Azure CLI. Consider the following:
- Only the General Purpose service tier on either standard-series (Gen5) or premium-series hardware is currently available.
- The pool name can contain only lowercase letters, numbers and hyphens, and can't start with a hyphen.
- The Azure Hybrid Benefit is applied at the instance pool level. You can set the license type when you create the pool, and update the license type after the pool is created.
Important
Deploying an instance pool is a long running operation that can take up to 4.5 hours.
To create an instance pool in the Azure portal, follow these steps:
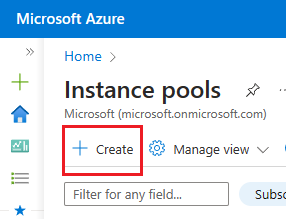
Search for instance pools in the Azure portal and select the Instance pools service to open the Instance pools page:

On the Instance pools page, select + Create to open the Create Azure SQL Managed Instance Pool page:
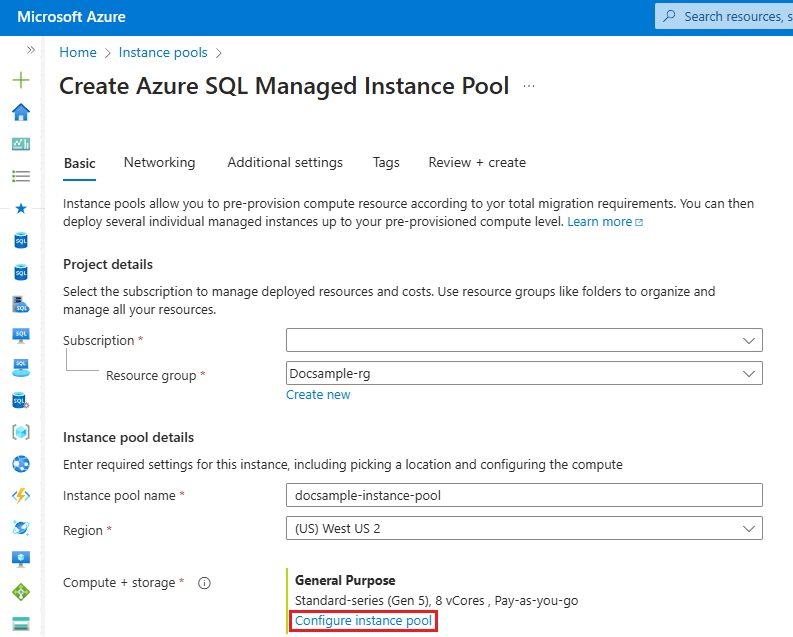
On the Create Azure SQL Managed Instance Pool:
- Provide project and instance details on the Basics tab.
- Use Configure instance pool under Compute + storage to open the Compute + Storage page and choose the service tier, compute hardware and SQL Server license that you want the pool to use. Use Apply to save your compute settings and go back to the Create Azure SQL Managed Instance Pool page.
- Select an existing virtual network, or configure a new virtual network on the Networking tab.
- (Optional) Configure a non-default maintenance window for the pool on the Additional settings tab.
- Review your configuration on the Review + create tab, and then select Create to create your instance pool.
You can monitor pool deployment from Notifications.


After your instance pool is created, you can create a new instance in the pool by using the Azure portal, or you can move an existing instance into the pool by using PowerShell or the Azure CLI.
Create new instance inside pool
After your pool is created, you can create a new instance within the pool by using the Azure portal, PowerShell, or the Azure CLI.
Consider the following:
- You must specify the license type for the new instance, and it must match the license type of the pool.
To create a new instance inside a pool by using the Azure portal, follow these steps:
Go to the Azure SQL page in the Azure portal.
On the Azure SQL page, select + Create to open the Select SQL deployment option.
On the SQL managed instances tile, choose Single instance as the resource type and then select Create to open the Create Azure SQL Managed Instance page.
On the Basics tab of the Create Azure SQL Managed Instance page:
- Select the resource group that contains your existing instance pool.
- Choose Yes to Belongs to an instance pool? under Managed Instance details to create your new instance inside an instance pool.
- Select the pool from the Instance pool dropdown list.
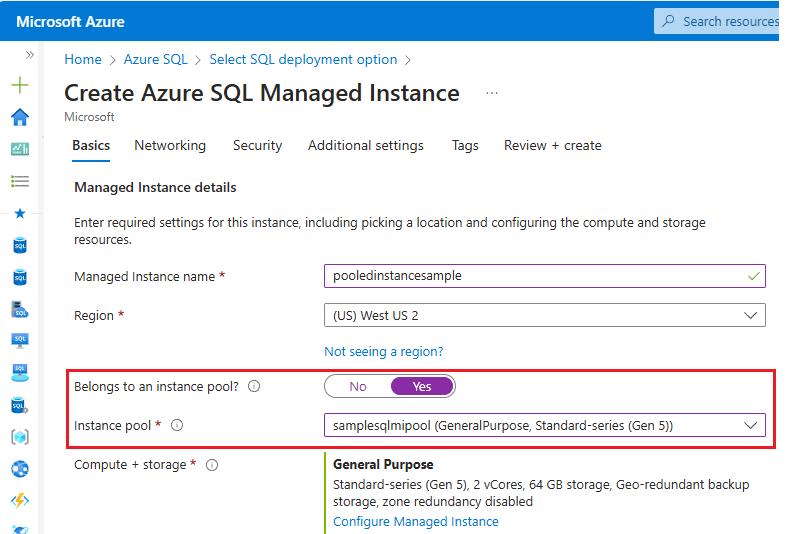
After you've selected an instance pool from the dropdown list, you see the compute cost for the instance change to 0 because compute is included in the cost of the pool.
Fill out the remaining details on the Create Azure SQL Managed Instance page to create your instance inside the pool. For details, review Create Azure SQL Managed Instance.
Select Review + create to review settings for your new instance and then use Create to deploy your instance inside the selected pool.

Move existing instance
You can move an existing instance into and out of a pool by using PowerShell or the Azure CLI if:
- It's in the same resource group as the pool.
- It's on the same virtual network and subnet as the pool.
- It fits the instance pool resource limits.
When an existing instance is moved into a pool, settings at the pool level take precedence over instance-level settings. For example, the instance inherits the license type and maintenance window set at the pool level. When an instance is moved out of the pool, it retains the settings it inherited from the pool. The only exception is with the license type, which defaults back to 'LicenseIncluded' when an instance is removed from the instance pool - the Azure Hybrid Benefit and hybrid failover rights benefit must be configured manually after an instance is moved out of a pool.
Moving an existing instance inside a pool by using the Azure portal is not currently supported.
To move an instance into a pool with PowerShell, provide the pool name when you use Set-AzSqlInstance:
$instance01 | Set-AzSqlInstance -InstancePoolName $instancePoolName
To move an instance out of a pool, provide a blank pool name:
$instance01 | Set-AzSqlInstance -InstancePoolName ''
Connect to instance in a pool
You can choose to connect to an instance in a pool with either a private endpoint, or a public endpoint. To use a private endpoint, you'll need to use the Azure Private Link.
To connect to an instance in a pool with a public endpoint, you need to enable the endpoint and then allow public endpoint traffic on the network security group.
Create a database
Creating a database for an instance inside a pool is the same as creating a database for a single instance. You can create a new database by using the Azure portal, PowerShell or the Azure CLI.
To create a new database for an existing SQL managed instance by using the Azure portal, follow these steps:
- Go to your SQL managed instance in the Azure portal.
- On the Overview pane, select + New database from the command bar to open the Create Azure SQL Managed Database page.
- Provide details for the new database.
- Select Review + create to review your new database configuration and then use Create to deploy your database.
Get pool usage
You can determine how resources are being used by resources in a pool by using the Azure portal, PowerShell, or the Azure CLI.
To get a list of instances inside a pool, use the Azure portal to view the Instance pools page. Select the pool name to view the instances inside the pool on the Overview page:

Update an instance pool
You can update settings for an existing instance pool by using the Azure portal, PowerShell or the Azure CLI.
Use the Compute + storage pane under Settings of the Instance pool page in the Azure portal to update the license type, vCore size, and hardware type for your pool:

Use the Maintenance pane under Settings of the Instance pool page in the Azure portal to update the maintenance window for your pool:

Update a pooled instance
If pool resource limits haven't been exceeded, you can modify resource configurations for an instance inside a pool using PowerShell or the Azure CLI,
To modify resource parameters for an instance inside a pool, use Set-AzSqlInstance.
The following sample updates the vCores to 8 and changes the storage size to 512 GB for Instance1:
$instancePoolParams = @{
    VCore = 8
    StorageSizeInGB = 512
    InstancePoolName = $instancePoolName
}

$instance1name | Set-AzSqlInstance @instancePoolParams
Delete an instance pool
You can delete an instance pool by using PowerShell or the Azure CLI, once all instances in the pool have either been deleted, or moved out of the pool.
To delete an instance pool, use Remove-AzSqlInstancePool.
The following sample script deletes an empty instance pool:
$params = @{
    ResourceGroupName = "<resource group name>"
    Name = "<instance pool name>"
}

Remove-AzSqlInstancePool @params
Instance pool operations
The following table shows available instance pool operations:
| Command | Azure portal | PowerShell | Azure CLI |
|---|---|---|---|
| Create an instance pool | Yes | Yes | Yes |
| Update pool properties | Yes | Yes | Yes |
| Check a pool use and properties | Yes | Yes | Yes |
| Delete an instance pool | Yes | Yes | Yes |
| Create new managed instance inside a pool | Yes | Yes | Yes |
| Move a managed instance into a pool | No | Yes | Yes |
| Delete a managed instance from a pool | Yes | Yes | Yes |
| Move a managed instance out of a pool | No | Yes | Yes |
| Create a database in instance within a pool | Yes | Yes | Yes |
| Delete a database from SQL Managed Instance | Yes | Yes | Yes |
To use PowerShell, install the latest version of PowerShell Core, and follow instructions to Install the Azure PowerShell module.
Available PowerShell commands:
| Cmdlet | Description |
|---|---|
| New-AzSqlInstancePool | Creates an instance pool. |
| Get-AzSqlInstancePool | Returns information about an instance pool. |
| Set-AzSqlInstancePool | Sets properties for an instance pool. |
| Remove-AzSqlInstancePool | Removes an instance pool. |
| Get-AzSqlInstancePoolUsage | Returns information about instance pool usage. |
For operations related to instances both inside pools and single instances, use the standard managed instance commands, but the instance pool name property must be populated when using these commands for an instance in a pool.

Limitations
Instances in a pool have the following limitations:
- The pool name can contain only lowercase letters, numbers and hyphens, and can't start with a hyphen.
- All instances in the pool use the same licensing model. When you specify a license model for an instance that is different than the license model for the pool, the pool license model is used. When the instance is moved out of the pool, it automatically switches to a full paid license (
LicenseType= 'LicenseIncluded'). Manually activate the Azure Hybrid Benefit or the hybrid failover rights benefit to change the licensing model. - Pooled instances must belong to the same subnet and resource group. Moving an instance in and out of the pool is only possible within the subnet of the pool and same resource group.
- Moving an instance pool to another subnet is not supported.
- Only General Purpose service tier is available. The Next-gen General Purpose and Business Critical service tiers aren't available.
- Only the standard-series (Gen5) or premium-series hardware is supported. The premium-series memory optimized hardware isn't supported.
- The maximum possible number of instances in the pool is 40.
- An instance pool can only be deleted after all instances in the pool are either deleted or moved out of the pool.
- You can't use the Azure portal to move instances in and out of the pool. Use PowerShell or the Azure CLI instead.
- The following SQL Managed Instance features aren't supported on instances in a pool:
- Failover groups. Failover rights aren't available to instances in a pool.
- Start/Stop.
- Zone Redundancy.
Support requests
Create and manage support requests for instance pools in the Azure portal.
To create a new support request in the Azure portal, follow these steps:
Open the New support request page in the Azure portal.
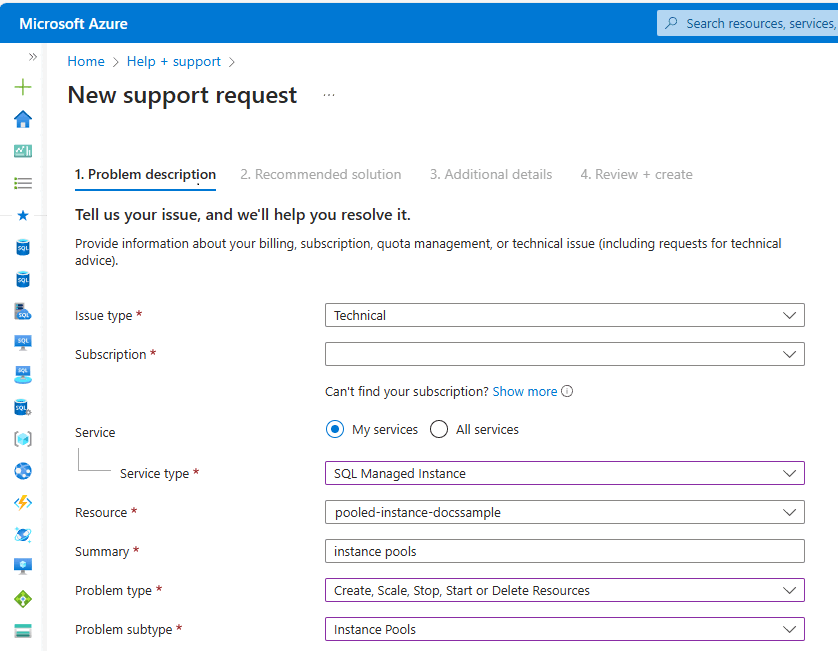
On the New support request, provide the following information:
- For Issue type, select
Technical. - Choose the appropriate Subscription from the dropdown list.
- For the Service type, select
SQL Managed Instance. - For Resource, provide the name of your SQL Managed Instance if it exists, or select General question if you're not able to deploy your instance inside the pool.
- For Summary, type
instance pools. - For Problem type, choose
Create, Scale, Stop, Start, or Delete Resources. - For Problem Subtype, choose
Instance Pools.
- For Issue type, select
Select Next on the subsequent pages until you're able to Create your support request.

To create larger SQL Managed Instance deployments (with or without instance pools), you might need to obtain a larger regional quota. For more information, see Request quota increases for Azure SQL Database. The deployment logic for instance pools compares total vCore consumption at the pool level against your quota to determine whether you're allowed to create new resources without further increasing your quota.
Related content
- Features comparison: Azure SQL Database and Azure SQL Managed Instance
- Connectivity architecture for Azure SQL Managed Instance
- Quickstart: Create Azure SQL Managed Instance
- SQL Managed Instance migration using Database Migration Service
- Monitor Azure SQL workloads with database watcher (preview)
- SQL Managed Instance pricing