Note
Access to this page requires authorization. You can try signing in or changing directories.
Access to this page requires authorization. You can try changing directories.
Applies to: ![]() Azure SQL Managed Instance
Azure SQL Managed Instance
In this quickstart, you'll use SQL Server Management Studio (SSMS) to restore a database from Azure Blob Storage to Azure SQL Managed Instance. The quickstart restores the Wide World Importers sample database from a publicly available backup file using a Shared Access Signature (SAS) key.
Note
This quickstart is to restore a database that has been manually backed up to Azure Blob Storage. If you're looking to restore from an automated backup, see Restore a database from an automated backup.
Prerequisites
This quickstart:
- Uses resources from the Create a SQL managed instance quickstart.
- Requires the latest version of SSMS.
- Requires SSMS to connect to SQL Managed Instance. See these quickstarts on how to connect:
- Enable a public endpoint on SQL Managed Instance. This approach is recommended for this quickstart.
- Connect to SQL Managed Instance from an Azure VM.
- Configure a point-to-site connection to SQL Managed Instance from on-premises.
- Requires a backup file stored in Azure Blob Storage. This quickstart uses a publicly available backup file for the Wide World Importers sample database, but you can also use your own backup file stored in your Azure Blob Storage account. For information on how to create a backup file and store it in Azure Blob Storage, see Back up SQL Server databases to Azure Blob Storage.
Use SSMS to restore from a backup file
In SSMS, take the steps in the following sections to restore the Wide World Importers database to SQL Managed Instance by using the Restore wizard. The database backup file is stored in a preconfigured Blob Storage account.
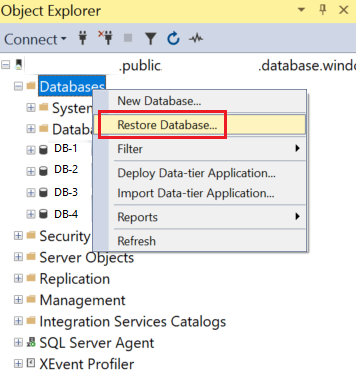
Open the Restore wizard
Open SSMS and connect to your SQL managed instance.
In Object Explorer, right-click the Databases folder of your SQL managed instance, and then select Restore Database... to open the Restore wizard.
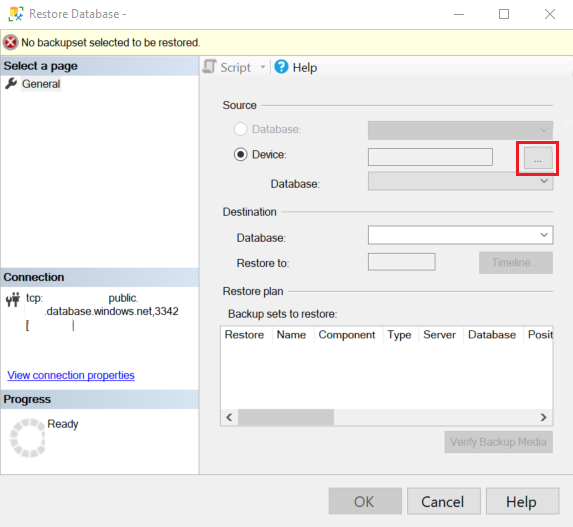
Select the backup source
In the Restore wizard, select the ellipsis (...) to select the source of the backup set to restore.
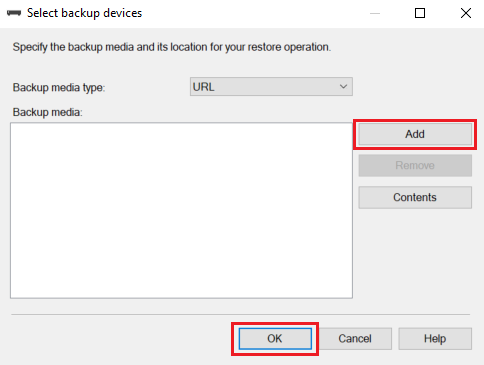
In Select backup devices, select Add. In Backup media type, URL is the only option that's available because it's the only source type supported. Select OK.
In Select a Backup File Location, choose from one of three options to provide information about the location of your backup files:
- Select a preregistered storage container from the Azure storage container list.
- Enter a new storage container and a shared access signature. A new SQL credential will be registered for you.
- Select Add to browse more storage containers from your Azure subscription.
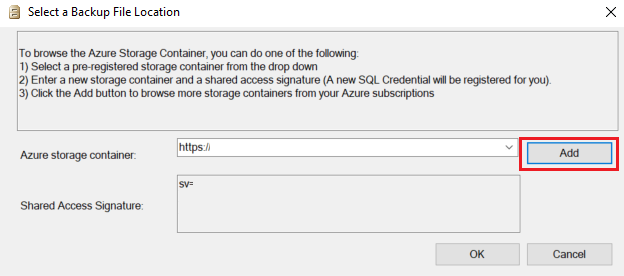
If you select Add, proceed to the next section, Browse Azure subscription storage containers. If you use a different method to provide the location of the backup files, skip to Restore the database.
To restore the Wide World Importers sample database from publicly accessible read-only storage, provide the value
https://mitutorials.blob.core.windows.net/examples/and for the Shared Access Signature field, provide any value, such asSAS.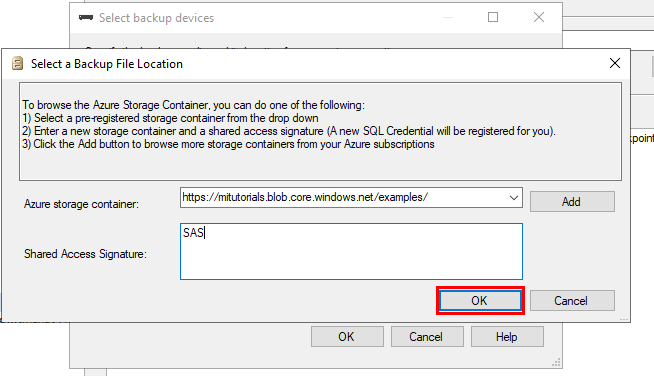
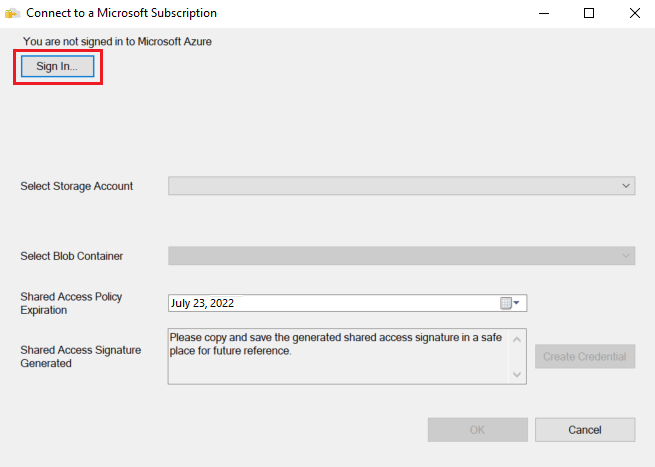
Browse Azure subscription storage containers
Note
These steps aren't necessary to restore the WideWorldImporters sample database from the publicly accessible read-only Azure blob storage, but are necessary to restore databases from your own Azure blob storage.
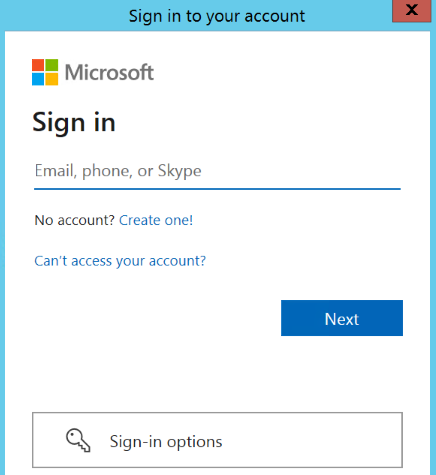
In Connect to a Microsoft Subscription, select Sign in to sign in to your Azure subscription.
Sign in to your Microsoft Account to initiate the session in Azure.
Select the subscription of the storage account that contains the backup files.
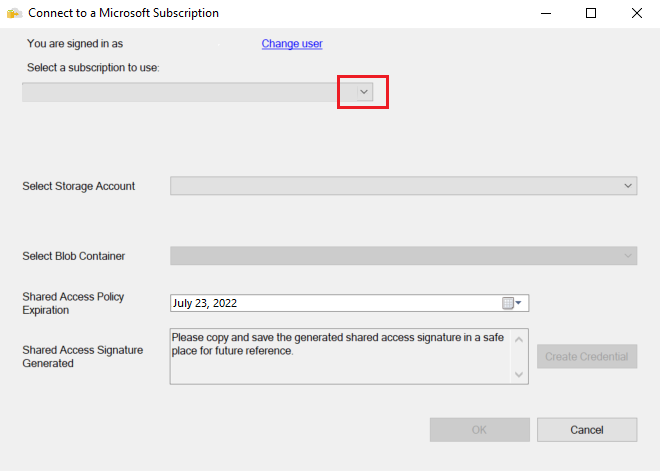
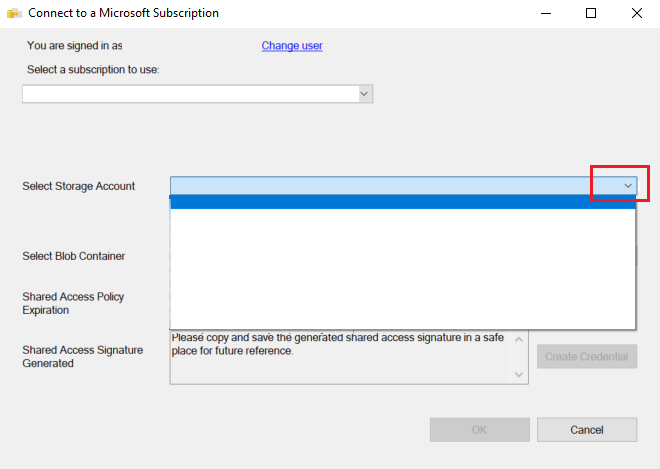
Select the storage account that contains the backup files.
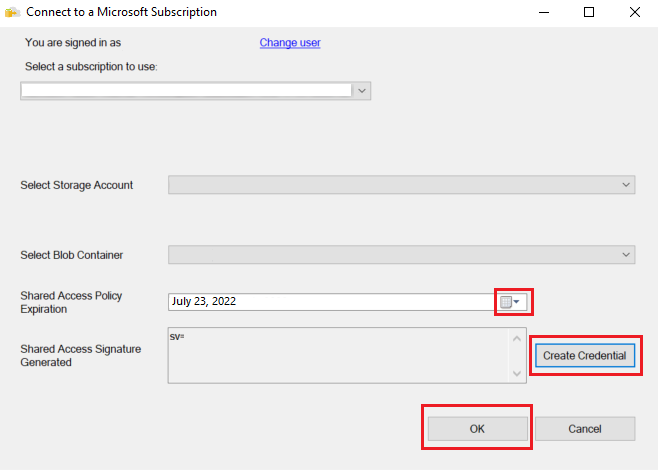
Select the blob container that contains the backup files.

Enter the expiration date of the shared access policy and select Create Credential. A shared access signature with the correct permissions is created. Select OK.
Restore the database
Now that you've selected a storage container, you should see the Locate Backup File in Microsoft Azure dialog.
In the left pane, expand the folder structure to show the folder that contains the backup files. In the right pane, select all the backup files that are related to the backup set that you're restoring, and then select OK. For example, the following screenshot shows the publicly accessible read-only blob storage containing the
WideWorldImporterssample database: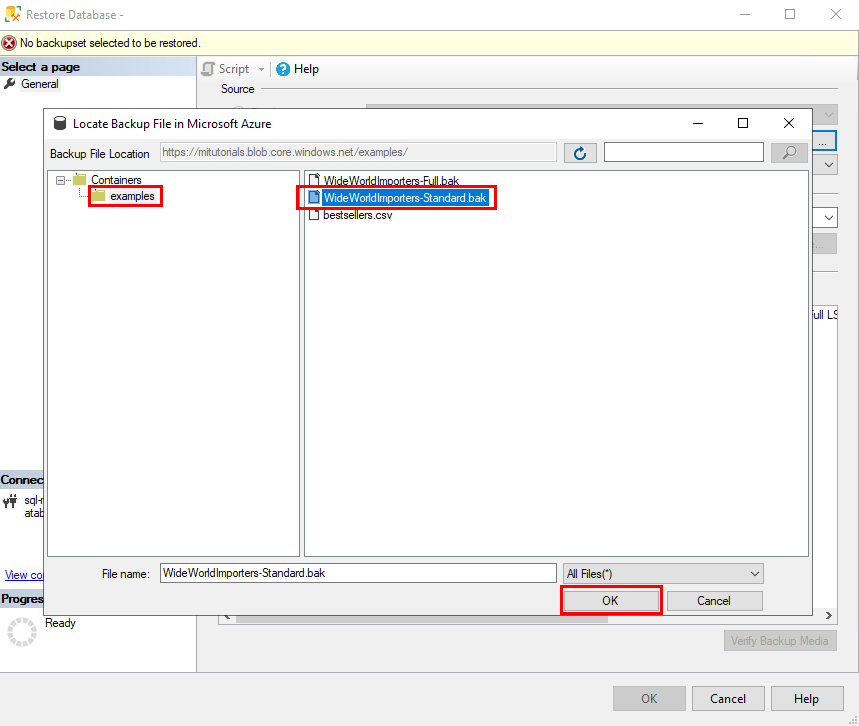
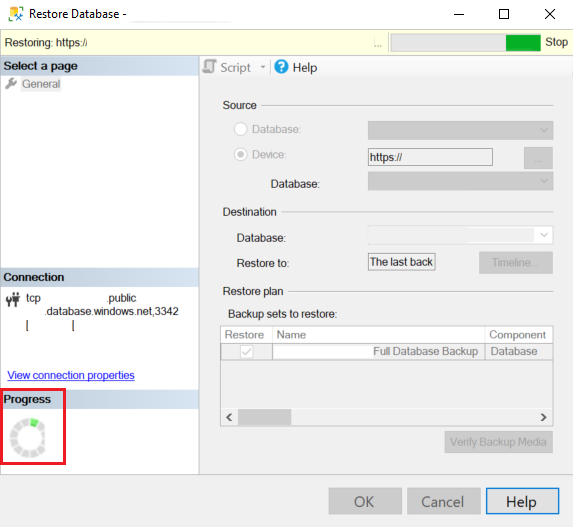
SSMS validates the backup set. This process takes at most a few seconds. The duration depends on the size of the backup set.
If the backup is validated, you need to specify a name for the database that's being restored. By default, under Destination, the Database box contains the name of the backup set database. To change the name, enter a new name for Database. Select OK.

The restore process starts. The duration depends on the size of the backup set.
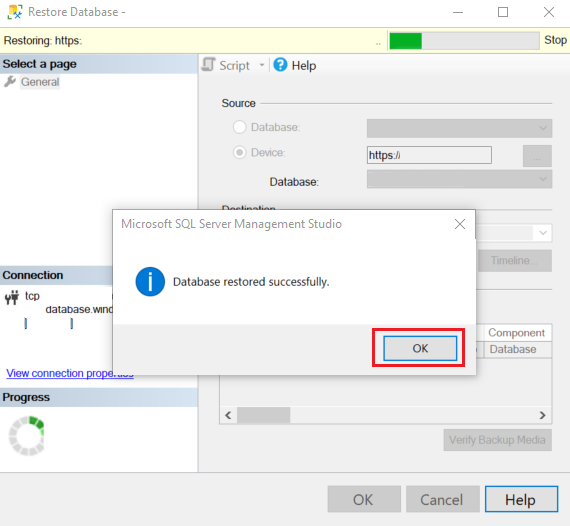
When the restore process finishes, a dialog shows that it was successful. Select OK.
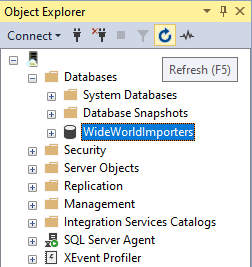
In Object Explorer, check for the restored database by selecting Refresh.


Use T-SQL to restore from a backup file
As an alternative to the Restore wizard, you can use T-SQL statements to restore a database. In SSMS, follow these steps to restore the Wide World Importers database to SQL Managed Instance by using T-SQL. The database backup file is stored in a preconfigured Blob Storage account.
Open SSMS and connect to your SQL managed instance.
In Object Explorer, right-click your SQL managed instance, and select New Query to open a new query window.
Run the following T-SQL statement, which uses publicly available preconfigured storage container and a shared access signature key to create a credential in your SQL managed instance.
Important
CREDENTIALmust match the container path, begin withhttps, and can't contain a trailing forward slash.IDENTITYmust beSHARED ACCESS SIGNATURE.SECRETmust be the shared access signature token and can't contain a leading?.- In this example,
SECRETis omitted because the storage account is publicly available. If you use a storage account that isn't publicly available, you must provide a shared access signature token.
CREATE CREDENTIAL [https://mitutorials.blob.core.windows.net/examples/WideWorldImporters-Standard.bak]
WITH IDENTITY = 'SHARED ACCESS SIGNATURE';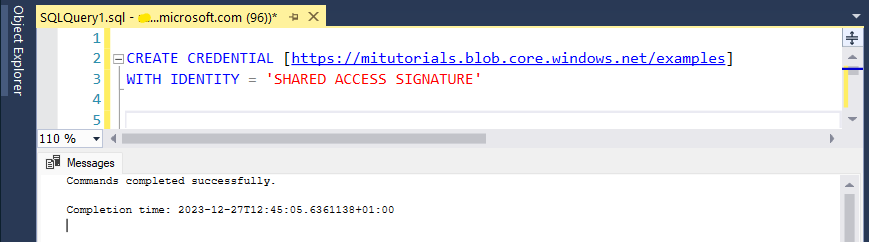
The credential path in the previous example provides access to a single file. You can also create a shared access signature token to a folder path, for example:
CREATE CREDENTIAL [https://<your storage>.blob.core.windows.net/databases/backups/]
WITH IDENTITY = 'SHARED ACCESS SIGNATURE'
, SECRET = '<your shared access signature>'; -- omit the leading ?
To check your credential is working properly, run the following statement, which uses a URL to get a backup file list.
RESTORE FILELISTONLY FROM URL = 'https://mitutorials.blob.core.windows.net/examples/WideWorldImporters-Standard.bak';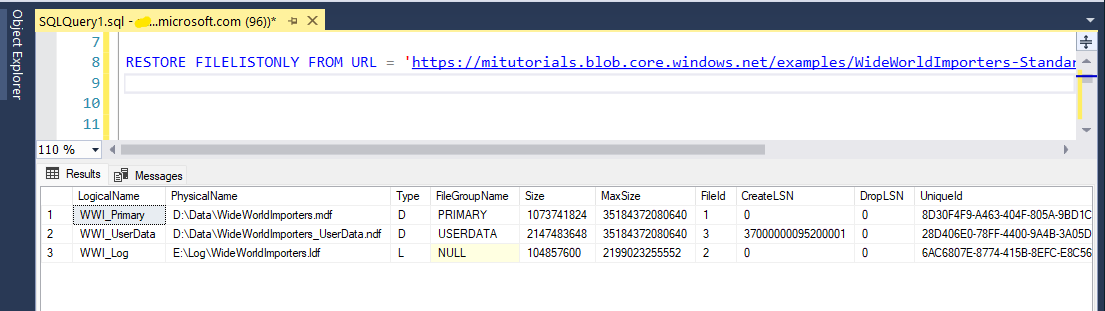
Run the following statement to restore the example Wide World Importers database.
RESTORE DATABASE [WideWorldImportersExample] FROM URL =
  'https://mitutorials.blob.core.windows.net/examples/WideWorldImporters-Standard.bak';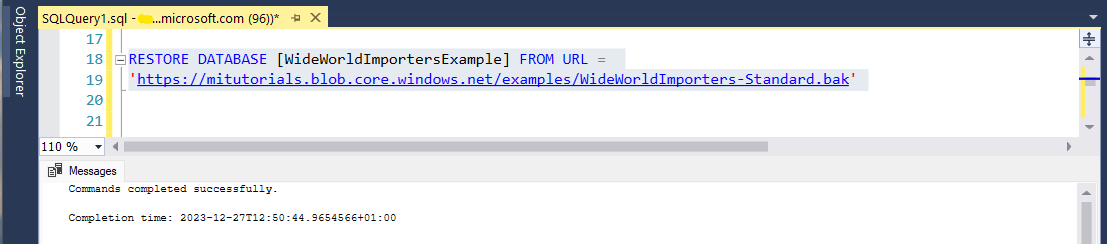
Tip
If you receive
Error: 3201orOperating system error 86(The specified network password is not correct.), it's likely because your SAS credential (created in previous steps) is incorrectly created.DROP CREDENTIALand recreate, review the credential name, identity, and secret.Run the following statement to track the status of your restore process.
SELECT session_id as SPID, command, a.text AS Query, start_time, percent_complete
   , dateadd(second,estimated_completion_time/1000, getdate()) as estimated_completion_time
FROM sys.dm_exec_requests r
CROSS APPLY sys.dm_exec_sql_text(r.sql_handle) a
WHERE r.command in ('BACKUP DATABASE','RESTORE DATABASE');
When the restore process finishes, view the database in Object Explorer. You can verify that the database is restored by using the sys.dm_operation_status view.


Note
A database restore operation is asynchronous and retryable. You might get an error in SSMS if the connection fails or a time-out expires. SQL Managed Instance keeps trying to restore the database in the background, and you can track the progress of the restore process by using the sys.dm_exec_requests and sys.dm_operation_status views.
In some phases of the restore process, you see a unique identifier instead of the actual database name in the system views. To learn about RESTORE statement behavior differences, see T-SQL differences between SQL Server & Azure SQL Managed Instance.
Related content
- SQL Server Backup to URL best practices and troubleshooting
- Connect your application to Azure SQL Managed Instance
- Azure SQL Database and Azure SQL Managed Instance connect and query articles
- Tutorial: Migrate SQL Server to an Azure SQL Managed Instance using Database Migration Service.
- SQL Server to Azure SQL Managed Instance guide.