Note
Access to this page requires authorization. You can try signing in or changing directories.
Access to this page requires authorization. You can try changing directories.
In this article, learn how to perform HCX migration over a public IP address using Azure VMware Solution.
Important
Before configuring a public IP on your Azure VMware Solution private cloud, consult your network administrator to understand the implications and the impact to your environment.
You also learn how to pair HCX sites and create service mesh from on-premises to an Azure VMware Solution private cloud using Public IP. The service mesh allows you to migrate a workload from an on-premises datacenter to an Azure VMware Solution private cloud over the public internet. This solution is useful when the customer isn't using ExpressRoute or VPN connectivity with the Azure cloud.
Important
The on-premises HCX appliance should be reachable from the internet to establish HCX communication from on-premises to the Azure VMware Solution private cloud.
Configure public IP block
For HCX manager to be available over the public IP address, you need one public IP address for DNAT rule.
To perform HCX migration over the public internet, you need other IP addresses. You can have a /29 subnet to create minimum configuration when defining HCX network profile (usable IPs in subnet are assigned to IX, NE appliances). You can choose a bigger subnet based on the requirements. Create an NSX-T segment using this public subnet. This segment can be used for creating HCX network profile.
Note
After assigning a subnet to NSX-T segment, you can't use an IP from that subnet to create a DNAT rule. Both subnets should be different.
Configure a Public IP block through portal by using the Public IP feature of the Azure VMware Solution private cloud.
Use public IP address for Cloud HCX Manager public access
Cloud HCX manager can be available over a public IP address by using a DNAT rule. However, since Cloud HCX manager is in the provider space, the null route is necessary to allow HCX Manager to route back to the client by way of the DNAT rule. It forces the NAT traffic through NSX-T Tier-0 router.
Add static null route to the Tier 1 router
The static null route is used to allow HCX private IP to route through the NSX Tier-1 for public endpoints. This static route can be the default Tier-1 router created in your private cloud or you can create a new tier-1 router.
Sign in to NSX-T manager, and select Networking.
Under the Connectivity section, select Tier-1 Gateways.
Edit the existing Tier-1 gateway.
Expand STATIC ROUTES.
Select the number next to Static Routes.
Select ADD STATIC ROUTE.
A pop-up window is displayed.Under Name, enter the name of the route.
Under Network, enter a nonoverlapping /32 IP address under Network.
Note
This address should not overlap with any other IP addresses on the private cloud network and the customer network.
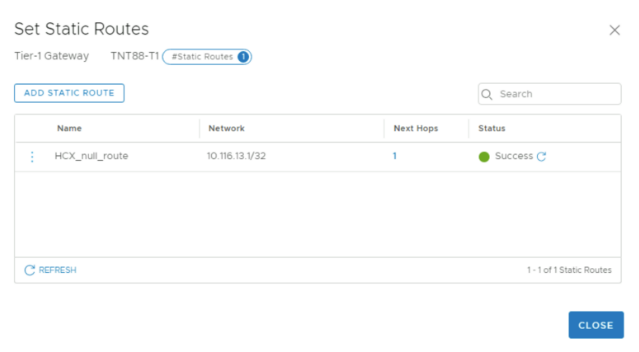
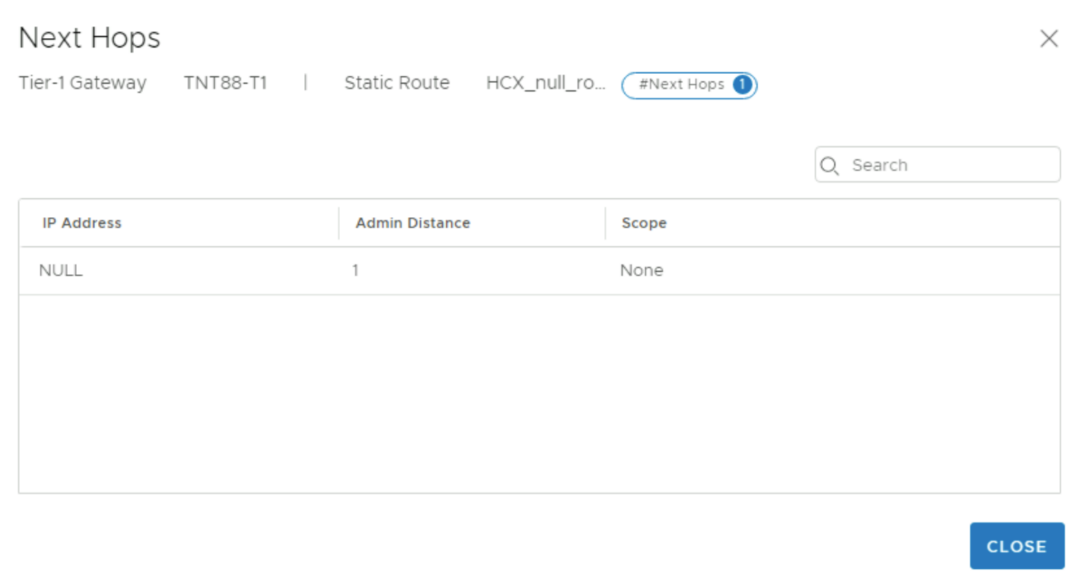
Under Next hops, select Set.
Select NULL as IP Address.
Leave defaults for Admin distance and scope.Select ADD, then select APPLY.
Select SAVE, then select CLOSE.
Select CLOSE EDITING.


Add NAT rule to Tier-1 gateway
Sign in to NSX-T Manager, and select Networking.
Select NAT.
Select the Tier-1 Gateway. Use same Tier-1 router to create NAT rule that you used to create null route in previous steps.
Select ADD NAT RULE.
Add one SNAT rule and one DNAT rule for HCX Manager.
- The DNAT Rule Destination is the Public IP for HCX Manager. The Translated IP is the HCX Manager IP in the cloud.
- The SNAT Rule Destination is the HCX Manager IP in the cloud. The Translated IP is the nonoverlapping /32 IP from the Static Route.
- Make sure to set the Firewall option on DNAT rule to Match External Address.

Create Tier-1 Gateway Firewall rules to allow only expected traffic to the Public IP for HCX Manager and drop everything else.
- Create a Gateway Firewall rule on the T1 that allows your on-premises as the Source IP and the Azure VMware Solution reserved Public as the Destination IP. This rule should be the highest priority.
- Create a Gateway Firewall rule on the Tier-1 that denies all other traffic where the Source IP is Any and Destination IP is the Azure VMware Solution reserved Public IP.

For more information, see HCX ports
Note
HCX manager can now be accessed over the internet using public IP.
Pair sites using HCX Cloud manager's public IP address
Site pairing is required before you create service mesh between source and destination sites.
- Sign in to the Source site HCX Manager.
- Select Site Pairing and select ADD SITE PAIRING.
- Enter the Cloud HCX Manager Public URL as remote site and sign in credentials, then select Connect.
After pairing is done, it will appear under site pairing.
Create public IP segment on NSX-T
Before you create a Public IP segment, get your credentials for NSX-T Manager from Azure VMware Solution portal.
- Under the Networking section select Connectivity, Segments, and then select ADD SEGMENT.
- Provide Segment name, select Tier-1 router as connected gateway, and provide the reserved public IP under subnets.
- Select Save.
Create network profile for HCX at destination site
- Sign in to Destination HCX Manager (cloud manager in this case).
- Select Interconnect and then select the Network Profiles tab.
- Select Create Network Profile.
- Select NSX Networks as network type under Network.
- Select the Public-IP-Segment created on NSX-T.
- Enter Name.
- Under IP pools, enter the IP Ranges for HCX uplink, Prefix Length, and Gateway of public IP segment.
- Scroll down and select the HCX Uplink checkbox under HCX Traffic Type, this profile is used for the HCX uplink.
- Select Create to create the network profile.
Create service mesh
Service Mesh deploys HCX WAN Optimizer, HCX Network Extension and HCX-IX appliances.
- Sign in to Source site HCX Manager.
- Select Interconnect and then select the Service Mesh tab.
- Select CREATE SERVICE MESH.
- Select the destination site to create service mesh with and then select Continue.
- Select the compute profiles for both sites and select Continue.
- Select the HCX services to be activated and select Continue.
Note
Premium services require an additional HCX Enterprise license.
- Select the network profile of source site.
- Select the network profile of destination that you created in the Network Profile section.
- Select Continue.
- Review the Transport Zone information, and then select Continue.
- Review the Topological view, and select Continue.
- Enter the Service Mesh name and select FINISH.
- Add the public IP addresses in firewall to allow required ports only.
Extend network
The HCX Network Extension service provides layer 2 connectivity between sites. The extension service also allows you to keep the same IP and MAC addresses during virtual machine migrations.
- Sign in to source HCX Manager.
- Under the Network Extension section, select the site for which you want to extend the network, and then select EXTEND NETWORKS.
- Select the network that you want to extend to destination site, and select Next.
- Enter the subnet details of network that you're extending.
- Select the destination first hop route (Tier-1), and select Submit.
- Sign in to the destination NSX, you see that Network 10.14.27.1/24 is now extended.
After the network is extended to destination site, VMs can be migrated over Layer 2 extension.
Next steps
Enable Public IP to the NSX Edge for Azure VMware Solution
For detailed information on HCX network underlay minimum requirements, see Network Underlay Minimum Requirements.