Note
Access to this page requires authorization. You can try signing in or changing directories.
Access to this page requires authorization. You can try changing directories.
This article shows you how to create and use a managed identity in Azure Web PubSub.
Important
Azure Web PubSub can support only one managed identity. You can add either a system-assigned identity or a user-assigned identity.
Add a system-assigned identity
To set up a managed identity in the Azure portal, create an Azure Web PubSub instance, and then turn on the feature.
In the Azure portal, create a Web PubSub resource. Go to the resource in the portal.
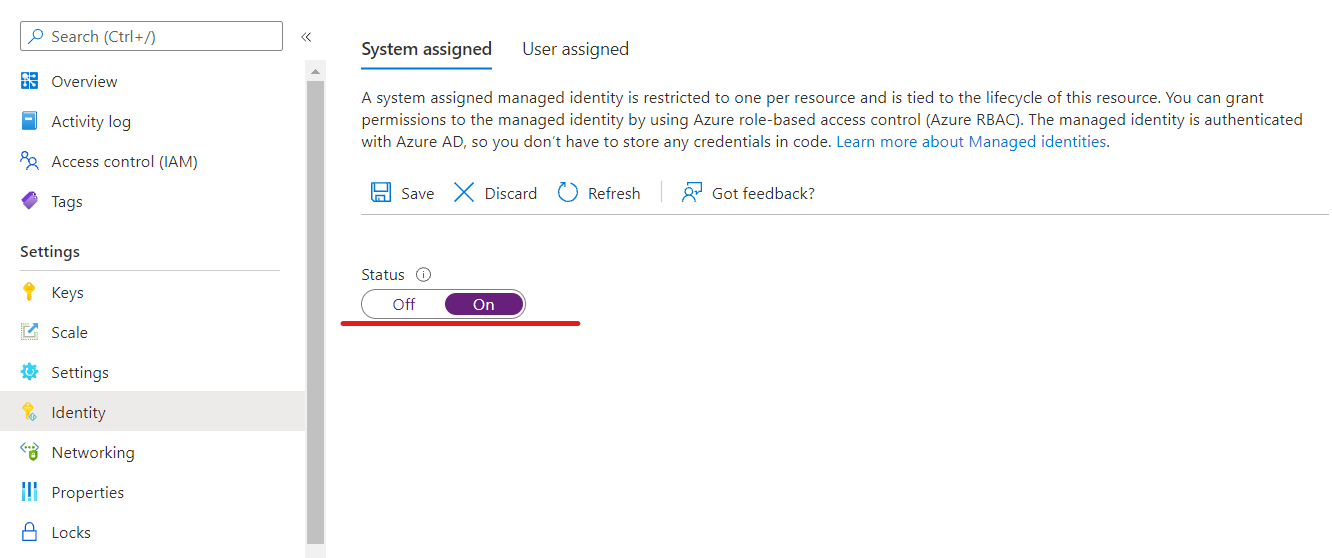
On the left menu, select Identity.
Select the System assigned tab, and then set Status to On. Select Save.
Add a user-assigned identity
To create a Web PubSub resource by using a user-assigned identity, create the identity, and then add the identity's resource identifier to your service.
Create a user-assigned managed identity resource.
In the Azure portal, create a Web PubSub resource. Go to the resource in the portal.
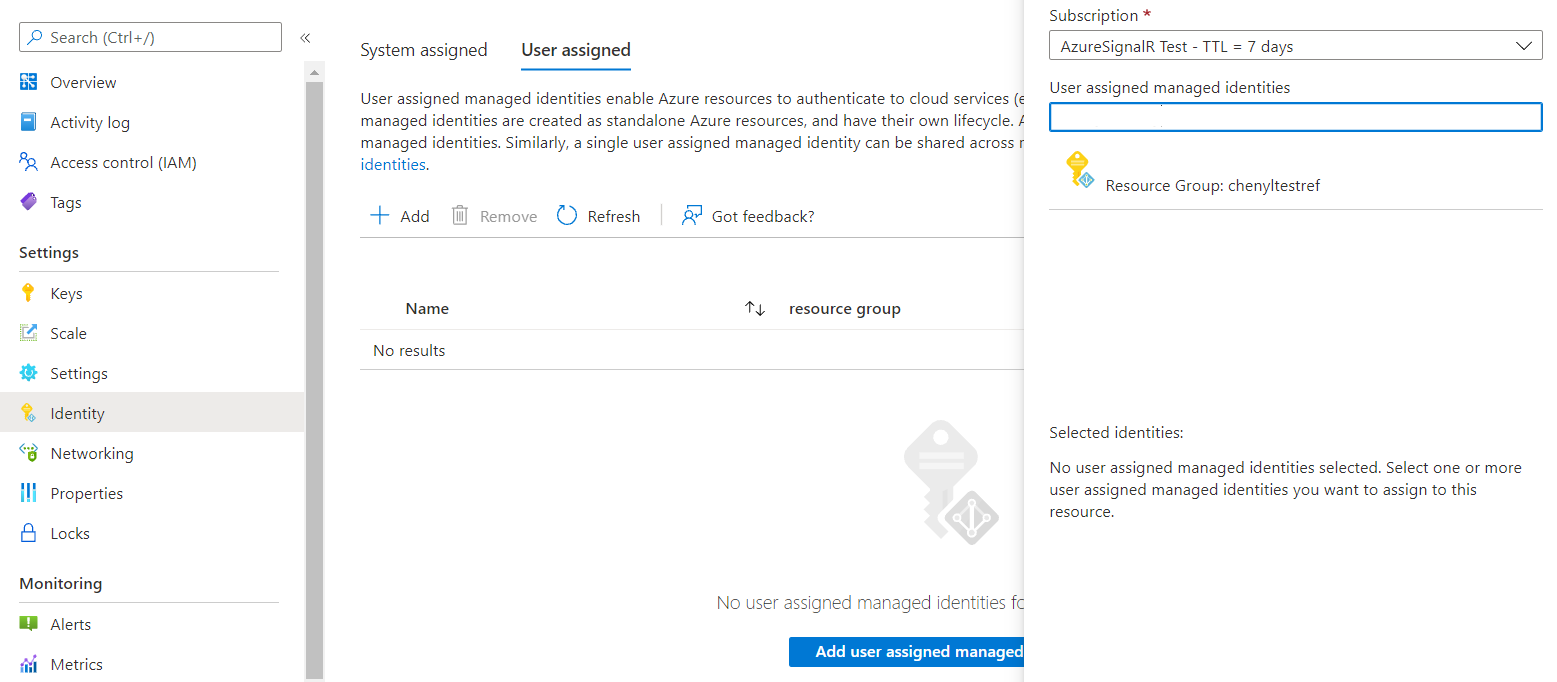
On the left menu, select Identity.
Select the User assigned tab, and then select Add.
Search for the identity that you created and select it. Select Add.
Use a managed identity in client events scenarios
Azure Web PubSub is a fully managed service, so you can't use a managed identity to manually get tokens. Instead, when Web PubSub sends events to an event handler, it uses the managed identity to get an access token. The service then sets the access token in the Authorization header of the HTTP request.
Set up managed identity authentication for an event handler
Add a system-assigned identity or a user-assigned identity.
Go to Configure hub settings and add or edit an upstream event handler.
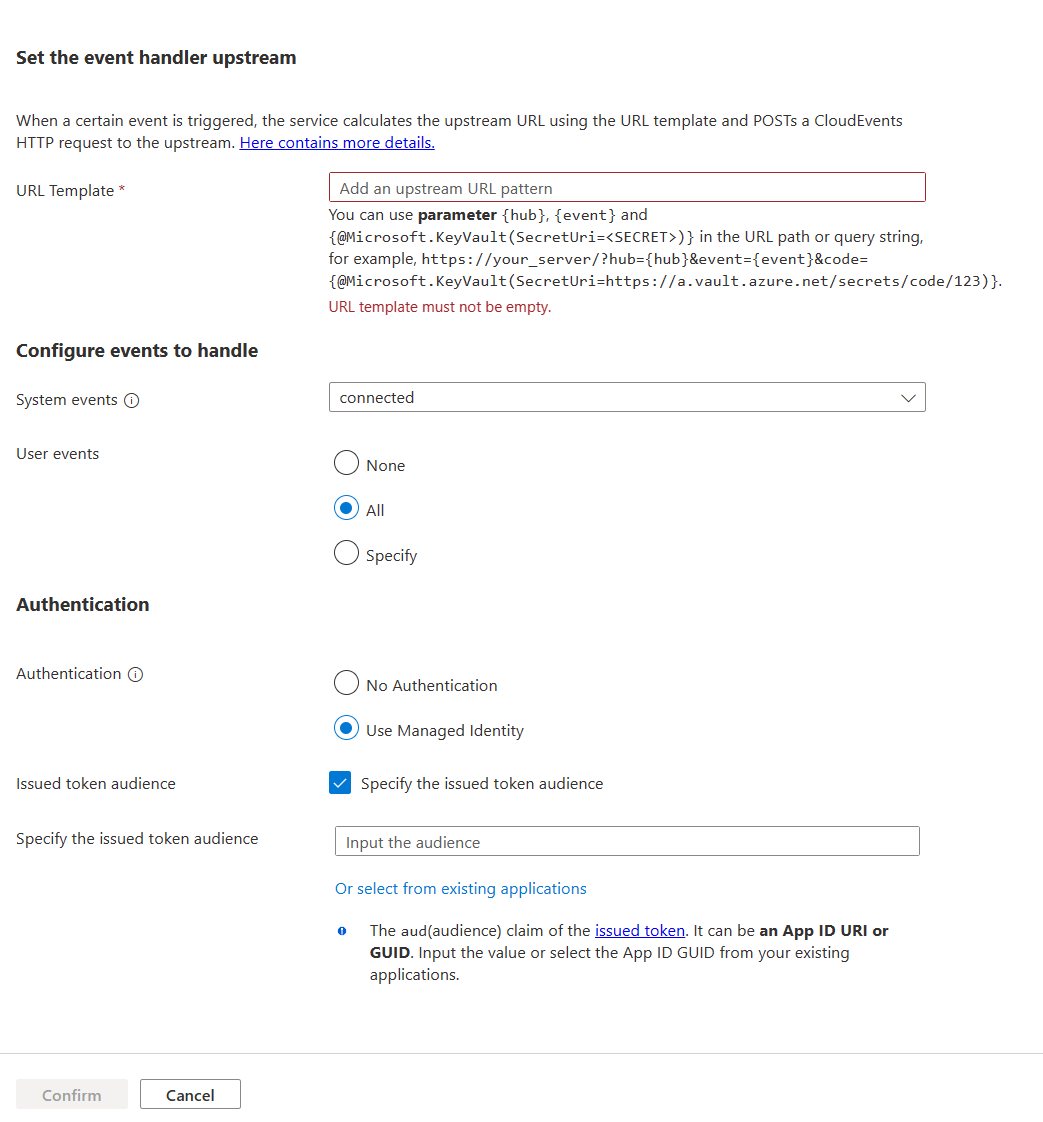
Under Authentication, select Use Managed Identity, and then select the Specify the issued token audience checkbox. The audience becomes the
audclaim in the access token. The claim can be part of validation for your event handler.For authentication, you can choose one of these options:
- Use an existing Microsoft Entra application. The application ID of the application you choose is used.
- Use the Application ID URI of the service principal.
Important
Using an empty resource actually acquires a token target for Microsoft Graph. Currently, Microsoft Graph enables token encryption, so it's not supported for an application to authenticate the token other than with Microsoft Graph. You should always create a service principal to represent your upstream target. Set the Application ID or Application ID URI value for the service principal you created.
Authentication in an Azure Functions app
You can easily set access validation for a Functions app without making code changes.
In the Azure portal, go to the Functions app.
On the left menu, select Authentication.
Select Add an identity provider.
On the Basics tab, for Identity provider, select Microsoft.
For Action to take when request is not authenticated, select Log in with Microsoft Entra ID.
The option to create a new registration is selected by default. You can change the name of the registration. For more information about how to enable a Microsoft Entra provider, see Configure your Azure App Service or Azure Functions app to use a Microsoft Entra ID sign-in.

Go to your Web PubSub resource and add a system-assigned identity or a user-assigned identity.
On the left menu for your Web PubSub resource, select Settings.
Select Edit to edit your hub settings, and then select Edit to edit your event handler settings. Under Authentication, select Use Managed Identity and select the Select from existing applications checkbox. Select the application that you created.
After you configure these settings, the Functions app rejects requests that don't have an access token in the header.
Validate an access token
If you're not using the Web Apps feature of Azure App Service or Azure Functions, you also can validate the token.
The token in the Authorization header is a Microsoft identity platform access token.
To validate an access token, your app should also validate the audience and the signing token. Signing tokens must be validated against the values in the OpenID discovery document. For an example, see the tenant-independent version of the document.
Microsoft Entra middleware has built-in capabilities for validating access tokens. You can browse our samples to find one that's written in the language you want to use.
We provide libraries and code samples that show you how to handle token validation. Several open-source partner libraries also are available for JSON Web Token (JWT) validation. There's at least one option for almost every platform and language. For more information about Microsoft Entra authorization libraries and code samples, see Microsoft identity platform authentication libraries.
If the event handler hosts in Azure Functions or Web Apps, an easy way is to configure Microsoft Entra sign-in.
Use a managed identity for a key vault reference
Web PubSub can access a key vault to get a secret by using a managed identity.
Add a system-assigned identity or a user-assigned identity for Azure Web PubSub.
In the key vault, grant secret read permissions for the managed identity by using access policies. For more information, see Assign a key vault access policy in the Azure portal.
Currently, this feature can be used in the following scenario:
- Use syntax
{@Microsoft.KeyVault(SecretUri=<secret-identity>)}to get secrets from a key vault in the event handler URL template setting.