Process and create Azure Cosmos DB documents using Azure Logic Apps
Applies to: Azure Logic Apps (Consumption + Standard)
From your workflow in Azure Logic Apps, you can connect to Azure Cosmos DB and work with documents by using the Azure Cosmos DB connector. This connector provides triggers and actions that your workflow can use for Azure Cosmos DB operations. For example, actions include creating or updating, reading, querying, and deleting documents.
You can connect to Azure Cosmos DB from both Logic App (Consumption) and Logic App (Standard) resource types by using the managed connector operations. For Logic App (Standard), Azure Cosmos DB also provides built-in operations, which are currently in preview and offer different functionality, better performance, and higher throughput. For example, if you're working with the Logic App (Standard) resource type, you can use the built-in trigger to respond to changes in an Azure Cosmos DB container. You can combine Azure Cosmos DB operations with other actions and triggers in your logic app workflows to enable scenarios such as event sourcing and general data processing.
Limitations
Currently, only stateful workflows in a Logic App (Standard) resource can use both the managed connector operations and built-in operations. Stateless workflows can use only built-in operations.
The Azure Cosmos DB connector supports only Azure Cosmos DB accounts created with Azure Cosmos DB for NoSQL.
Prerequisites
An Azure account and subscription. If you don't have an Azure subscription, sign up for a free Azure account.
A logic app workflow from which you want to access your Azure Cosmos DB account. To use the Azure Cosmos DB trigger, you need to create your logic app using the Logic App (Standard) resource type, and add a blank workflow.
Add Azure Cosmos DB trigger
In Azure Logic Apps, every workflow must start with a trigger, which fires when a specific event happens or when a specific condition is met.
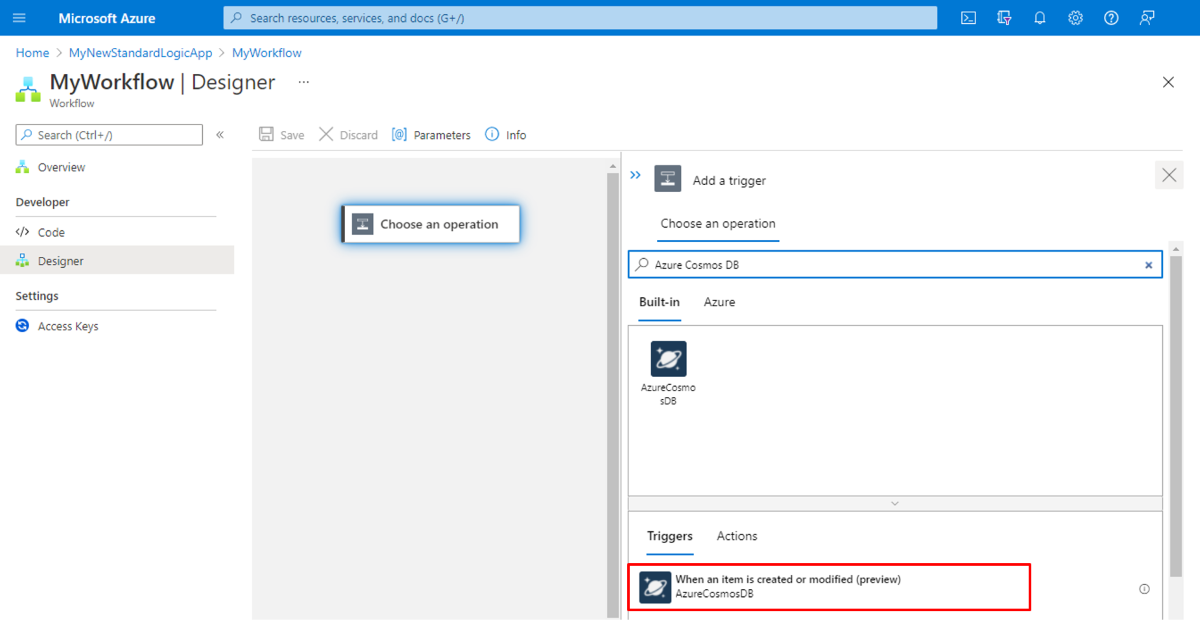
If you're working with the Logic App (Standard) resource type, the built-in trigger called When an item is created or modified (preview) is available and is based on the Azure Cosmos DB change feed pattern. This trigger is unavailable for the Logic App (Consumption) resource type.
No Azure Cosmos DB triggers are available for the Logic App (Consumption) resource type.
Add Azure Cosmos DB action
In Azure Logic Apps, an action is a step in your workflow that follows a trigger or another action. The Azure Cosmos DB connector offers actions for both the Logic App (Consumption) and Logic App (Standard) resource types. The following examples for each resource type show how to use an action that creates or updates a document.
To add an Azure Cosmos DB action to a logic app workflow in multi-tenant Azure Logic Apps, use the following steps:
In the Azure portal, open your workflow in the designer.
If your workflow is blank, add any trigger that you want.
This example starts with the When an HTTP request is received trigger.
Under the trigger or action where you want to add the Azure Cosmos DB action, select New step or Add an action, if between steps.
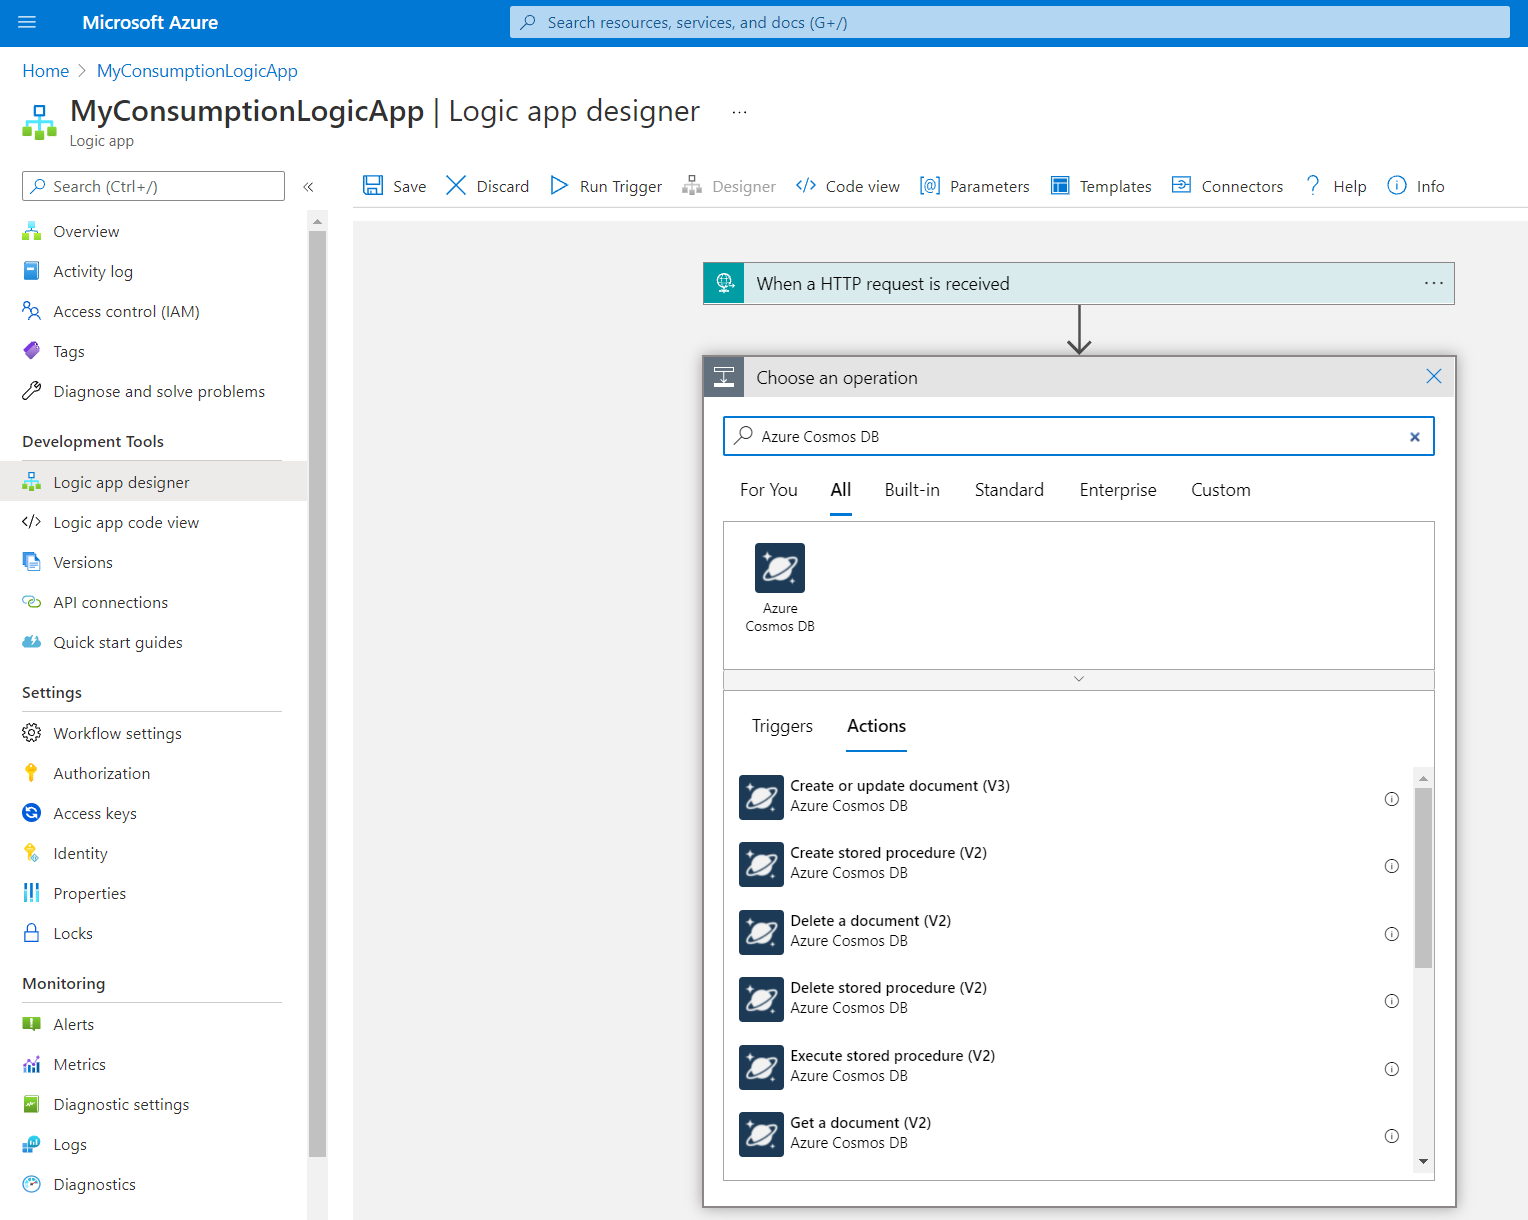
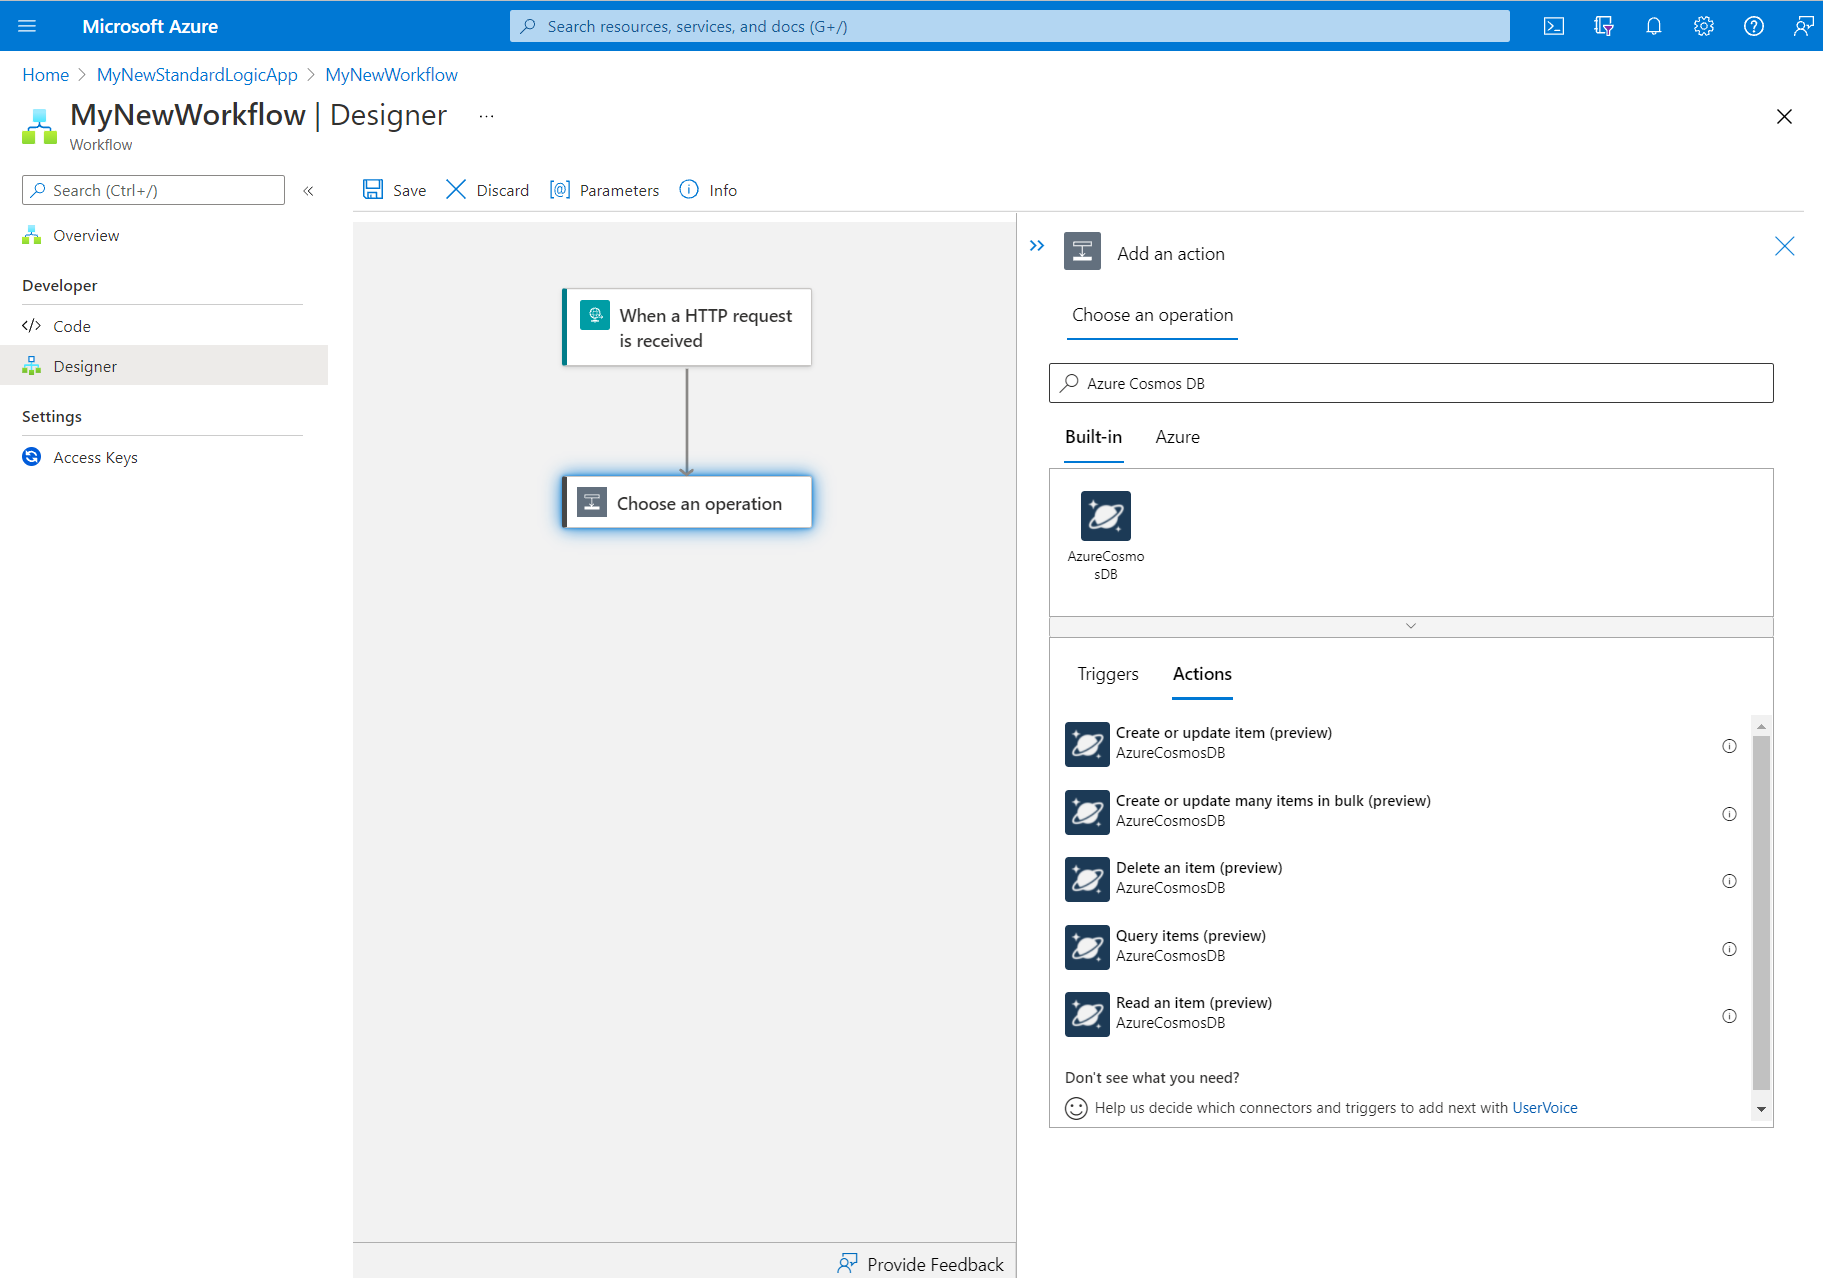
In the designer search box, enter
Azure Cosmos DB. Select the Azure Cosmos DB action that you want to use.This example uses the action named Create or update document (V3).
If you're prompted for connection details, create a connection to your Azure Cosmos DB account now.
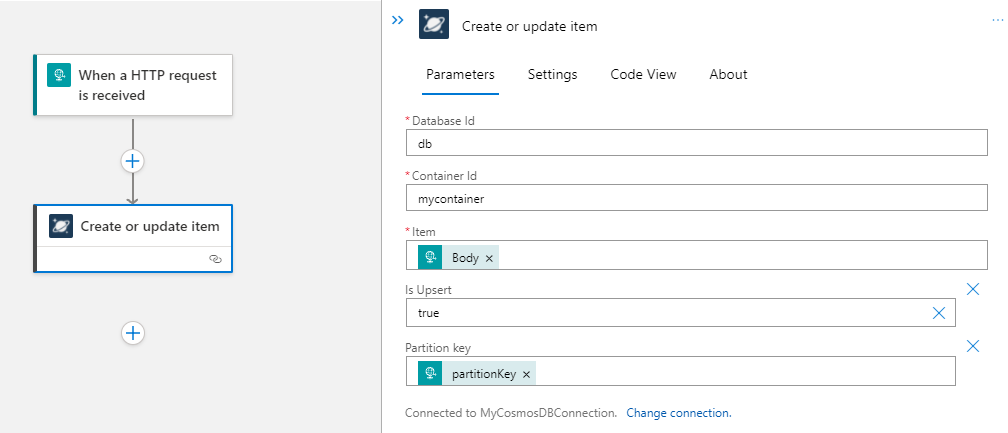
Provide the necessary information for the action.
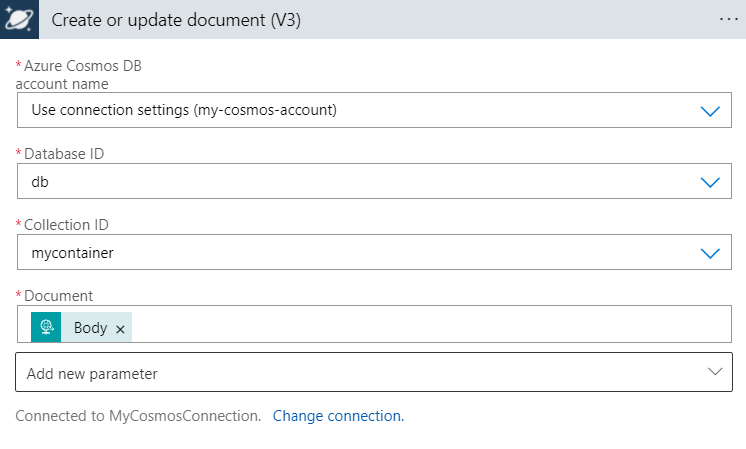
Property Required Value Description Azure Cosmos DB account name Yes Either select Use connection settings (<Azure-Cosmos-DB-account-name>), or manually enter the name. The account name for your Azure Cosmos DB account. Database ID Yes <database-ID> The database that you want to connect. Container ID Yes <container-ID> The container that you want to query. Document Yes <JSON-document> The JSON document that you want to create. This example uses the request body from the trigger output. Tip: If the HTTP trigger's Body token doesn't appear in the dynamic content list for you to add, next to the trigger name, select See more.
Note: Make sure that the body is well-formed JSON, and at a minimum, contains the
idproperty and the partition key property for your document. If a document with the specifiedidand partition key already exist, the document is updated. Otherwise, a new document is created.The following image shows an example action:
Configure any other action settings as needed.
On the designer toolbar, select Save.
Test your logic app to make sure your workflow creates a document in the specified container.

Connect to Azure Cosmos DB
When you add a trigger or action that connects to a service or system, and you don't have an existing or active connection, Azure Logic Apps prompts you to provide the connection information, which varies based on the connection type, for example:
- Your account credentials
- A name to use for the connection
- The name for the server or system
- The authentication type to use
- A connection string
Before you can configure your Azure Cosmos DB trigger or Azure Cosmos DB action, you need to connect to a database account.
In a Logic App (Consumption) workflow, an Azure Cosmos DB connection requires the following property values:
| Property | Required | Value | Description |
|---|---|---|---|
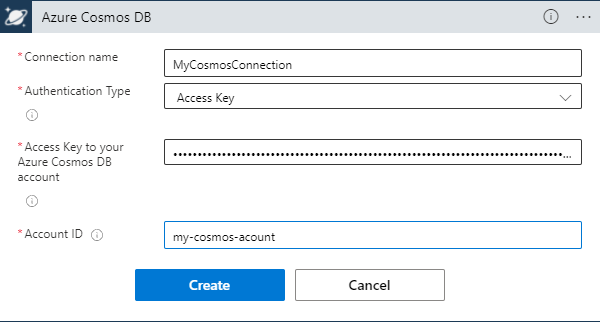
| Connection name | Yes | <connection-name> | The name to use for your connection. |
| Authentication Type | Yes | <connection-type> | The authentication type that you want to use. This example uses Access key. - If you select Access Key, provide the remaining required property values to create the connection. - If you select Microsoft Entra integrated, no other property values are required, but you have to configure your connection by following the steps for Microsoft Entra authentication and Azure Cosmos DB connector. |
| Access key to your Azure Cosmos DB account | Yes | <access-key> | The access key for the Azure Cosmos DB account to use for this connection. This value is either a read-write key or a read-only key. Note: To find the key, go to the Azure Cosmos DB account page. In the navigation menu, under Settings, select Keys. Copy one of the available key values. |
| Account Id | Yes | <acccount-ID> | The name for the Azure Cosmos DB account to use for this connection. |
The following image shows an example connection:
Note
After you create your connection, if you have a different existing Azure Cosmos DB connection that you want to use instead, or if you want to create another new connection, select Change connection in the trigger or action details editor.
Connector reference
For reference information about the Azure Cosmos DB managed connector operations, such as triggers, actions, and limits, review the connector's reference page.
No corresponding reference page exists for Azure Cosmos DB built-in operations. Instead, review the following table for more information:
| Type | Name | Parameters |
|---|---|---|
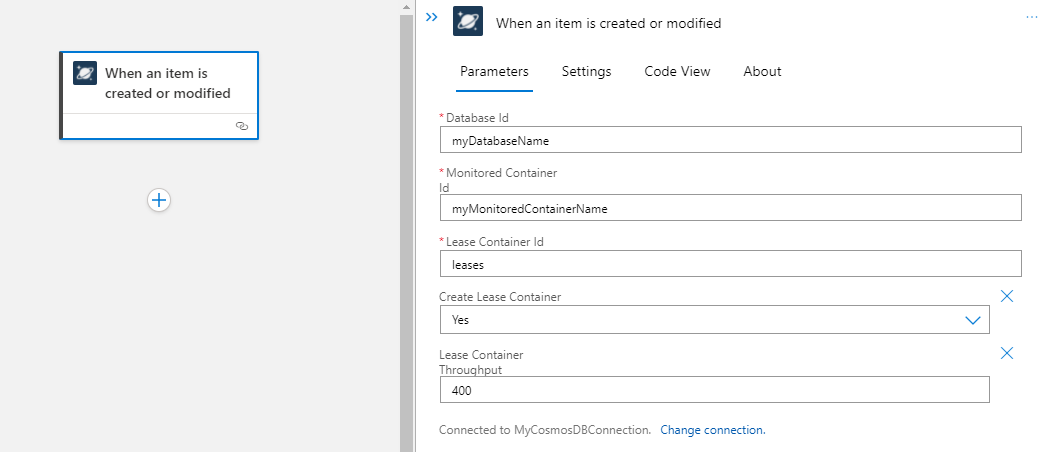
| Trigger | When an item is created or modified | - Database Id: Required. The name of the database with the monitored and lease containers. - Monitored Container Id: Required. The name of the container being monitored. - Lease Container Id: Required. The name of the container used to store leases. - Create Lease Container: Required. If true, create the lease container if not already existing. - Lease Container Throughput: Optional. The number of Request Units to assign when the lease container is created. |
| Action | Create or update item | - Database Id: Required. The name of the database. - Container Id: Required. The name of the container. - Item: Required. The item to create or update. - Partition Key: Optional. The partition key value for the requested item. - Is Upsert: Optional. If true, replace the item, if existing. Otherwise, create the item. |
| Action | Create or update many items in bulk | This action is optimized for high throughput scenarios and has extra processing before the action submits your items to be created in the Azure Cosmos DB container. For large numbers of items, this extra processing speeds up the total request time. For small numbers of items, this extra overhead can cause slower performance than using multiple single create item actions. - Database Id: Required. The name of the database. |
| Action | Read an item | - Database Id: Required. The name of the database. - Container Id: Required. The name of the container. - Item Id: Required. The id value for the requested item. - Partition Key: Required. The partition key value for the requested item. |
| Action | Delete an item | - Database Id: Required. The name of the database. - Container Id Required. The name of the container. - Item Id: Required. The id value for the requested item. - Partition Key: Required. The partition key value for the requested item. |
| Action | Query items | - Database Id: Required. The name of the database. - Container Id: Required. The name of the container. - Sql Query: Required. The Azure Cosmos DB SQL query text. - Partition Key: Optional. The partition key value for the request, if any. - Continuation Token: Optional. The continuation token for this query given by the Azure Cosmos DB service, if any. - Max Item Count: Optional. The maximum number of items for the query to return. |
Best practices for Azure Cosmos DB built-in operations
Get iterable results from the Query items action
The built-in Query items action in a Logic App (Standard) workflow has many dynamic content outputs available for use in subsequent actions. To get the query result items or item metadata as an iterable object, use the following steps:
In the Azure portal, open your workflow in the designer.
If your workflow is blank, add any trigger that you want.
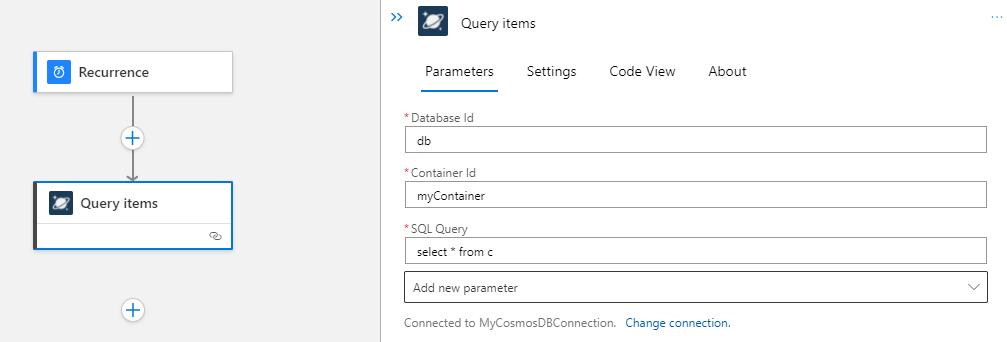
This example starts with the Recurrence trigger.
Under the trigger or action where you want to add the Azure Cosmos DB action, select Insert a new step (+) > Add an action.
On the designer, make sure that Add an operation is selected. In the Add an action pane that opens, under the Choose an operation search box, select Built-in to find the Azure Cosmos DB actions.
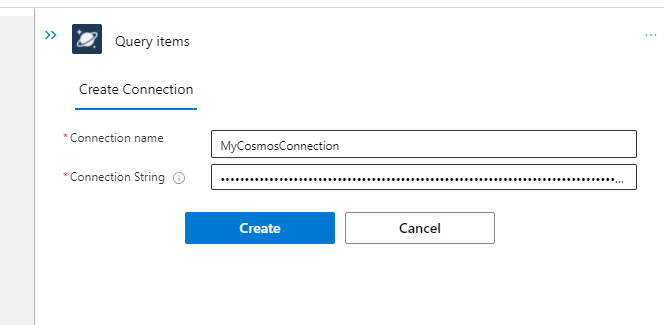
In the search box, enter
Azure Cosmos DB. Select the Query items (preview) action.If you're prompted for connection details, create a connection to your Azure Cosmos DB account.
Provide the necessary information for the action.
Properties Required Value Description Database Id Yes <database-ID> The database that you want to connect. Container Id Yes <container-ID> The container that you want to query. SQL Query Yes <sql-query> The SQL query for your request. The following image shows an example action:
Configure any other action settings as needed.
Under the action, select Insert a new step (+) > Add an action. In the Add an action pane that opens, select the action that you want to run on all of the query result items.
This example uses the Azure Cosmos DB built-in action named Delete an item (preview).
- In the action that you previously added, you can access data from the query action output. Click inside any of the input fields in that action so that the dynamic content list appears. Select any of the available response items or select See more for more options.
This example uses the Response Item Id in the Item Id field to populate IDs based on the query results.

After you select a response item, the For each action is automatically added to iterate through all the query results. The For each loop contains the action that you previously added. You can add any other actions that you want to the loop.
On the designer toolbar, select Save.
Test your logic app to make sure your workflow returns the output that you expect.
Next steps
Feedback
Coming soon: Throughout 2024 we will be phasing out GitHub Issues as the feedback mechanism for content and replacing it with a new feedback system. For more information see: https://aka.ms/ContentUserFeedback.
Submit and view feedback for