Receive and respond to inbound HTTPS calls to workflows in Azure Logic Apps
Applies to: Azure Logic Apps (Consumption + Standard)
This how-to guide shows create a logic app workflow that can receive and handle an inbound HTTPS request or call from another service using the Request built-in trigger. When your workflow uses this trigger, you can then respond to the HTTPS request by using the Response built-in action.
Note
The Response action works only when you use the Request trigger.
For example, this list describes some tasks that your workflow can perform when you use the Request trigger and Response action:
Receive and respond to an HTTPS request for data in an on-premises database.
Receive and respond to an HTTPS request sent from another logic app workflow.
Trigger a workflow run when an external webhook event happens.
To run your workflow by sending an outgoing or outbound request instead, use the HTTP built-in trigger or HTTP built-in action.
Prerequisites
An Azure account and subscription. If you don't have a subscription, you can sign up for a free Azure account.
The logic app workflow where you want to receive the inbound HTTPS request. To start your workflow with a Request trigger, you have to start with a blank workflow. To use the Response action, your workflow must start with the Request trigger.
Add a Request trigger
The Request trigger creates a manually callable endpoint that handles only inbound requests over HTTPS. When the caller sends a request to this endpoint, the Request trigger fires and runs the workflow. For information about how to call this trigger, review Call, trigger, or nest workflows with HTTPS endpoints in Azure Logic Apps.
In the Azure portal, open your Consumption logic app and blank workflow in the designer.
On the designer, follow these general steps to find and add the Request built-in trigger named When a HTTP request is received.
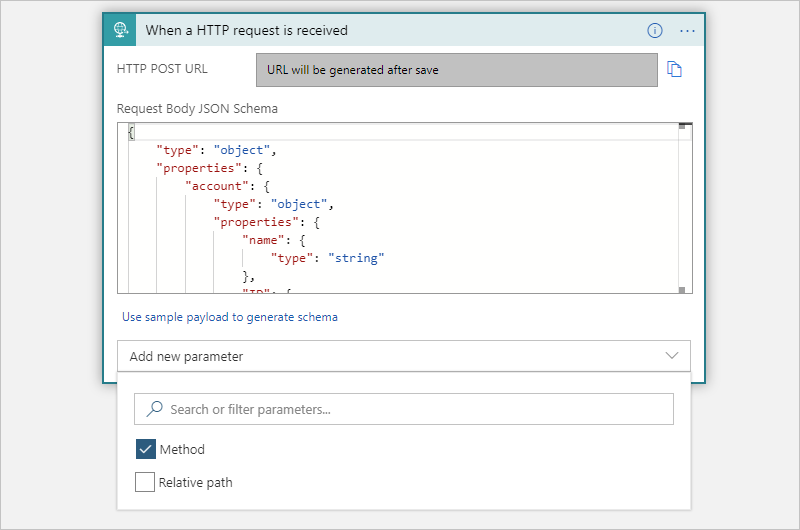
After the trigger information box appears, provide the following information as required:
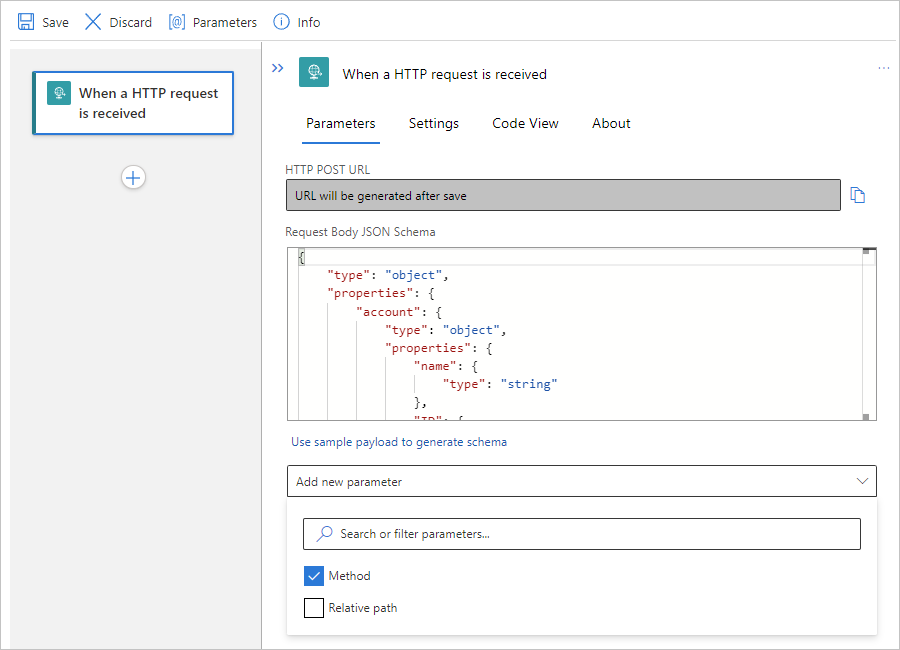
Property name JSON property name Required Description HTTP POST URL {none} Yes The endpoint URL that's generated after you save your workflow and is used for sending a request that triggers your workflow. Request Body JSON Schema schemaNo The JSON schema that describes the properties and values in the incoming request body. The designer uses this schema to generate tokens for the properties in the request. That way, your workflow can parse, consume, and pass along outputs from the Request trigger into your workflow.
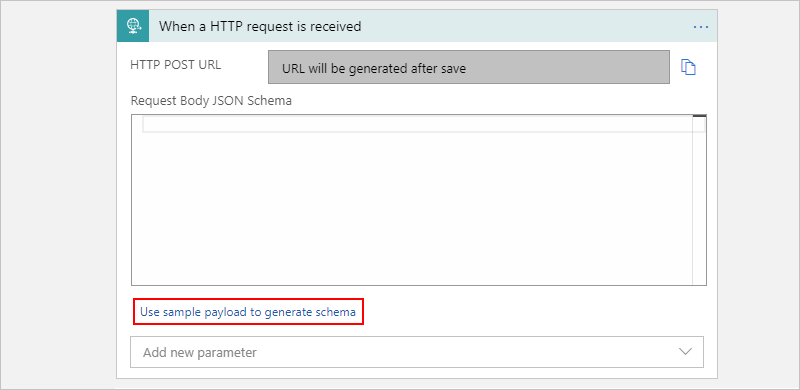
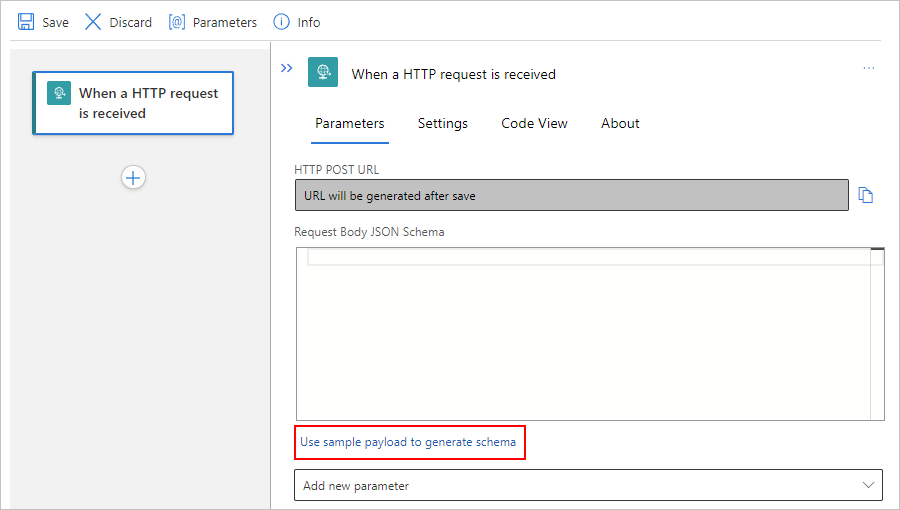
If you don't have a JSON schema, you can generate the schema from a sample payload by using the Use sample payload to generate schema capability.The following example shows a sample JSON schema:
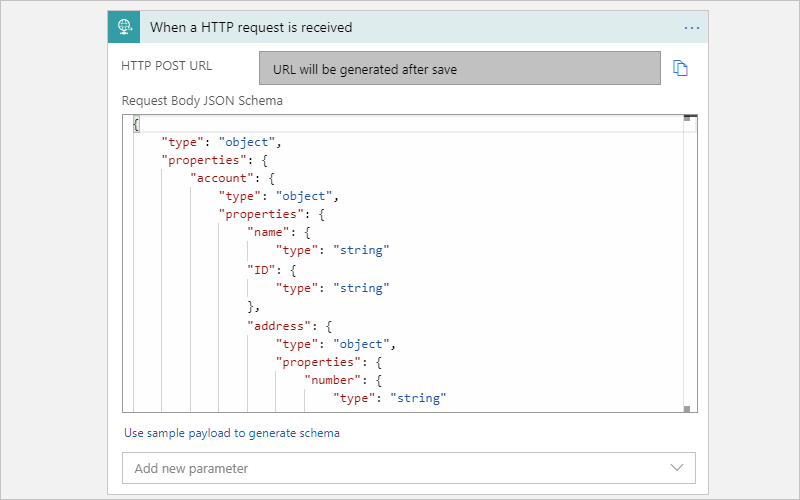
The following example shows the complete sample JSON schema:
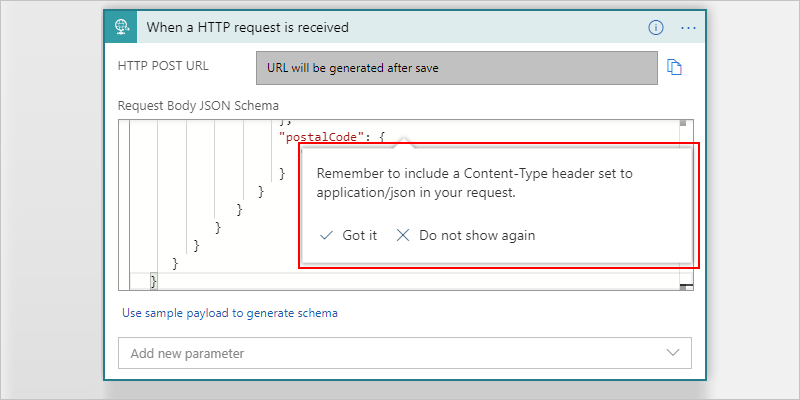
{
   "type": "object",
   "properties": {
      "account": {
         "type": "object",
         "properties": {
            "name": {
               "type": "string"
            },
            "ID": {
               "type": "string"
            },
            "address": {
               "type": "object",
               "properties": {
                  "number": {
                     "type": "string"
                  },
                  "street": {
                     "type": "string"
                  },
                  "city": {
                     "type": "string"
                  },
                  "state": {
                     "type": "string"
                  },
                  "country": {
                     "type": "string"
                  },
                  "postalCode": {
                     "type": "string"
                  }
               }
            }
         }
      }
   }
}
When you enter a JSON schema, the designer shows a reminder to include the Content-Type header in your request and set that header value to application/json. For more information, see Handle content types.
The following example shows how the Content-Type header appears in JSON format:
{
   "Content-Type": "application/json"
}
To generate a JSON schema that's based on the expected payload (data), you can use a tool such as JSONSchema.net, or you can follow these steps:
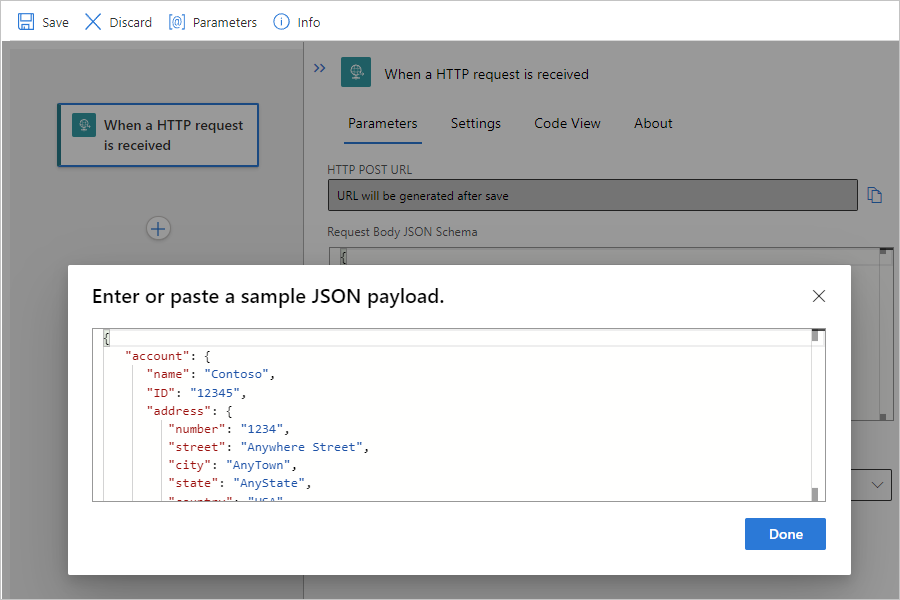
In the Request trigger, select Use sample payload to generate schema.
Enter the sample payload, and select Done.
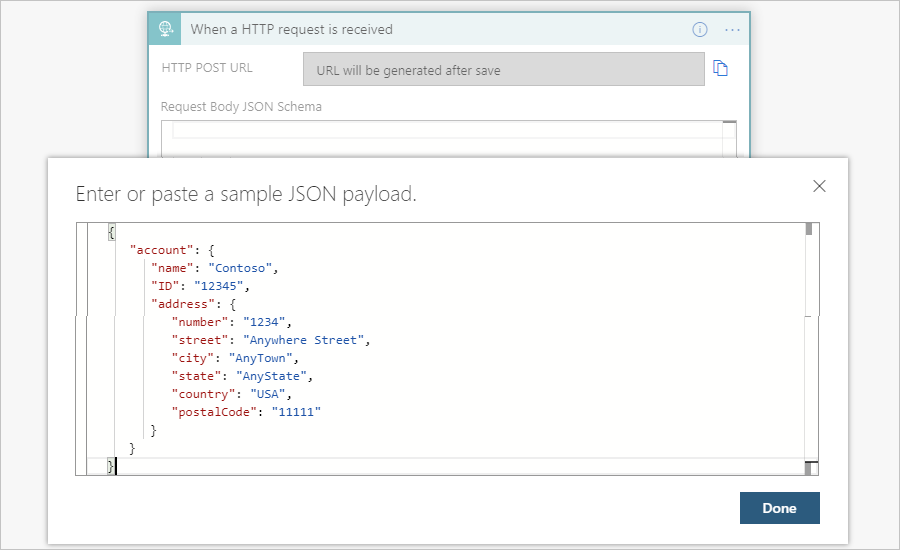
The following example shows the sample payload:
{
   "account": {
      "name": "Contoso",
      "ID": "12345",
      "address": {
         "number": "1234",
         "street": "Anywhere Street",
         "city": "AnyTown",
         "state": "AnyState",
         "country": "USA",
         "postalCode": "11111"
      }
   }
}
To check that the inbound call has a request body that matches your specified schema, follow these steps:
To enforce the inbound message to have the same exact fields that your schema describes, in your schema, add the
requiredproperty and specify the required fields. Add theaddtionalPropertiesproperty, and set the value tofalse.For example, the following schema specifies that the inbound message must have the
msgfield and not any other fields:{ "properties": { "msg": { "type": "string" } }, "type": "object", "required": ["msg"], "additionalProperties": false }In the Request trigger's title bar, select the ellipses button (...).
In the trigger's settings, turn on Schema Validation, and select Done.
If the inbound call's request body doesn't match your schema, the trigger returns an HTTP 400 Bad Request error.
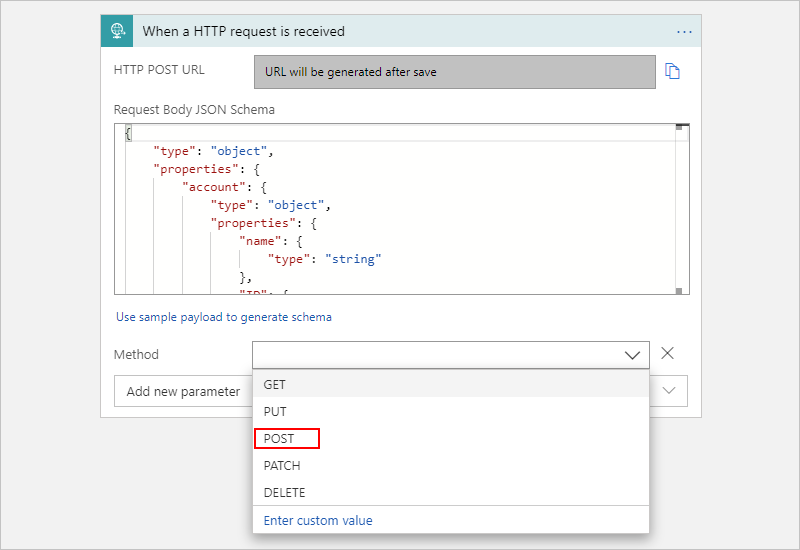
To add other properties or parameters to the trigger, open the Add new parameter list, and select the parameters that you want to add.
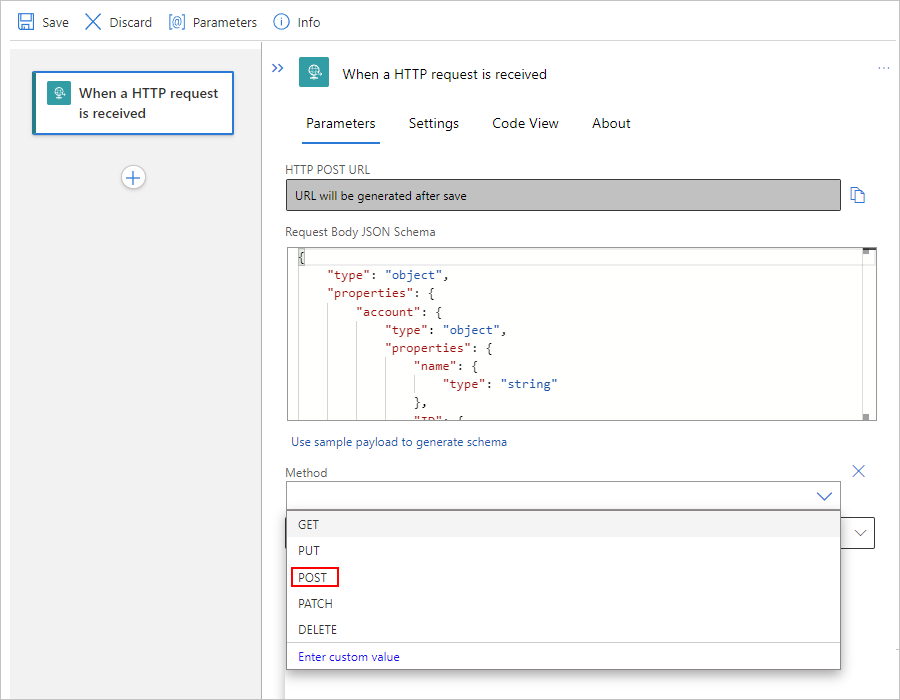
Property name JSON property name Required Description Method methodNo The method that the incoming request must use to call the logic app Relative path relativePathNo The relative path for the parameter that the logic app's endpoint URL can accept The following example adds the Method property:
The Method property appears in the trigger so that you can select a method from the list.
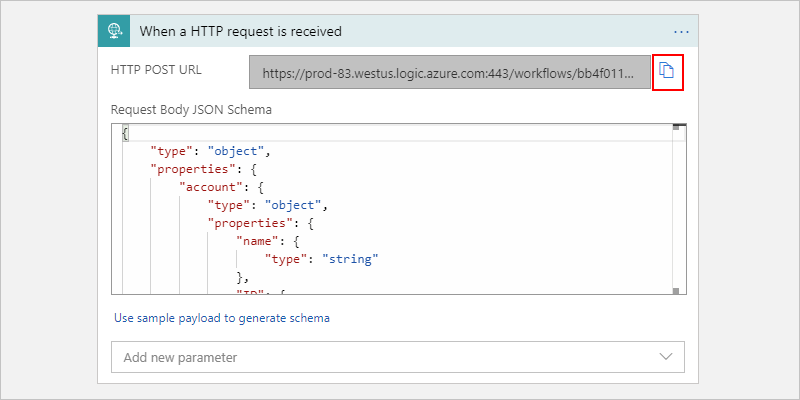
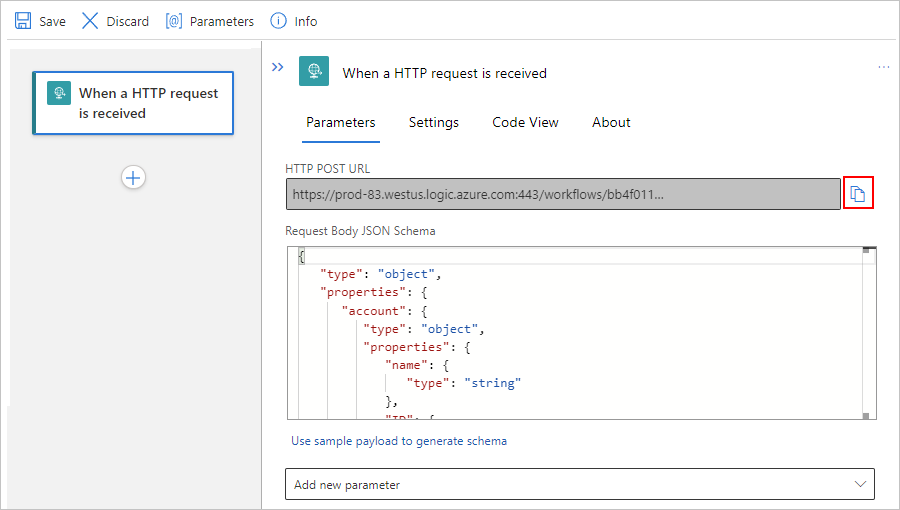
When you're ready, save your workflow. On the designer toolbar, select Save.
This step generates the URL that you can use to send a request that triggers the workflow.
To copy the generated URL, select the copy icon next to the URL.
Note
If you want to include the hash or pound symbol (#) in the URI when making a call to the Request trigger, use this encoded version instead:
%25%23


Now, continue building your workflow by adding another action as the next step. For example, you can respond to the request by adding a Response action, which you can use to return a customized response and is described later in this article.
Note
Your workflow keeps an inbound request open only for a limited time. Assuming that your workflow also includes a Response action, if your workflow doesn't return a response to the caller after this time expires, your workflow returns the 504 GATEWAY TIMEOUT status to the caller. If your workflow doesn't include a Response action, your workflow immediately returns the 202 ACCEPTED status to the caller.
For information about security, authorization, and encryption for inbound calls to your workflow, such as Transport Layer Security (TLS), previously known as Secure Sockets Layer (SSL), Microsoft Entra ID Open Authentication (Microsoft Entra ID OAuth), exposing your logic app resource with Azure API Management, or restricting the IP addresses that originate inbound calls, see Secure access and data - Access for inbound calls to request-based triggers.
Trigger outputs
The following table lists the outputs from the Request trigger:
| JSON property name | Data type | Description |
|---|---|---|
| headers | Object | A JSON object that describes the headers from the request |
| body | Object | A JSON object that describes the body content from the request |
Add a Response action
When you use the Request trigger to receive inbound requests, you can model the response and send the payload results back to the caller by using the Response built-in action, which works only with the Request trigger. This combination with the Request trigger and Response action creates the request-response pattern. Except for inside Foreach loops and Until loops, and parallel branches, you can add the Response action anywhere in your workflow.
Important
If your Response action includes the following headers, Azure Logic Apps automatically removes these headers from the generated response message without showing any warning or error. Azure Logic Apps won't include these headers, although the service won't stop you from saving workflows that have a Response action with these headers.
AllowContent-*headers except forContent-Disposition,Content-Encoding, andContent-Typewhen you use POST and PUT operations, but are not included for GET operationsCookieExpiresLast-ModifiedSet-CookieTransfer-Encoding
If you have one or more Response actions in a complex workflow with branches, make sure that the workflow processes at least one Response action during runtime. Otherwise, if all Response actions are skipped, the caller receives a 502 Bad Gateway error, even if the workflow finishes successfully.
In a Standard logic app stateless workflow, the Response action must appear last in your workflow. If the action appears anywhere else, Azure Logic Apps still won't run the action until all other actions finish running.
On the workflow designer, follow these general steps to find and add the Response built-in action named Response.
For simplicity, the following examples show a collapsed Request trigger.
In the action information box, add the required values for the response message.
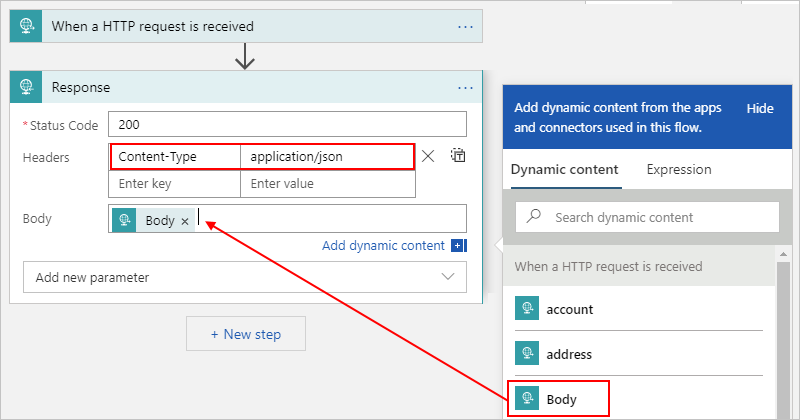
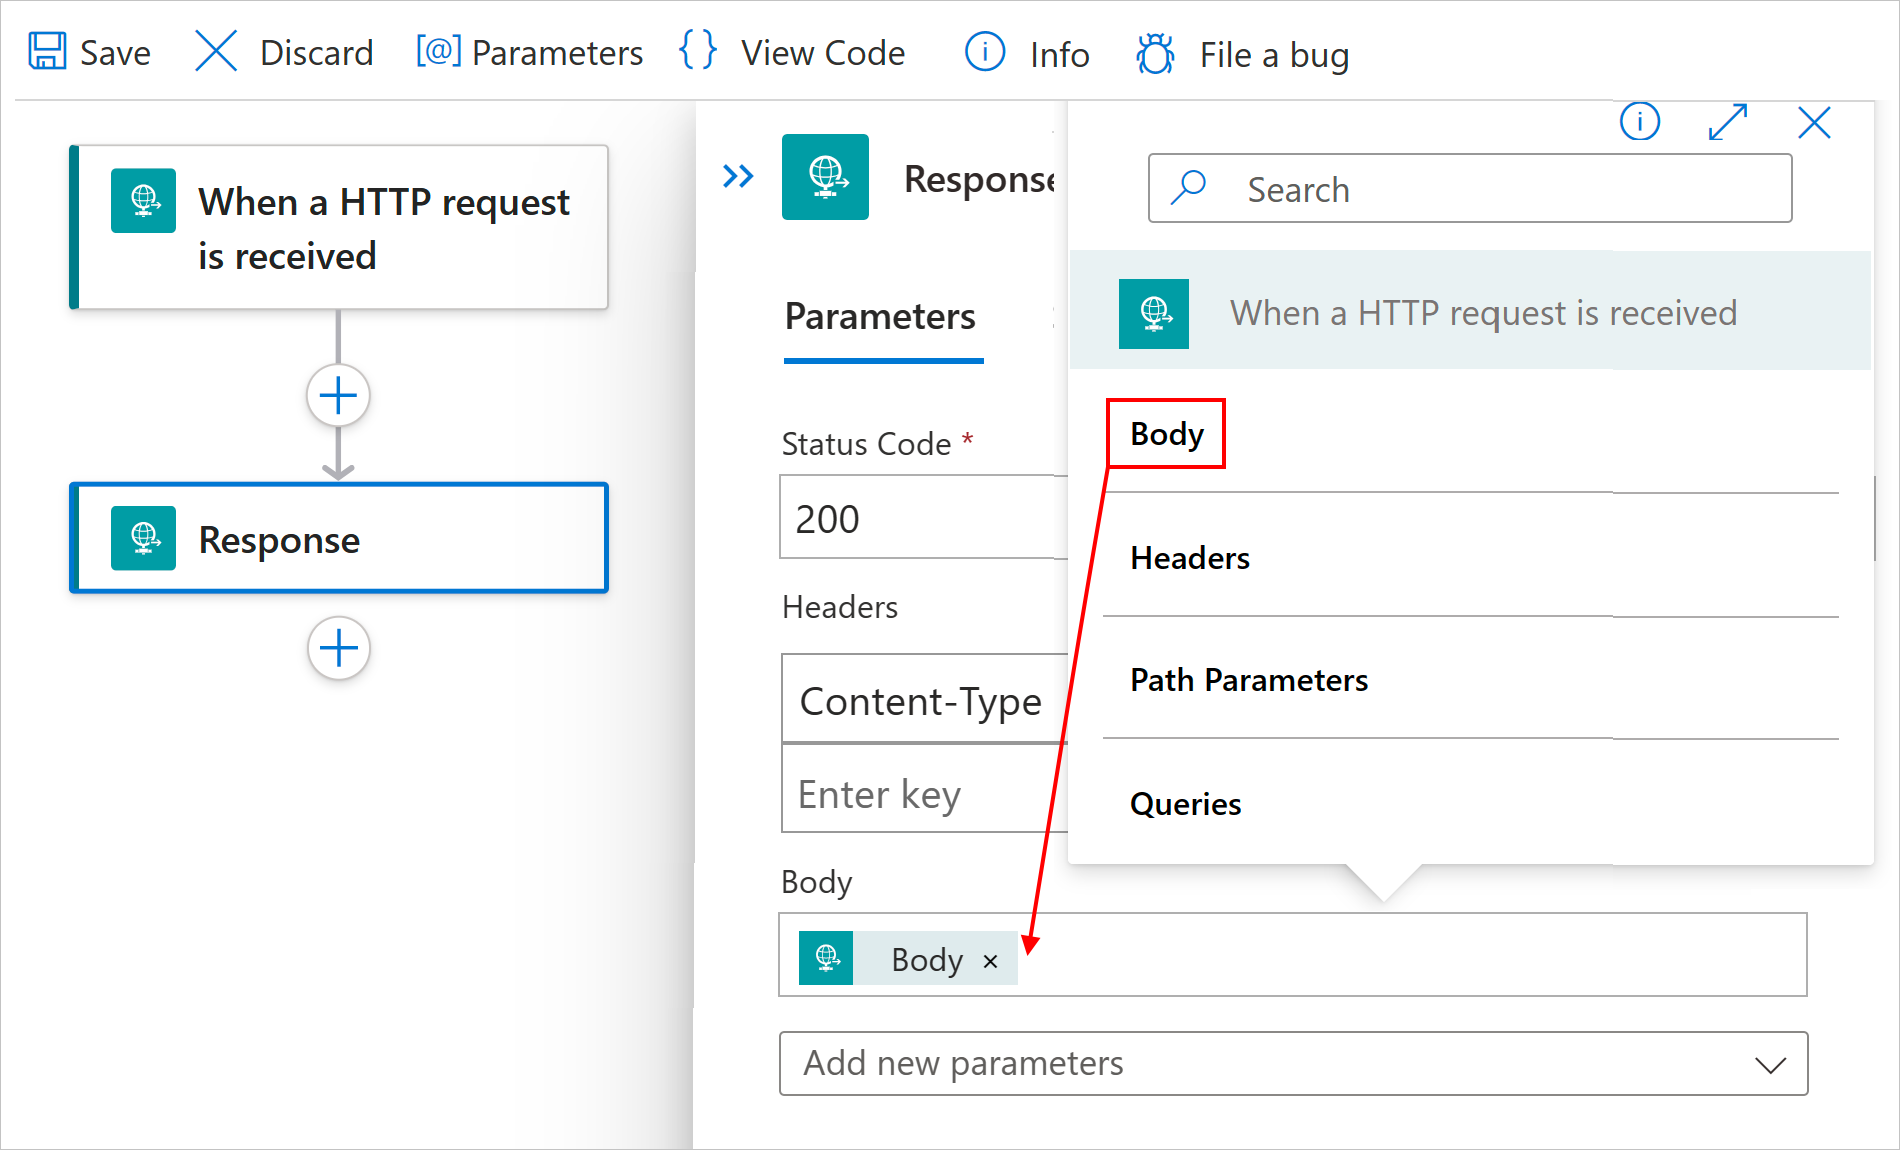
Property name JSON property name Required Description Status Code statusCodeYes The status code to return in the response Headers headersNo A JSON object that describes one or more headers to include in the response Body bodyNo The response body When you select inside any text fields, the dynamic content list automatically opens. You can then select tokens that represent any available outputs from previous steps in the workflow. The properties from the schema that you specify also appear in this dynamic content list. You can select these properties to use in your workflow.
For example, in the Headers field, include Content-Type as the key name, and set the key value to application/json as mentioned earlier in this article. For the Body box, you can select the trigger body output from the dynamic content list.
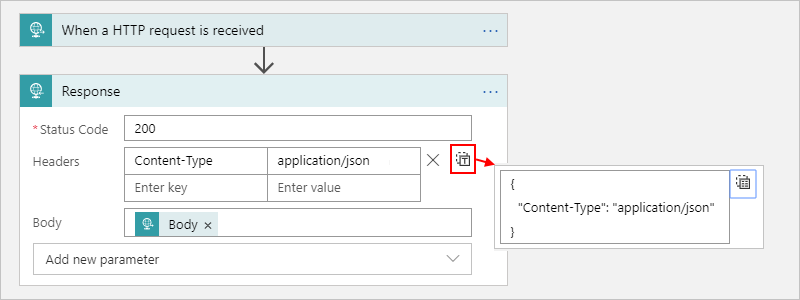
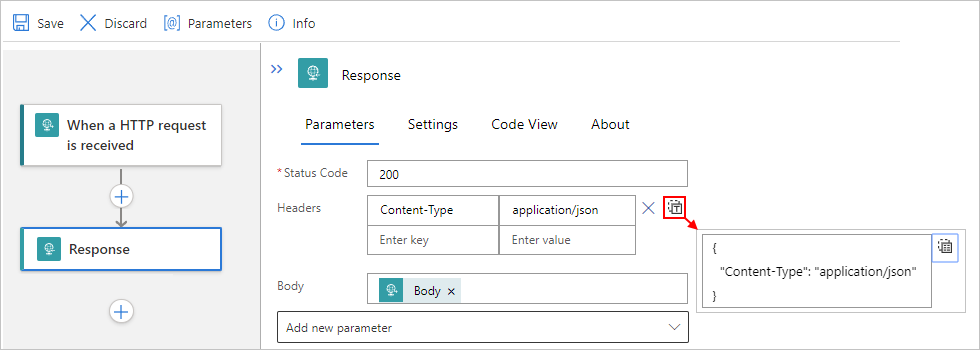
To view the headers in JSON format, select Switch to text view.
To add more properties for the action, such as a JSON schema for the response body, from the Add new parameter list, select the parameters that you want to add.
When you're done, save your workflow. On the designer toolbar, select Save.
Test your workflow
To test your workflow, send an HTTP request to the generated URL. For example, you can use a tool such as Postman to send the HTTP request. For more information about the trigger's underlying JSON definition and how to call this trigger, see these topics, Request trigger type and Call, trigger, or nest workflows with HTTP endpoints in Azure Logic Apps.
Security and authentication
In a Standard logic app workflow that starts with the Request trigger (but not a webhook trigger), you can use the Azure Functions provision for authenticating inbound calls sent to the endpoint created by that trigger by using a managed identity. This provision is also known as "Easy Auth". For more information, review Trigger workflows in Standard logic apps with Easy Auth.
For more information about security, authorization, and encryption for inbound calls to your logic app workflow, such as Transport Layer Security (TLS), previously known as Secure Sockets Layer (SSL), Microsoft Entra ID Open Authentication (Microsoft Entra ID OAuth), exposing your logic app with Azure API Management, or restricting the IP addresses that originate inbound calls, see Secure access and data - Access for inbound calls to request-based triggers.
Next steps
Feedback
Coming soon: Throughout 2024 we will be phasing out GitHub Issues as the feedback mechanism for content and replacing it with a new feedback system. For more information see: https://aka.ms/ContentUserFeedback.
Submit and view feedback for