Note
Access to this page requires authorization. You can try signing in or changing directories.
Access to this page requires authorization. You can try changing directories.
Applies to: Azure Logic Apps (Standard)
To access and run IBM mainframe apps on Customer Information Control System (CICS) systems from Standard workflows in Azure Logic Apps, you can use the CICS Program Call built-in, service provider-based connector. CICS provides a Transaction Program (TP) Monitor with an integrated Transaction Manager (TM). The connector communicates with IBM CICS transaction programs by using TCP/IP. The CICS connector is available in all Azure Logic Apps regions except for Azure Government and Microsoft Azure operated by 21Vianet.
This article describes the following aspects about the CICS connector:
- Scenarios for using the CICS connector in Azure Logic Apps
- Prerequisites and setup for using the CICS connector
- Steps for adding CICS connector actions to your Standard logic app workflow
Review the connector usage scenarios
CICS systems were one of the first mission-critical systems that run on mainframes. Microsoft Host Integration Server (HIS) provides connectivity to CICS systems using TCP/IP, HTTP, and APPC LU6.2. Customers have used the HIS Transaction Integrator to integrate CICS systems with on-premises Windows for many years. The CICS Program Call connector uses TCP/IP and HTTP programming models to interact with CICS transaction programs.
The following diagram shows how the CICS connector interacts with an IBM mainframe system:

To extend these hybrid cloud scenarios, the CICS connector in a Standard workflow works with the HIS Designer for Logic Apps, which you can use to create a program definition or program map of the mainframe transaction program. For this task, the HIS Designer uses a programming model that determines the characteristics of the data exchange between the mainframe and the workflow. The HIS Designer converts that information into metadata that the CICS connector uses when running an action in your workflow.
After you generate the metadata file as a Host Integration Designer XML (HIDX) file from the HIS Designer, you can add that file as a map artifact to your Standard logic app resource. That way, your workflow can access your app's metadata when you add a CICS connector action. The connector reads the metadata file from your logic app resource, and dynamically presents parameters to use with the CICS connector in your workflow. You can then provide parameters to the host application, and the connector returns the results to your workflow. As a result, you can integrate your legacy apps with Azure, Microsoft, other apps, services, and systems that Azure Logic Apps supports.
Connector technical reference
Currently, one operation is available for the CICS connector: Call a CICS program. The following table summarizes the usage for this action:
| Parameter | Required | Type | Description |
|---|---|---|---|
| HIDX Name | Yes | String | Select the CICS HIDX file that you want to use. |
| Method Name | Yes | String | Select the method in the HIDX file that you want to use. |
| Advanced parameters | No | Varies | This list appears after you select a method so that you can add other parameters to use with the selected method. The available parameters vary based on your HIDX file and the method that you select. |
This operation also includes advanced parameters, which appear after you select a method, for you to select and use with the selected method. These parameters vary based on your HIDX file and the method that you select.
Prerequisites
An Azure account and subscription. If you don't have an Azure subscription, sign up for a free Azure account.
Access to the mainframe that hosts the CICS system.
The Host Integration Designer XML (HIDX) file that provides the necessary metadata for the CICS Program Call connector to execute your mainframe program.
To create this HIDX file, download and install the HIS Designer for Azure Logic Apps. The only prerequisite is Microsoft .NET Framework 4.8.
To invoke a mainframe program, your workflow needs to understand the mainframe program's type, parameters, and return values. The CICS connector manages this process and data conversions. The conversions provide input data from the workflow to the mainframe program and send any output data generated from the mainframe program to the workflow. The connector also provides tabular data definition and code page translation. For this process, Azure Logic Apps requires that you provide this information as metadata.
To create this metadata, use the HIS Designer for Logic Apps. With this tool, you can manually create the methods, parameters, and return values that you use in your workflow. You can also import COBOL or RPG program definitions (copybooks) that provide this information.
The tool generates a Host Integration Designer XML (HIDX) file that provides the necessary metadata for the connector. If you're using HIS, you can use the HIS Transaction Integrator (TI) Designer to create the HIDX file.
The Standard logic app workflow where you want to integrate with the CICS system.
The CICS connector doesn't have triggers, so use any trigger to start your workflow, such as the Recurrence trigger or Request trigger. You can then add the CICS connector actions. To get started, create a blank workflow in your Standard logic app resource.
Limitations
Currently, the CICS connector requires that you upload your HIDX file directly to your Standard logic app resource, not an integration account.
Define and generate metadata
After you download and install the HIS Designer for Azure Logic Apps, follow these steps to generate the HIDX file from the metadata artifact.
Upload the HIDX file
For your workflow to use the HIDX file, follow these steps:
Go to the folder where you saved your HIDX file, and copy the file.
In the Azure portal, upload the HIDX file as a map to your Standard logic app resource.
Continue to the next section to add a CICS action to your workflow.
Later in this article, when you add a CICS Program Call connector action to your workflow for the first time, a prompt asks you to create a connection between your workflow and the mainframe system. After you create the connection, you can select your previously added HIDX file, the method to run, and the parameters to use.
Add a CICS action
Follow these steps to add a CICS action and configure the necessary parameters:
In the Azure portal, open your Standard logic app resource and workflow in the designer.
If you don't have a trigger to start your workflow, follow these general steps to add the trigger that you want.
This example continues with the Request trigger named When a HTTP request is received:
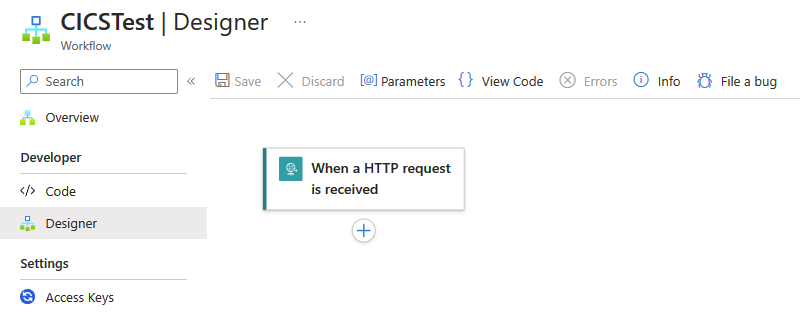
To add a CICS connector action, follow these general steps to add the CICS Program Call built-in connector action named Call a CICS Program.
After the connection details pane appears, provide the following information, such as the host server name and CICS system configuration information:
Parameter Required Value Description Connection Name Yes <connection-name> The name for your connection. Programming Model Yes <CICS-programming-model> The selected CICS programming model. For more information, see Programming Models. Code Page No <code-page> The code page number to use for converting text. Password No <password> The optional user password for connection authentication. Port Number Yes <port-number> The port number to use for connection authentication. Server Name Yes <server-name> The server name. Timeout No <time-out> The time-out period in seconds while waiting for responses from the server. User Name No <user-name> The optional username for connection authentication. Use TLS No True or false Secure the connection with Transport Security Layer (TLS). Validate Server certificate No True or false Validate the server's certificate. Server certificate common name No <server-cert-common-name> The name of the Transport Security layer (TLS) certificate to use. Use IBM Request Header Format No True or false Direct the server to expect ELM or TRM headers in the IBM format. For example:
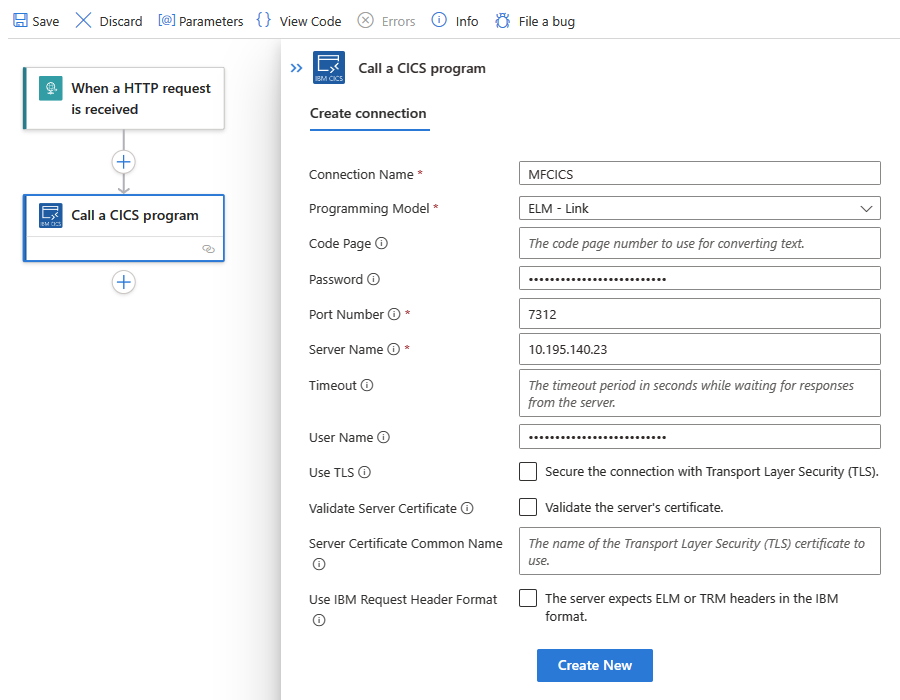
When you're done, select Create New.
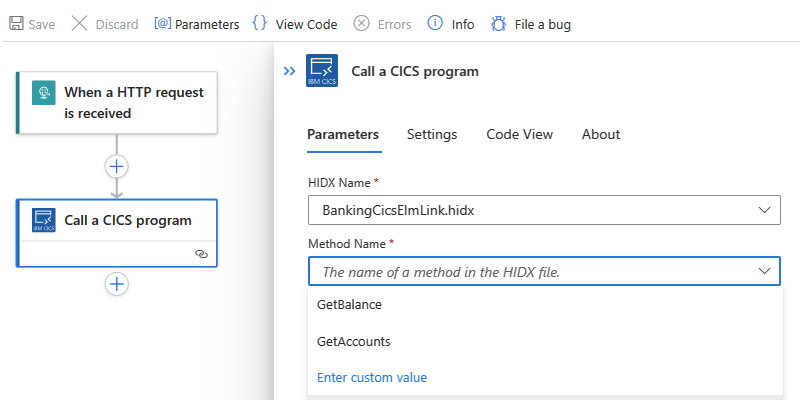
After the action details pane appears, in the Parameters section, provide the required information:
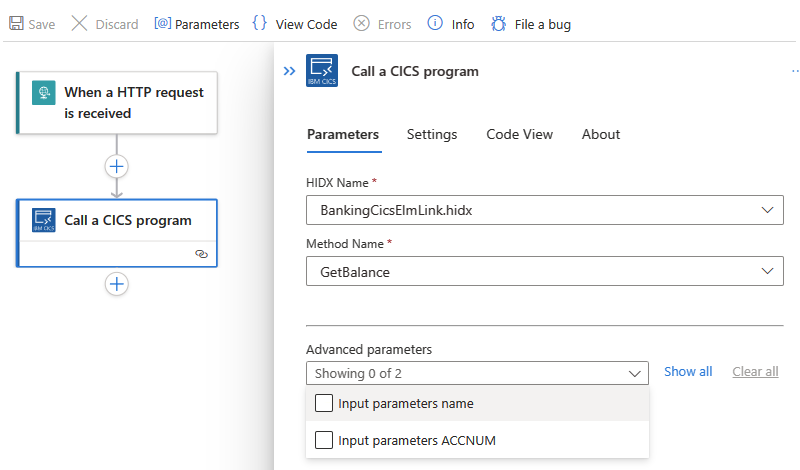
Parameter Required Value Description HIDX Name Yes <HIDX-file-name> Select the CICS HIDX file that you want to use. Method Name Yes <method-name> Select the method in the HIDX file that you want to use. Advanced parameters No Varies This list appears after you select a method so that you can add other parameters to use with the selected method. The available parameters vary based on your HIDX file and the method that you select. For example:
Select HIDX file and method
Select advanced parameters
When you're done, save your workflow. On the designer toolbar, select Save.


Test your workflow
Follow these steps to check your workflow and confirm the outputs:
To run your workflow, on the designer toolbar, select Run > Run.
After your workflow finishes running, the workflow run history appears. Successful steps show check marks, while unsuccessful steps show an exclamation point (!).
To review the inputs and outputs for each step, expand that step.
To review the outputs, select See raw outputs.
Related content
- Check workflow status, view run history, and set up alerts in Azure Logic Apps
- View metrics for workflow health and performance in Azure Logic Apps
- Monitor and collect diagnostic data for workflows in Azure Logic Apps
- Enable and view enhanced telemetry in Application Insights for Standard workflows in Azure Logic Apps