Quickstart: Azure Cosmos DB for NoSQL client library for .NET

APPLIES TO: NoSQL

Get started with the Azure Cosmos DB client library for .NET to create databases, containers, and items within your account. Follow these steps to deploy a sample application and explore the code. In this quickstart, you use the Azure Developer CLI (azd) and the Microsoft.Azure.Cosmos library to connect to a newly created Azure Cosmos DB for NoSQL account.

API reference documentation | Library source code | Package (NuGet) | Azure Developer CLI

Prerequisites

Azure Cloud Shell

Azure hosts Azure Cloud Shell, an interactive shell environment that you can use through your browser. You can use either Bash or PowerShell with Cloud Shell to work with Azure services. You can use the Cloud Shell preinstalled commands to run the code in this article, without having to install anything on your local environment.

To start Azure Cloud Shell:

Option Example/Link
Select Try It in the upper-right corner of a code or command block. Selecting Try It doesn't automatically copy the code or command to Cloud Shell. Screenshot that shows an example of Try It for Azure Cloud Shell.
Go to https://shell.azure.com, or select the Launch Cloud Shell button to open Cloud Shell in your browser. Screenshot that shows how to launch Cloud Shell in a new window.
Select the Cloud Shell button on the menu bar at the upper right in the Azure portal. Screenshot that shows the Cloud Shell button in the Azure portal

To use Azure Cloud Shell:

  1. Start Cloud Shell.

  2. Select the Copy button on a code block (or command block) to copy the code or command.

  3. Paste the code or command into the Cloud Shell session by selecting Ctrl+Shift+V on Windows and Linux, or by selecting Cmd+Shift+V on macOS.

  4. Select Enter to run the code or command.

Deploy the Azure Developer CLI template

Use the Azure Developer CLI (azd) to create an Azure Cosmos DB for NoSQL account and set up an Azure Container Apps web application. The sample application uses the client library for .NET to manage resources.

  1. Start in an empty directory in the Azure Cloud Shell.

    Tip

    We recommend creating a new uniquely named directory within the fileshare folder (~/clouddrive).

    For example, this command will create a new directory and navigate to that directory:

    mkdir ~/clouddrive/cosmos-db-nosql-dotnet-quickstart
    
    cd ~/clouddrive/cosmos-db-nosql-dotnet-quickstart
    
  2. Initialize the Azure Developer CLI using azd init and the cosmos-db-nosql-dotnet-quickstart template.

    azd init --template cosmos-db-nosql-dotnet-quickstart
    
  3. During initialization, configure a unique environment name.

    Note

    The environment name will also be used as the target resource group name.

  4. Deploy the Azure Cosmos DB account and other resources for this quickstart with azd provision.

    azd provision
    
  5. During the provisioning process, select your subscription and desired location. Wait for the provisioning process to complete. The process can take approximately five minutes.

  6. Once the provisioning of your Azure resources is done, a link to the running web application is included in the output.

    View the running web application in Azure Container Apps:
    <https://container-app-39423723798.redforest-xz89v7c.eastus.azurecontainerapps.io>
    
    SUCCESS: Your application was provisioned in Azure in 5 minutes 0 seconds.
    
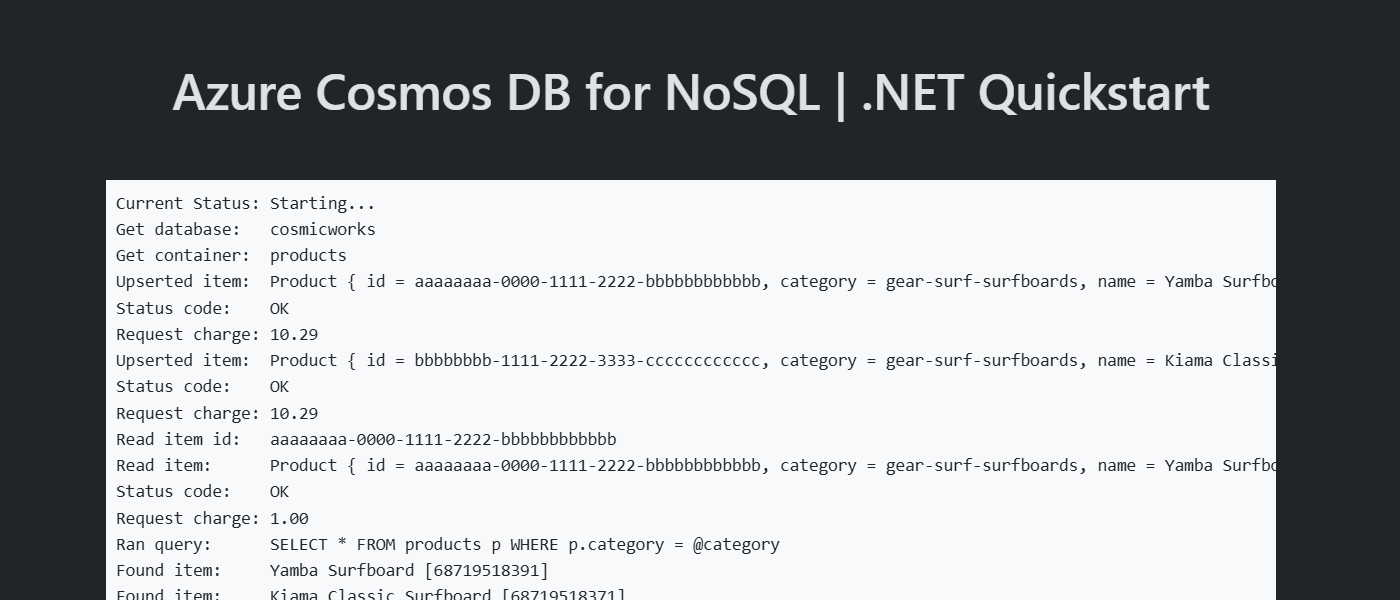
  7. Use the link in the console to navigate to your web application in the browser.

    Screenshot of the running web application.

Get the application code

Use the Azure Developer CLI (azd) to get the application code. The sample application uses the client library for .NET to manage resources.

  1. Start in an empty directory.

  2. Initialize the Azure Developer CLI using azd init and the cosmos-db-nosql-dotnet-quickstart template.

    azd init --template cosmos-db-nosql-dotnet-quickstart
    
  3. During initialization, configure a unique environment name.

    Note

    If you decide to deploy this application to Azure in the future, the environment name will also be used as the target resource group name.

Create the API for NoSQL account

Use the Azure CLI (az) to create an API for NoSQL account. You can choose to create an account in your existing subscription, or try a free Azure Cosmos DB account.

  1. Navigate to the Try Azure Cosmos DB free homepage: https://cosmos.azure.com/try/

  2. Sign-in using your Microsoft account.

  3. In the list of APIs, select the Create button for the API for NoSQL.

  4. Navigate to the newly created account by selecting Open in portal.

  5. Record the account and resource group names for the API for NoSQL account. You use these values in later steps.

Important

If you are using a free account, you might need to change the default subscription in Azure CLI to the subscription ID used for the free account.

az account set --subscription <subscription-id>

Create the database and container

Use the Azure CLI to create the cosmicworks database and products container for the quickstart.

  1. Create a new database with az cosmosdb sql database create. Set the name of the database to comsicworks and use autoscale throughput with a maximum of 1,000 RU/s.

    az cosmosdb sql database create \
        --resource-group <resource-group-name> \
        --account-name <account-name> \
        --name "cosmicworks" \
        --max-throughput 1000
    
  2. Create a container named products within the cosmicworks database using az cosmosdb sql container create. Set the partition key path to /category.

    az cosmosdb sql container create \
        --resource-group <resource-group-name> \
        --account-name <account-name> \
        --database-name "cosmicworks" \
        --name "products" \
        --partition-key-path "/category"
    

Configure passwordless authentication

When developing locally with passwordless authentication, make sure the user account that connects to Cosmos DB is assigned a role with the correct permissions to perform data operations. Currently, Azure Cosmos DB for NoSQL doesn't include built-in roles for data operations, but you can create your own using the Azure CLI or PowerShell.

  1. Get the API for NoSQL endpoint for the account using az cosmosdb show. You'll use this value in the next step.

    az cosmosdb show \
        --resource-group <resource-group-name> \
        --name <account-name> \
        --query "documentEndpoint"
    
  2. Set the AZURE_COSMOS_DB_NOSQL_ENDPOINT environment variable using the .NET secret manager (dotnet user-secrets). Set the value to the API for NoSQL account endpoint recorded in the previous step.

    dotnet user-secrets set "AZURE_COSMOS_DB_NOSQL_ENDPOINT" "<cosmos-db-nosql-endpoint>" --project ./src/web/Cosmos.Samples.NoSQL.Quickstart.Web.csproj
    
  3. Create a JSON file named role-definition.json. Use this content to configure the role with the following permissions:

    • Microsoft.DocumentDB/databaseAccounts/readMetadata
    • Microsoft.DocumentDB/databaseAccounts/sqlDatabases/containers/items/*
    • Microsoft.DocumentDB/databaseAccounts/sqlDatabases/containers/*
    {
      "RoleName": "Write to Azure Cosmos DB for NoSQL data plane",
      "Type": "CustomRole",
      "AssignableScopes": [
        "/"
      ],
      "Permissions": [
        {
          "DataActions": [
            "Microsoft.DocumentDB/databaseAccounts/readMetadata",
            "Microsoft.DocumentDB/databaseAccounts/sqlDatabases/containers/items/*",
            "Microsoft.DocumentDB/databaseAccounts/sqlDatabases/containers/*"
          ]
        }
      ]
    }
    
  4. Create a role using the az role definition create command. Name the role Write to Azure Cosmos DB for NoSQL data plane and ensure the role is scoped to the account level using /. Use the role-definition.json file you created in the previous step.

    az cosmosdb sql role definition create \
        --resource-group <resource-group-name> \
        --account-name <account-name> \
        --body @role-definition.json
    
  5. When the command is finished, it outputs an object that includes an id field. Record the value from the id field. You use this value in an upcoming step.

    Tip

    If you need to get the id again, you can use the az cosmosdb sql role definition list command:

    az cosmosdb sql role definition list \
        --resource-group <resource-group-name> \
        --account-name <account-name> \
        --query "[?roleName == 'Write to Azure Cosmos DB for NoSQL data plane'].id"
    
  6. For local development, get your currently logged in service principal id. Record this value as you'll also use this value in the next step.

    az ad signed-in-user show --query id
    
  7. Assign the role definition to your currently logged in user using az cosmosdb sql role assignment create.

    az cosmosdb sql role assignment create \
        --resource-group <resource-group-name> \
        --account-name <account-name> \
        --scope "/" \
        --role-definition-id "<your-custom-role-definition-id>" \
        --principal-id "<your-service-principal-id>"
    
  8. Run the .NET web application.

    dotnet run --project ./src/web/Cosmos.Samples.NoSQL.Quickstart.Web.csproj
    
  9. Use the link in the console to navigate to your web application in the browser.

    Screenshot of the running web application.

Walk through the .NET library code

The sample code in the Azure Develop CLI template creates a database named cosmicworks with a container named products. The products container is designed to contain product details such as name, category, quantity, and a sale indicator. Each product also contains a unique identifier.

For this sample, the container uses the /category property as a logical partition key.

The code blocks used to perform these operations in this sample are included in this section. You can also browse the entire template's source using Visual Studio Code for the Web.

Authenticate the client

Application requests to most Azure services must be authorized. Using the DefaultAzureCredential class provided by the Azure.Identity client library and namespace is the recommended approach for implementing passwordless connections to Azure services in your code.

Important

You can also authorize requests to Azure services using passwords, connection strings, or other credentials directly. However, this approach should be used with caution. Developers must be diligent to never expose these secrets in an unsecure location. Anyone who gains access to the password or secret key is able to authenticate. DefaultAzureCredential offers improved management and security benefits over the account key to allow passwordless authentication.

DefaultAzureCredential supports multiple authentication methods and determines which method should be used at runtime.

The client authentication code for this project is in the src/web/Program.cs file.

For example, your app can authenticate using your Visual Studio sign-in credentials when developing locally, and then use a system-assigned managed identity once it has been deployed to Azure. No code changes are required for this transition between environments.

CosmosClient client = new(
    accountEndpoint: builder.Configuration["AZURE_COSMOS_DB_NOSQL_ENDPOINT"]!,
    tokenCredential: new DefaultAzureCredential()
);

Alternatively, your app can specify a clientId with the DefaultAzureCredentialOptions class to use a user-assigned managed identity locally or in Azure.

CosmosClient client = new(
    accountEndpoint: builder.Configuration["AZURE_COSMOS_DB_NOSQL_ENDPOINT"]!,
    tokenCredential: new DefaultAzureCredential(
        new DefaultAzureCredentialOptions()
        {
            ManagedIdentityClientId = builder.Configuration["AZURE_MANAGED_IDENTITY_CLIENT_ID"]!
        }
    )
);

Get a database

The code to access database resources is in the GenerateQueryDataAsync method of the src/web/Pages/Index.razor file.

Use the GetDatabase method to return a reference to the specified database.

Database database = client.GetDatabase("cosmicworks");

Get a container

The code to access container resources is also in the GenerateQueryDataAsync method.

The GetContainer returns a reference to the specified container.

Container container = database.GetContainer("products");

Create an item

The easiest way to create a new item in a container is to first build a C# class or record type with all of the members you want to serialize into JSON. In this example, the C# record has a unique identifier, a category field for the partition key, name, quantity, price, and clearance fields.

public record Product(
    string id,
    string category,
    string name,
    int quantity,
    decimal price,
    bool clearance
);

In the GenerateQueryDataAsync method, create an item in the container by calling UpsertItemAsync.

Product item = new(
    id: "68719518391",
    category: "gear-surf-surfboards",
    name: "Yamba Surfboard",
    quantity: 12,
    price: 850.00m,
    clearance: false
);

ItemResponse<Product> response = await container.UpsertItemAsync<Product>(
    item: item,
    partitionKey: new PartitionKey("gear-surf-surfboards")
);

Read an item

In Azure Cosmos DB, you can perform a point read operation by using both the unique identifier (id) and partition key fields. In the SDK, call ReadItemAsync passing in both values to return a deserialized instance of your C# type. Still in the GenerateQueryDataAsync method, use ReadItemAsync<Product> to serialize the item using the Product type.

ItemResponse<Product> response = await container.ReadItemAsync<Product>(
    id: "68719518391",
    partitionKey: new PartitionKey("gear-surf-surfboards")
);

Query items

After you insert an item, you can run a query to get all items that match a specific filter. This example runs the SQL query: SELECT * FROM products p WHERE p.category = "gear-surf-surfboards". This example uses the QueryDefinition type and a parameterized query expression for the partition key filter. Once the query is defined, call GetItemQueryIterator to get a result iterator that manages the pages of results. In the example, the query logic is also in the GenerateQueryDataAsync method.

var query = new QueryDefinition(
    query: "SELECT * FROM products p WHERE p.category = @category"
)
    .WithParameter("@category", "gear-surf-surfboards");

using FeedIterator<Product> feed = container.GetItemQueryIterator<Product>(
    queryDefinition: query
);

Then, use a combination of while and foreach loops to retrieve pages of results and then iterate over the individual items.

List<Product> items = new();
double requestCharge = 0d;
while (feed.HasMoreResults)
{
    FeedResponse<Product> response = await feed.ReadNextAsync();
    foreach (Product item in response)
    {
        items.Add(item);
    }
    requestCharge += response.RequestCharge;
}

Clean up resources

When you no longer need the sample application or resources, remove the corresponding deployment and all resources.

azd down
  1. Navigate to the Try Azure Cosmos DB free homepage again: https://cosmos.azure.com/try/

  2. Sign-in using your Microsoft account.

  3. Select Delete your account.

Next step