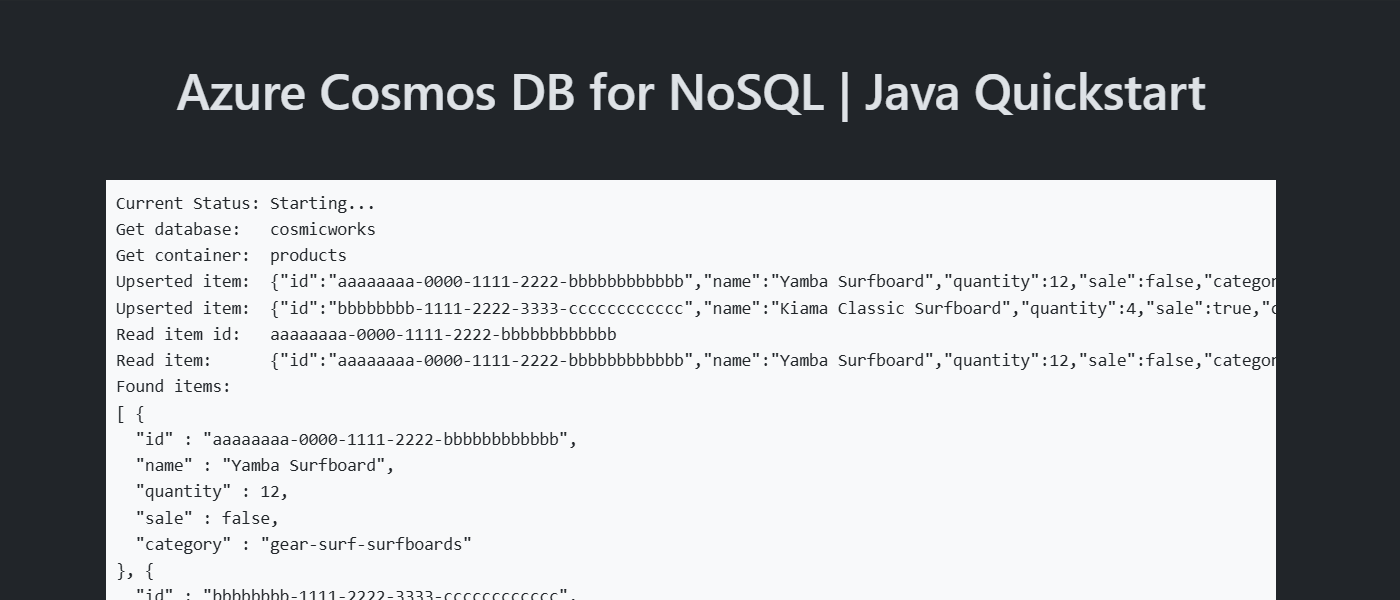
Quickstart: Build a Java app to manage Azure Cosmos DB for NoSQL data
APPLIES TO:
NoSQL
This quickstart guide explains how to build a Java app to manage an Azure Cosmos DB for NoSQL account. You create the Java app using the SQL Java SDK, and add resources to your Azure Cosmos DB account by using the Java application.
First, create an Azure Cosmos DB for NoSQL account using the Azure portal. Azure Cosmos DB is a multi-model database service that lets you quickly create and query document, table, key-value, and graph databases with global distribution and horizontal scale capabilities. You can try Azure Cosmos DB account for free without a credit card or an Azure subscription.
Important
This quickstart is for Azure Cosmos DB Java SDK v4 only. For more information, see the release notes, Maven repository, performance tips, and troubleshooting guide. If you currently use an older version than v4, see the Migrate to Azure Cosmos DB Java SDK v4 guide for help upgrading to v4.
Tip
If you work with Azure Cosmos DB resources in a Spring application, consider using Spring Cloud Azure as an alternative. Spring Cloud Azure is an open-source project that provides seamless Spring integration with Azure services. To learn more about Spring Cloud Azure, and to see an example using Cosmos DB, see Access data with Azure Cosmos DB NoSQL API.
Prerequisites
- An Azure account with an active subscription. If you don't have an Azure subscription, you can try Azure Cosmos DB free with no credit card required.
- Java Development Kit (JDK) 8. Point your
JAVA_HOME
environment variable to the folder where the JDK is installed. - A Maven binary archive. On Ubuntu, run
apt-get install maven
to install Maven. - Git. On Ubuntu, run
sudo apt-get install git
to install Git.
Introductory notes
The structure of an Azure Cosmos DB account: For any API or programming language, an Azure Cosmos DB account contains zero or more databases, a database (DB) contains zero or more containers, and a container contains zero or more items, as shown in the following diagram:
For more information, see Databases, containers, and items in Azure Cosmos DB.
A few important properties are defined at the level of the container, including provisioned throughput and partition key. The provisioned throughput is measured in request units (RUs), which have a monetary price and are a substantial determining factor in the operating cost of the account. Provisioned throughput can be selected at per-container granularity or per-database granularity, however container-level throughput specification is typically preferred. To learn more about throughput provisioning, see Introduction to provisioned throughput in Azure Cosmos DB.
As items are inserted into an Azure Cosmos DB container, the database grows horizontally by adding more storage and compute to handle requests. Storage and compute capacity are added in discrete units known as partitions, and you must choose one field in your documents to be the partition key that maps each document to a partition. Partitions are managed such that each partition is assigned a roughly equal slice out of the range of partition key values. Therefore, you're advised to choose a partition key that's relatively random or evenly distributed. Otherwise, some partitions see substantially more requests (hot partition) while other partitions see substantially fewer requests (cold partition). To learn more, see Partitioning and horizontal scaling in Azure Cosmos DB.
Create a database account
Before you can create a document database, you need to create an API for NoSQL account with Azure Cosmos DB.
From the Azure portal menu or the Home page, select Create a resource.
Search for Azure Cosmos DB. Select Create > Azure Cosmos DB.
On the Create an Azure Cosmos DB account page, select the Create option within the Azure Cosmos DB for NoSQL section.
Azure Cosmos DB provides several APIs:
- NoSQL, for document data
- PostgreSQL
- MongoDB, for document data
- Apache Cassandra
- Table
- Apache Gremlin, for graph data
To learn more about the API for NoSQL, see Welcome to Azure Cosmos DB.
In the Create Azure Cosmos DB Account page, enter the basic settings for the new Azure Cosmos DB account.
Setting Value Description Subscription Subscription name Select the Azure subscription that you want to use for this Azure Cosmos DB account. Resource Group Resource group name Select a resource group, or select Create new, then enter a unique name for the new resource group. Account Name A unique name Enter a name to identify your Azure Cosmos DB account. Because documents.azure.com is appended to the name that you provide to create your URI, use a unique name. The name can contain only lowercase letters, numbers, and the hyphen (-) character. It must be 3-44 characters. Location The region closest to your users Select a geographic location to host your Azure Cosmos DB account. Use the location that is closest to your users to give them the fastest access to the data. Capacity mode Provisioned throughput or Serverless Select Provisioned throughput to create an account in provisioned throughput mode. Select Serverless to create an account in serverless mode. Apply Azure Cosmos DB free tier discount Apply or Do not apply With Azure Cosmos DB free tier, you get the first 1000 RU/s and 25 GB of storage for free in an account. Learn more about free tier. Limit total account throughput Selected or not Limit the total amount of throughput that can be provisioned on this account. This limit prevents unexpected charges related to provisioned throughput. You can update or remove this limit after your account is created. You can have up to one free tier Azure Cosmos DB account per Azure subscription and must opt in when creating the account. If you don't see the option to apply the free tier discount, another account in the subscription has already been enabled with free tier.
Note
The following options are not available if you select Serverless as the Capacity mode:
- Apply Free Tier Discount
- Limit total account throughput
In the Global Distribution tab, configure the following details. You can leave the default values for this quickstart:
Setting Value Description Geo-Redundancy Disable Enable or disable global distribution on your account by pairing your region with a pair region. You can add more regions to your account later. Multi-region Writes Disable Multi-region writes capability allows you to take advantage of the provisioned throughput for your databases and containers across the globe. Availability Zones Disable Availability Zones help you further improve availability and resiliency of your application. Note
The following options are not available if you select Serverless as the Capacity mode in the previous Basics page:
- Geo-redundancy
- Multi-region Writes
Optionally, you can configure more details in the following tabs:
- Networking. Configure access from a virtual network.
- Backup Policy. Configure either periodic or continuous backup policy.
- Encryption. Use either service-managed key or a customer-managed key.
- Tags. Tags are name/value pairs that enable you to categorize resources and view consolidated billing by applying the same tag to multiple resources and resource groups.
Select Review + create.
Review the account settings, and then select Create. It takes a few minutes to create the account. Wait for the portal page to display Your deployment is complete.
Select Go to resource to go to the Azure Cosmos DB account page.
Add a container
You can now use the Data Explorer tool in the Azure portal to create a database and container.
Select Data Explorer > New Container.
The Add Container area is displayed on the far right, you may need to scroll right to see it.
In the Add container page, enter the settings for the new container.
Setting Suggested value Description Database ID ToDoList Enter Tasks as the name for the new database. Database names must contain from 1 through 255 characters, and they cannot contain /, \\, #, ?
, or a trailing space. Check the Share throughput across containers option, it allows you to share the throughput provisioned on the database across all the containers within the database. This option also helps with cost savings.Database throughput You can provision Autoscale or Manual throughput. Manual throughput allows you to scale RU/s yourself whereas autoscale throughput allows the system to scale RU/s based on usage. Select Manual for this example.
Leave the throughput at 400 request units per second (RU/s). If you want to reduce latency, you can scale up the throughput later by estimating the required RU/s with the capacity calculator.
Note: This setting is not available when creating a new container in a serverless account.Container ID Items Enter Items as the name for your new container. Container IDs have the same character requirements as database names. Partition key /category The sample described in this article uses /category as the partition key. Don't add Unique keys or turn on Analytical store for this example. Unique keys let you add a layer of data integrity to the database by ensuring the uniqueness of one or more values per partition key. For more information, see Unique keys in Azure Cosmos DB. Analytical store is used to enable large-scale analytics against operational data without any impact to your transactional workloads.
Select OK. The Data Explorer displays the new database and container.
Add sample data
You can now add data to your new container using Data Explorer.
From the Data Explorer, expand the Tasks database, expand the Items container. Select Items, and then select New Item.
Now add a document to the container with the following structure.
{ "id": "1", "category": "personal", "name": "groceries", "description": "Pick up apples and strawberries.", "isComplete": false }
Once you've added the json to the Documents tab, select Save.
Create and save one more document where you insert a unique value for the
id
property, and change the other properties as you see fit. Your new documents can have any structure you want as Azure Cosmos DB doesn't impose any schema on your data.
Query your data
You can use queries in Data Explorer to retrieve and filter your data.
At the top of the Items tab in Data Explorer, review the default query
SELECT * FROM c
. This query retrieves and displays all documents from the container ordered by ID.To change the query, select Edit Filter, replace the default query with
ORDER BY c._ts DESC
, and then select Apply Filter.The modified query displays the documents in descending order based on their timestamp, so now your second document is listed first.
If you're familiar with SQL syntax, you can enter any supported SQL queries in the query predicate box. You can also use Data Explorer to create stored procedures, user defined functions, and triggers for server-side business logic.
Data Explorer provides easy access in the Azure portal to all of the built-in programmatic data access features available in the APIs. You can also use the Azure portal to scale throughput, get keys and connection strings, and review metrics and SLAs for your Azure Cosmos DB account.
Clone the sample application
Now let's switch to working with code. Clone an API for NoSQL app from GitHub, set the connection string, and run it. You can see how easy it is to work with data programmatically.
Run the following command to clone the sample repository. This command creates a copy of the sample app on your computer.
git clone https://github.com/Azure-Samples/azure-cosmos-java-getting-started.git
Review the code
This step is optional. If you're interested in learning how the database resources are created in the code, you can review the following snippets. Otherwise, you can skip ahead to Run the app.
DefaultAzureCredential
is a class provided by the Azure Identity library for Java. To learn more about DefaultAzureCredential
, see the Azure authentication with Java and Azure Identity. DefaultAzureCredential
supports multiple authentication methods and determines which method should be used at runtime. This approach enables your app to use different authentication methods in different environments (local vs. production) without implementing environment-specific code.
For example, your app can authenticate using your Visual Studio sign-in credentials when developing locally, and then use a managed identity once it has been deployed to Azure. No code changes are required for this transition.
When developing locally with passwordless authentication, make sure the user account that connects to Cosmos DB is assigned a role with the correct permissions to perform data operations. Currently, Azure Cosmos DB for NoSQL doesn't include built-in roles for data operations, but you can create your own using the Azure CLI or PowerShell.
Roles consist of a collection of permissions or actions that a user is allowed to perform, such as read, write, and delete. You can read more about configuring role-based access control (RBAC) in the Cosmos DB security configuration documentation.
Create the custom role
Create a role using the
az role definition create
command. Pass in the Cosmos DB account name and resource group, followed by a body of JSON that defines the custom role. The following example creates a role namedPasswordlessReadWrite
with permissions to read and write items in Cosmos DB containers. The role is also scoped to the account level using/
.az cosmosdb sql role definition create \ --account-name <cosmosdb-account-name> \ --resource-group <resource-group-name> \ --body '{ "RoleName": "PasswordlessReadWrite", "Type": "CustomRole", "AssignableScopes": ["/"], "Permissions": [{ "DataActions": [ "Microsoft.DocumentDB/databaseAccounts/readMetadata", "Microsoft.DocumentDB/databaseAccounts/sqlDatabases/containers/items/*", "Microsoft.DocumentDB/databaseAccounts/sqlDatabases/containers/*" ] }] }'
When the command completes, copy the ID value from the
name
field and paste it somewhere for later use.Assign the role you created to the user account or service principal that will connect to Cosmos DB. During local development, this will generally be your own account that's logged into a development tool like Visual Studio or the Azure CLI. Retrieve the details of your account using the
az ad user
command.az ad user show --id "<your-email-address>"
Copy the value of the
id
property out of the results and paste it somewhere for later use.Assign the custom role you created to your user account using the
az cosmosdb sql role assignment create
command and the IDs you copied previously.az cosmosdb sql role assignment create \ --account-name <cosmosdb-account-name> \ --resource-group <resource-group-name> \ --scope "/" \ --principal-id <your-user-id> \ --role-definition-id <your-custom-role-id>
Authenticate using DefaultAzureCredential
For local development, make sure you're authenticated with the same Azure AD account you assigned the role to. You can authenticate via popular development tools, such as the Azure CLI or Azure PowerShell. The development tools with which you can authenticate vary across languages.
Sign-in to Azure through the Azure CLI using the following command:
az login
You can authenticate to Cosmos DB for NoSQL using DefaultAzureCredential
by adding the azure-identity
dependency to your application. DefaultAzureCredential
automatically discovers and uses the account you signed into in the previous step.
Manage database resources using the synchronous (sync) API
CosmosClient
initialization: TheCosmosClient
provides client-side logical representation for the Azure Cosmos DB database service. This client is used to configure and execute requests against the service.DefaultAzureCredential credential = new DefaultAzureCredentialBuilder().build(); client = new CosmosClientBuilder() .endpoint(AccountSettings.HOST) .credential(credential) // Setting the preferred location to Cosmos DB Account region // West US is just an example. User should set preferred location to the Cosmos DB region closest to the application .preferredRegions(Collections.singletonList("West US")) .consistencyLevel(ConsistencyLevel.EVENTUAL) .buildClient();
Use the az cosmosdb sql database create and az cosmosdb sql container create commands to create a Cosmos DB NoSQL database and container.
# Create a SQL API database az cosmosdb sql database create \ --account-name msdocs-cosmos-nosql \ --resource-group msdocs \ --name AzureSampleFamilyDB
# Create a SQL API container az cosmosdb sql container create \ --account-name msdocs-cosmos-nosql \ --resource-group msdocs \ --database-name AzureSampleFamilyDB \ --name FamilyContainer \ --partition-key-path '/lastName'
Item creation by using the
createItem
method.// Create item using container that we created using sync client // Use lastName as partitionKey for cosmos item // Using appropriate partition key improves the performance of database operations CosmosItemRequestOptions cosmosItemRequestOptions = new CosmosItemRequestOptions(); CosmosItemResponse<Family> item = container.createItem(family, new PartitionKey(family.getLastName()), cosmosItemRequestOptions);
Point reads are performed using
readItem
method.try { CosmosItemResponse<Family> item = container.readItem(family.getId(), new PartitionKey(family.getLastName()), Family.class); double requestCharge = item.getRequestCharge(); Duration requestLatency = item.getDuration(); logger.info("Item successfully read with id {} with a charge of {} and within duration {}", item.getItem().getId(), requestCharge, requestLatency); } catch (CosmosException e) { logger.error("Read Item failed with", e); }
SQL queries over JSON are performed using the
queryItems
method.// Set some common query options CosmosQueryRequestOptions queryOptions = new CosmosQueryRequestOptions(); //queryOptions.setEnableCrossPartitionQuery(true); //No longer necessary in SDK v4 // Set query metrics enabled to get metrics around query executions queryOptions.setQueryMetricsEnabled(true); CosmosPagedIterable<Family> familiesPagedIterable = container.queryItems( "SELECT * FROM Family WHERE Family.lastName IN ('Andersen', 'Wakefield', 'Johnson')", queryOptions, Family.class); familiesPagedIterable.iterableByPage(10).forEach(cosmosItemPropertiesFeedResponse -> { logger.info("Got a page of query result with {} items(s) and request charge of {}", cosmosItemPropertiesFeedResponse.getResults().size(), cosmosItemPropertiesFeedResponse.getRequestCharge()); logger.info("Item Ids {}", cosmosItemPropertiesFeedResponse .getResults() .stream() .map(Family::getId) .collect(Collectors.toList())); });
Run the app
Now go back to the Azure portal to get your connection string information and launch the app with your endpoint information. This enables your app to communicate with your hosted database.
In the git terminal window,
cd
to the sample code folder.cd azure-cosmos-java-getting-started
In the git terminal window, use the following command to install the required Java packages.
mvn package
In the git terminal window, use the following command to start the Java application. Replace SYNCASYNCMODE with
sync-passwordless
orasync-passwordless
, depending on which sample code you'd like to run. Replace YOUR_COSMOS_DB_HOSTNAME with the quoted URI value from the portal, and replace YOUR_COSMOS_DB_MASTER_KEY with the quoted primary key from portal.mvn exec:java@SYNCASYNCMODE -DACCOUNT_HOST=YOUR_COSMOS_DB_HOSTNAME -DACCOUNT_KEY=YOUR_COSMOS_DB_MASTER_KEY
The terminal window displays a notification that the
FamilyDB
database was created.The app references the database and container you created via Azure CLI earlier.
The app performs point reads using object IDs and partition key value (which is
lastName
in our sample).The app queries items to retrieve all families with last name (Andersen, Wakefield, Johnson).
The app doesn't delete the created resources. Switch back to the portal to clean up the resources from your account so that you don't incur charges.
Use Throughput Control
Having throughput control helps to isolate the performance needs of applications running against a container, by limiting the amount of request units that can be consumed by a given Java SDK client.
There are several advanced scenarios that benefit from client-side throughput control:
Different operations and tasks have different priorities - there can be a need to prevent normal transactions from being throttled due to data ingestion or copy activities. Some operations and/or tasks aren't sensitive to latency, and are more tolerant to being throttled than others.
Provide fairness/isolation to different end users/tenants - An application will usually have many end users. Some users may send too many requests, which consume all available throughput, causing others to get throttled.
Load balancing of throughput between different Azure Cosmos DB clients - in some use cases, it's important to make sure all the clients get a fair (equal) share of the throughput
Warning
Please note that throughput control is not yet supported for gateway mode.
Currently, for serverless Azure Cosmos DB accounts, attempting to use targetThroughputThreshold
to define a percentage will result in failure. You can only provide an absolute value for target throughput/RU using targetThroughput
.
Global throughput control
Global throughput control in the Java SDK is configured by first creating a container that will define throughput control metadata. This container must have a partition key of groupId
, and ttl
enabled. Assuming you already have objects for client, database, and container as defined in the examples above, you can create this container as below. Here we name the container ThroughputControl
:
CosmosContainerProperties throughputContainerProperties = new CosmosContainerProperties("ThroughputControl", "/groupId").setDefaultTimeToLiveInSeconds(-1);
ThroughputProperties throughputProperties = ThroughputProperties.createManualThroughput(400);
database.createContainerIfNotExists(throughputContainerProperties, throughputProperties);
Note
The throughput control container must be created with a partition key /groupId
and must have ttl
value set, or throughput control will not function correctly.
Then, to enable the container object used by the current client to use a shared global control group, we need to create two sets of config. The first is to define the control groupName
, and the targetThroughputThreshold
or targetThroughput
for that group. If the group does not already exist, an entry for it will be created in the throughput control container:
ThroughputControlGroupConfig groupConfig =
new ThroughputControlGroupConfigBuilder()
.groupName("globalControlGroup")
.targetThroughputThreshold(0.25)
.targetThroughput(100)
.build();
Note
In the above, we define a targetThroughput
value of 100
, meaning that only a maximum of 100 RUs of the container's provisioned throughput can be used by all clients consuming the throughput control group, before the SDK will attempt to rate limit clients. You can also define targetThroughputThreshold
to provide a percentage of the container's throughput as the threshold instead (the example above defines a threshold of 25%). Defining a value for both with not cause an error, but the SDK will apply the one with the lower value. For example, if the container in the above example has 1000 RUs provisioned, the value of targetThroughputThreshold(0.25)
will be 250 RUs, so the lower value of targetThroughput(100)
will be used as the threshold.
Important
If you reference a groupName
that already exists, but define targetThroughputThreshold
or targetThroughput
values to be different than what was originally defined for the group, this will be treated as a different group (even though it has the same name). To make sure all clients use the same group, make sure they all have the same settings for both groupName
and targetThroughputThreshold
(or targetThroughput
). You also need to restart all applications after making any such changes, to ensure they all consume the new threshold or target throughput properly.
The second config you need to create will reference the throughput container you created earlier, and define some behaviours for it using two parameters:
- Use
setControlItemRenewInterval
to determine how fast throughput will be re-balanced between clients. At each renewal interval, each client will update it's own throughput usage in a client item record stored in the throughput control container. It will also read all the throughput usage of all other active clients, and adjust the throughput that should be assigned to itself. The minimum value that can be set is 5 seconds (there is no maximum value). - Use
setControlItemExpireInterval
to determine when a dormant client should be considered offline and no longer part of any throughput control group. Upon expiry, the client item in the throughput container will be removed, and the data will no longer be used for re-balancing between clients. The value of this must be at least (2 *setControlItemRenewInterval
+ 1). For example, if the value ofsetControlItemRenewInterval
is 5 seconds, the value ofsetControlItemExpireInterval
must be at least 11 seconds.
GlobalThroughputControlConfig globalControlConfig =
this.client.createGlobalThroughputControlConfigBuilder("ThroughputControlDatabase", "ThroughputControl")
.setControlItemRenewInterval(Duration.ofSeconds(5))
.setControlItemExpireInterval(Duration.ofSeconds(11))
.build();
Now we're ready to enable global throughput control for this container object. Other Cosmos clients running in other JVMs can share the same throughput control group, and as long as they are referencing the same throughput control metadata container, and reference the same throughput control group name.
container.enableGlobalThroughputControlGroup(groupConfig, globalControlConfig);
Note
Throughput control does not do RU pre-calculation of each operation. Instead, it tracks the RU usages after the operation based on the response header. As such, throughput control is based on an approximation - and does not guarantee that amount of throughput will be available for the group at any given time. This means that if the configured RU is so low that a single operation can use it all, then throughput control cannot avoid the RU exceeding the configured limit. Therefore, throughput control works best when the configured limit is higher than any single operation that can be executed by a client in the given control group. With that in mind, when reading via query or change feed, you should configure the page size to be a modest amount, so that client throughput control can be re-calculated with higher frequency, and therefore reflected more accurately at any given time. However, when using throughput control for a write-job using bulk, the number of documents executed in a single request will automatically be tuned based on the throttling rate to allow the throughput control to kick-in as early as possible.
Local throughput control
You can also use local throughput control, without defining a shared control group that multiple clients will use. However, with this approach, each client will be unaware of how much throughput other clients are consuming from the total available throughput in the container, while global throughput control attempts to load balance the consumption of each client.
ThroughputControlGroupConfig groupConfig =
new ThroughputControlGroupConfigBuilder()
.groupName("localControlGroup")
.targetThroughputThreshold(0.1)
.build();
container.enableLocalThroughputControlGroup(groupConfig);
Review SLAs in the Azure portal
The Azure portal monitors your Azure Cosmos DB account throughput, storage, availability, latency, and consistency. Charts for metrics associated with an Azure Cosmos DB Service Level Agreement (SLA) show the SLA value compared to actual performance. This suite of metrics makes monitoring your SLAs transparent.
To review metrics and SLAs:
Select Metrics in your Azure Cosmos DB account's navigation menu.
Select a tab such as Latency, and select a timeframe on the right. Compare the Actual and SLA lines on the charts.
Review the metrics on the other tabs.
Clean up resources
When you're done with your app and Azure Cosmos DB account, you can delete the Azure resources you created so you don't incur more charges. To delete the resources:
In the Azure portal Search bar, search for and select Resource groups.
From the list, select the resource group you created for this quickstart.
On the resource group Overview page, select Delete resource group.
In the next window, enter the name of the resource group to delete, and then select Delete.
Next steps
In this quickstart, you learned how to create an Azure Cosmos DB for NoSQL account, create a document database and container using Data Explorer, and run a Java app to do the same thing programmatically. You can now import additional data into your Azure Cosmos DB account.
Are you capacity planning for a migration to Azure Cosmos DB? You can use information about your existing database cluster for capacity planning.
- If all you know is the number of vcores and servers in your existing database cluster, read about estimating RUs using vCores or vCPUs.
- If you know typical request rates for your current database workload, learn how to estimate RUs using Azure Cosmos DB capacity planner.
Feedback
Submit and view feedback for