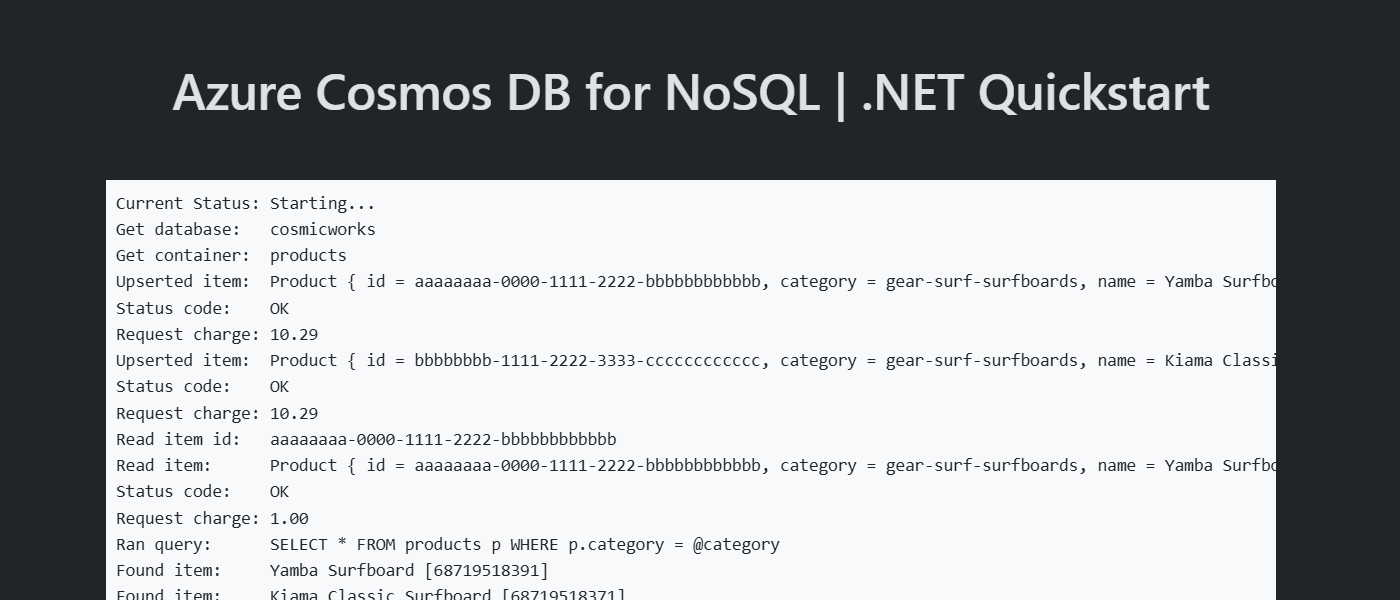
Quickstart: Azure Cosmos DB for NoSQL client library for .NET
APPLIES TO:
NoSQL
Get started with the Azure Cosmos DB client library for .NET to create databases, containers, and items within your account. Follow these steps to install the package and try out example code for basic tasks.
Note
The example code snippets are available on GitHub as a .NET project.
API reference documentation | Library source code | Package (NuGet) | Samples
Prerequisites
- An Azure account with an active subscription.
- No Azure subscription? You can try Azure Cosmos DB free with no credit card required.
- .NET 6.0 or later
- Azure Command-Line Interface (CLI) or Azure PowerShell
Prerequisite check
- In a terminal or command window, run
dotnet --version
to check that the .NET SDK is version 6.0 or later. - Run
az --version
(Azure CLI) orGet-Module -ListAvailable AzureRM
(Azure PowerShell) to check that you have the appropriate Azure command-line tools installed.
Setting up
This section walks you through creating an Azure Cosmos DB account and setting up a project that uses Azure Cosmos DB for NoSQL client library for .NET to manage resources.
Create an Azure Cosmos DB account
Tip
No Azure subscription? You can try Azure Cosmos DB free with no credit card required. If you create an account using the free trial, you can safely skip ahead to the Create a new .NET app section.
This quickstart will create a single Azure Cosmos DB account using the API for NoSQL.
Tip
For this quickstart, we recommend using the resource group name msdocs-cosmos-quickstart-rg
.
Sign in to the Azure portal.
From the Azure portal menu or the Home page, select Create a resource.
On the New page, search for and select Azure Cosmos DB.
On the Select API option page, select the Create option within the NoSQL section. Azure Cosmos DB has six APIs: NoSQL, MongoDB, PostgreSQL, Apache Cassandra, Apache Gremlin, and Table. Learn more about the API for NoSQL.
On the Create Azure Cosmos DB Account page, enter the following information:
Setting Value Description Subscription Subscription name Select the Azure subscription that you wish to use for this Azure Cosmos account. Resource Group Resource group name Select a resource group, or select Create new, then enter a unique name for the new resource group. Account Name A unique name Enter a name to identify your Azure Cosmos account. The name will be used as part of a fully qualified domain name (FQDN) with a suffix of documents.azure.com, so the name must be globally unique. The name can only contain lowercase letters, numbers, and the hyphen (-) character. The name must also be between 3-44 characters in length. Location The region closest to your users Select a geographic location to host your Azure Cosmos DB account. Use the location that is closest to your users to give them the fastest access to the data. Capacity mode Provisioned throughput or Serverless Select Provisioned throughput to create an account in provisioned throughput mode. Select Serverless to create an account in serverless mode. Apply Azure Cosmos DB free tier discount Apply or Do not apply Enable Azure Cosmos DB free tier. With Azure Cosmos DB free tier, you'll get the first 1000 RU/s and 25 GB of storage for free in an account. Learn more about free tier. Note
You can have up to one free tier Azure Cosmos DB account per Azure subscription and must opt-in when creating the account. If you do not see the option to apply the free tier discount, this means another account in the subscription has already been enabled with free tier.
Select Review + create.
Review the settings you provide, and then select Create. It takes a few minutes to create the account. Wait for the portal page to display Your deployment is complete before moving on.
Select Go to resource to go to the Azure Cosmos DB account page.
From the API for NoSQL account page, select the Keys navigation menu option.
Record the values from the URI and PRIMARY KEY fields. You'll use these values in a later step.
Create a new .NET app
Create a new .NET application in an empty folder using your preferred terminal. Use the dotnet new
command specifying the console template.
dotnet new console
Install the package
Add the Microsoft.Azure.Cosmos NuGet package to the .NET project. Use the dotnet add package
command specifying the name of the NuGet package.
dotnet add package Microsoft.Azure.Cosmos
Build the project with the dotnet build
command.
dotnet build
Make sure that the build was successful with no errors. The expected output from the build should look something like this:
Determining projects to restore...
All projects are up-to-date for restore.
dslkajfjlksd -> C:\Users\sidandrews\Demos\dslkajfjlksd\bin\Debug\net6.0\dslkajfjlksd.dll
Build succeeded.
0 Warning(s)
0 Error(s)
Configure environment variables
To use the URI and PRIMARY KEY values within your code, persist them to new environment variables on the local machine running the application. To set the environment variable, use your preferred terminal to run the following commands:
$env:COSMOS_ENDPOINT = "<cosmos-account-URI>"
$env:COSMOS_KEY = "<cosmos-account-PRIMARY-KEY>"
Object model
Before you start building the application, let's look into the hierarchy of resources in Azure Cosmos DB. Azure Cosmos DB has a specific object model used to create and access resources. The Azure Cosmos DB creates resources in a hierarchy that consists of accounts, databases, containers, and items.
Hierarchical diagram showing an Azure Cosmos DB account at the top. The account has two child database nodes. One of the database nodes includes two child container nodes. The other database node includes a single child container node. That single container node has three child item nodes.
For more information about the hierarchy of different resources, see working with databases, containers, and items in Azure Cosmos DB.
You'll use the following .NET classes to interact with these resources:
CosmosClient
- This class provides a client-side logical representation for the Azure Cosmos DB service. The client object is used to configure and execute requests against the service.Database
- This class is a reference to a database that may, or may not, exist in the service yet. The database is validated server-side when you attempt to access it or perform an operation against it.Container
- This class is a reference to a container that also may not exist in the service yet. The container is validated server-side when you attempt to work with it.QueryDefinition
- This class represents a SQL query and any query parameters.FeedIterator<>
- This class represents an iterator that can track the current page of results and get a new page of results.FeedResponse<>
- This class represents a single page of responses from the iterator. This type can be iterated over using aforeach
loop.
Code examples
The sample code described in this article creates a database named cosmicworks
with a container named products
. The products
table is designed to contain product details such as name, category, quantity, and a sale indicator. Each product also contains a unique identifier.
For this sample code, the container will use the category as a logical partition key.
Authenticate the client
Application requests to most Azure services must be authorized. Using the DefaultAzureCredential
class provided by the Azure Identity client library is the recommended approach for implementing passwordless connections to Azure services in your code.
You can also authorize requests to Azure services using passwords, connection strings, or other credentials directly. However, this approach should be used with caution. Developers must be diligent to never expose these secrets in an unsecure location. Anyone who gains access to the password or secret key is able to authenticate. DefaultAzureCredential
offers improved management and security benefits over the account key to allow passwordless authentication. Both options are demonstrated in the following example.
DefaultAzureCredential
is a class provided by the Azure Identity client library for .NET. To learn more about DefaultAzureCredential
, see the DefaultAzureCredential overview. DefaultAzureCredential
supports multiple authentication methods and determines which method should be used at runtime. This approach enables your app to use different authentication methods in different environments (local vs. production) without implementing environment-specific code.
For example, your app can authenticate using your Visual Studio sign-in credentials when developing locally, and then use a managed identity once it has been deployed to Azure. No code changes are required for this transition.
When developing locally with passwordless authentication, make sure the user account that connects to Cosmos DB is assigned a role with the correct permissions to perform data operations. Currently, Azure Cosmos DB for NoSQL doesn't include built-in roles for data operations, but you can create your own using the Azure CLI or PowerShell.
Roles consist of a collection of permissions or actions that a user is allowed to perform, such as read, write, and delete. You can read more about configuring role-based access control (RBAC) in the Cosmos DB security configuration documentation.
Create the custom role
Create a role using the
az role definition create
command. Pass in the Cosmos DB account name and resource group, followed by a body of JSON that defines the custom role. The following example creates a role namedPasswordlessReadWrite
with permissions to read and write items in Cosmos DB containers. The role is also scoped to the account level using/
.az cosmosdb sql role definition create \ --account-name <cosmosdb-account-name> \ --resource-group <resource-group-name> \ --body '{ "RoleName": "PasswordlessReadWrite", "Type": "CustomRole", "AssignableScopes": ["/"], "Permissions": [{ "DataActions": [ "Microsoft.DocumentDB/databaseAccounts/readMetadata", "Microsoft.DocumentDB/databaseAccounts/sqlDatabases/containers/items/*", "Microsoft.DocumentDB/databaseAccounts/sqlDatabases/containers/*" ] }] }'
When the command completes, copy the ID value from the
name
field and paste it somewhere for later use.Assign the role you created to the user account or service principal that will connect to Cosmos DB. During local development, this will generally be your own account that's logged into a development tool like Visual Studio or the Azure CLI. Retrieve the details of your account using the
az ad user
command.az ad user show --id "<your-email-address>"
Copy the value of the
id
property out of the results and paste it somewhere for later use.Assign the custom role you created to your user account using the
az cosmosdb sql role assignment create
command and the IDs you copied previously.az cosmosdb sql role assignment create \ --account-name <cosmosdb-account-name> \ --resource-group <resource-group-name> \ --scope "/" \ --principal-id <your-user-id> \ --role-definition-id <your-custom-role-id>
Authenticate using DefaultAzureCredential
For local development, make sure you're authenticated with the same Azure AD account you assigned the role to. You can authenticate via popular development tools, such as the Azure CLI or Azure PowerShell. The development tools with which you can authenticate vary across languages.
Sign-in to Azure through the Azure CLI using the following command:
az login
You can authenticate to Cosmos DB for NoSQL using DefaultAzureCredential
by adding the Azure.Identity
NuGet package to your application. DefaultAzureCredential
will automatically discover and use the account you signed-in with in the previous step.
dotnet add package Azure.Identity
From the project directory, open the Program.cs
file. In your editor, add using directives for the Microsoft.Azure.Cosmos
and Azure.Identity
namespaces.
using Microsoft.Azure.Cosmos;
using Azure.Identity;
Define a new instance of the CosmosClient
class using the constructor, and Environment.GetEnvironmentVariable
to read the COSMOS_ENDPOINT
environment variable you created earlier.
// New instance of CosmosClient class
using CosmosClient client = new(
accountEndpoint: Environment.GetEnvironmentVariable("COSMOS_ENDPOINT"),
tokenCredential: new DefaultAzureCredential()
);
For more information on different ways to create a CosmosClient
instance, see Get started with Azure Cosmos DB for NoSQL and .NET.
Create and query the database
Next you'll create a database and container to store products, and perform queries to insert and read those items.
The Microsoft.Azure.Cosmos
client libraries enable you to perform data operations using Azure RBAC. However, to authenticate management operations such as creating and deleting databases you must use RBAC through one of the following options:
The Azure CLI approach is used in this example. Use the az cosmosdb sql database create
and az cosmosdb sql container create
commands to create a Cosmos DB NoSQL database and container.
# Create a SQL API database
az cosmosdb sql database create
--account-name msdocs-cosmos-nosql
--resource-group msdocs
--name cosmicworks
# Create a SQL API container
az cosmosdb sql container create
--account-name msdocs-cosmos-nosql
--resource-group msdocs
--database-name cosmicworks
--name products
After the resources have been created, use classes from the Microsoft.Azure.Cosmos
client libraries to connect to and query the database.
Get the database
Use the CosmosClient.GetDatabase
method will return a reference to the specified database.
// Database reference with creation if it does not already exist
Database database = client.GetDatabase(id: "cosmicworks");
Console.WriteLine($"New database:\t{database.Id}");
Get the container
The Database.GetContainer
will return a reference to the specified container.
// Container reference with creation if it does not alredy exist
Container container = database.GetContainer(id: "products");
Console.WriteLine($"New container:\t{container.Id}");
Create an item
The easiest way to create a new item in a container is to first build a C# class or record type with all of the members you want to serialize into JSON. In this example, the C# record has a unique identifier, a categoryId field for the partition key, and extra categoryName, name, quantity, and sale fields.
// C# record representing an item in the container
public record Product(
string id,
string categoryId,
string categoryName,
string name,
int quantity,
bool sale
);
Create an item in the container by calling Container.CreateItemAsync
.
// Create new object and upsert (create or replace) to container
Product newItem = new(
id: "70b63682-b93a-4c77-aad2-65501347265f",
categoryId: "61dba35b-4f02-45c5-b648-c6badc0cbd79",
categoryName: "gear-surf-surfboards",
name: "Yamba Surfboard",
quantity: 12,
sale: false
);
Product createdItem = await container.CreateItemAsync<Product>(
item: newItem,
partitionKey: new PartitionKey("61dba35b-4f02-45c5-b648-c6badc0cbd79")
);
Console.WriteLine($"Created item:\t{createdItem.id}\t[{createdItem.categoryName}]");
For more information on creating, upserting, or replacing items, see Create an item in Azure Cosmos DB for NoSQL using .NET.
Get an item
In Azure Cosmos DB, you can perform a point read operation by using both the unique identifier (id
) and partition key fields. In the SDK, call Container.ReadItemAsync<>
passing in both values to return a deserialized instance of your C# type.
// Point read item from container using the id and partitionKey
Product readItem = await container.ReadItemAsync<Product>(
id: "70b63682-b93a-4c77-aad2-65501347265f",
partitionKey: new PartitionKey("61dba35b-4f02-45c5-b648-c6badc0cbd79")
);
For more information about reading items and parsing the response, see Read an item in Azure Cosmos DB for NoSQL using .NET.
Query items
After you insert an item, you can run a query to get all items that match a specific filter. This example runs the SQL query: SELECT * FROM products p WHERE p.categoryId = "61dba35b-4f02-45c5-b648-c6badc0cbd79"
. This example uses the QueryDefinition type and a parameterized query expression for the partition key filter. Once the query is defined, call Container.GetItemQueryIterator<>
to get a result iterator that will manage the pages of results. Then, use a combination of while
and foreach
loops to retrieve pages of results and then iterate over the individual items.
// Create query using a SQL string and parameters
var query = new QueryDefinition(
query: "SELECT * FROM products p WHERE p.categoryId = @categoryId"
)
.WithParameter("@categoryId", "61dba35b-4f02-45c5-b648-c6badc0cbd79");
using FeedIterator<Product> feed = container.GetItemQueryIterator<Product>(
queryDefinition: query
);
while (feed.HasMoreResults)
{
FeedResponse<Product> response = await feed.ReadNextAsync();
foreach (Product item in response)
{
Console.WriteLine($"Found item:\t{item.name}");
}
}
Run the code
This app creates an API for NoSQL database and container. The example then creates an item and then reads the exact same item back. Finally, the example issues a query that should only return that single item. With each step, the example outputs metadata to the console about the steps it has performed.
To run the app, use a terminal to navigate to the application directory and run the application.
dotnet run
The output of the app should be similar to this example:
New database: adventureworks
New container: products
Created item: 68719518391 [gear-surf-surfboards]
Clean up resources
When you no longer need the API for NoSQL account, you can delete the corresponding resource group.
Next steps
In this quickstart, you learned how to create an Azure Cosmos DB for NoSQL account, create a database, and create a container using the .NET SDK. You can now dive deeper into a tutorial where you manage your Azure Cosmos DB for NoSQL resources and data using a .NET console application.
Feedback
Submit and view feedback for