Note
Access to this page requires authorization. You can try signing in or changing directories.
Access to this page requires authorization. You can try changing directories.
APPLIES TO:  Azure Data Factory
Azure Synapse Analytics
Azure Data Factory
Azure Synapse Analytics
Tip
Try out Data Factory in Microsoft Fabric, an all-in-one analytics solution for enterprises. Microsoft Fabric covers everything from data movement to data science, real-time analytics, business intelligence, and reporting. Learn how to start a new trial for free!
This article shows you how to join your existing Azure-SQL Server Integration Services (SSIS) integration runtime (IR) to a virtual network via portal.
Before joining your Azure-SSIS IR to a virtual network, you need to properly configure the virtual network first, see the Configure a virtual network to inject Azure-SSIS IR article. Next, follow the steps in the section below that applies to the type of your virtual network (Azure Resource Manager/classic). Finally, follow the steps in the last section to join your Azure-SSIS IR to the virtual network.
Configure an Azure Resource Manager virtual network
Use Azure portal to configure an Azure Resource Manager virtual network before you try to join your Azure-SSIS IR to it.
Start Microsoft Edge or Google Chrome. Currently, only these web browsers support ADF UI.
Sign in to the Azure portal.
Select More services. Filter for and select Virtual networks.
Filter for and select your virtual network in the list.
On the left-hand-side menu, select Subnets:
Make sure that there's a proper subnet for your Azure-SSIS IR to join, see the Select a subnet section.
If you use express virtual network injection method, make sure that the selected subnet is delegated to Azure Batch, see the Delegate a subnet to Azure Batch section.
Make sure that Microsoft.Batch is a registered resource provider in Azure subscription that has the virtual network for your Azure-SSIS IR to join. For detailed instructions, see the Register Azure Batch as a resource provider section.
Configure a classic virtual network
Use Azure portal to configure a classic virtual network before you try to join your Azure-SSIS IR to it.
Start Microsoft Edge or Google Chrome. Currently, only these web browsers support ADF UI.
Sign in to the Azure portal.
Select More services. Filter for and select Virtual networks (classic).
Filter for and select your virtual network in the list.
On the Virtual network (classic) page, select Properties.
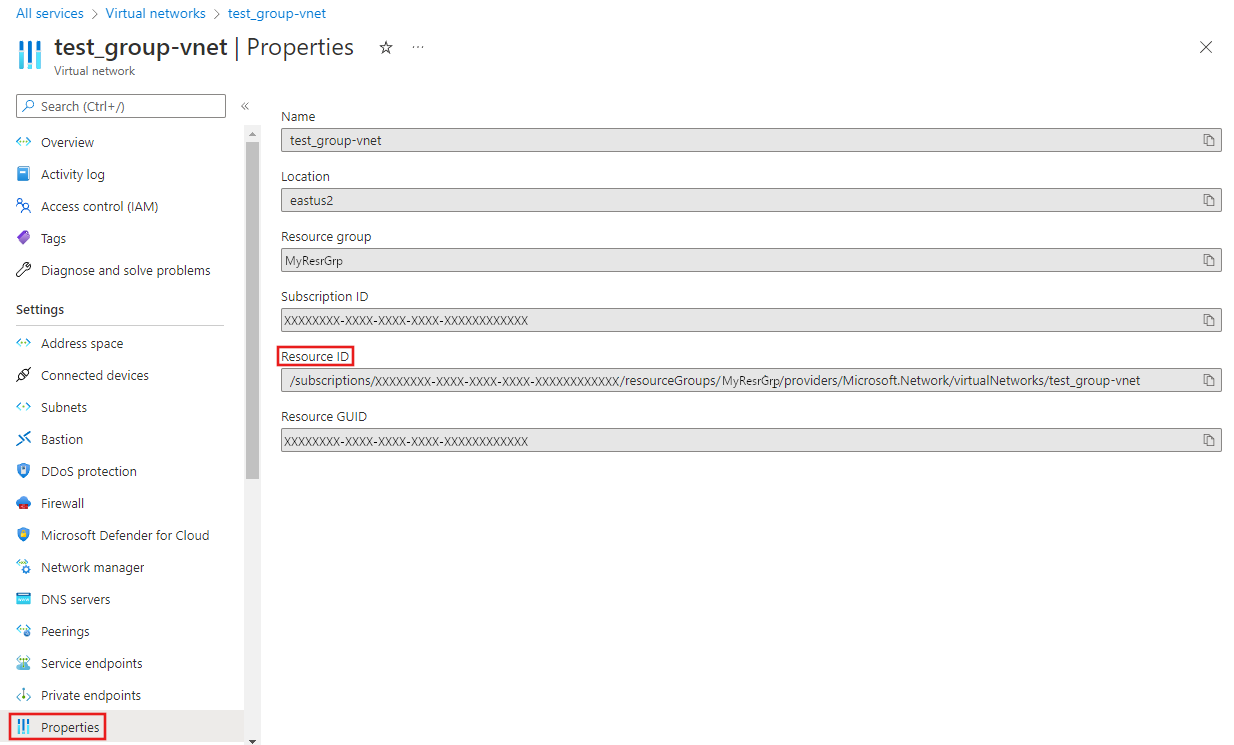
Select the copy button for RESOURCE ID to copy the resource ID for the classic virtual network to the clipboard. Save the ID from the clipboard in OneNote or a file.
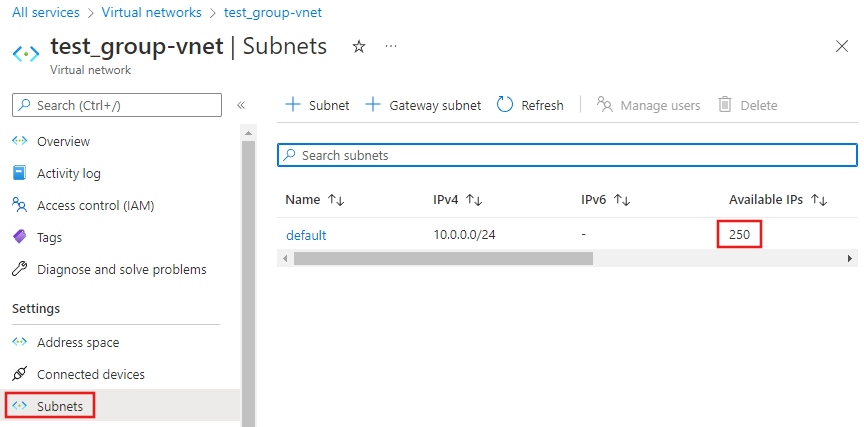
On the left-hand-side menu, select Subnets. Make sure that the number of available IP addresses in your selected subnet is greater than twice the number of your Azure-SSIS IR nodes.
Join MicrosoftAzureBatch to the Classic Virtual Machine Contributor role for the virtual network.
On the left-hand-side menu, select Access control (IAM), and select the Role assignments tab.
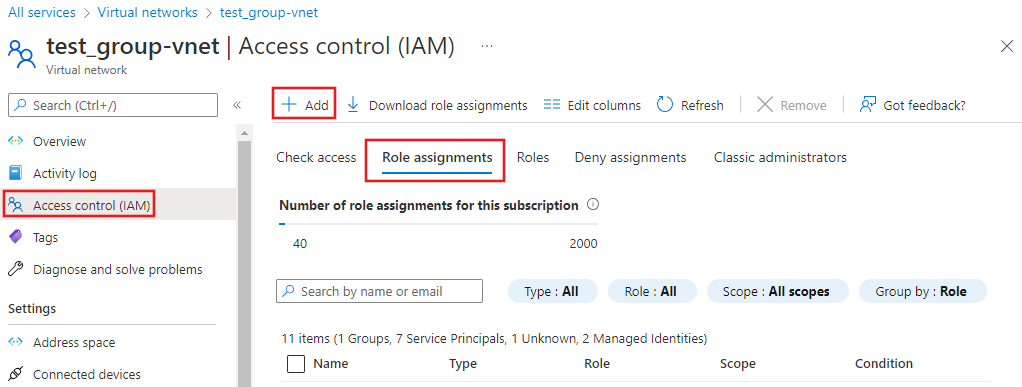
Select Add, and then Add role assignment from the dropdown that appears.
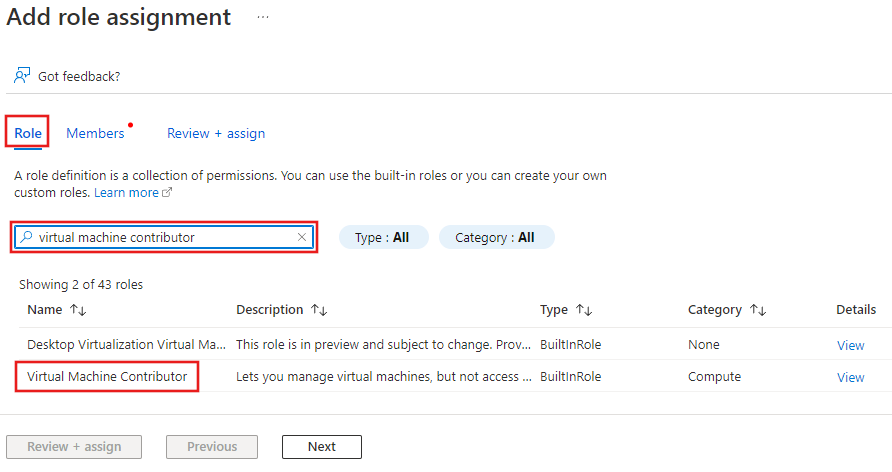
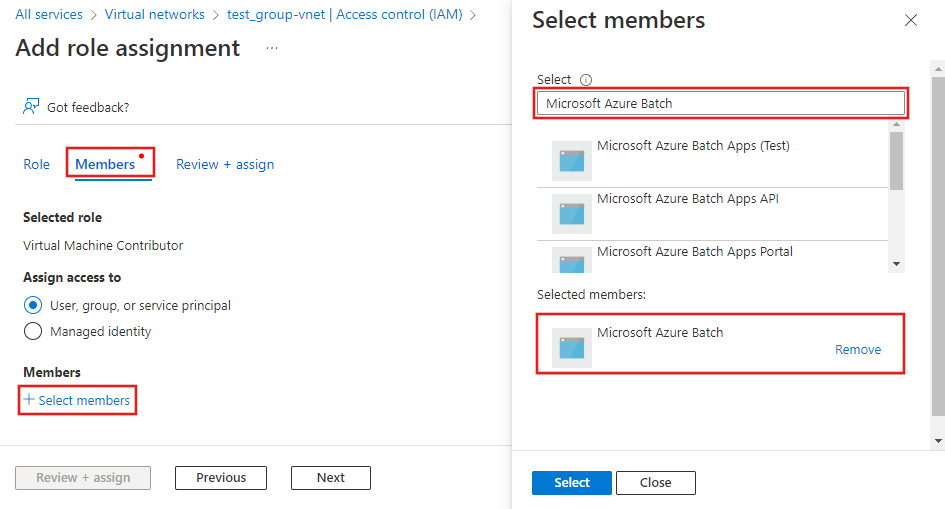
On the Add role assignment page, enter Microsoft Azure Batch in the search box, select the role, and select Next.
On the Members page, under Members select + Select members. Then on the Select Members pane, search for Microsoft Azure Batch, and select it from the list to add it, and click Select.
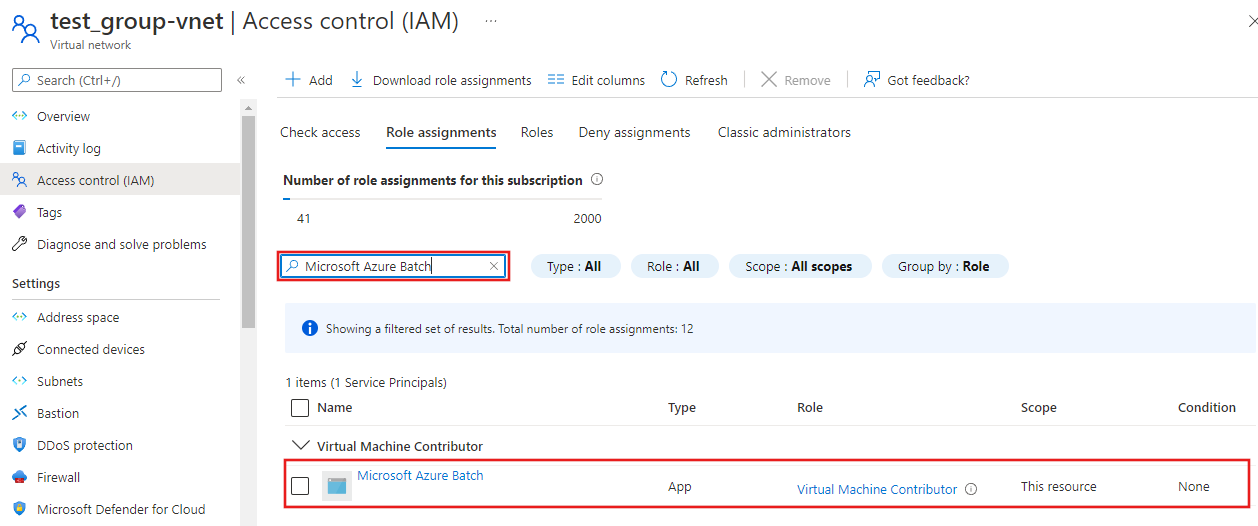
On the Role Assignments page, Search for Microsoft Azure Batch if necessary and Confirm that you see it in the list in the Virtual Machine Contributors role.
Make sure that Microsoft.Batch is a registered resource provider in the Azure subscription that has the virtual network for your Azure-SSIS IR to join. For detailed instructions, see the Register Azure Batch as a resource provider section.
Join Azure-SSIS IR to the virtual network
After you've configured an Azure Resource Manager/classic virtual network, you can join your Azure-SSIS IR to the virtual network:
Start Microsoft Edge or Google Chrome. Currently, only these web browsers support ADF UI.
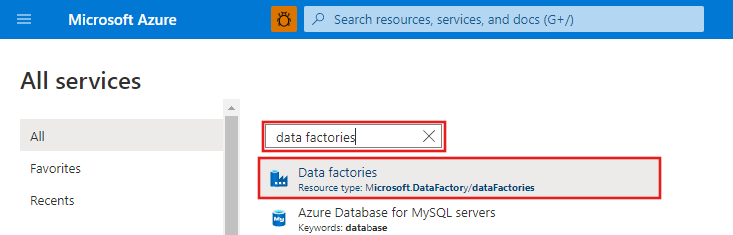
In the Azure portal, under the Azure Services section, select More Services to see a list of all Azure services. In the Filter services search box, type Data Factories, and then choose Data Factories in the list of services that appear.
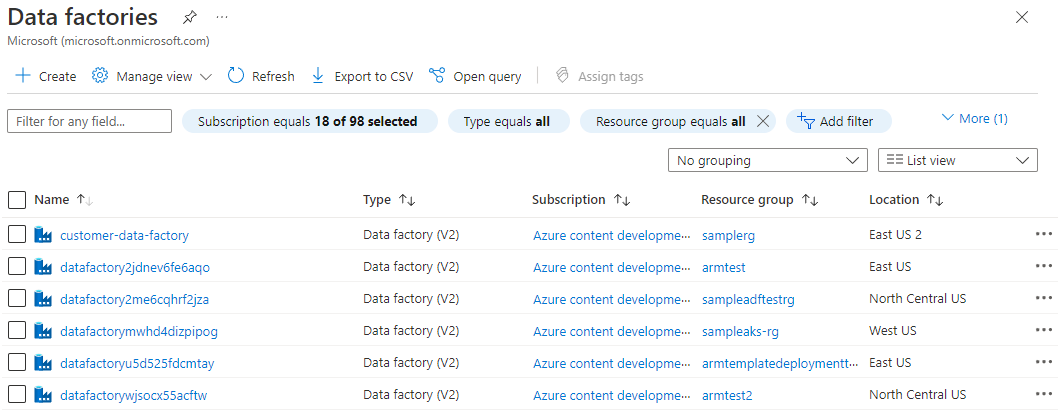
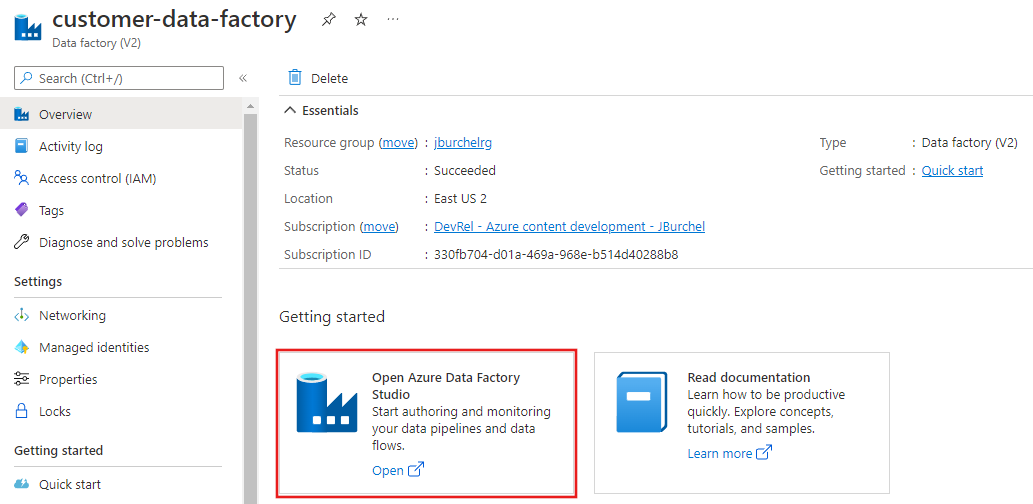
Select your data factory with the Azure-SSIS IR in the list. You see the home page for your data factory. Select the Open Azure Data Factory Studio tile. Azure Data Factory Studio will open on a separate tab.
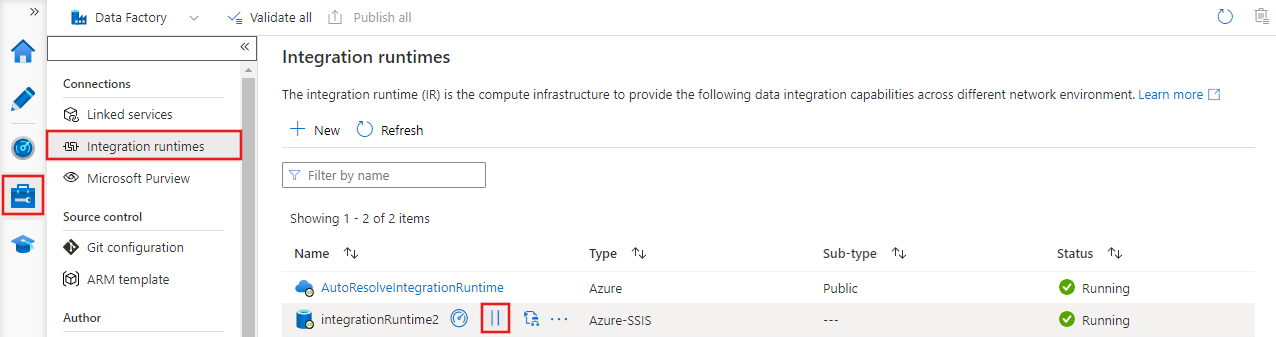
In Azure Data Factory Studio, select the Manage tab on the far left, and then switch to the Integration Runtimes tab. If your Azure-SSIS IR is running, hover over it in the list to find and select the Stop button, as shown below. You can't edit your Azure-SSIS IR until you stop it.
After your Azure-SSIS IR is stopped, select it in the Integration Runtimes list to edit it.
On the Edit integration runtime pane, advance through the General settings and Deployment settings pages by selecting the Continue button.
On the Advanced settings page, complete the following steps.
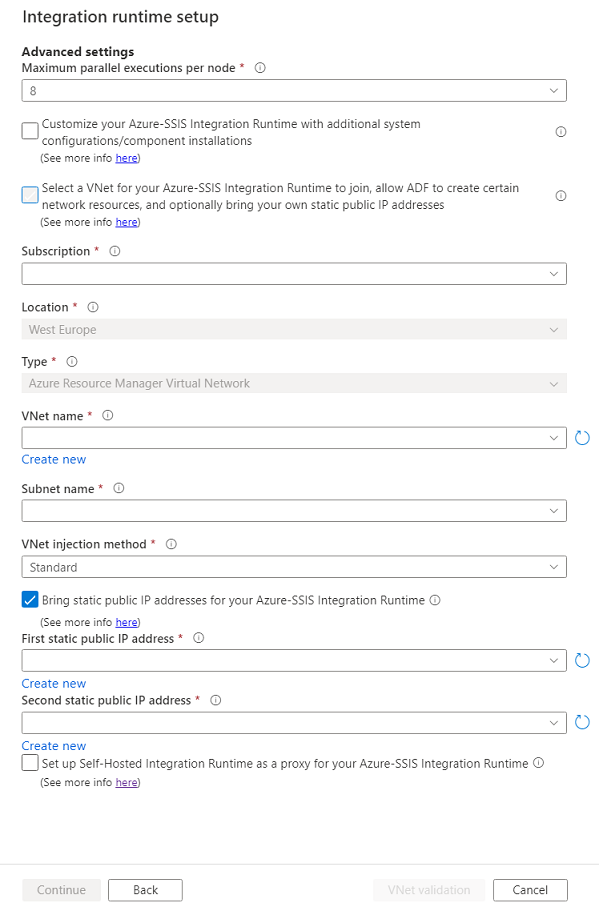
Select the Select a VNet for your Azure-SSIS Integration Runtime to join, allow ADF to create certain network resources, and optionally bring your own static public IP addresses check box.
For Subscription, select the Azure subscription that has your virtual network.
For Location, the same location of your integration runtime is selected.
For Type, select the type of your virtual network: Azure Resource Manager Virtual Network/classic virtual network. We recommend that you select Azure Resource Manager Virtual Network, because classic virtual network will be deprecated soon.
For VNet Name, select the name of your virtual network. It should be the same one used to configure a virtual network service endpoint/private endpoint for your Azure SQL Database server that hosts SSISDB. Or it should be the same one joined by your Azure SQL Managed Instance that hosts SSISDB. Or it should be the same one connected to your on-premises network. Otherwise, it can be any virtual network to bring your own static public IP addresses for Azure-SSIS IR.
For Subnet Name, select the name of subnet for your virtual network. It should be the same one used to configure a virtual network service endpoint for your Azure SQL Database server that hosts SSISDB. Or it should be a different subnet from the one joined by your Azure SQL Managed Instance that hosts SSISDB. Otherwise, it can be any subnet to bring your own static public IP addresses for Azure-SSIS IR.
For VNet injection method, select the method of your virtual network injection: Express/Standard.
To compare these methods, see the Compare the standard and express virtual network injection methods article.
If you select Express, see the Express virtual network injection method article.
If you select Standard, see the Standard virtual network injection method article. With this method, you can also:
Select the Bring static public IP addresses for your Azure-SSIS Integration Runtime check box to choose whether you want to bring your own static public IP addresses for Azure-SSIS IR, so you can allow them on the firewall of your data stores.
If you select the check box, complete the following steps.
For First static public IP address, select the first static public IP address that meets the requirements for your Azure-SSIS IR. If you don't have any, click the Create new link to create static public IP addresses on Azure portal and then click the refresh button here, so you can select them.
For Second static public IP address, select the second static public IP address that meets the requirements for your Azure-SSIS IR. If you don't have any, click the Create new link to create static public IP addresses on Azure portal and then click the refresh button here, so you can select them.
Select VNet Validation. If the validation is successful, select Continue.
On the Summary page, review all settings for your Azure-SSIS IR and then select Update.
Start your Azure-SSIS IR by selecting the Start button in Actions column for your Azure-SSIS IR. It takes about 5/20-30 minutes to start your Azure-SSIS IR that joins a virtual network with express/standard injection method, respectively.
Related content
- Configure a virtual network to inject Azure-SSIS IR
- Express virtual network injection method
- Standard virtual network injection method
- Join Azure-SSIS IR to a virtual network via Azure PowerShell
For more information about Azure-SSIS IR, see the following articles:
- Azure-SSIS IR. This article provides general conceptual information about IRs, including Azure-SSIS IR.
- Tutorial: Deploy SSIS packages to Azure. This tutorial provides step-by-step instructions to create your Azure-SSIS IR. It uses Azure SQL Database server to host SSISDB.
- Create an Azure-SSIS IR. This article expands on the tutorial. It provides instructions on using Azure SQL Database server configured with a virtual network service endpoint/IP firewall rule/private endpoint or Azure SQL Managed Instance that joins a virtual network to host SSISDB. It shows you how to join your Azure-SSIS IR to a virtual network.
- Monitor an Azure-SSIS IR. This article shows you how to retrieve and understand information about your Azure-SSIS IR.
- Manage an Azure-SSIS IR. This article shows you how to stop, start, or delete your Azure-SSIS IR. It also shows you how to scale out your Azure-SSIS IR by adding more nodes.