Manage Azure Data Lake Analytics using the Azure CLI
Important
Azure Data Lake Analytics retired on 29 February 2024. Learn more with this announcement.
For data analytics, your organization can use Azure Synapse Analytics or Microsoft Fabric.
Learn how to manage Azure Data Lake Analytics accounts, data sources, users, and jobs using the Azure CLI. To see management topics using other tools, select the tab select above.
Prerequisites
Before you begin this tutorial, you must have the following resources:
An Azure subscription. See Get Azure free trial.
Azure CLI. See Install and configure Azure CLI.
- Download and install the pre-release Azure CLI tools in order to complete this demo.
Authenticate by using the
az logincommand and select the subscription that you want to use. For more information on authenticating using a work or school account, see Connect to an Azure subscription from the Azure CLI.az login az account set --subscription <subscription id>You can now access the Data Lake Analytics and Data Lake Store commands. Run the following command to list the Data Lake Store and Data Lake Analytics commands:
az dls -h
az dla -h
Manage accounts
Before running any Data Lake Analytics jobs, you must have a Data Lake Analytics account. Unlike Azure HDInsight, you don't pay for an Analytics account when it isn't running a job. You only pay for the time when it's running a job. For more information, see Azure Data Lake Analytics Overview.
Create accounts
Run the following command to create a Data Lake account,
az dla account create --account "<Data Lake Analytics account name>" --location "<Location Name>" --resource-group "<Resource Group Name>" --default-data-lake-store "<Data Lake Store account name>"
Update accounts
The following command updates the properties of an existing Data Lake Analytics Account
az dla account update --account "<Data Lake Analytics Account Name>" --firewall-state "Enabled" --query-store-retention 7
List accounts
List Data Lake Analytics accounts within a specific resource group
az dla account list "<Resource group name>"
Get details of an account
az dla account show --account "<Data Lake Analytics account name>" --resource-group "<Resource group name>"
Delete an account
az dla account delete --account "<Data Lake Analytics account name>" --resource-group "<Resource group name>"
Manage data sources
Data Lake Analytics currently supports the following two data sources:
When you create an Analytics account, you must designate an Azure Data Lake Storage account to be the default storage account. The default Data Lake storage account is used to store job metadata and job audit logs. After you've created an Analytics account, you can add other Data Lake Storage accounts and/or Azure Storage account.
Find the default Data Lake Store account
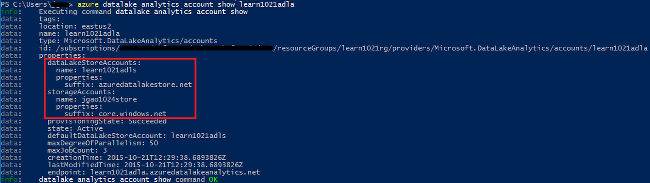
You can view the default Data Lake Store account used by running the az dla account show command. Default account name is listed under the defaultDataLakeStoreAccount property.
az dla account show --account "<Data Lake Analytics account name>"
Add other Blob storage accounts
az dla account blob-storage add --access-key "<Azure Storage Account Key>" --account "<Data Lake Analytics account name>" --storage-account-name "<Storage account name>"
Note
Only Blob storage short names are supported. Don't use FQDN, for example "myblob.blob.core.windows.net".
Add other Data Lake Store accounts
The following command updates the specified Data Lake Analytics account with another Data Lake Store account:
az dla account data-lake-store add --account "<Data Lake Analytics account name>" --data-lake-store-account-name "<Data Lake Store account name>"
Update existing data source
To update an existing Blob storage account key:
az dla account blob-storage update --access-key "<New Blob Storage Account Key>" --account "<Data Lake Analytics account name>" --storage-account-name "<Data Lake Store account name>"
List data sources
To list the Data Lake Store accounts:
az dla account data-lake-store list --account "<Data Lake Analytics account name>"
To list the Blob storage account:
az dla account blob-storage list --account "<Data Lake Analytics account name>"
Delete data sources
To delete a Data Lake Store account:
az dla account data-lake-store delete --account "<Data Lake Analytics account name>" --data-lake-store-account-name "<Azure Data Lake Store account name>"
To delete a Blob storage account:
az dla account blob-storage delete --account "<Data Lake Analytics account name>" --storage-account-name "<Data Lake Store account name>"
Manage jobs
You must have a Data Lake Analytics account before you can create a job. For more information, see Manage Data Lake Analytics accounts.
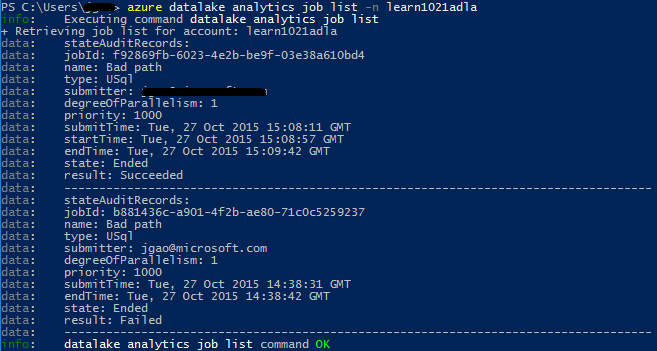
List jobs
az dla job list --account "<Data Lake Analytics account name>"
Get job details
az dla job show --account "<Data Lake Analytics account name>" --job-identity "<Job Id>"
Submit jobs
Note
The default priority of a job is 1000, and the default degree of parallelism for a job is 1.
az dla job submit --account "<Data Lake Analytics account name>" --job-name "<Name of your job>" --script "<Script to submit>"
Cancel jobs
Use the list command to find the job ID, and then use cancel to cancel the job.
az dla job cancel --account "<Data Lake Analytics account name>" --job-identity "<Job Id>"
Pipelines and recurrences
Get information about pipelines and recurrences
Use the az dla job pipeline commands to see the pipeline information previously submitted jobs.
az dla job pipeline list --account "<Data Lake Analytics Account Name>"

az dla job pipeline show --account "<Data Lake Analytics Account Name>" --pipeline-identity "<Pipeline ID>"
Use the az dla job recurrence commands to see the recurrence information for previously submitted jobs.
az dla job recurrence list --account "<Data Lake Analytics Account Name>"

az dla job recurrence show --account "<Data Lake Analytics Account Name>" --recurrence-identity "<Recurrence ID>"