Note
Access to this page requires authorization. You can try signing in or changing directories.
Access to this page requires authorization. You can try changing directories.
APPLIES TO:  Azure Stack Edge Pro - GPUAzure Stack Edge Pro 2Azure Stack Edge Pro RAzure Stack Edge Mini R
You can create and manage virtual machines (VMs) on an Azure Stack Edge Pro GPU device by using the Azure portal, templates, and Azure PowerShell cmdlets, and via the Azure CLI or Python scripts. This article describes how to create and manage a VM on your Azure Stack Edge Pro GPU device by using the Azure portal.
Important
You'll need to enable multifactor authentication for the user who manages the VMs and images that are deployed on your device from the cloud. The cloud operations fail if the user doesn't have multifactor authentication enabled. For steps to enable multifactor authentication, see Enable Microsoft Entra multifactor authentication.
VM deployment workflow
The high-level summary of the deployment workflow is as follows:
Enable a network interface for compute on your Azure Stack Edge device. This step creates a virtual switch on the specified network interface.
Enable cloud management of VMs from the Azure portal.
Upload a VHD to an Azure Storage account by using Azure Storage Explorer.
Use the uploaded VHD to download the VHD onto the device, and create a VM image from the VHD.
Use the resources created in the previous steps:
- VM image that you created.
- Virtual switch associated with the network interface on which you enabled compute.
- Subnet associated with the virtual switch.
And create or specify the following resources inline:
- VM name, choose a supported VM size, sign-in credentials for the VM.
- Create new data disks or attach existing data disks.
- Configure static or dynamic IP for the VM. If you're providing a static IP, choose from a free IP in the subnet range of the network interface enabled for compute.
Use the preceding resources to create a VM.
Prerequisites
Before you begin to create and manage VMs on your device via the Azure portal, make sure that:
You complete the network settings on your Azure Stack Edge Pro GPU device as described in Step 1: Configure an Azure Stack Edge Pro GPU device.
You enable a network interface for compute. This network interface IP is used to create a virtual switch for the VM deployment. In the local UI of your device, go to Compute. Select the network interface that you use to create a virtual switch.
Important
You can configure only one port for compute.
Enable compute on the network interface. Azure Stack Edge Pro GPU creates and manages a virtual switch corresponding to that network interface.
You have access to a Windows or Linux VHD that you use to create the VM image for the VM you intend to create.
Deploy a VM
Follow these steps to create a VM on your Azure Stack Edge Pro GPU device.
Add a VM image
Upload a VHD to an Azure Storage account. Follow the steps in Use Storage Explorer for upload.
For information about preparing the VHD, see Prepare a generalized image from a Windows VHD.
In the Azure portal, go to the Azure Stack Edge resource for your device. Then go to Edge services > Virtual machines.
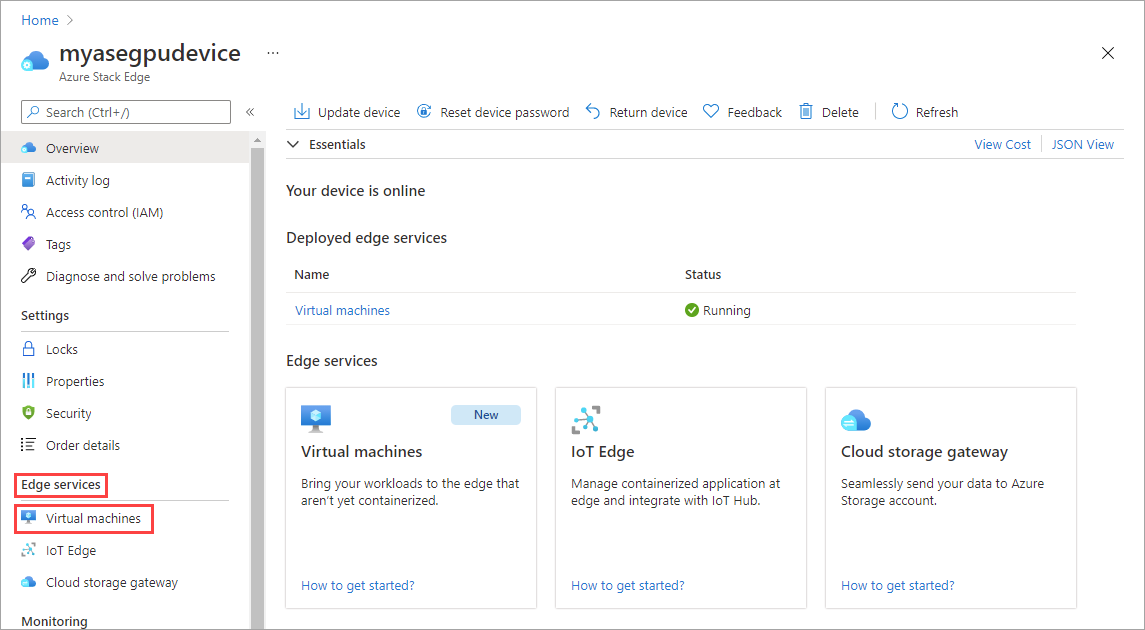
On the Overview page, select Enable to enable virtual machine cloud management.

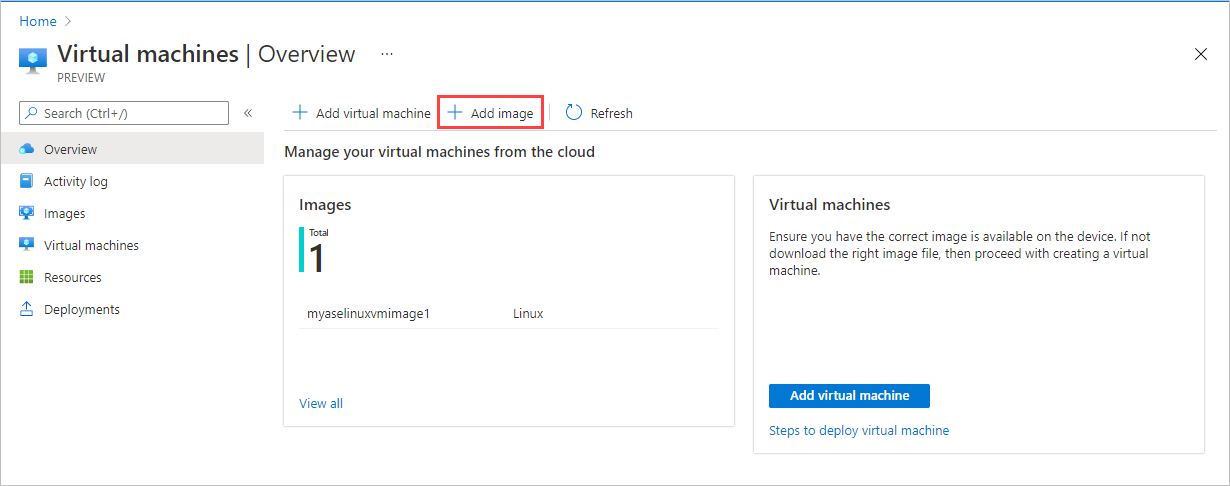
The first step is to add a VM image. You already uploaded a VHD into the storage account in the earlier step. Use this VHD to create a VM image.
Select + Add image to download the VHD from the storage account and add it to the device. The download process takes several minutes depending on the size of the VHD and the internet bandwidth available for the download.
On the Add image pane, make the following field entries. Then select Add.
Field Description Download from storage blob Browse to the location of the storage blob in the storage account where you uploaded the VHD. Download to Automatically set to the current device where you're deploying the VM. Edge resource group Select the resource group to add the image to. Save image as The name for the VM image that you're creating from the VHD you uploaded to the storage account. OS type Choose from Windows or Linux as the operating system of the VHD you use to create the VM image. VM generation Choose Gen 1 or Gen 2 as the generation of the image you use to create the VM. For Gen 2 VMs, secure boot is enabled by default. 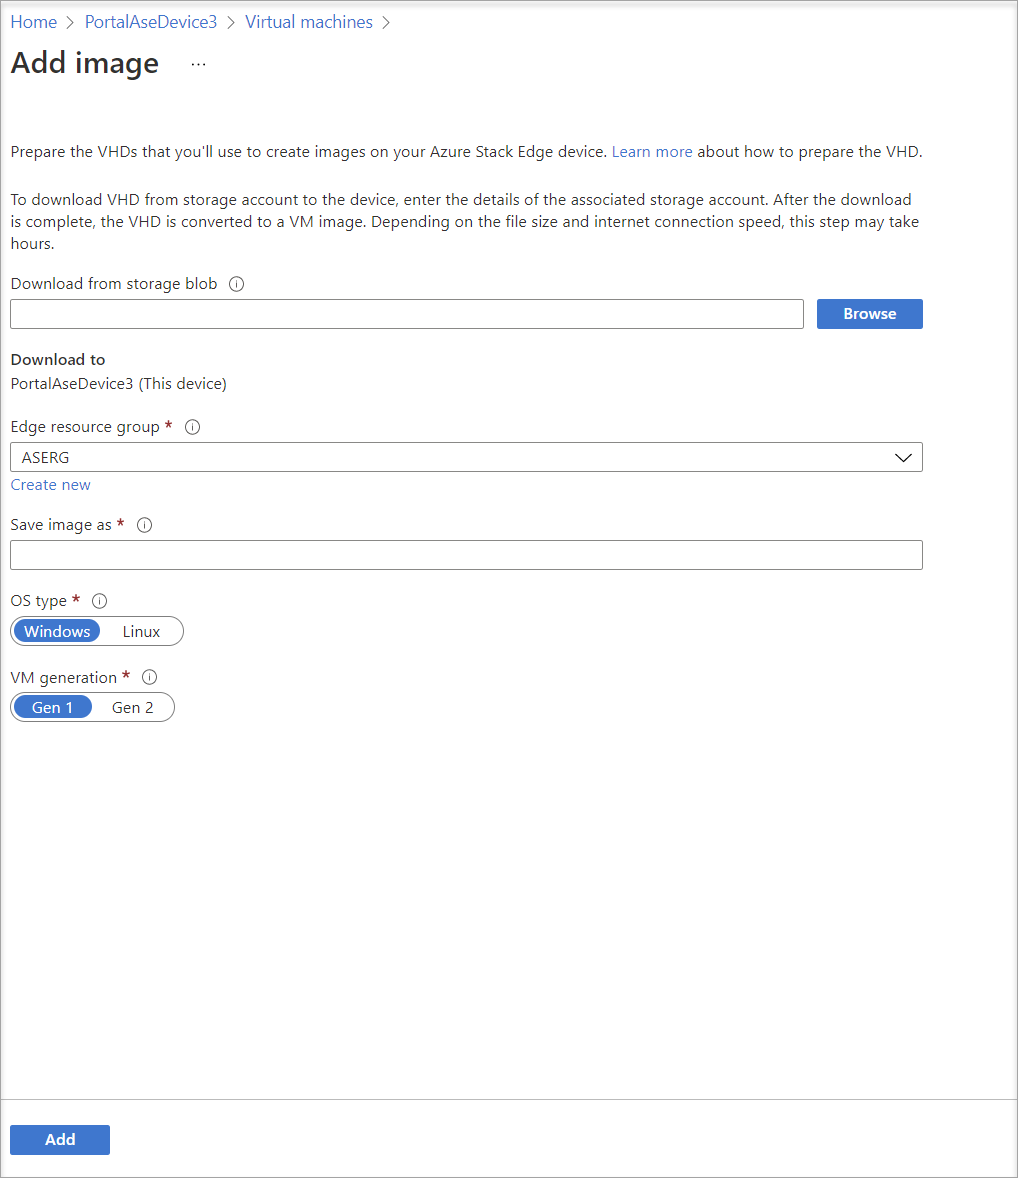
The VHD is downloaded, and the VM image is created. Image creation takes several minutes to complete. You see a notification for the successful completion of the VM image.
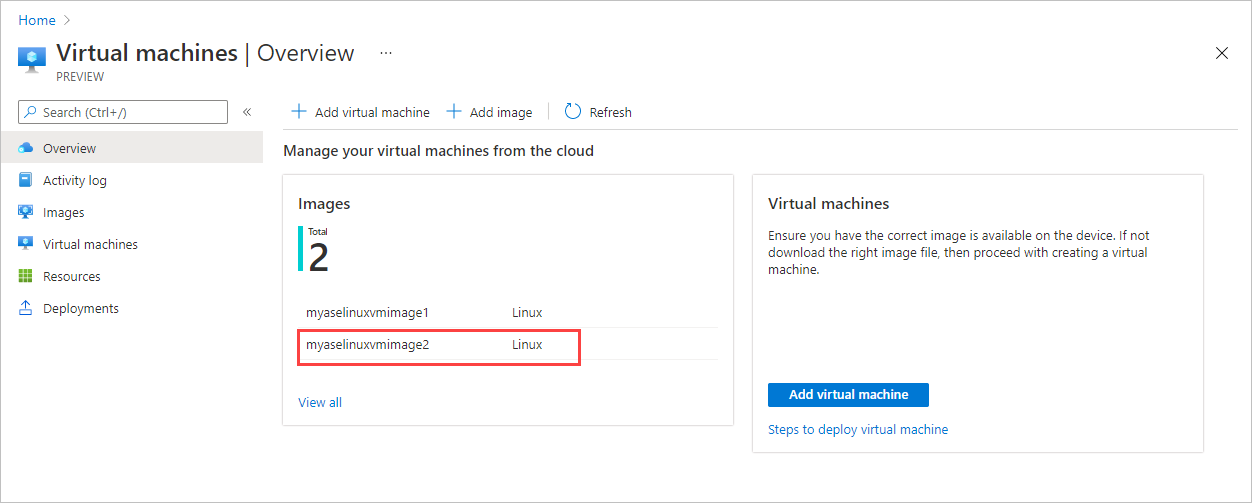
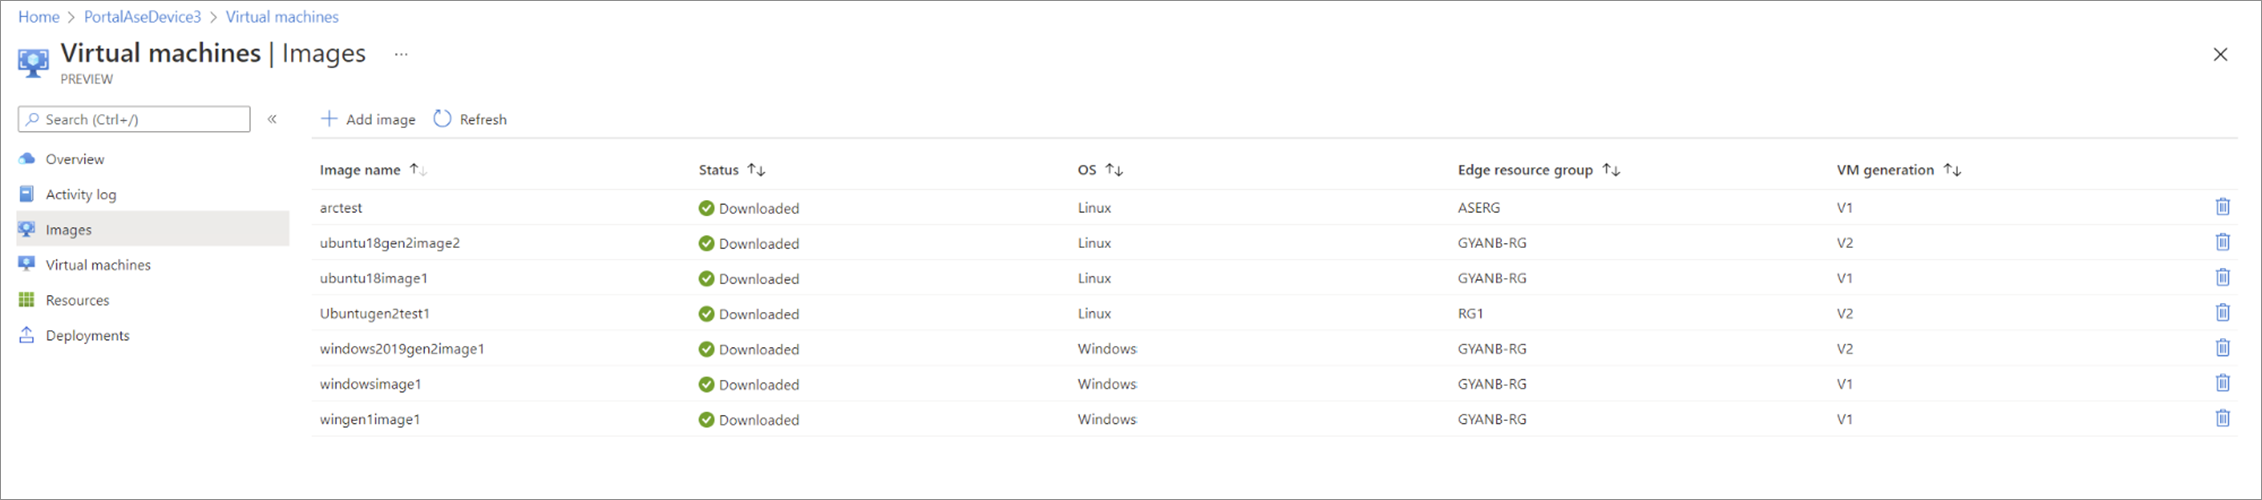
After the VM image is successfully created, it's added to the list of images on the Images pane.
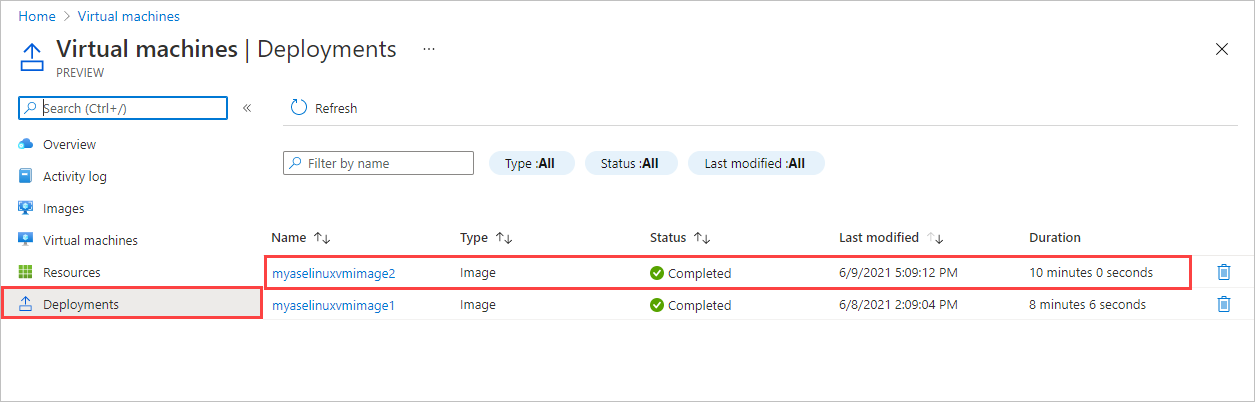
The Deployments pane updates to indicate the status of the deployment.
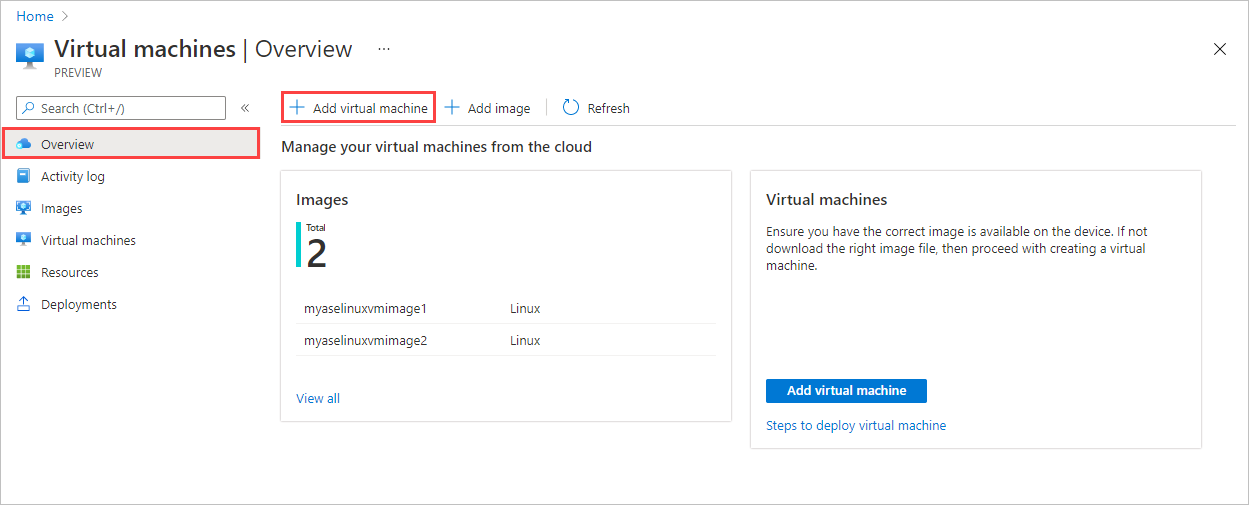
The newly added image is also displayed on the Overview page.

Add a VM
Follow these steps to create a VM after you've created a VM image.
On the Overview page for Virtual machines, select + Add virtual machine.
On the Basics tab, input the following parameters.
Parameter Description Virtual machine name Enter a name for the new virtual machine. Edge resource group Create a new resource group for all the resources associated with the VM. Image Select from the VM images available on the device. Size Choose from the Supported VM sizes.
For a GPU VM, select a VM size from NCasT4-v3-series.Username Use the default username azureuser for the admin to sign in to the VM. Authentication type Choose from an SSH public key or a user-defined password. SSH public key Displayed when you select the SSH public key authentication type. Paste in the SSH public key. Password Displayed when you select the Password authentication type. Enter a password to sign in to the VM. The password must be at least 12 characters long and meet the defined complexity requirements. Confirm password Enter the password again. 
Select Next: Disks.
On the Disks tab, attach disks to your VM.
You can choose to Create and attach a new disk or Attach an existing disk.
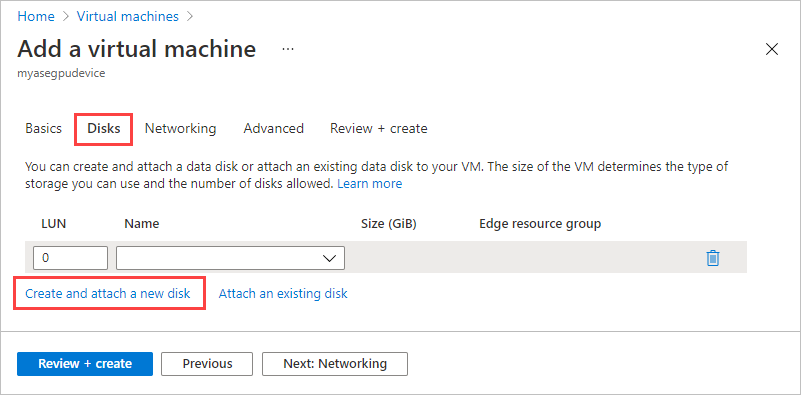
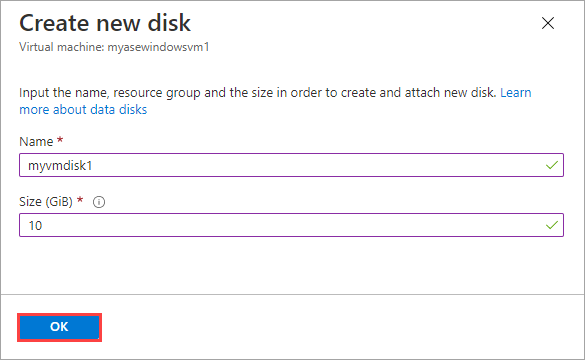
Select Create and attach a new disk. On the Create new disk pane, provide a name for the disk and the size in GiB.
Repeat the preceding process to add more disks. After the disks are created, they show up on the Disks tab. Select Next: Networking.
On the Networking tab, configure the network connectivity for your VM.
Parameter Description Virtual network From the dropdown list, select the virtual switch created on your Azure Stack Edge device when you enabled compute on the network interface. Subnet This field is automatically populated with the subnet associated with the network interface on which you enabled compute. IP address Provide a static or a dynamic IP for your VM. The static IP should be an available, free IP from the specified subnet range. 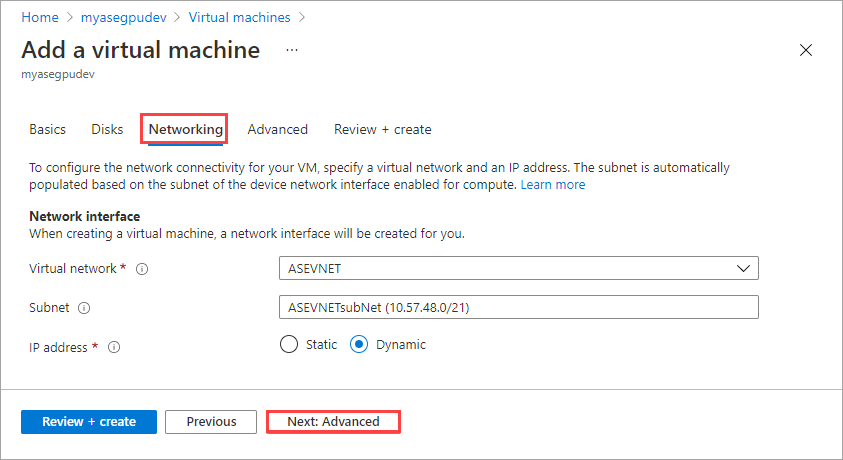
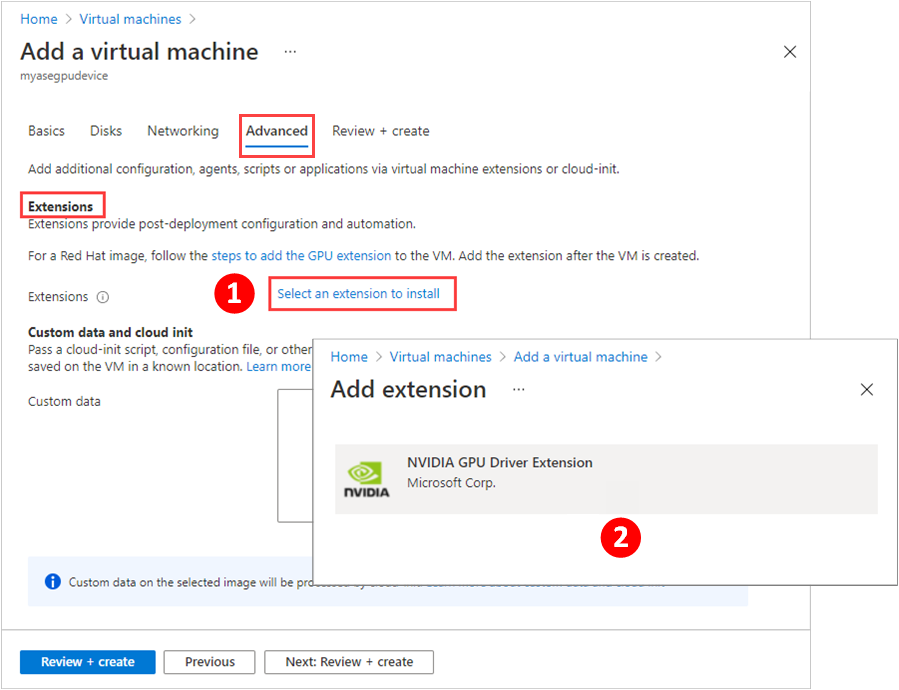
Select Next: Advanced. On the Advanced tab, you can select an extension to install during VM deployment, and you can specify a
cloud-initscript to customize your VM.If you want to install an extension on your VM when you create it, choose Select an extension to install. Then select the extension on the Add extension screen.
For detailed steps to install a GPU extension during VM deployment, see Deploy GPU VMs.
If you want to use the
cloud-initutility to customize the new VM on its first boot, on the Advanced tab, paste yourcloud-initscript into the Custom data box under Custom data and cloud init.For more information about using
cloud-init, see Cloud-init overview.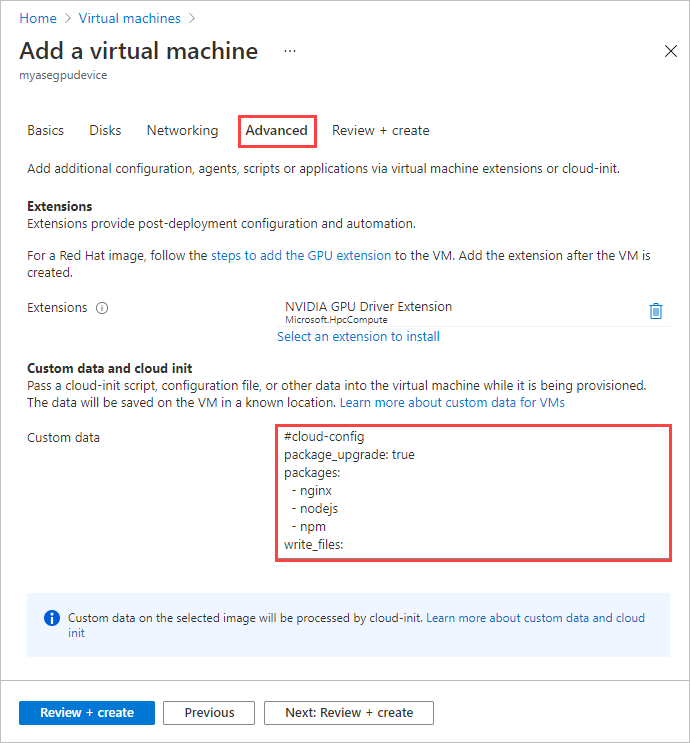
Select Next: Review + Create.
On the Review + Create tab, review the specifications for the VM. Then select Create.
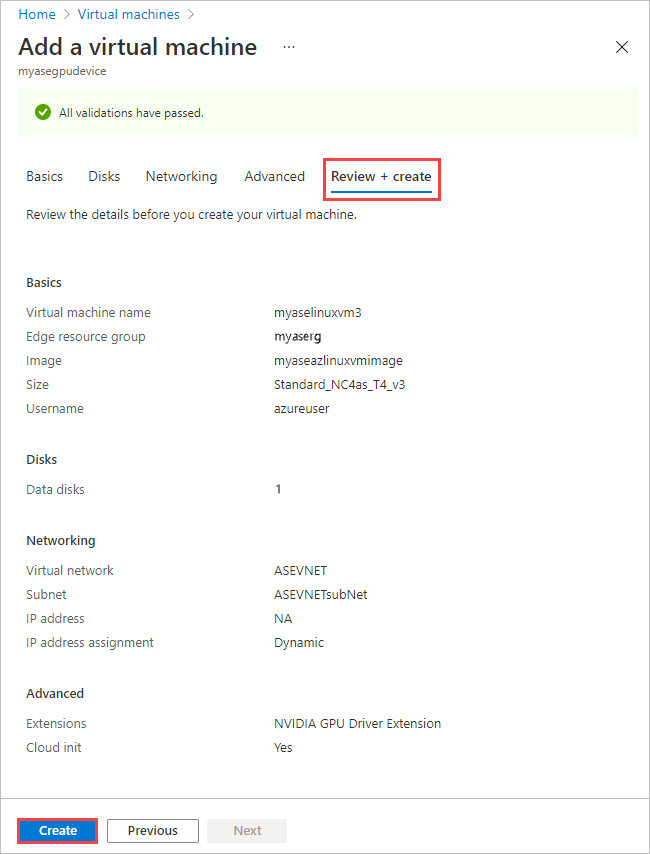
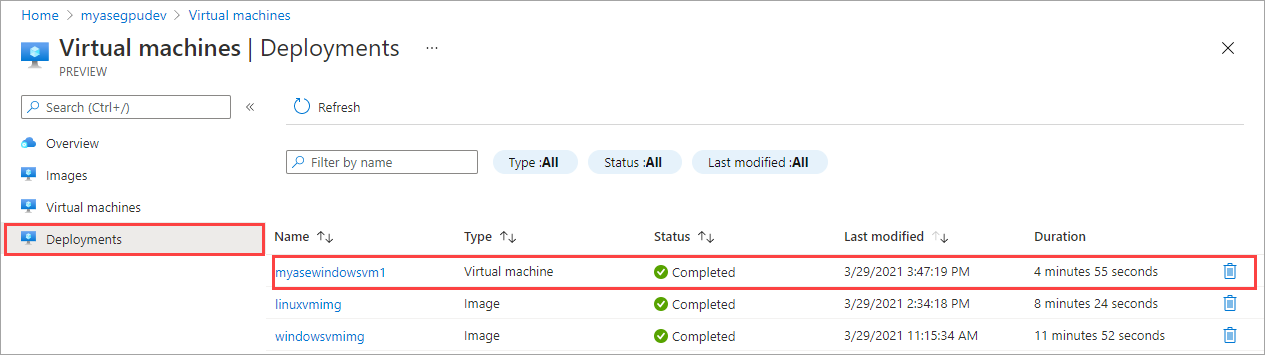
The VM creation starts and can take up to 20 minutes. You can go to Deployments to monitor the VM creation.
After the VM is successfully created, you'll see your new VM on the Overview pane.
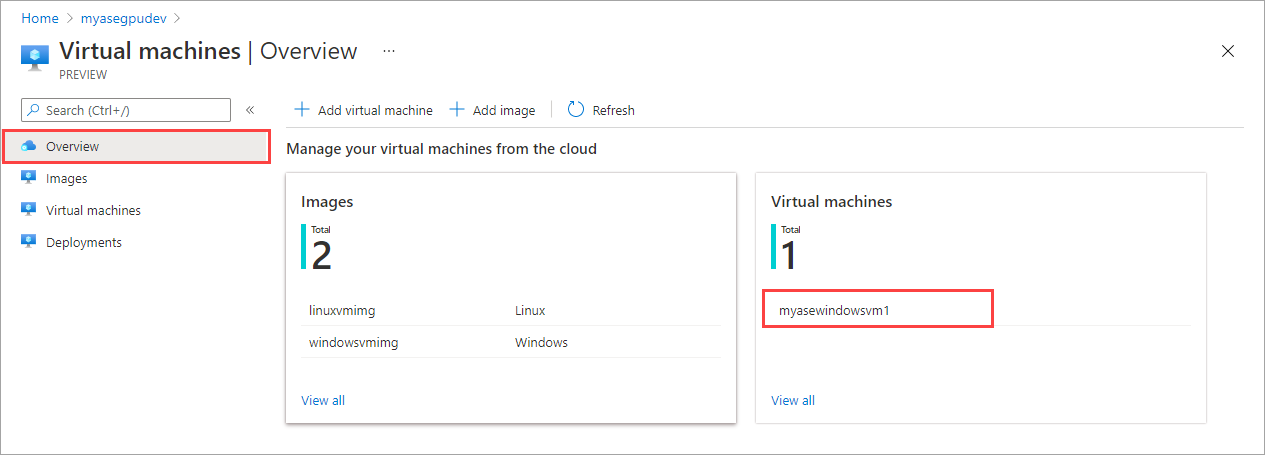
Select the newly created VM to go to Virtual machines.
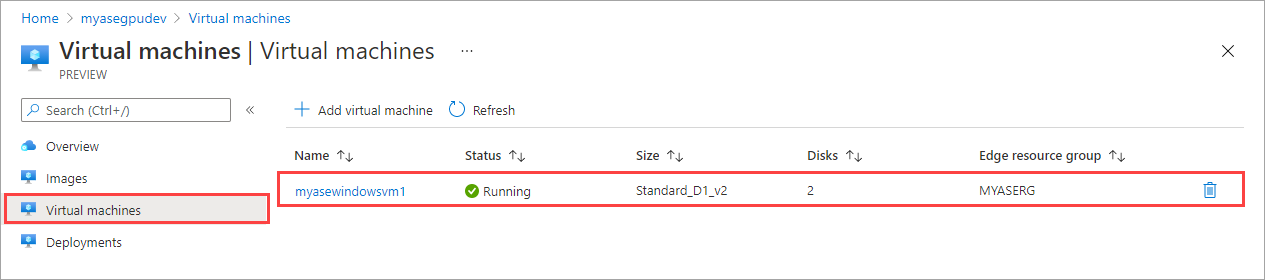
Select the VM to see the details.
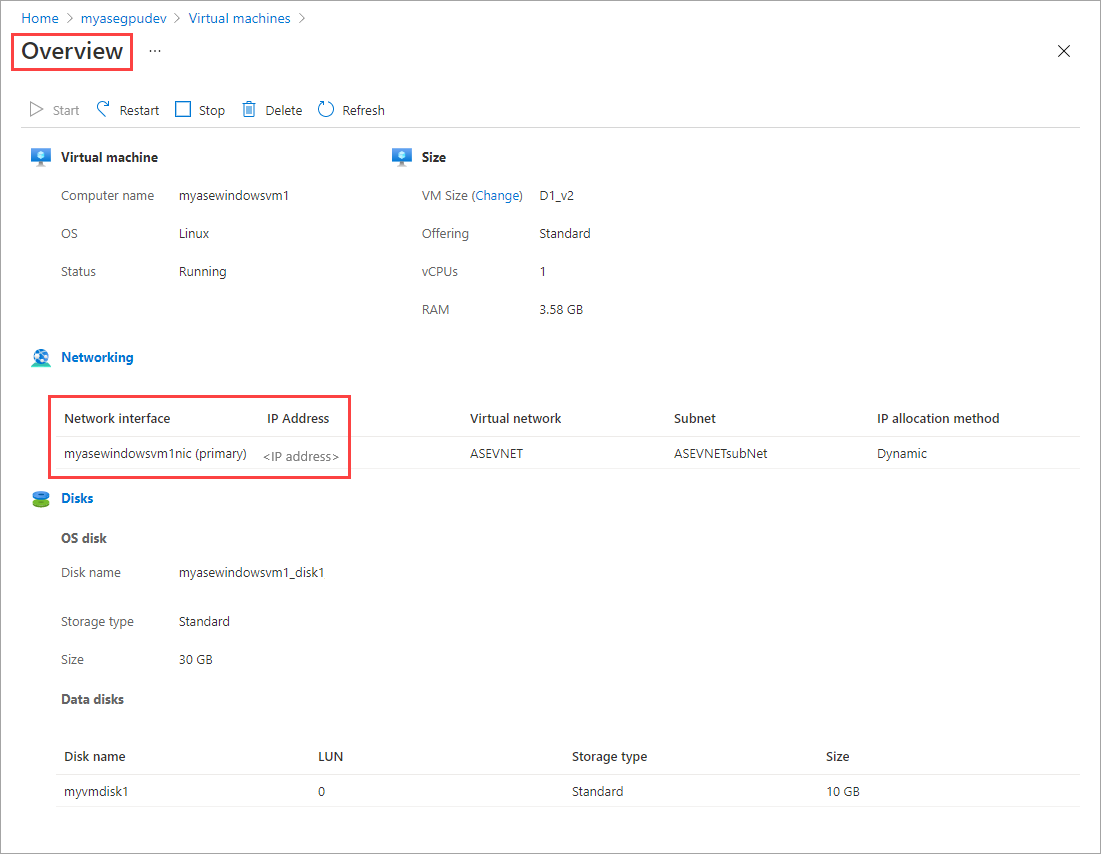
Use the IP address for the network interface to connect to the VM.
Connect to a VM
Depending on whether you created a Linux or Windows VM, the steps to connect can be different. You can't connect to the VMs deployed on your device via the Azure portal. Follow the steps to connect to your Linux or Windows VM.
Connect to a Linux VM
Follow these steps to connect to a Linux VM.
Connect to the VM by using the private IP that you passed during the VM creation.
Open an SSH session to connect with the IP address.
ssh -l <username> <ip address>At the prompt, provide the password that you used when you created the VM.
If you need to provide the SSH key, use this command.
ssh -i c:/users/Administrator/.ssh/id_rsa Administrator@5.5.41.236Here's an example output when you connect to the VM:
PS C:\WINDOWS\system32> ssh -l myazuser "10.126.76.60"
The authenticity of host '10.126.76.60 (10.126.76.60)' can't be established.
ECDSA key fingerprint is SHA256:V649Zbo58zAYMKreeP7M6w7Na0Yf9QPg4SM7JZVV0E4.
Are you sure you want to continue connecting (yes/no/[fingerprint])? yes
Warning: Permanently added '10.126.76.60' (ECDSA) to the list of known hosts.
myazuser@10.126.76.60's password:
Welcome to Ubuntu 18.04.2 LTS (GNU/Linux 4.18.0-1013-azure x86_64)

 * Documentation:  https://help.ubuntu.com
 * Management:     https://landscape.canonical.com
 * Support:        https://ubuntu.com/advantage

 System information disabled due to load higher than 1.0

  Get cloud support with Ubuntu Advantage Cloud Guest:
    http://www.ubuntu.com/business/services/cloud

284 packages can be updated.
192 updates are security updates.

The programs included with the Ubuntu system are free software;
the exact distribution terms for each program are described in the
individual files in /usr/share/doc/*/copyright.

Ubuntu comes with ABSOLUTELY NO WARRANTY, to the extent permitted by
applicable law.

To run a command as administrator (user "root"), use "sudo <command>".
See "man sudo_root" for details.

myazuser@myazvmfriendlyname:~$ client_loop: send disconnect: Connection reset
PS C:\WINDOWS\system32>
Connect to a Windows VM
Follow these steps to connect to a Windows VM.
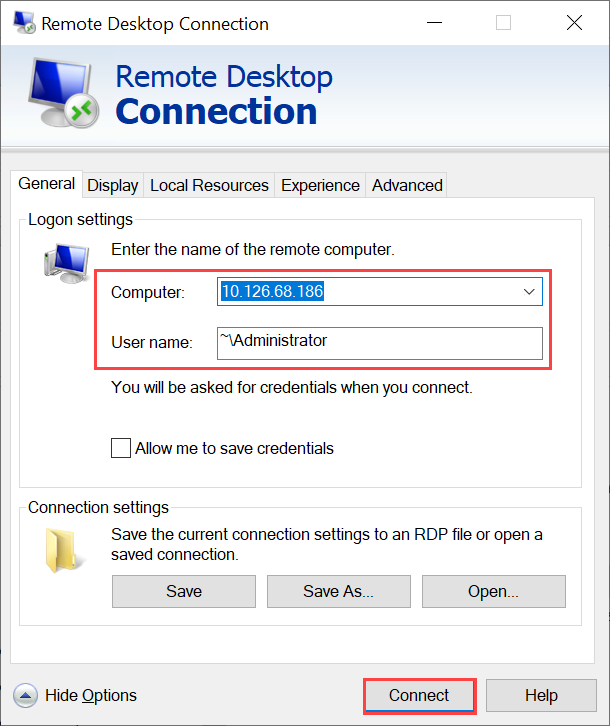
Connect to your Windows VM by using the Remote Desktop Protocol (RDP) via the IP that you passed during the VM creation.
On your client, open RDP.
Go to Start, and then enter mstsc.
On the Remote Desktop Connection pane, enter the IP address of the VM and the access credentials you used in the VM template parameters file. Then select Connect.
Note
You might need to approve connecting to an untrusted machine.
You're now signed in to your VM that runs on the appliance.