Note
Access to this page requires authorization. You can try signing in or changing directories.
Access to this page requires authorization. You can try changing directories.
This page describes how to configure Git integration for Azure Databricks Git folders, including credentials, network connectivity, and security features. To create a Git folder and start working with Git operations, see Create and manage Git folders.
Important
Use Git folders for interactive development. For CI/CD and production deployments, use Declarative Automation Bundles with versioned artifacts and workload identity federation. See CI/CD with Databricks Git folders and What are Declarative Automation Bundles?.
Prerequisites
Before you begin, confirm the following:
Git folders are enabled in your workspace (enabled by default). See Enable or disable Databricks Git folders.
You have a Git provider account (GitHub, GitLab, Azure DevOps, Bitbucket, or AWS CodeCommit).
For private repositories or write operations, you have a personal access token (PAT) or OAuth credentials from your Git provider. See Connect your Git provider to Databricks.
Note
You can clone public remote repositories without Git credentials. To modify a public remote repository or to work with private repositories, configure Git credentials with Write permissions.
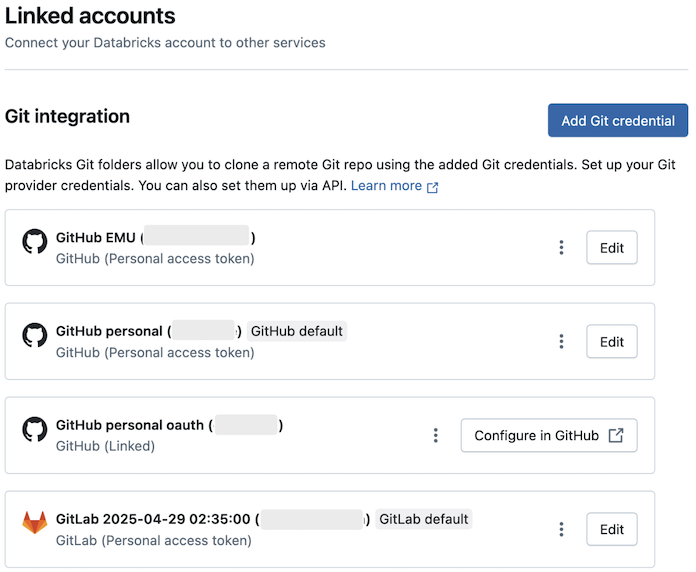
Add Git credentials
To configure Git credentials in Databricks:
- Click your username in the top bar of the Azure Databricks workspace and select Settings.
- Click Linked accounts.
- Click Add Git credential.
- Select your Git provider from the drop-down menu. Some providers offer OAuth account linking, while others require a personal access token (PAT). If you link your account using OAuth, complete the authentication flow and skip to the last step.
- Enter your email in the Git provider email field.
- Paste your PAT in the Token field. For instructions on creating a PAT, see Connect your Git provider to Databricks. If your organization has SAML SSO enabled in GitHub, authorize your personal access token for SSO.
- Click Save.
You can also manage Git credentials using the Databricks Repos API.
Azure DevOps
By default, Git integration uses your Microsoft Entra ID token if you don't enter a token or app password. If you provide an Azure DevOps personal access token, Git integration uses that instead. See Personal access token.
After you update your Azure password, re-authenticate with Databricks. Otherwise, the Azure DevOps connection validation can take up to 24 hours.
If you can't clone a repository using Azure DevOps with Microsoft Entra ID authentication, see Issue with a conditional access policy (CAP) for Microsoft Entra ID.
Multiple Git credentials per user
Databricks lets each user store multiple Git credentials, so you can use different providers or accounts without having to switch credentials.
Select credentials for Git folders
Each Git folder can use a specific credential for Git operations. To change the credential for a Git folder:
- Open the Git folder and go to the Git settings tab.
- Under Git credential, select a credential from the drop-down menu.
- Click Save.

How default credentials work
Each Git provider supports one default Git credential per user. Databricks automatically uses this default credential for:
The first credential you create for a provider automatically becomes the default. To change your default credential:
- Go to User Settings > Linked accounts.
- Click the kebab
 next to the credential that you want to make default.
 - Select Set as default.
Limitations
- Jobs that require a non-default Git credential for a provider must use a service principal.
- The Databricks GitHub App allows only one linked credential.
- Each user can have a maximum of 10 Git credentials.
Configure Git commit identity
Your Git commit identity determines how commits made from Databricks appear in your Git provider. When you commit through Databricks Git folders, your Git provider needs to identify you as the author. Configure your email address so that:
- Commits appear in your Git provider profile
- Your profile picture and name display correctly
- You receive proper credit for contributions
- Team members can track who made each change
How commit identity works
When you configure Git credentials with an email address:
- Email: Becomes the author email (
GIT_AUTHOR_EMAILandGIT_COMMITTER_EMAIL) for all commits - Username: Becomes the committer name (
GIT_AUTHOR_NAMEandGIT_COMMITTER_NAME)
If you don't specify an email address, Databricks uses your Git username as the email. This can prevent proper commit attribution in your Git provider.
Example commit in Git history:
commit 480ee5b0214e4d46db2da401a83794c5f5c5d375 (HEAD -> main)
Author: GitHub-username <your.email@example.com>
Date:   Fri Sep 26 00:38:23 2025 -0700

    My commit message
Example in Git provider:

Note
If you created Git credentials before email configuration was available, your email field defaults to your username. Update it to your actual email address for proper commit attribution.
Linked GitHub credentials
If you use linked Git credentials through the Databricks GitHub app, Databricks automatically configures your email and Git identity. If your identity isn't set correctly, Approve the required permissions or re-link your GitHub account for proper permissions.
Configure network connectivity
Git folders require network connectivity to your Git provider. Most configurations work over the internet without additional setup. However, you might need extra configuration if you have:
- IP allowlists on your Git provider
- Self-hosted Git servers (GitHub Enterprise, Bitbucket Server, GitLab Self-managed)
- Private network hosting
Git folders with Git CLI access run UI-based Git operations on serverless compute. Workspace admins must ensure that serverless compute can reach your Git provider.
To connect serverless compute to a private Git server, configure a network connectivity configuration (NCC) with private endpoint rules. See Configure Databricks Serverless Private Git for setup steps. You don't need to enable the Serverless Private Git preview to use NCC connectivity.
To enable serverless compute, see Connect to serverless compute.
Configure IP allowlists
If your Git server is internet-accessible but uses an IP allowlist, such as GitHub allow lists:
- Find your Databricks control plane network address translation (NAT) IP address for your region at Azure Databricks regions.
- Add this IP address to your Git server's IP allowlist.
Configure private Git servers
If you host a private Git server, see Set up private Git connectivity for Azure Databricks Git folders or contact your Databricks account team for setup instructions.
Security features
Databricks Git folders include the following security features to protect your code and credentials:
Encrypt Git credentials
Use Azure Key Vault to encrypt Git personal access tokens and other Git credentials with your own encryption keys (customer managed keys).
For more information, see Customer managed keys for encryption.
Git URL allowlists
Workspace admins can restrict which remote repositories users can access. This helps prevent code exfiltration and enforces use of approved repositories.
If you use Microsoft Entra ID authentication with Azure DevOps, the default allowlist restricts Git URLs to:
dev.azure.comvisualstudio.com
For custom CNAMEs or Git URL aliases, configure a custom allowlist and explicitly add these URLs if you want to work with them.
Set up a Git URL allowlist
To configure an allowlist:
Click your username in the top bar of the Azure Databricks workspace and select Settings.
Click Development.
Select a Git URL allow list permission option:
- Disabled (no restrictions): No allowlist enforcement.
- Restrict Clone, Commit & Push to Allowed Git Repositories: Restricts all operations to allowlist URLs.
- Only Restrict Commit & Push to Allowed Git Repositories: Restricts only write operations. Clone and pull remain unrestricted.
Click the edit icon
 next to Git URL allowlist: Empty list.
Enter a comma-separated list of URL prefixes. Databricks uses prefix matching (case-insensitive) to allow repository access. Wildcards aren't supported.
Examples:
https://github.com- Allows all GitHub repositorieshttps://github.com/CompanyName- Restricts to specific organizationhttps://dev.azure.com/CompanyName- Restricts to Azure DevOps organization
Don't enter URLs with user names or authentication tokens, as they might be replicated globally and can block your users from working with Git folders.
Click Save.
Saving a new list overwrites the existing allowlist. Changes can take up to 15 minutes to take effect.
Access control
Note
Only the Premium plan includes access control.
Control who can access Git folders in your workspace by setting permissions. Permissions apply to all content within a Git folder. Assign one of the following permission levels:
NO PERMISSIONS: No access to the Git folderCAN READ: View files onlyCAN RUN: View and run filesCAN EDIT: View, run, and modify filesCAN MANAGE: Full control including sharing and deleting
For detailed information about Git folder permissions, see Git folder ACLs.
Audit logging
When you enable audit logging, Databricks logs all Git folder operations, including:
- Creating, updating, or deleting Git folders
- Listing Git folders in a workspace
- Syncing changes between Git folders and remote repositories
Secrets detection
Git folders automatically scan code for exposed credentials before commits. It warns you if it detects:
- AWS access key IDs starting with
AKIA - Other sensitive credential patterns
Next steps
After setting up Git folders, explore these related topics: