Note
Access to this page requires authorization. You can try signing in or changing directories.
Access to this page requires authorization. You can try changing directories.
In Defender for Servers Plan 2 in Microsoft Defender for Cloud, the File Integrity Monitoring feature helps to keep enterprise assets and resources secure. It scans and analyzes operating system files, Windows registries, application software, and Linux system files for changes that might indicate an attack.
After you enable Defender for Servers Plan 2, follow the instructions in this article to configure File Integrity Monitoring using the Microsoft Defender for Endpoint agent and agentless machine scanning to collect data.
Note
- If you use a previous version of File Integrity Monitoring with the Log Analytics agent (Microsoft Monitoring agent (MMA)) or the Azure Monitor agent (AMA), you can migrate to the new File Integrity Monitoring experience.
- From June 2025 onwards, File Integrity Monitoring powered by Microsoft Defender for Endpoint requires a minimum version. Update the agent as needed.
- Windows: 10.8760 or later.
- Linux: 30.124082 or later.
Prerequisites
You must enable Defender for Servers Plan 2 on your subscription.
You must install the Defender for Endpoint agent through the Defender for Servers extensions on machines you want to monitor.
You must connect Non-Azure machines with Azure Arc.
You must enable agentless machine scanning on your subscription to gain extra coverage and the ability to monitor custom paths.
You need Workspace owner and Security admin permissions to enable and disable File Integrity Monitoring. Security reader permissions can view results.
Verify Defender for Endpoint client version
Before you begin, verify that the Defender for Endpoint client version on your machines is at least the minimum version required for File Integrity Monitoring.
Windows Server 2019 or later - the Defender for Endpoint agent is updated as part of continuous operating system updates. Make sure Windows machines have the latest update installed.
Learn more about using the Windows Servers Update Service to install machines at scale.
Windows Servers 2016 and Windows Server 2012 R2 - You must update machines manually to the latest agent version.
You can install KB 5005292 from the Microsoft Update Catalog. KB 5005292 is periodically updated with the latest agent version.
Linux machines - The Defender for Endpoint agent is automatically updated if autoprovisioning is turned on for the machines in Defender for Cloud. After the MDE.Linux extension is installed on a Linux machine, the machine attempts to update the agent version each time the Virtual Machine (VM) reboots. You can also update the agent version manually.
Enable File Integrity Monitoring
File Integrity Monitoring isn't enabled by default. You can enable it in the Microsoft Defender for Cloud portal.
Sign in to the Azure portal.
Navigate to Microsoft Defender for Cloud > Environment settings > relevant subscription.
Locate the Defenders for Servers plan and select Settings.
In the File Integrity Monitoring section, switch the toggle to On.

Select Edit configuration.
Select a workspace to store the File Integrity Monitoring data. (Optional) Or, select Create new to create a new workspace.

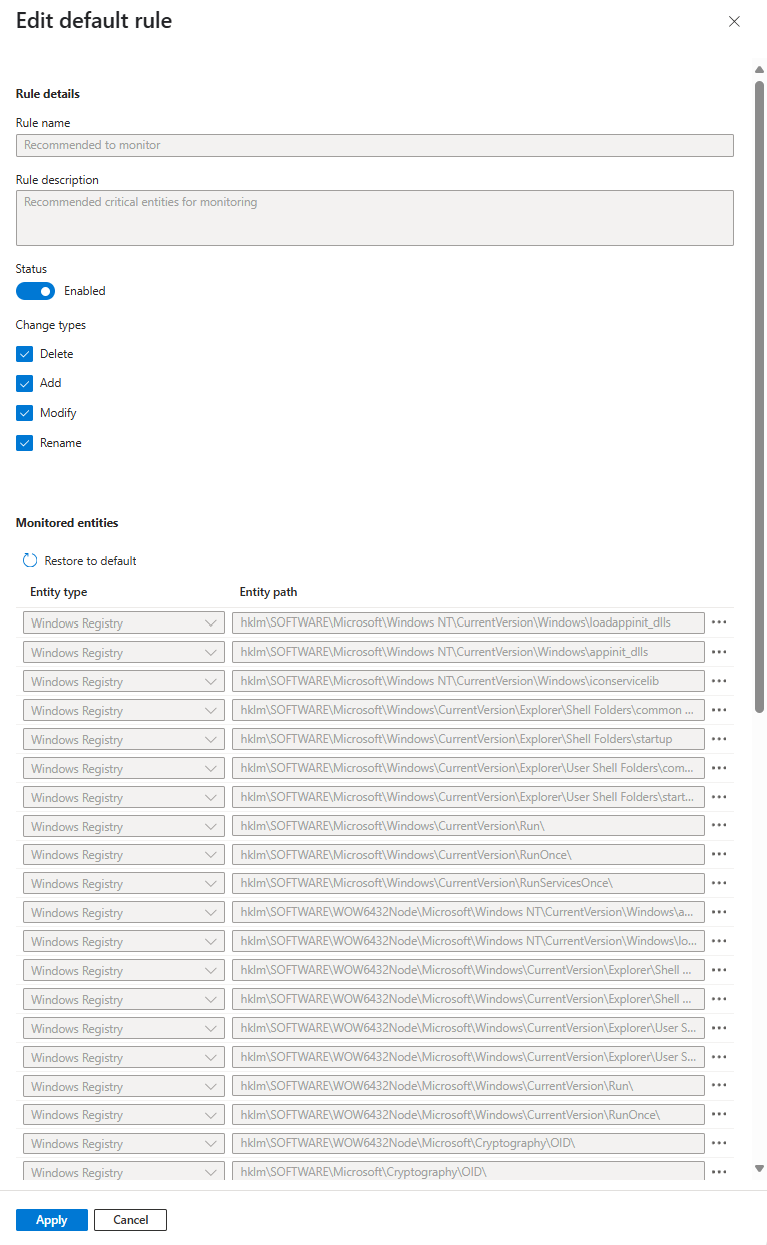
Under the Recommended to monitor rule section, select Edit.
Select the files and registries recommended for monitoring.
Ensure the Status toggle is set to Enabled and select the Change types you want to monitor. By default, all entities recommended for monitoring are selected. You can remove entities from monitoring by selecting the three dot button next to the monitoring rule and then selecting Delete.
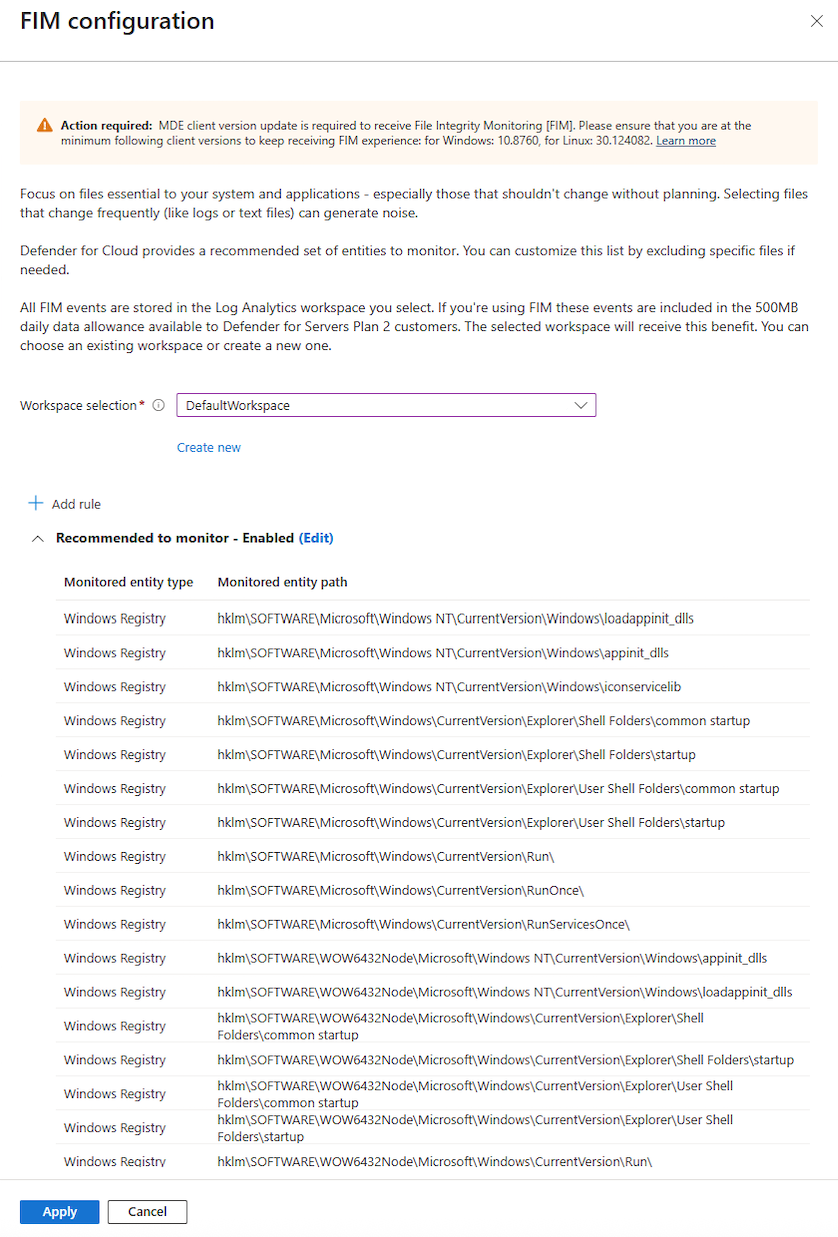
Select Apply to save your changes.
(Optional) Select + Add rule to create a custom rule.
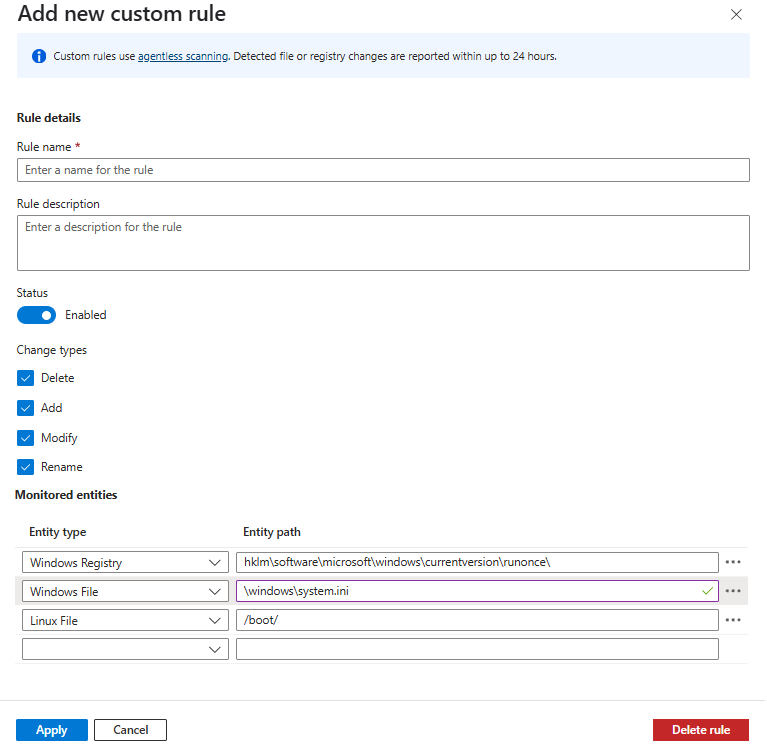
Under the Add new custom rule section, enter a Rule name and (Optional) a Rule description.
Ensure Status toggle is set to Enabled.
Select the Change types and define Entity type and Entity path for your custom rules.
Select Apply to save your changes.
(Optional) Select Delete rule to delete a rule configuration.
Select Apply.
Select Continue.


Review enablement status for File Integrity Monitoring
Review the File Integrity Monitoring enablement to ensure it's correct and all prerequisites are met.
Go to Workload protection > File Integrity Monitoring.

Select Settings.
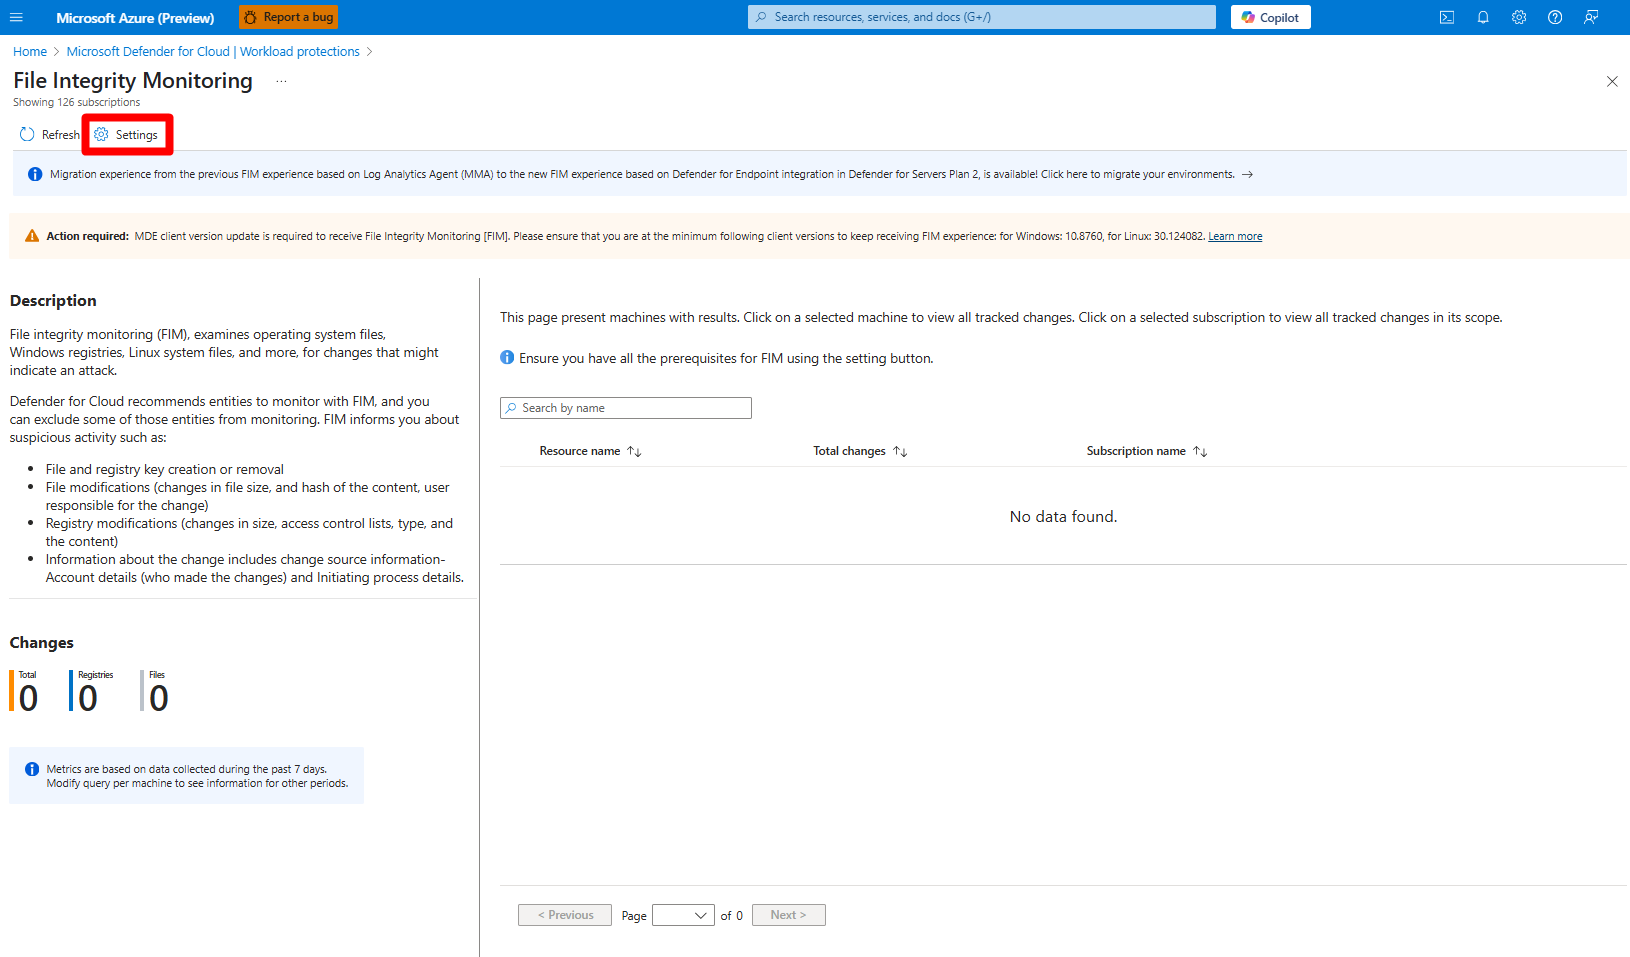
Check for any missing prerequisites.
Select a subscription and review corrective actions for the necessary workspace.

Select the checkbox for any required fixes.
Select Apply.


Disable File Integrity Monitoring
If you disable File Integrity Monitoring, no new events are collected. However, the data collected before the disablement, remains in the Log Analytics workspace, in accordance with the workspace retention policy.
Disable as follows:
Sign in to the Azure portal.
Navigate to Microsoft Defender for Cloud > Environment settings > relevant subscription.
Locate the Defenders for Servers plan and select Settings.
In the File Integrity Monitoring section, switch the toggle to Off.

Select Apply.
Select Continue.
Select Save.

Next step
- Events collected for File Integrity Monitoring are included in the data types eligible for the 500-MB benefit for Defender for Servers Plan 2 customers. Learn more about the benefit.
- Review changes in File Integrity Monitoring.