Note
Access to this page requires authorization. You can try signing in or changing directories.
Access to this page requires authorization. You can try changing directories.
You can set up Microsoft Security DevOps to scan your connected GitHub repository or Azure DevOps project. Use a GitHub action or an Azure DevOps extension to run Microsoft Security DevOps only on your Infrastructure as Code (IaC) source code, and help reduce your pipeline runtime.
This article shows you how to apply a template YAML configuration file to scan your connected repository or project specifically for IaC security issues by using Microsoft Security DevOps rules.
Prerequisites
- For Microsoft Security DevOps, set up the GitHub action or the Azure DevOps extension based on your source code management system:
- If your repository is in GitHub, set up the Microsoft Security DevOps GitHub action.
- If you manage your source code in Azure DevOps, set up the Microsoft Security DevOps Azure DevOps extension.
- Ensure that you have an IaC template in your repository.
Set up and run a GitHub action to scan your connected IaC source code
To set up an action and view scan results in GitHub:
Sign in to GitHub.
Go to the main page of your repository.
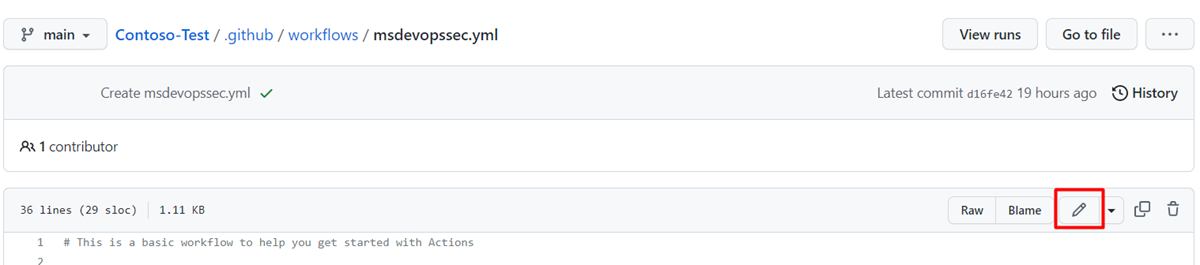
In the file directory, select .github > workflows > msdevopssec.yml.
For more information about working with an action in GitHub, see Prerequisites.
Select the Edit this file (pencil) icon.
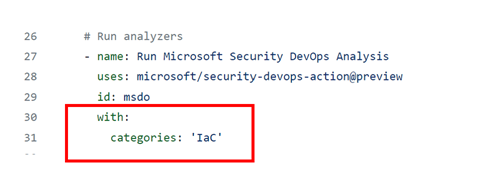
In the Run analyzers section of the YAML file, add this code:
with:
    categories: 'IaC'
Note
Values are case sensitive.
Here's an example:
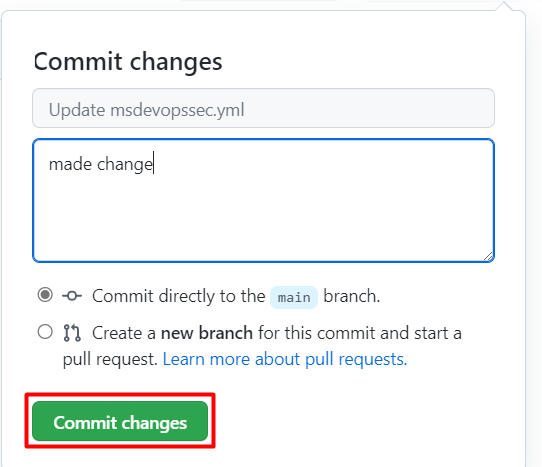
Select Commit changes . . . .
Select Commit changes.
(Optional) Add an IaC template to your repository. If you already have an IaC template in your repository, skip this step.
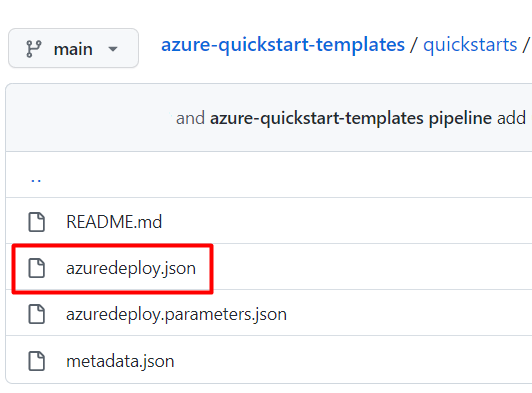
For example, commit an IaC template that you can use to deploy a basic Linux web application.
Select the azuredeploy.json file.
Select Raw.
Copy all the information in the file, like in the following example:
{
  "$schema": "https://schema.management.azure.com/schemas/2019-04-01/deploymentTemplate.json#",
  "contentVersion": "1.0.0.0",
  "parameters": {
    "webAppName": {
      "type": "string",
      "defaultValue": "AzureLinuxApp",
      "metadata": {
        "description": "The base name of the resource, such as the web app name or the App Service plan."
      },
      "minLength": 2
    },
    "sku": {
      "type": "string",
      "defaultValue": "S1",
      "metadata": {
        "description": "The SKU of the App Service plan."
      }
    },
    "linuxFxVersion": {
      "type": "string",
      "defaultValue": "php|7.4",
      "metadata": {
        "description": "The runtime stack of the current web app."
      }
    },
    "location": {
      "type": "string",
      "defaultValue": "[resourceGroup().location]",
      "metadata": {
        "description": "The location for all resources."
      }
    }
  },
  "variables": {
    "webAppPortalName": "[concat(parameters('webAppName'), '-webapp')]",
    "appServicePlanName": "[concat('AppServicePlan-', parameters('webAppName'))]"
  },
  "resources": [
    {
      "type": "Microsoft.Web/serverfarms",
      "apiVersion": "2020-06-01",
      "name": "[variables('appServicePlanName')]",
      "location": "[parameters('location')]",
      "sku": {
        "name": "[parameters('sku')]"
      },
      "kind": "linux",
      "properties": {
        "reserved": true
      }
    },
    {
      "type": "Microsoft.Web/sites",
      "apiVersion": "2020-06-01",
      "name": "[variables('webAppPortalName')]",
      "location": "[parameters('location')]",
      "kind": "app",
      "dependsOn": [
        "[resourceId('Microsoft.Web/serverfarms', variables('appServicePlanName'))]"
      ],
      "properties": {
        "serverFarmId": "[resourceId('Microsoft.Web/serverfarms', variables('appServicePlanName'))]",
        "siteConfig": {
          "linuxFxVersion": "[parameters('linuxFxVersion')]"
        }
      }
    }
  ]
}
In your GitHub repository, go to the .github/workflows folder.
Select Add file > Create new file.
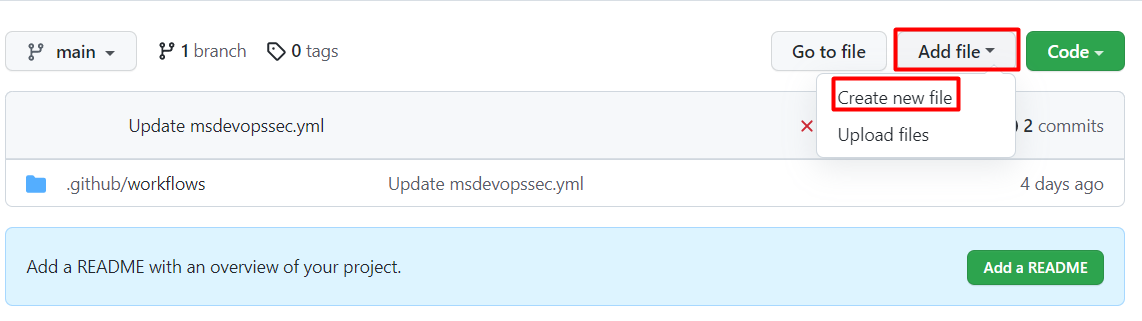
Enter a name for the file.
Paste the copied information in the file.
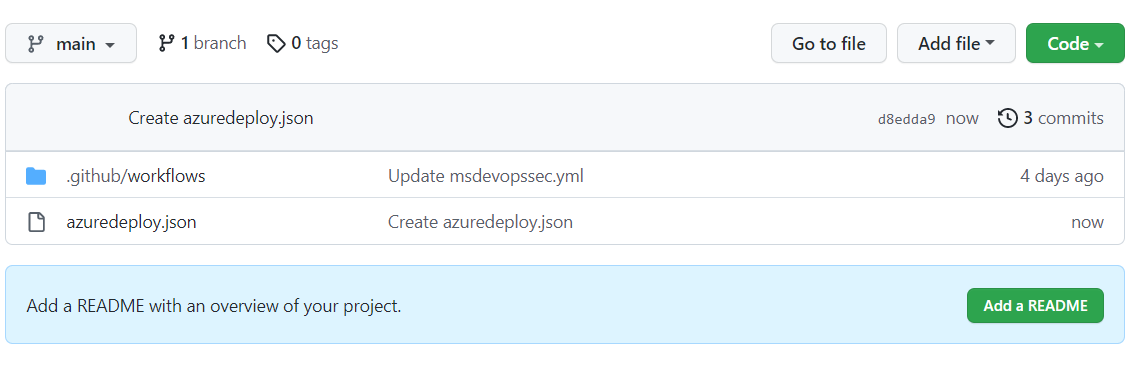
Select Commit new file.
The template file is added to your repository.
Verify that the Microsoft Security DevOps scan is finished:
For the repository, select Actions.
Select the workflow to see the action status.
To view the results of the scan, go to Defender for Cloud > DevOps security (No GHAS pre-requisite) or Security > Code scanning alerts natively in GitHub (Requires GHAS license).


Set up and run an Azure DevOps extension to scan your connected IaC source code
To set up an extension and view scan results in Azure DevOps:
Sign in to Azure DevOps.
Select your project.
Select Pipelines.
Select the pipeline where your Azure DevOps extension for Microsoft Security DevOps is configured.
Select Edit pipeline.
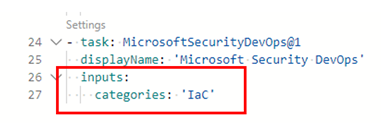
In the pipeline YAML configuration file, below the
displayNameline for the MicrosoftSecurityDevOps@1 task, add this code:inputs: categories: 'IaC'Here's an example:
Select Save.
(Optional) Add an IaC template to your Azure DevOps project. If you already have an IaC template in your project, skip this step.
Choose whether to commit directly to the main branch or to create a new branch for the commit, and then select Save.
To view the results of the IaC scan, select Pipelines, and then select the pipeline you modified.
To see more details, select a specific pipeline run.
View details and remediation information for applied IaC rules
The IaC scanning tools that are included with Microsoft Security DevOps are Template Analyzer (PSRule is included in Template Analyzer), Checkov and Terrascan.
Template Analyzer runs rules on Azure Resource Manager templates (ARM templates) and Bicep templates. For more information, see the Template Analyzer rules and remediation details.
Terrascan runs rules on ARM templates and templates for CloudFormation, Docker, Helm, Kubernetes, Kustomize, and Terraform. For more information, see the Terrascan rules.
Chekov runs rules on ARM templates and templates for CloudFormation, Docker, Helm, Kubernetes, Kustomize, and Terraform. For more information, see the Checkov rules.
To learn more about the IaC scanning tools that are included with Microsoft Security DevOps, see:
Related content
In this article, you learned how to set up a GitHub action and an Azure DevOps extension for Microsoft Security DevOps to scan for IaC security misconfigurations and how to view the results.
To get more information:
- Learn more about DevOps security.
- Learn how to connect your GitHub repository to Defender for Cloud.
- Learn how to connect your Azure DevOps project to Defender for Cloud.