Note
Access to this page requires authorization. You can try signing in or changing directories.
Access to this page requires authorization. You can try changing directories.
After onboarding a new OT network sensor to Microsoft Defender for IoT, you might want to define several settings directly on the OT sensor console, such as adding local users.
The OT sensor settings listed in this article are also available directly from the Azure portal. Use the Azure portal to apply these settings in bulk across multiple cloud-connected OT sensors at a time, or across all cloud-connected OT sensors in a specific site or zone. This article describes how to view and configure view OT network sensor settings from the Azure portal.
Note
The Sensor settings page in Defender for IoT is in PREVIEW. The Azure Preview Supplemental Terms include other legal terms that apply to Azure features that are in beta, preview, or otherwise not yet released into general availability.
Prerequisites
To define OT sensor settings, make sure that you have the following:
An Azure subscription onboarded to Defender for IoT. If you need to, sign up for a free account, and then use the Quickstart: Get started with Defender for IoT to start a free trial.
Permissions:
To view settings that others have defined, sign in with a Security Reader, Security admin, Contributor, or Owner role for the subscription.
To define or update settings, sign in with Security admin, Contributor, or Owner role.
For more information, see Azure user roles and permissions for Defender for IoT.
One or more cloud-connected OT network sensors. For more information, see Onboard OT sensors to Defender for IoT.
Define a new sensor setting
Define a new setting whenever you want to define a specific configuration for one or more OT network sensors. For example, if you want to define bandwidth caps for all OT sensors in a specific site or zone, or define them for a single OT sensor at a specific location in your network.
To define a new setting:
In Defender for IoT on the Azure portal, select Sites and sensors > Sensor settings (Preview).
On the Sensor settings (Preview) page, select + Add, and then use the wizard to define the following values for your setting. Select Next when you're done with each tab in the wizard to move to the next step.
Tab name Description Basics Select the subscription where you want to apply your setting, and your setting type.
Enter a meaningful name and an optional description for your setting.Setting Define the values for your selected setting type.
For details about the options available for each setting type, find your selected setting type in the Sensor setting reference below.Apply Use the Select sites, Select zones, and Select sensors dropdown menus to define where you want to apply your setting.
Important: Selecting a site or zone applies the setting to all connected OT sensors, including any OT sensors added to the site or zone later on.
If you select to apply your settings to an entire site, you don't also need to select its zones or sensors.Review and create Check the selections made for your setting.
If your new setting replaces an existing setting, a warning is shown to indicate the existing setting.
When you're satisfied with the setting's configuration, select Create.
Your new setting is now listed on the Sensor settings (Preview) page under its setting type, and on the sensor details page for any related OT sensor. Sensor settings are shown as read-only on the sensor details page. For example:
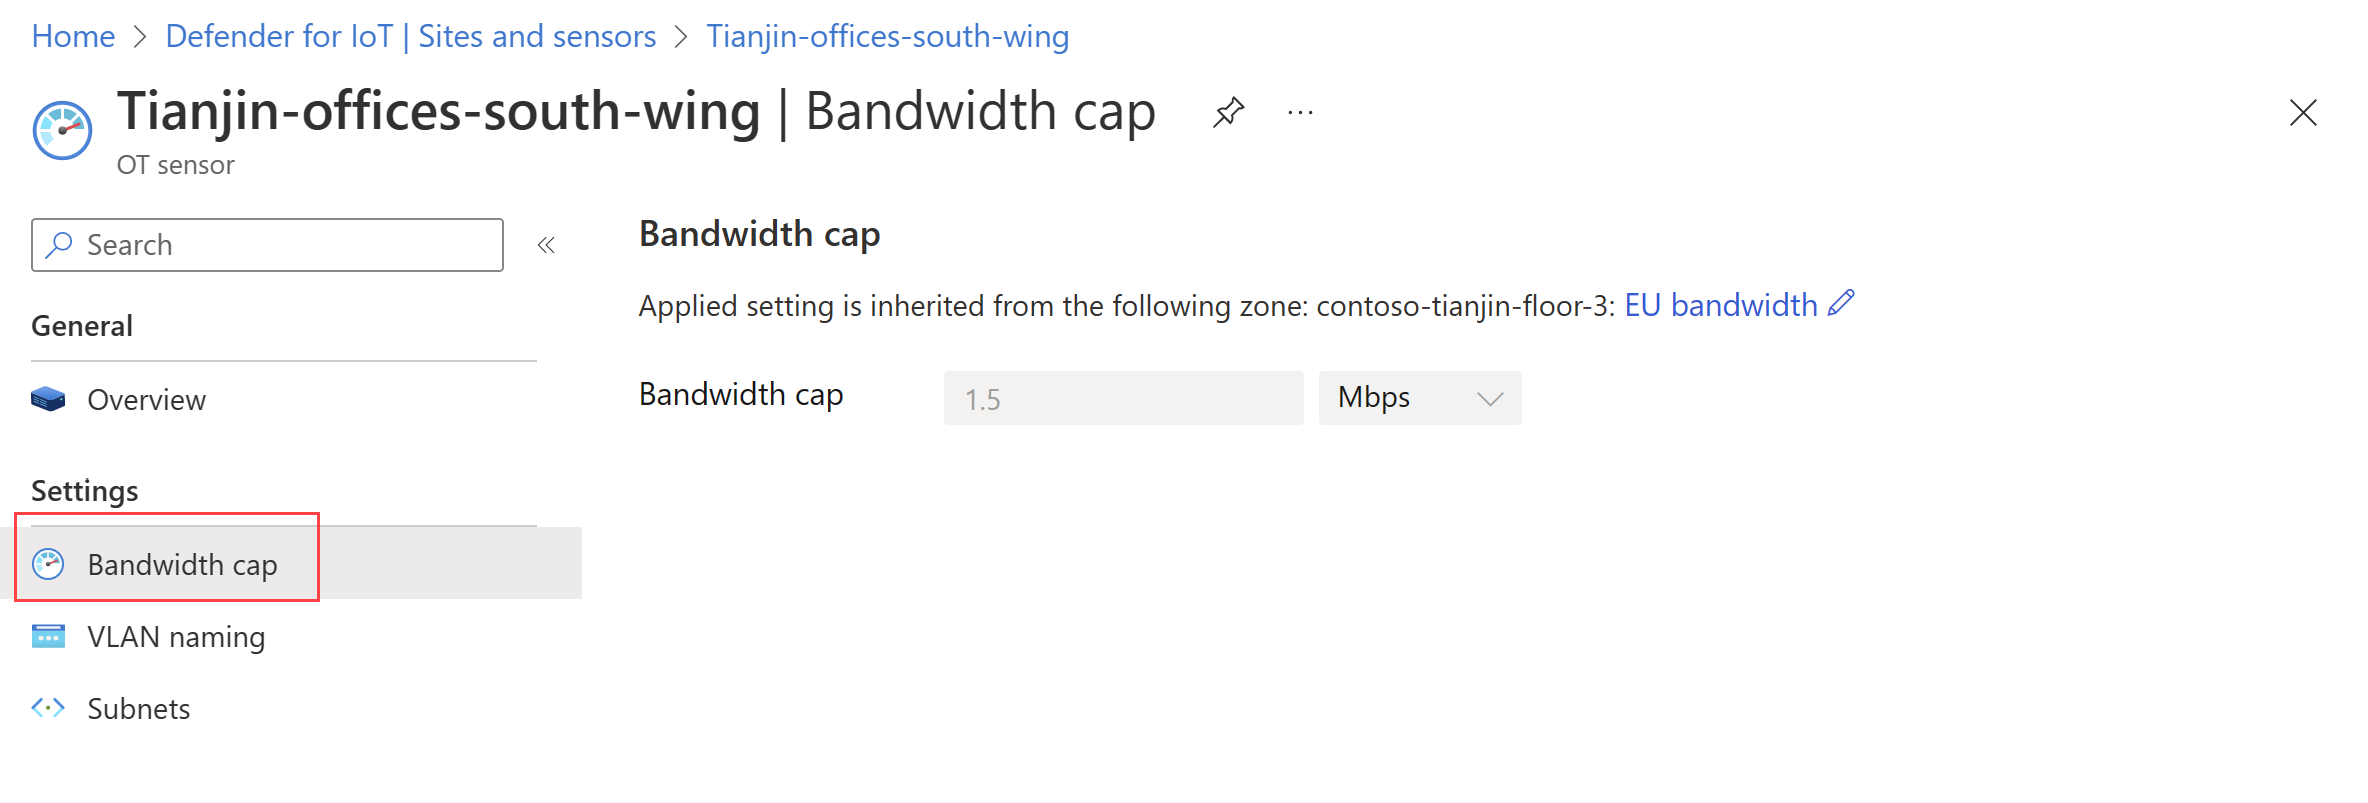
Tip
You may want to configure exceptions to your settings for a specific OT sensor or zone. In such cases, create an extra setting for the exception.
Settings override each other in a hierarchical manner, so that if your setting is applied to a specific OT sensor, it overrides any related settings that are applied to the entire zone or site. To create an exception for an entire zone, add a setting for that zone to override any related settings applied to the entire site.
View and edit current OT sensor settings
To view the current settings already defined for your subscription:
In Defender for IoT on the Azure portal, select Sites and sensors > Sensor settings (Preview)
The Sensor settings (Preview) page shows any settings already defined for your subscriptions, listed by setting type. Expand or collapse each type to view detailed configurations. For example:
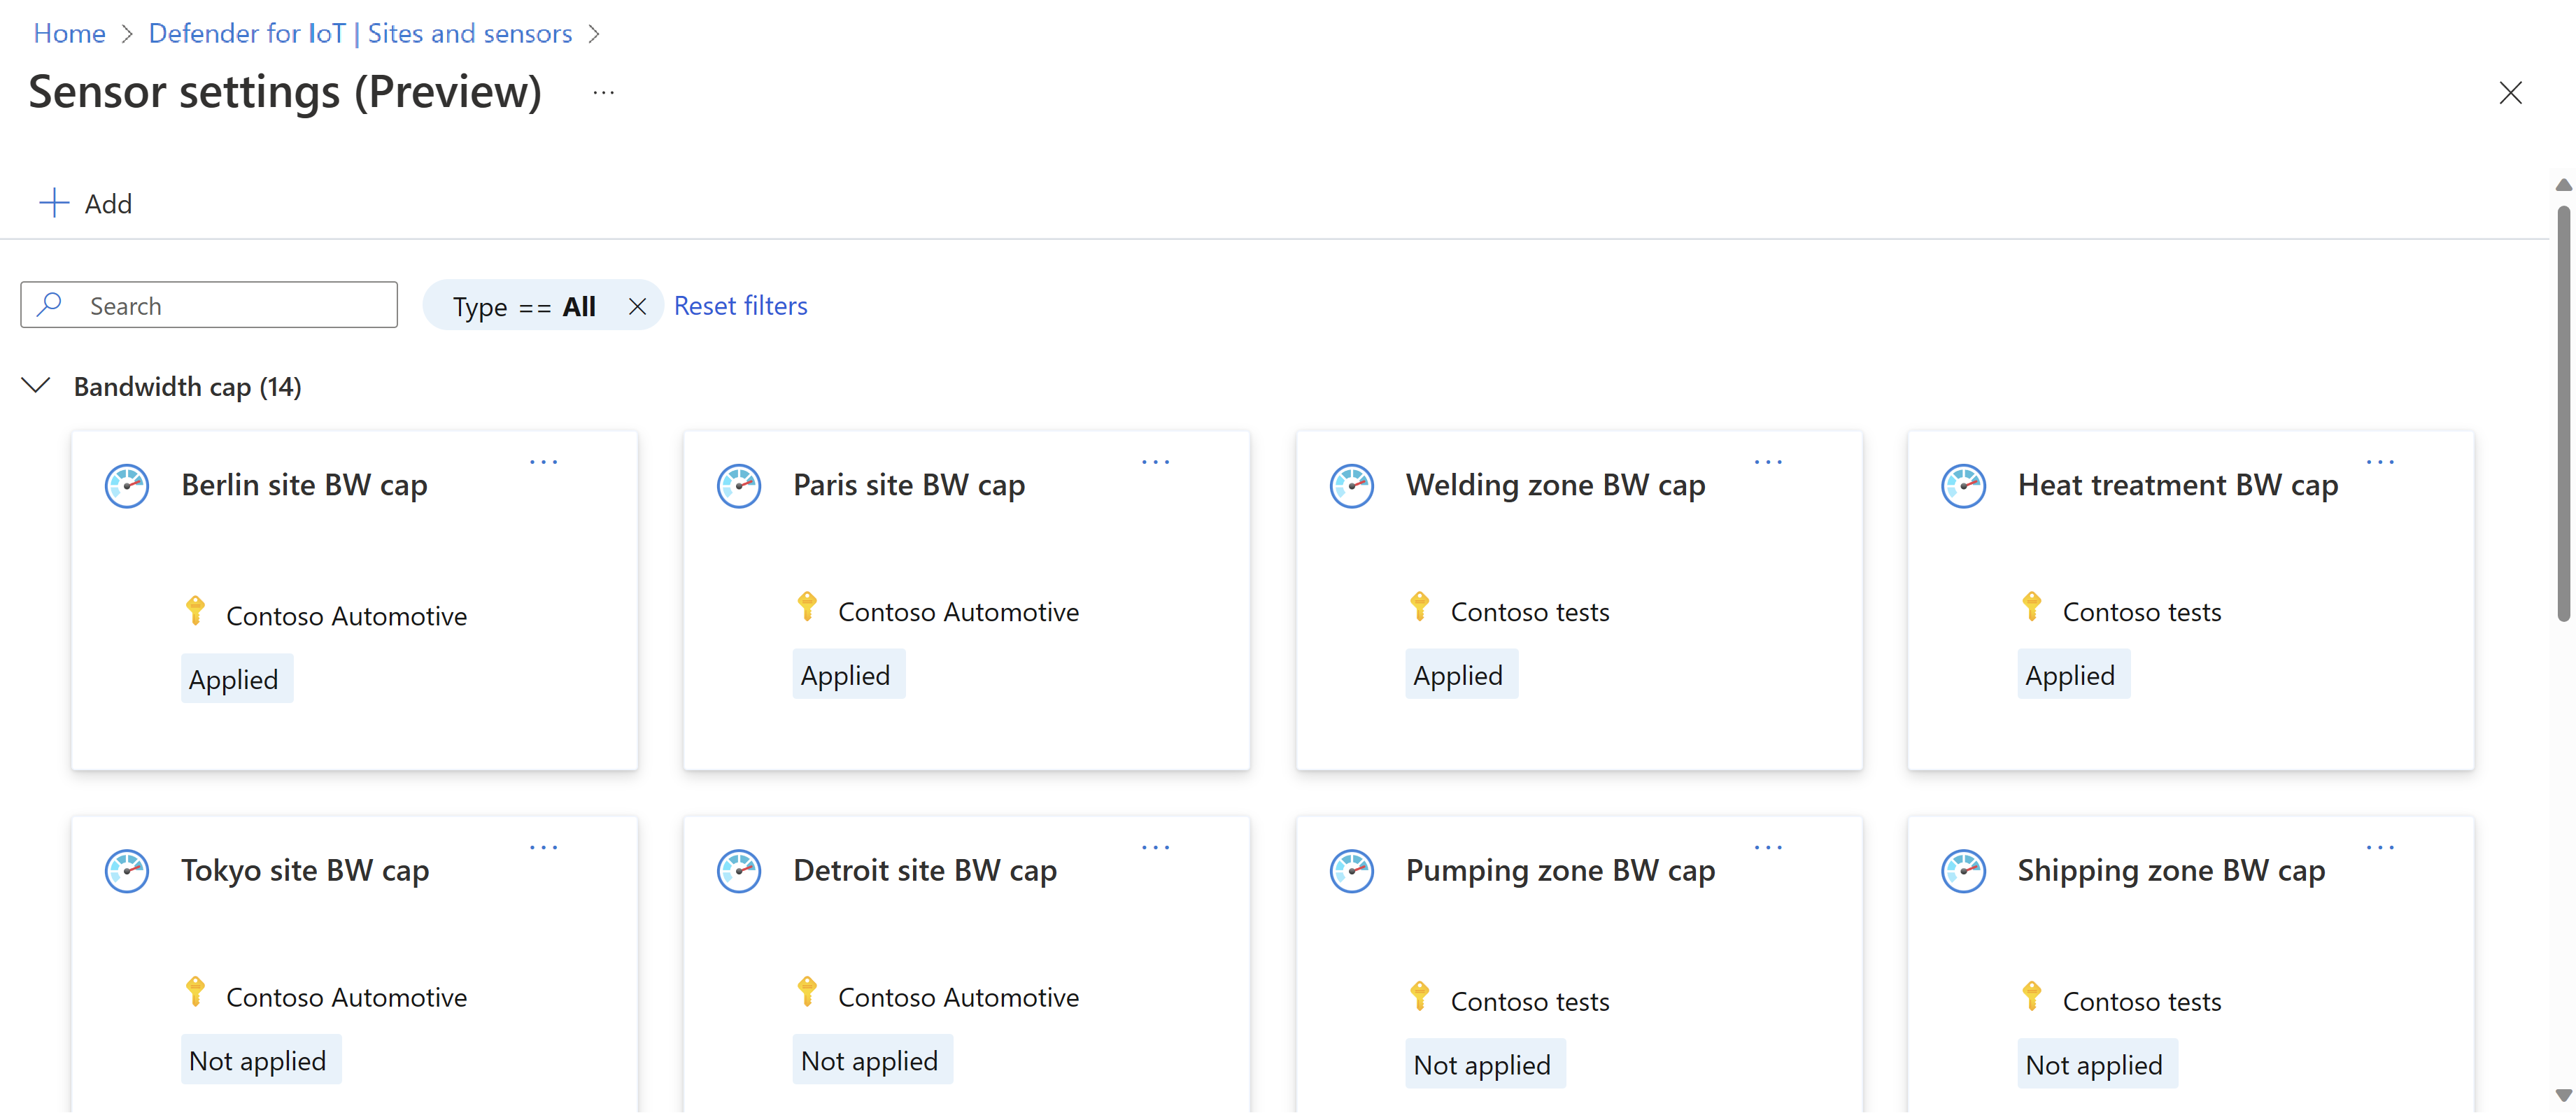
Select a specific setting to view its exact configuration and the site, zones, or individual sensors where the setting is applied.
To edit the setting's configuration, select Edit and then use the same wizard you used to create the setting to make the updates you need. When you're done, select Apply to save your changes.
Delete an existing OT sensor setting
To delete an OT sensor setting altogether:
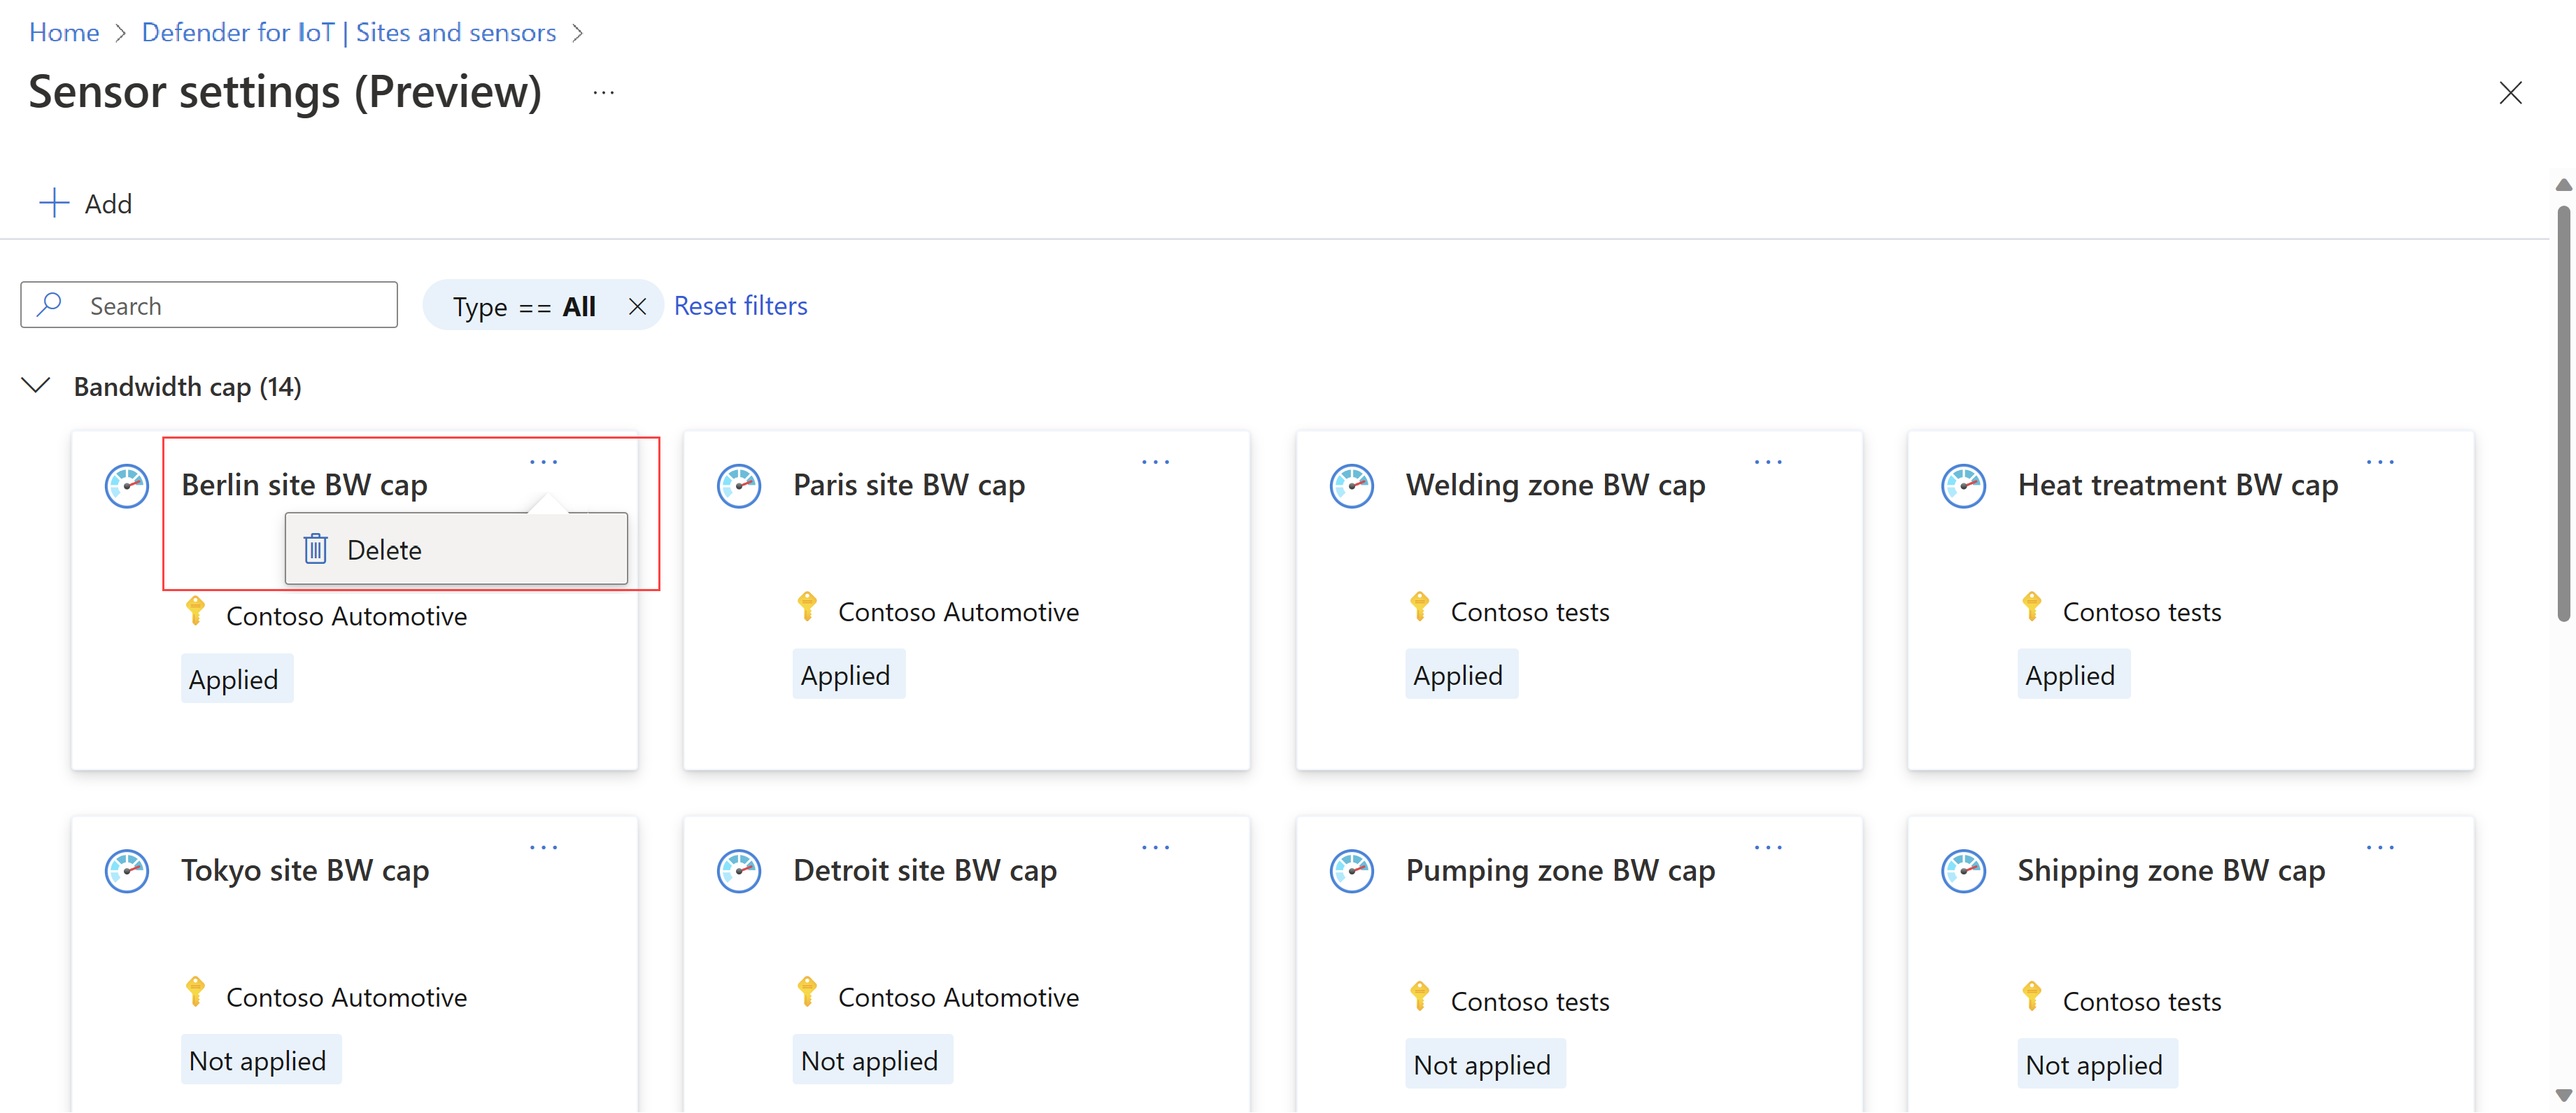
- On the Sensor settings (Preview) page, locate the setting you want to delete.
- Select the ... options menu at the top-right corner of the setting's card and then select Delete.
For example:
Edit settings for disconnected OT sensors
This procedure describes how to edit OT sensor settings if your OT sensor is currently disconnected from Azure, such as during an ongoing security incident.
By default, if you configure any settings from the Azure portal, all settings that are configurable from both the Azure portal and the OT sensor are set to read-only on the OT sensor itself. For example, if you configure a VLAN from the Azure portal, then bandwidth cap, subnet, and VLAN settings are all set to read-only, and blocked from modifications on the OT sensor.
If you're in a situation where the OT sensor is disconnected from Azure, and you need to modify one of these settings, you must first gain write access to those settings.
To gain write access to blocked OT sensor settings:
On the Azure portal, in the Sensor settings (Preview) page, locate the setting you want to edit and open it for editing. For more information, see View and edit current OT sensor settings above.
Edit the scope of the setting so that it no longer includes the OT sensor, and any changes you make while the OT sensor is disconnected aren't overwritten when you connect it back to Azure.
Important
Settings defined on the Azure portal always override settings defined on the OT sensor.
Sign into the affected OT sensor console, and select Settings > Advanced configurations > Azure Remote Config.
In the code box, modify the
block_local_configvalue from1to0, and select Close. For example:

Continue by updating the relevant setting directly on the OT network sensor. For more information, see Manage individual sensors.
Add sensor settings
Use the following sections to learn more about the individual OT sensor settings available from the Azure portal.
The Type settings are:
- Active Directory
- Bandwidth cap
- NTP
- Local subnets
- VLAN naming
- Public addresses
- Single sign-on
- DHCP ranges
To add a new setting Type, select Sites and sensors > Sensor settings. Select the setting from the Type drop down, for example:

Active Directory
To configure Active Directory settings from the Azure portal, define values for the following options:
| Name | Description |
|---|---|
| Domain Controller FQDN | The fully qualified domain name (FQDN), exactly as it appears on your LDAP server. For example, enter host1.subdomain.contoso.com. If you encounter an issue with the integration using the FQDN, check your DNS configuration. You can also enter the explicit IP of the LDAP server instead of the FQDN when setting up the integration. |
| Domain Controller Port | The port where your LDAP is configured. For example, use port 636 for LDAPS (SSL) connections. |
| Primary Domain | The domain name, such as subdomain.contoso.com, and then select the connection type for your LDAP configuration. Supported connection types include: LDAPS/NTLMv3 (recommended), LDAP/NTLMv3, or LDAP/SASL-MD5 |
| Active Directory Groups | Select + Add to add an Active Directory group to each permission level listed, as needed. When you enter a group name, make sure that you enter the group name exactly as defined in your Active Directory configuration on the LDAP server. You use these group names when adding new sensor users with Active Directory. Supported permission levels include Read-only, Security Analyst, Admin, and Trusted Domains. |
Important
When entering LDAP parameters:
- Define values exactly as they appear in Active Directory, except for the case.
- User lowercase characters only, even if the configuration in Active Directory uses uppercase.
- LDAP and LDAPS can't be configured for the same domain. However, you can configure each in different domains and then use them at the same time.
To add another Active Directory server, select + Add Server and define those server values.
Bandwidth cap
For a bandwidth cap, define the maximum bandwidth you want the sensor to use for outgoing communication from the sensor to the cloud, either in Kbps or Mbps.
Default: 1500 Kbps
Minimum required for a stable connection to Azure: 350 Kbps. At this minimum setting, connections to the sensor console might be slower than usual.
NTP
To configure an NTP server for your sensor from the Azure portal, define an IP/Domain address of a valid IPv4 NTP server using port 123.
Local subnets
To focus the Azure device inventory on devices that are in your OT scope, you need to manually edit the subnet list to include only the locally monitored subnets that are in your OT scope.
Subnets in the subnet list are automatically configured as ICS subnets, which means that Defender for IoT recognizes these subnets as OT networks. You can edit this setting when you configure the subnets.
Once the subnets are configured, the network location of the devices is shown in the Network location (Public preview) column in the Azure device inventory. All of the devices associated with the listed subnets are displayed as local, while devices associated with detected subnets not included in the list are displayed as routed.
Configure subnets in the Azure portal
Under Local subnets, review the configured subnets. To focus the device inventory and view local devices in the inventory, delete any subnets that are not in your IoT/OT scope by selecting the options menu (...) on any subnet you want to delete.
To modify additional settings, select any subnet and then select Edit for the following options:
Select Import subnets to import a comma-separated list of subnet IP addresses and masks. Select Export subnets to export a list of currently configured data, or Clear all to start from scratch.
Enter values in the IP Address, Mask, and Name fields to add subnet details manually. Select Add subnet to add additional subnets as needed.
ICS Subnet is on by default, which means that Defender for IoT recognizes the subnet as an OT network. To mark a subnet as non-ICS, toggle off ICS Subnet.
VLAN naming
To define a VLAN for your OT sensor, enter the VLAN ID and a meaningful name.
Select Add VLAN to add more VLANs as needed.
Public addresses
Add the public addresses of internal devices into this configuration to ensure that the sensor includes them in the inventory and doesn't treat them as internet communication.
In the Settings tab, type the IP address and Mask address.
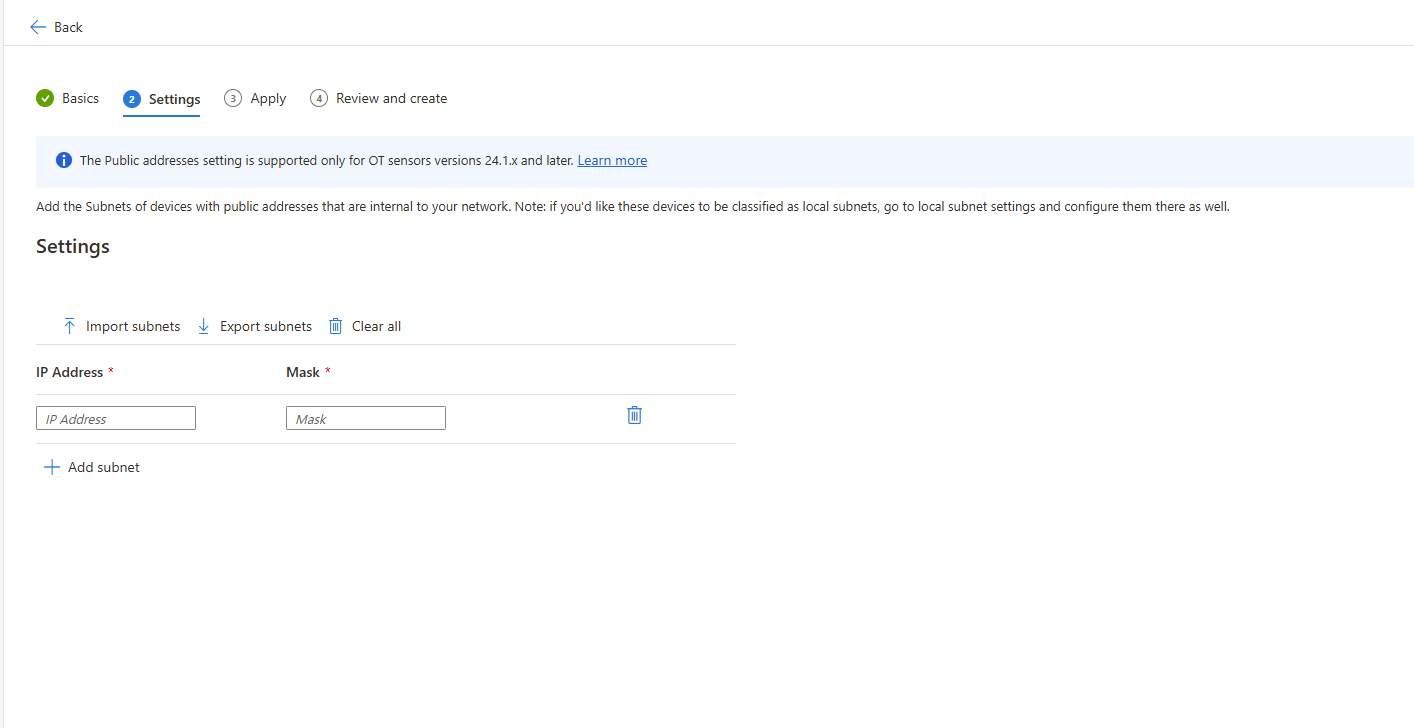
Select Next
In the Apply tab, select sites, and toggle the Add selection by specific zone/sensor to optionally apply the IP addresses to specific zones and sensors.
Select Next.
Review the details and select Create to add the address to the public addresses list.
Single sign-on
With Single sign-on (SSO), users simply sign into the sensor console and don't need multiple login credentials across different sensors and sites. For more information, see create SSO configuration.
DHCP ranges
Add the range of IP addresses to configure the DHCP settings that can apply to a device that might have multiple IP addresses associated with it.
In the Settings tab, type the From and To IP addresses, and optionally enter a Name.
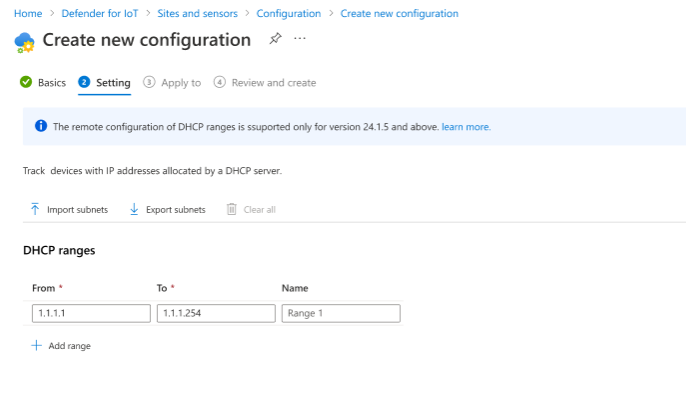
To add additional ranges, select Add range.
Select Next: Selection.
In the Apply to tab, select the sites, and toggle the Add selection by specific zone/sensor to optionally apply the IP addresses to specific zones and sensors.
Select Next: Review.
Review the details and select Save and assign to add the range of addresses to the DHCP range list.
Configure a backup server
Your OT sensor can have a backup server setup during its initially deployment or later on. In both cases, follow this procedure to confirm that the backup server is correctly configured once it's setup.
A misconfigured backup server might falsely recognize traffic as malware and trigger a Malware engine alert. If you think a Suspicion of Malicious Activity malware alert was triggered falsely, consider following this procedure to check the backup server configuration.
To configure the backup server:
Sign into your OT sensor console and select System settings > Sensor management > Advanced configurations.
Select the Global category. Ensure the parameter is_reduce_backup_malware_enabled is set to 1 or true.
Select the Vulnerability assessment category. Ensure backup_servers lists the backup server device's IP address.
Select the Ports category. Ensure that backup_known_ports lists the port(s) that the backup server uses.
Select Save.