Note
Access to this page requires authorization. You can try signing in or changing directories.
Access to this page requires authorization. You can try changing directories.
The Azure Explorer, which is part of the Azure Toolkit for IntelliJ, provides Java developers with an easy-to-use solution for managing Redis caches in their Azure account from inside the IntelliJ IDE.
Prerequisites
- A supported Java Development Kit (JDK). For more information about the JDKs available for use when developing on Azure, see Java support on Azure and Azure Stack.
- IntelliJ IDEA, Ultimate or Community Edition.
- The Azure Toolkit for IntelliJ. For more information, see Install the Azure Toolkit for IntelliJ. You'll also need to sign in to your Azure account for the Azure Toolkit for IntelliJ. For more information, see Sign-in instructions for the Azure Toolkit for IntelliJ.
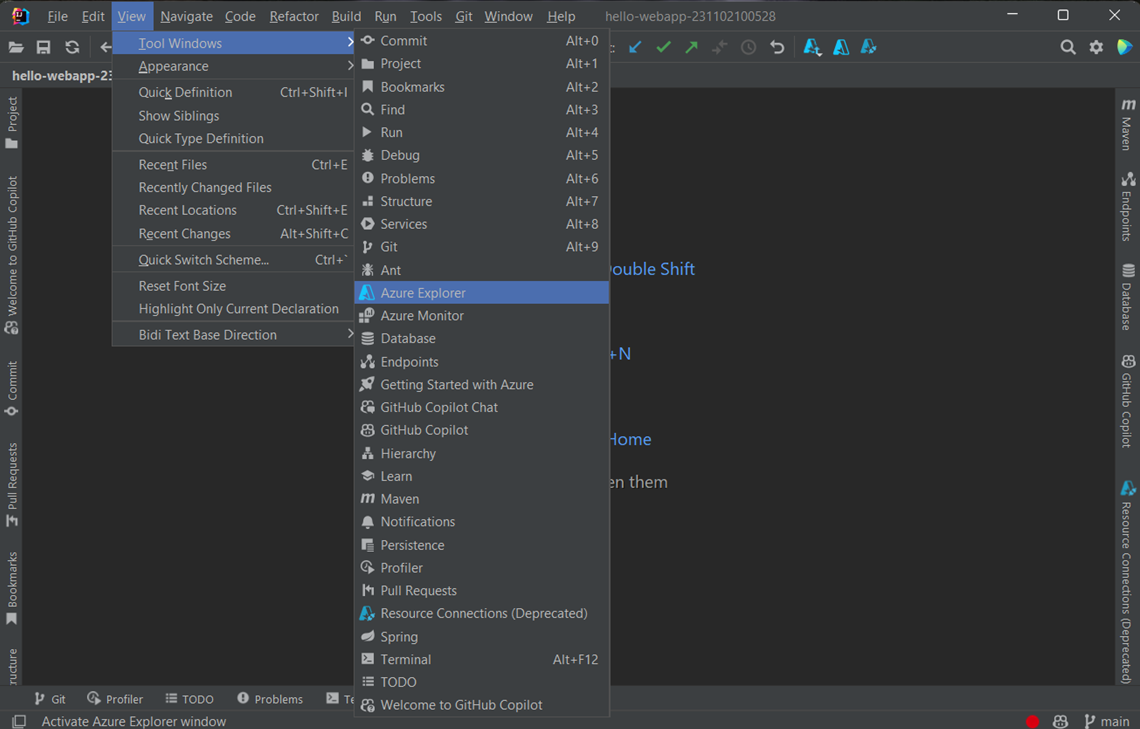
Displaying the Azure Explorer Tool Window
If the Azure Explorer tool window is not visible in IntelliJ, click View, then click Tool Windows, and then click Azure Explorer.
Create a Redis Cache by using IntelliJ
The following steps walk you through the steps to create a Redis cache using the Azure Explorer.
Sign in to your Azure account by using the steps in Sign-in instructions for the Azure Toolkit for IntelliJ.
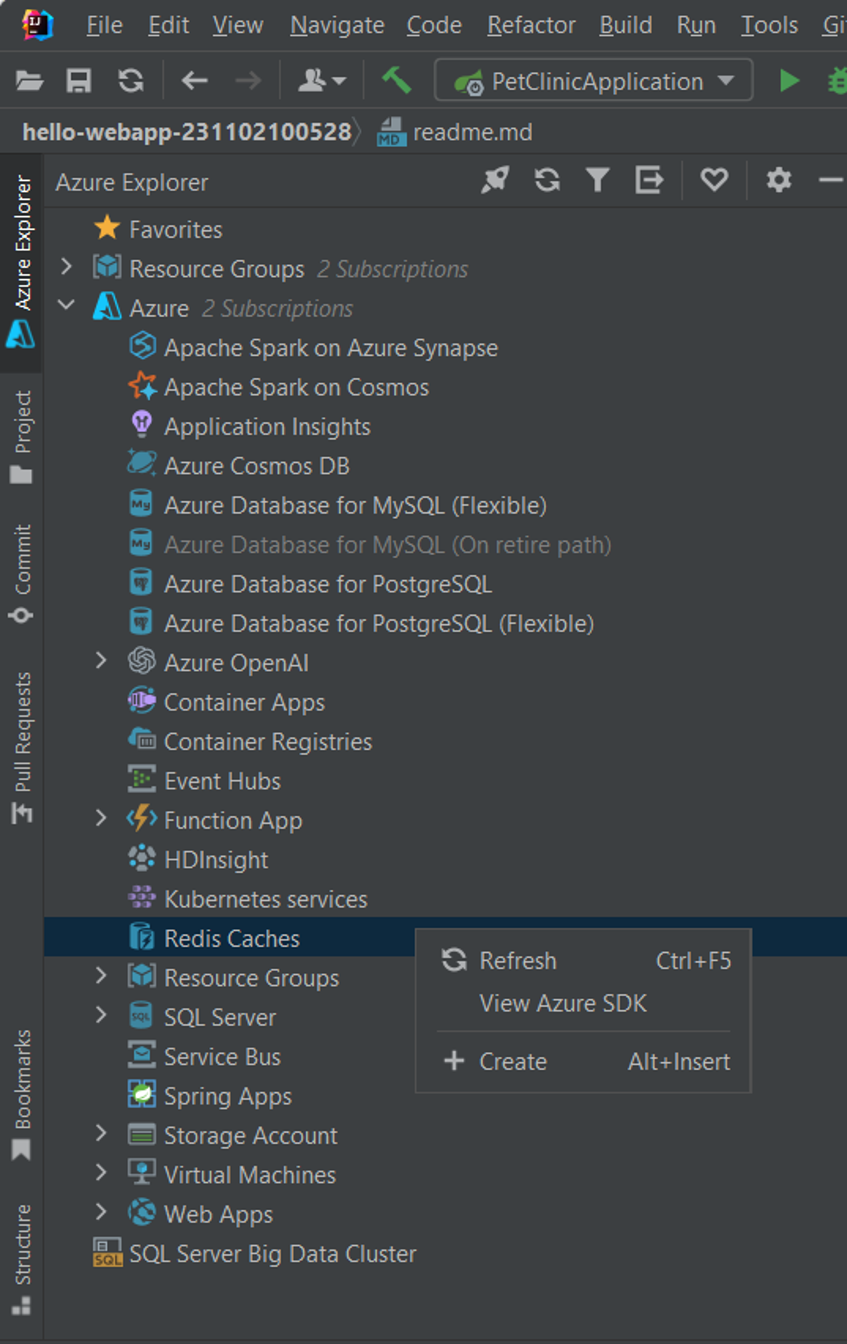
In the Azure Explorer tool window, expand the Azure node, right-click Redis Caches, and then click Create.
When the Create Azure Cache for Redis dialog box appears, specify the following options:
Basic:
Subscription: Specifies the Azure subscription you want to use for the new Redis cache.
Resource Group: Specifies the resource group for your redis cache. Select one of the following options:
Create new: Specifies that you want to create a new resource group by clicking + to finish.
Use existing: Specifies that you'll select from a dropdown list of resource groups that are associated with your Azure account.
Instance details:
DNS Name: Specifies the DNS subdomain for the new Redis cache, which is prepended to ".redis.cache.windows.net" - for example, wingtiptoys.redis.cache.windows.net.
Location: Specifies the location where your Redis cache is created - for example, West US.
Pricing Tier: Specifies which pricing tier your Redis cache uses. This setting determines the number of client connections. (For more information, see Azure Cache for Redis pricing.)
Non-TLS port: Specifies whether your Redis cache allows non-TLS connections. By default, the non-TLS port is disabled. For more information, see Azure Cache for Redis management FAQs.

When you've specified all your Redis cache settings, click OK.
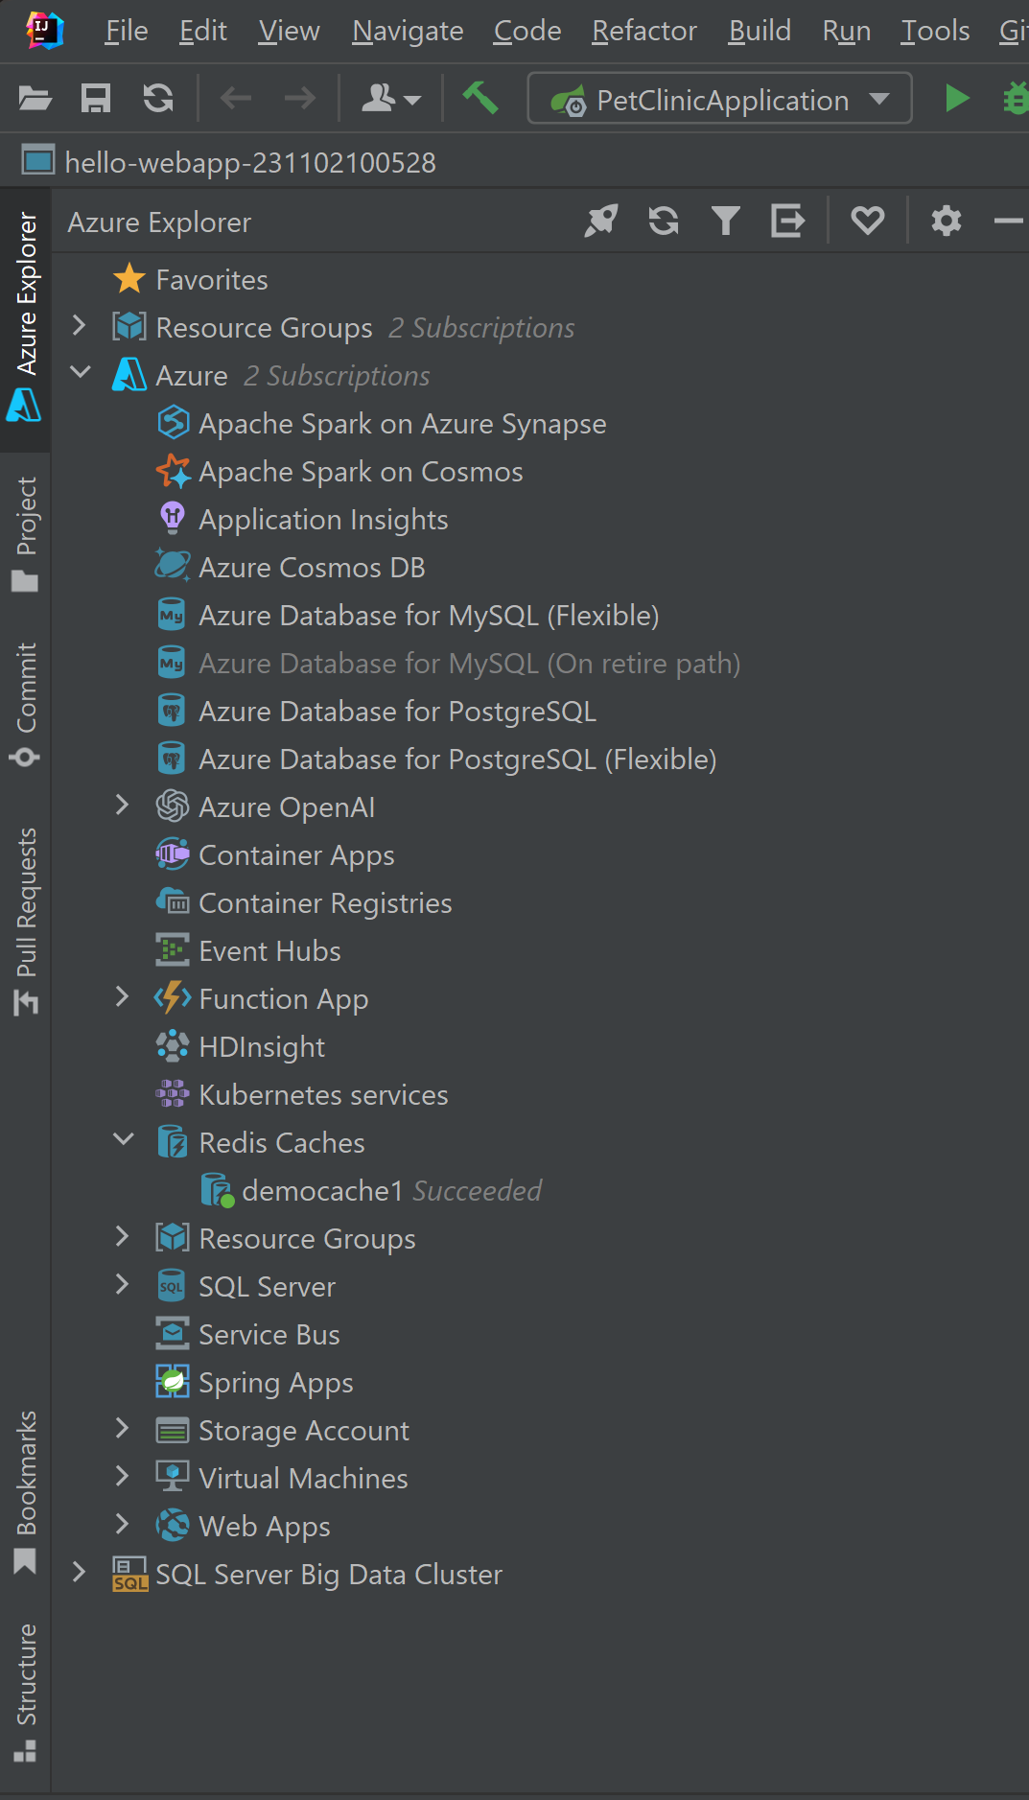
After your Redis cache has been created, it will be displayed in the Azure Explorer.
Note
For more information about configuring your Azure Cache for Redis cache settings, see How to configure Azure Cache for Redis.
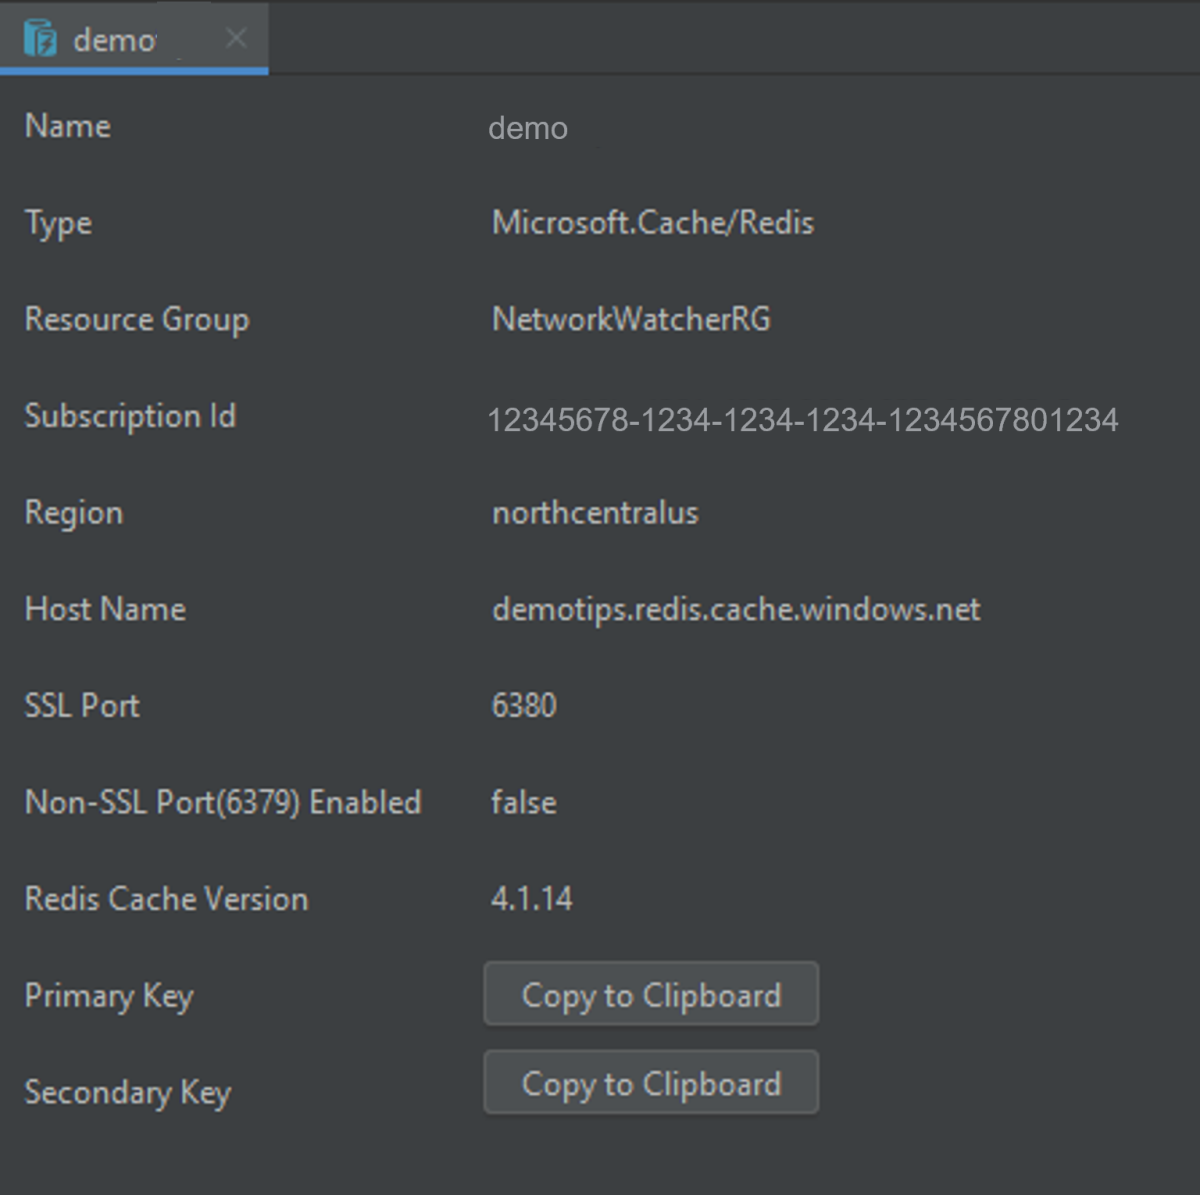
Display the properties for your Redis Cache in IntelliJ
In the Azure Explorer, right-click your Redis cache and click Show properties.
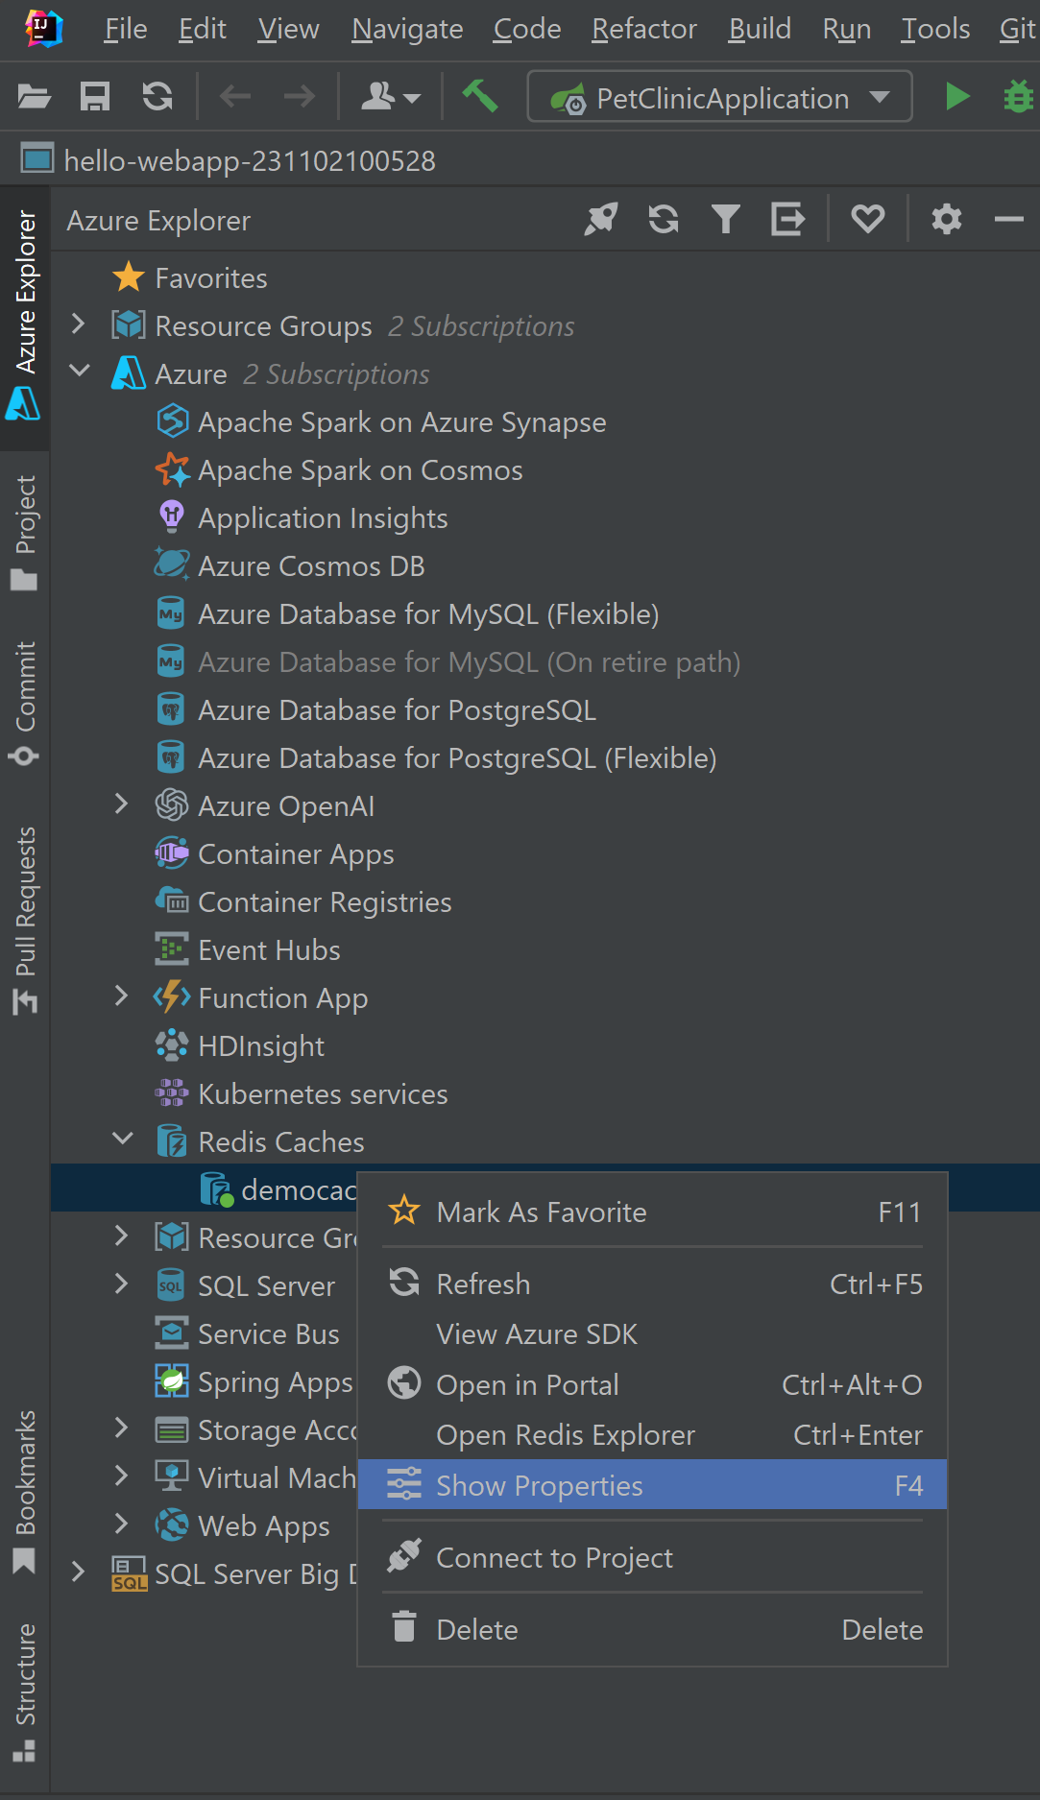
The Azure Explorer displays the properties for your Redis cache.
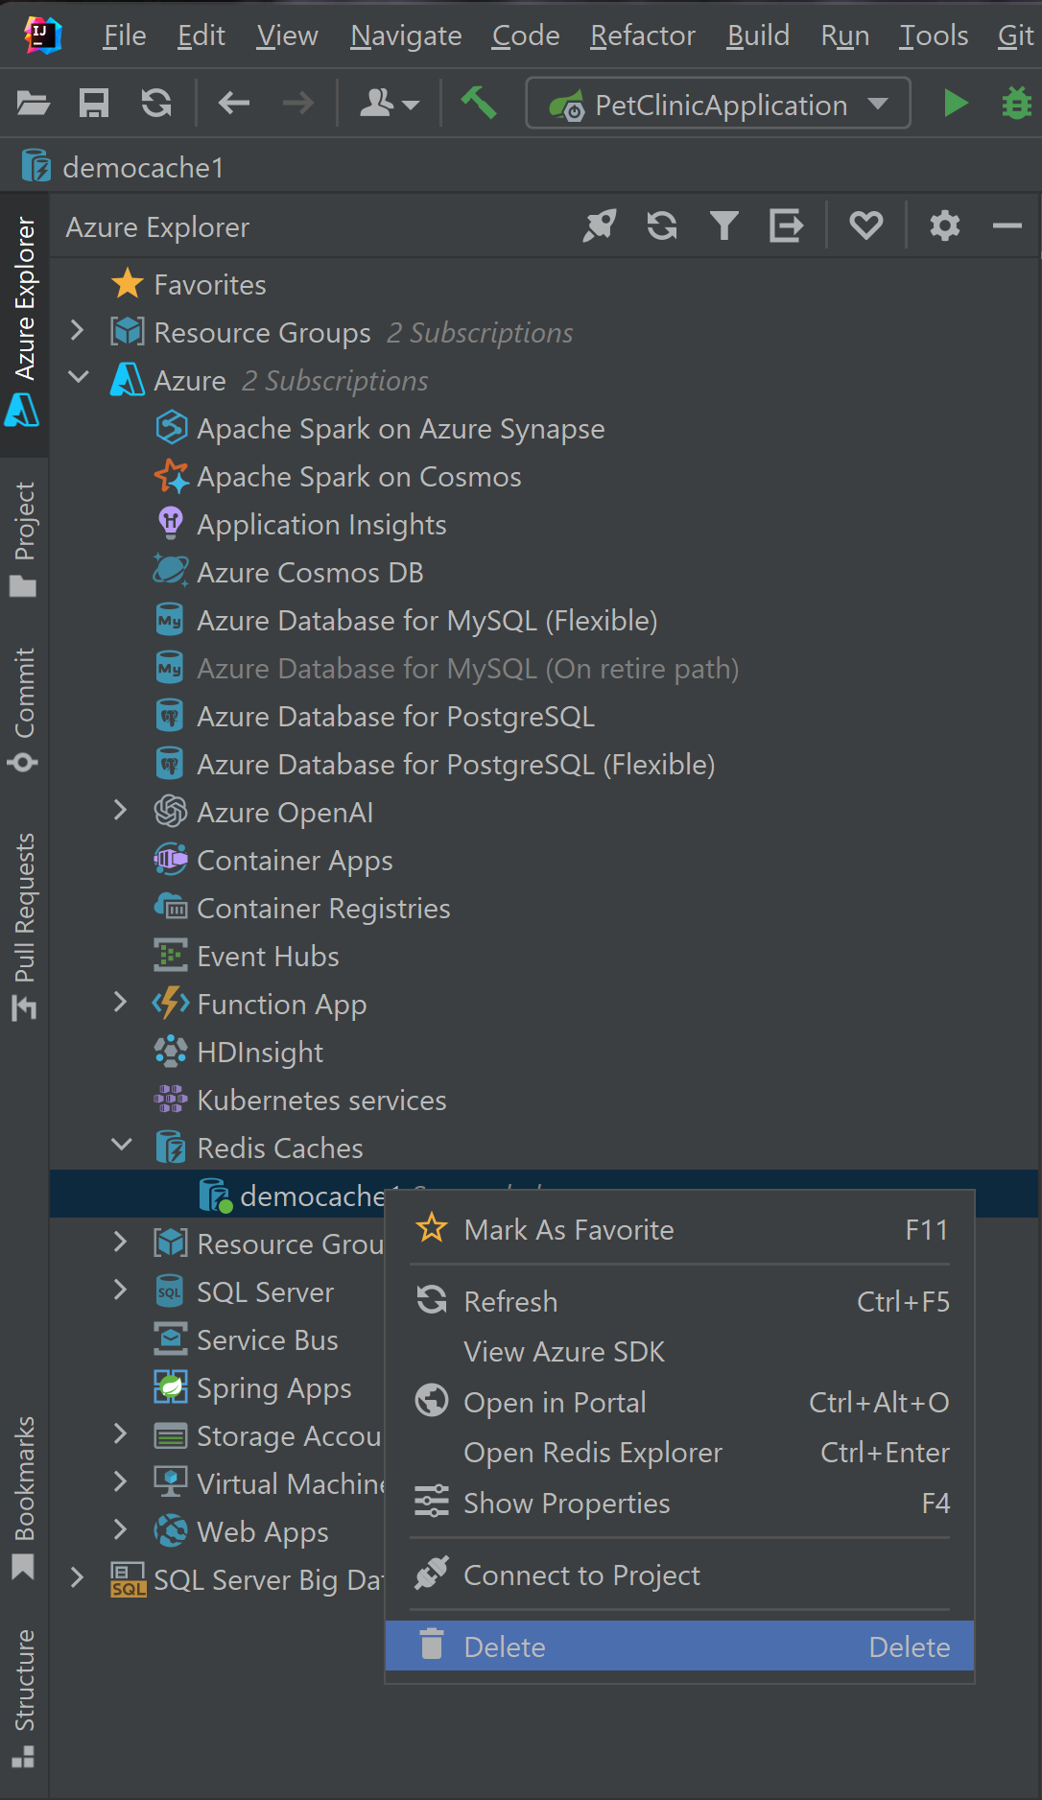
Delete your Redis Cache by using IntelliJ
In the Azure Explorer, right-click your Redis cache and click Delete.
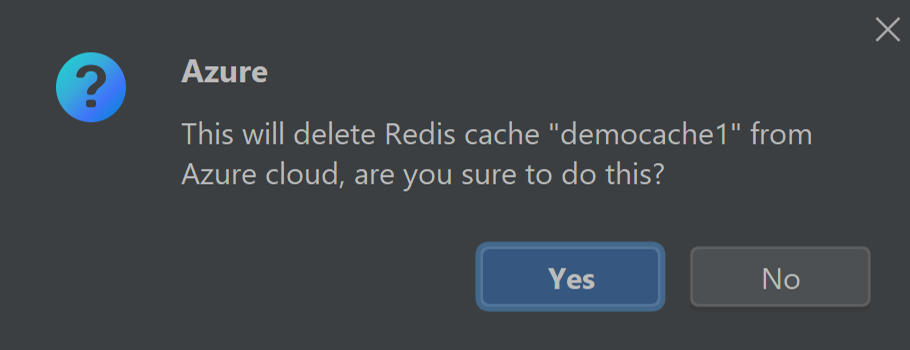
Click Yes when prompted to delete your Redis cache.
Next steps
For more information about Azure Redis caches, configuration settings and pricing, see the following links:
- Azure Cache for Redis
- Azure Cache for Redis documentation
- Azure Cache for Redis pricing
- How to configure Azure Cache for Redis
To report bugs or request new features, create issues on our GitHub repository, or ask questions on Stack Overflow with tag azure-java-tools.
For more information about using Java with Azure, see the following links: