Note
Access to this page requires authorization. You can try signing in or changing directories.
Access to this page requires authorization. You can try changing directories.
This tutorial shows you how to upload files from a browser directly to Azure Blob Storage without exposing credentials. You'll use TypeScript to implement the Valet Key pattern with Shared Access Signature (SAS) tokens and Managed Identity for secure, keyless authentication.
The sample application includes:
- A Fastify API that generates time-limited SAS tokens
- A React frontend that uploads files directly to Azure Storage
- Infrastructure as code for deployment with Azure Developer CLI
By the end of this tutorial, you'll have a working application deployed to Azure Container Apps that demonstrates secure file uploads without exposing storage credentials to the browser.
Prerequisites
Before you begin, ensure you have:
- An Azure subscription - [create one for free][free Azure account]
- A GitHub account to use GitHub Codespaces (includes free monthly hours)
Tip
This tutorial uses GitHub Codespaces, which provides a pre-configured development environment in your browser. No local setup required.
Architecture

The frontend requests a SAS token from the API, then uploads files directly to Azure Storage. After upload, the API lists all uploaded files with read-only SAS tokens for display.
Key concepts
User Delegation SAS tokens
The application uses User Delegation SAS tokens for secure, keyless authentication. These tokens are signed with Microsoft Entra ID credentials through Managed Identity. The API generates short-lived tokens (10-60 minutes) with specific permissions (read, write, or delete), allowing the browser to upload files directly to storage without exposing credentials.
Azure Developer CLI deployment
Deploy the complete infrastructure with azd up. This provisions Azure Container Apps for the React frontend and Fastify API backend, configures managed identities, and assigns RBAC permissions. The infrastructure uses Bicep templates following Azure Well-Architected Framework principles with Azure Verified Modules where applicable.
Development container environment
This tutorial's complete sample code uses a development container in either GitHub Codespaces or local Visual Studio Code.
Note
You can also run this tutorial locally in Visual Studio Code with the Dev Containers extension. The complete sample code includes the development container configuration.
Open the sample in GitHub Codespaces
GitHub Codespaces provides a browser-based VS Code environment with all dependencies preinstalled.
Important
All GitHub accounts can use Codespaces with free hours each month. For more information, see GitHub Codespaces monthly included storage and core hours.
In a web browser, open the sample repository and select Code > Create codespace on main.

Wait for the development container to start. This startup process can take a few minutes. The remaining steps in this tutorial take place in the context of this development container.
Deploy the sample
Sign in to Azure.
azd auth loginProvision resources and deploy the sample to the hosting environment.
azd upWhen prompted, enter the following information:
Prompt Enter Enter a unique environment name secure-uploadSelect an Azure Subscription to use Select your subscription from the list Enter a value for the 'location' infrastructure parameter Select from the locations available Alternatively, if you would like to see the resources provisioned then see the deployment output, you can run the following command to deploy without prompts:
azd provisionThen run this command to deploy the application code:
azd deployIf you change the API or web app code, you can redeploy just the application code with one of the following commands:
azd deploy app
azd deploy api
When the deployment is complete, note the URL of the deployed web app displayed in the terminal.
  (✓) Done: Deploying service app
  - Endpoint: https://app-gp2pofajnjhy6.calmtree-87e53015.eastus2.azurecontainerapps.io/
This is an example URL. Your URL will be different.
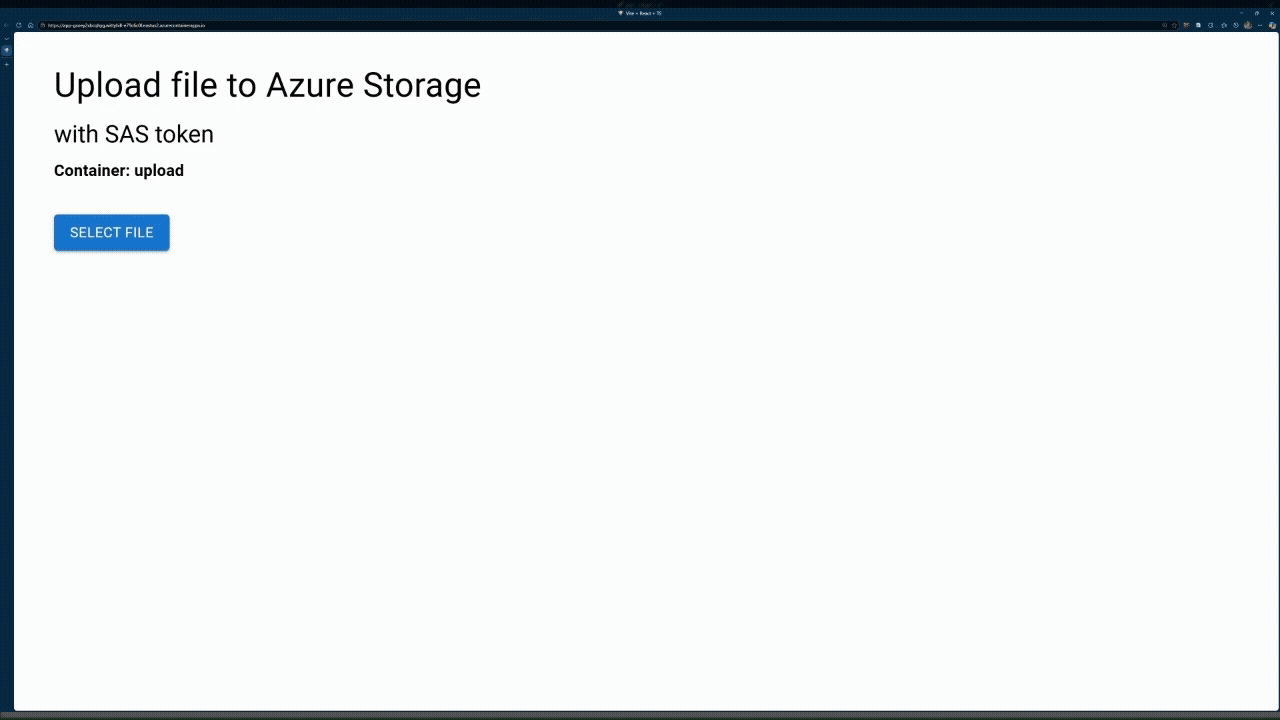
Try the sample
Open the deployed web app in a new browser tab and select a PNG file to upload. Several PNG files are available in the
./docs/mediafolder.
Select Get SAS token, then select Upload file.
View your uploaded file in the gallery below the upload button.
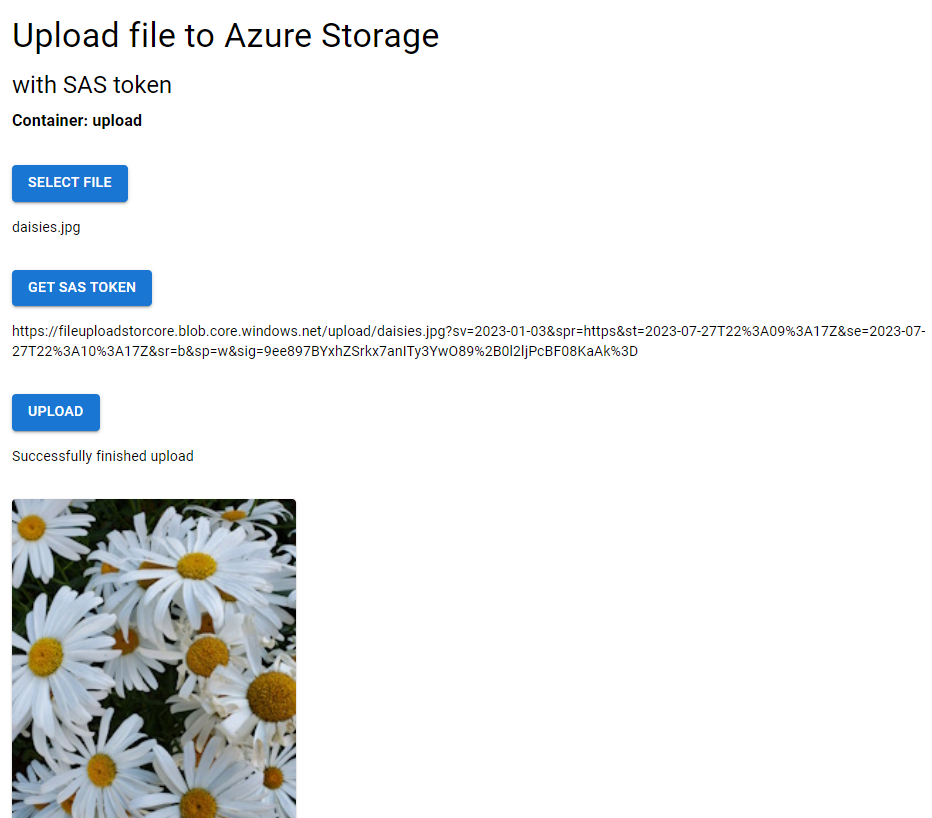


What just happened?
- Your file uploaded directly from the browser to Azure Storage using a time-limited, write-only SAS token
- The gallery images load directly from Azure Storage using read-only SAS tokens
- No authentication secrets were exposed in your browser
How the code works
Now that you've seen the application in action, explore how the code implements secure file uploads. The application has two main parts:
- API backend - Authenticates with Azure and generates SAS tokens
- React frontend - Uploads files directly to Azure Storage using SAS tokens
The following sections walk through the key code implementations.
API server to generate SAS tokens and list files
The API server authenticates to Azure Storage and generates time-limited SAS tokens for the browser to use.
Authentication with Managed Identity
The application uses User Delegation Keys with Managed Identity for authentication, which is the most secure approach for Azure applications. The ChainedTokenCredential tries authentication methods in this order:
- In Azure:
ManagedIdentityCredential(Container Apps identity) - Local development:
AzureCliCredential(youraz loginsession)
// From: packages/api/src/lib/azure-storage.ts
export function getCredential(): ChainedTokenCredential {
  if (!_credential) {
    const clientId = process.env.AZURE_CLIENT_ID;

    // Create credential chain with ManagedIdentity first
    const credentials = [
      new ManagedIdentityCredential(clientId ? { clientId } : undefined),
      new AzureCliCredential()
    ];

    _credential = new ChainedTokenCredential(...credentials);
  }
  return _credential;
}
After authentication, create a BlobServiceClient to interact with Azure Storage:
// From: packages/api/src/lib/azure-storage.ts
export function getBlobServiceClient(accountName: string): BlobServiceClient {
  const credential = getCredential();
  const url = `https://${accountName}.blob.core.windows.net`;

  return new BlobServiceClient(url, credential);
}
Generate SAS tokens with User Delegation Keys
SAS tokens require a User Delegation Key, which authenticates the token using Microsoft Entra ID credentials instead of storage account keys. The key is valid for a specific time range:
const startsOn = new Date();
const expiresOn = new Date(startsOn.valueOf() + minutes * 60 * 1000);

const userDelegationKey = await blobServiceClient.getUserDelegationKey(
  startsOn,
  expiresOn
);
Generate write-only SAS tokens for file uploads
For file uploads, the API generates write-only tokens that can't read or delete data. The tokens expire after 10 minutes:
// From: packages/api/src/routes/sas.ts
const DEFAULT_SAS_TOKEN_PERMISSION = 'w';
const DEFAULT_SAS_TOKEN_EXPIRATION_MINUTES = 10;

const sasToken = generateBlobSASQueryParameters(
  {
    containerName: container,
    blobName: file,
    permissions: BlobSASPermissions.parse(permission),
    startsOn,
    expiresOn
  },
  userDelegationKey,
  accountName
).toString();

const sasUrl = `${blobClient.url}?${sasToken}`;
Available permission levels:
'r'- Read (download/view)'w'- Write (upload/overwrite) - Used for uploads'd'- Delete'c'- Create'a'- Add (append blobs)
Generate read-only SAS tokens for listing and viewing files
For listing and displaying files, the API generates read-only tokens that expire after 60 minutes:
// From: packages/api/src/routes/list.ts
const LIST_SAS_TOKEN_PERMISSION = 'r';
const LIST_SAS_TOKEN_EXPIRATION_MINUTES = 60;

const sasToken = generateBlobSASQueryParameters(
  {
    containerName: container,
    blobName: blob.name,
    permissions: BlobSASPermissions.parse(LIST_SAS_TOKEN_PERMISSION),
    startsOn,
    expiresOn
  },
  userDelegationKey,
  accountName
).toString();

const sasUrl = `${blobClient.url}?${sasToken}`;
Web app client request and receive SAS tokens from the API server
The React frontend requests SAS tokens from the API and uses them to directly upload files to Azure Storage from the browser.
The frontend follows a three-step process:
- Request a SAS token from the API for a specific file
- Upload directly to Azure Storage using the SAS token URL
- Fetch and display the list of uploaded files with read-only SAS tokens
This architecture keeps the backend lightweight - it only generates tokens, never handles file data.
Request a Blob Storage SAS Token from the API server
When a user selects a file and selects "Get SAS Token", the frontend requests a write-only SAS token from the API:
// From: packages/app/src/App.tsx
const handleFileSasToken = () => {
  const permission = 'w'; // write-only
  const timerange = 10;   // 10 minutes expiration

  if (!selectedFile) return;

  // Build API request URL
  const url = `${API_URL}/api/sas?file=${encodeURIComponent(
    selectedFile.name
  )}&permission=${permission}&container=${containerName}&timerange=${timerange}`;

  fetch(url, {
    method: 'GET',
    headers: {
      'Content-Type': 'application/json'
    }
  })
    .then((response) => {
      if (!response.ok) {
        throw new Error(`Error: ${response.status} ${response.statusText}`);
      }
      return response.json();
    })
    .then((data: SasResponse) => {
      const { url } = data;
      setSasTokenUrl(url); // Store the SAS URL for upload
    });
};
What happens:
- Frontend sends:
GET /api/sas?file=photo.jpg&permission=w&container=upload&timerange=10 - API returns:
{ url: "https://storageaccount.blob.core.windows.net/upload/photo.jpg?sv=2024-05-04&..." } - This URL is valid for 10 minutes and grants write-only access to that specific blob
Upload directly to Blob Storage using the SAS token
Once the SAS token URL is received, the frontend converts the file to an ArrayBuffer and uploads the file directly to Azure Storage - bypassing the API entirely. This reduces server load and improves performance.
Convert the file to an ArrayBuffer.
// From: packages/app/src/lib/convert-file-to-arraybuffer.ts
export function convertFileToArrayBuffer(file: File): Promise<ArrayBuffer | null> {
  return new Promise((resolve, reject) => {
    const reader = new FileReader();

    reader.onload = () => {
      const arrayBuffer = reader.result;
      resolve(arrayBuffer as ArrayBuffer);
    };

    reader.onerror = () => {
      reject(new Error('Error reading file.'));
    };

    reader.readAsArrayBuffer(file);
  });
}
Then, use the BlockBlobClient from @azure/storage-blob to upload the file data using the SAS token URL.
// From: packages/app/src/App.tsx
const handleFileUpload = () => {
  console.log('SAS Token URL:', sasTokenUrl);

  // Convert file to ArrayBuffer
  convertFileToArrayBuffer(selectedFile as File)
    .then((fileArrayBuffer) => {
      if (fileArrayBuffer === null || fileArrayBuffer.byteLength < 1) {
        throw new Error('Failed to convert file to ArrayBuffer');
      }

      // Create Azure Storage client with SAS URL
      const blockBlobClient = new BlockBlobClient(sasTokenUrl);

      // Upload directly to Azure Storage
      return blockBlobClient.uploadData(fileArrayBuffer);
    })
    .then((uploadResponse) => {
      if (!uploadResponse) {
        throw new Error('Upload failed - no response from Azure Storage');
      }
      setUploadStatus('Successfully finished upload');

      // After upload, fetch the updated list of files
      const listUrl = `${API_URL}/api/list?container=${containerName}`;
      return fetch(listUrl);
    });
};
Key points:
- The file never passes through your API server
- Upload goes directly from browser to Azure Storage
- The SAS token authenticates the request
- No server bandwidth or processing costs for file handling
Fetch the file directly from Azure Storage and display the thumbnail image
After a successful upload, the frontend fetches a list of all files in the container. Each file in the list comes with its own read-only SAS token:
// From: packages/app/src/App.tsx
const listUrl = `${API_URL}/api/list?container=${containerName}`;

fetch(listUrl)
  .then((response) => {
    if (!response.ok) {
      throw new Error(`Error: ${response.status}`);
    }
    return response.json();
  })
  .then((data: ListResponse) => {
    setList(data.list); // Array of SAS URLs with read permission
  });
Response example:
{
  "list": [
    "https://storageaccount.blob.core.windows.net/upload/photo1.jpg?sv=2024-05-04&se=2025-12-18T15:30:00Z&sr=b&sp=r&...",
    "https://storageaccount.blob.core.windows.net/upload/photo2.jpg?sv=2024-05-04&se=2025-12-18T15:30:00Z&sr=b&sp=r&..."
  ]
}
The frontend uses the SAS URLs directly in image tags. The browser fetches images from Azure Storage using the embedded read-only tokens:
// From: packages/app/src/App.tsx
<Grid container spacing={2}>
  {list.map((item) => {
    const urlWithoutQuery = item.split('?')[0];
    const filename = urlWithoutQuery.split('/').pop() || '';
    const isImage = filename.endsWith('.jpg') ||
                    filename.endsWith('.png') ||
                    filename.endsWith('.jpeg');

    return (
      <Grid item xs={6} sm={4} md={3} key={item}>
        <Card>
          {isImage ? (
            <CardMedia component="img" image={item} alt={filename} />
          ) : (
            <Typography>{filename}</Typography>
          )}
        </Card>
      </Grid>
    );
  })}
</Grid>
How it works:
- Each URL in the list includes a read-only SAS token (
sp=r) - Browser makes GET requests directly to Azure Storage
- No authentication required - the token is in the URL
- Tokens expire after 60 minutes (configured in the API)
Clean up resources
When you're finished with this tutorial, remove all Azure resources to avoid ongoing charges:
azd down
Troubleshoot
Report issues with this sample in the GitHub repo. Include the following with the issue:
- The URL of the article
- The step or context within the article that was problematic
- Your development environment
Sample code
- GitHub repository: Azure-Samples/azure-typescript-upload-file-storage-blob