Azure DevOps Services | Azure DevOps Server 2022 - Azure DevOps Server 2019
Azure Artifacts enables developers to publish and install various package types from feeds and public registries like npmjs.com. To authenticate with Azure Artifacts, it's necessary to configure your npm config file.
This file contains feed URLs and credentials used by npm, offering options to customize your npm client behavior, such as setting up proxies, defining default package locations, or configuring private package feeds. The .npmrc file is typically located in the user's home directory but can also be created at the project level to override default settings. By modifying the .npmrc file, users can personalize their npm experience to meet their specific requirements.
Prerequisites
An Azure DevOps organization and a project. Create an organization or a project if you haven't already.
An Azure Artifacts feed. Create a new feed if you don't have one already.
For best practices, it's recommended to use two separate configuration files. The first one is used for authenticating with Azure Artifacts, while the second one is stored locally and holds your credentials.
To set up the second file, simply place it in your home directory on your development machine and include all of your registry credentials. This way, the npm client can easily access your credentials for authentication, allowing you to share your configuration file while keeping your credentials secure.
The following steps will guide you through setting up the first configuration file:
Note
vsts-npm-auth is not supported in Azure DevOps Server.
Copy the following snippet into your user-level npmrc file:
Organization-scoped feed:
; begin auth token
//pkgs.dev.azure.com/<ORGANIZATION_NAME>/_packaging/<FEED_NAME>/npm/registry/:username=[ENTER_ANY_VALUE_BUT_NOT_AN_EMPTY_STRING]
//pkgs.dev.azure.com/<ORGANIZATION_NAME>/_packaging/<FEED_NAME>/npm/registry/:_password=[BASE64_ENCODED_PERSONAL_ACCESS_TOKEN]
//pkgs.dev.azure.com/<ORGANIZATION_NAME>/_packaging/<FEED_NAME>/npm/registry/:email=npm requires email to be set but doesn't use the value
//pkgs.dev.azure.com/<ORGANIZATION_NAME>/_packaging/<FEED_NAME>/npm/:username=[ANY_VALUE_BUT_NOT_AN_EMPTY_STRING]
//pkgs.dev.azure.com/<ORGANIZATION_NAME>/_packaging/<FEED_NAME>/npm/:_password=[BASE64_ENCODED_PERSONAL_ACCESS_TOKEN]
//pkgs.dev.azure.com/<ORGANIZATION_NAME>/_packaging/<FEED_NAME>/npm/:email=npm requires email to be set but doesn't use the value
; end auth token
Project-scoped feed:
; begin auth token
//pkgs.dev.azure.com/<ORGANIZATION_NAME>/<PROJECT_NAME>/_packaging/<FEED_NAME>/npm/registry/:username=[ENTER_ANY_VALUE_BUT_NOT_AN_EMPTY_STRING]
//pkgs.dev.azure.com/<ORGANIZATION_NAME>/<PROJECT_NAME>/_packaging/<FEED_NAME>/npm/registry/:_password=[BASE64_ENCODED_PERSONAL_ACCESS_TOKEN]
//pkgs.dev.azure.com/<ORGANIZATION_NAME>/<PROJECT_NAME>/_packaging/<FEED_NAME>/npm/registry/:email=npm requires email to be set but doesn't use the value
//pkgs.dev.azure.com/<ORGANIZATION_NAME>/<PROJECT_NAME>/_packaging/<FEED_NAME>/npm/:username=[ENTER_ANY_VALUE_BUT_NOT_AN_EMPTY_STRING]
//pkgs.dev.azure.com/<ORGANIZATION_NAME>/<PROJECT_NAME>/_packaging/<FEED_NAME>/npm/:_password=[BASE64_ENCODED_PERSONAL_ACCESS_TOKEN]
//pkgs.dev.azure.com/<ORGANIZATION_NAME>/<PROJECT_NAME>/_packaging/<FEED_NAME>/npm/:email=npm requires email to be set but doesn't use the value
; end auth token
Copy the following snippet into your user-level .npmrc file:
Collection-scoped feed:
; begin auth token
//<SERVER_NAME>/<COLLECTION_NAME>/_packaging/<FEED_NAME>/npm/registry/:username=DefaultCollection
//<SERVER_NAME>/<COLLECTION_NAME>/_packaging/<FEED_NAME>/npm/registry/:_password=[BASE64_ENCODED_PERSONAL_ACCESS_TOKEN]
//<SERVER_NAME>/<COLLECTION_NAME>/_packaging/<FEED_NAME>/npm/registry/:email=npm requires email to be set but doesn't use the value
//<SERVER_NAME>/<COLLECTION_NAME>/_packaging/<FEED_NAME>/npm/:username=DefaultCollection
//<SERVER_NAME>/<COLLECTION_NAME>/_packaging/<FEED_NAME>/npm/:_password=[BASE64_ENCODED_PERSONAL_ACCESS_TOKEN]
//<SERVER_NAME>/<COLLECTION_NAME>/_packaging/<FEED_NAME>/npm/:email=npm requires email to be set but doesn't use the value
; end auth token
Project-scoped feed:
; begin auth token
//<SERVER_NAME>/<COLLECTION_NAME>/<PROJECT_NAME>/_packaging/<FEED_NAME>/npm/registry/:username=[ENTER_ANY_VALUE_BUT_NOT_AN_EMPTY_STRING]
//<SERVER_NAME>/<COLLECTION_NAME>/<PROJECT_NAME>/_packaging/<FEED_NAME>/npm/registry/:_password=[BASE64_ENCODED_PERSONAL_ACCESS_TOKEN]
//<SERVER_NAME>/<COLLECTION_NAME>/<PROJECT_NAME>/_packaging/<FEED_NAME>/npm/registry/:email=npm requires email to be set but doesn't use the value
//<SERVER_NAME>/<COLLECTION_NAME>/<PROJECT_NAME>/_packaging/<FEED_NAME>/npm/:username=[ENTER_ANY_VALUE_BUT_NOT_AN_EMPTY_STRING]
//<SERVER_NAME>/<COLLECTION_NAME>/<PROJECT_NAME>/_packaging/<FEED_NAME>/npm/:_password=[BASE64_ENCODED_PERSONAL_ACCESS_TOKEN]
//<SERVER_NAME>/<COLLECTION_NAME>/<PROJECT_NAME>/_packaging/<FEED_NAME>/npm/:email=npm requires email to be set but doesn't use the value
; end auth token
Replace both [BASE64_ENCODED_PERSONAL_ACCESS_TOKEN] values in your user .npmrc file with your personal access token from Step 3.
Select your collection, and then navigate to your project.
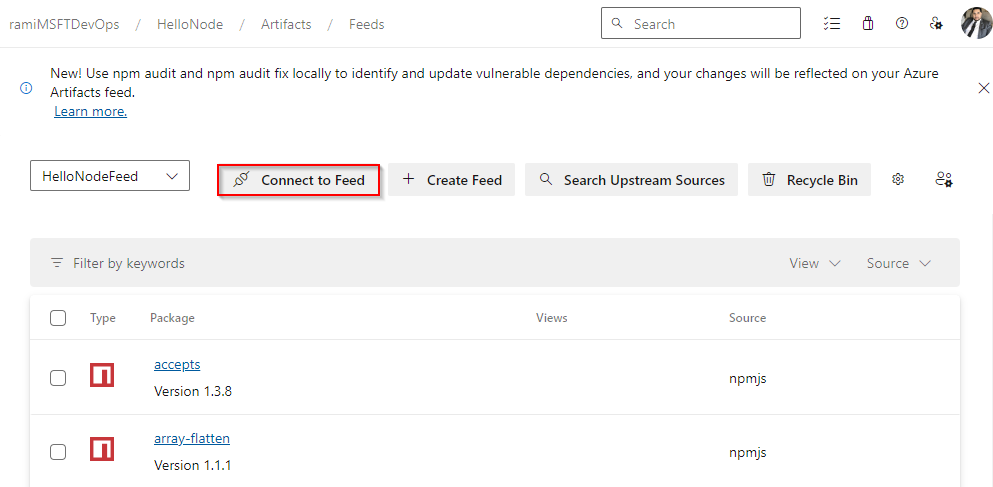
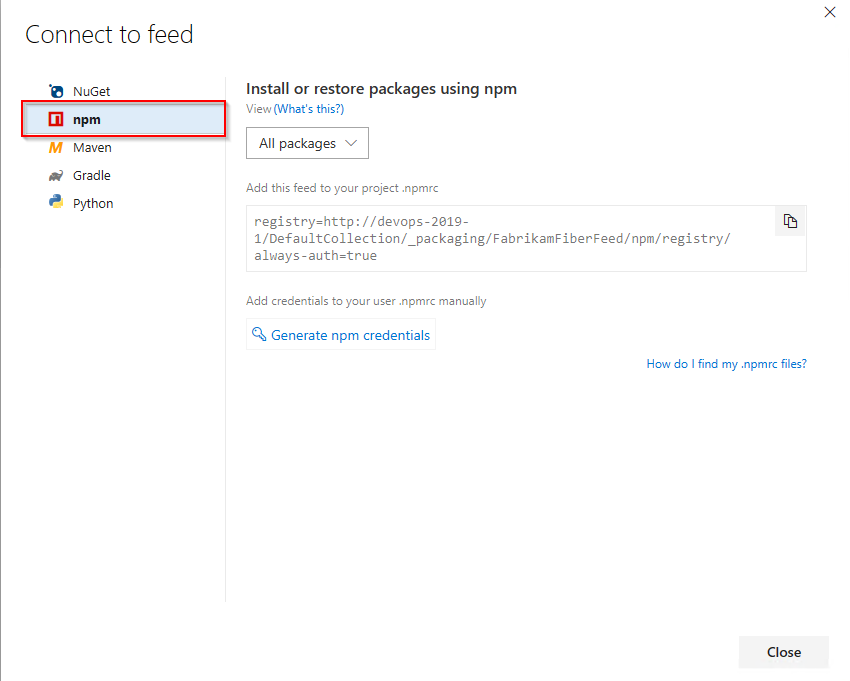
Select Artifacts, and then select Connect to feed.
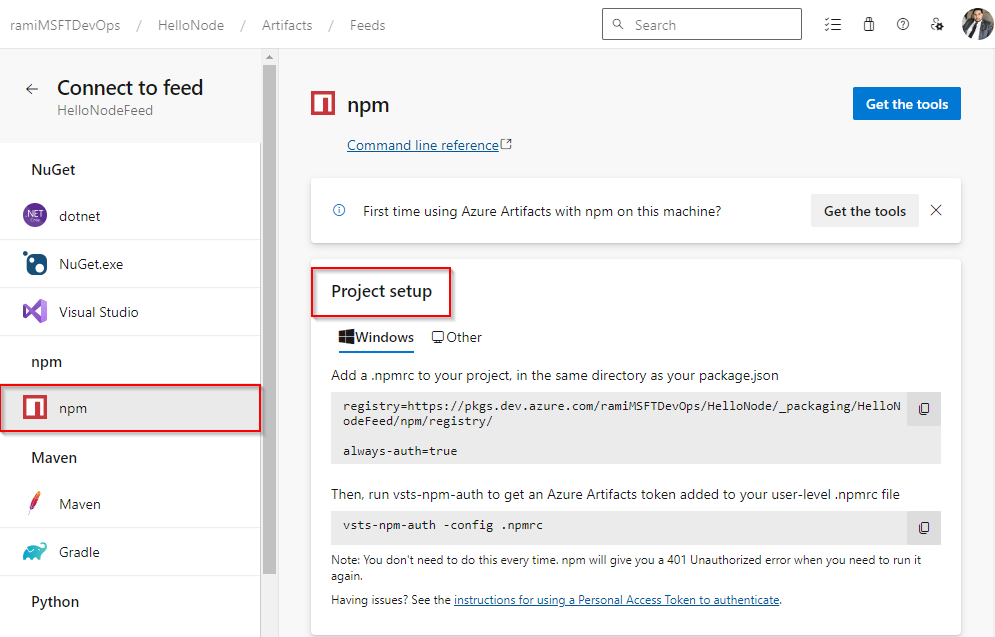
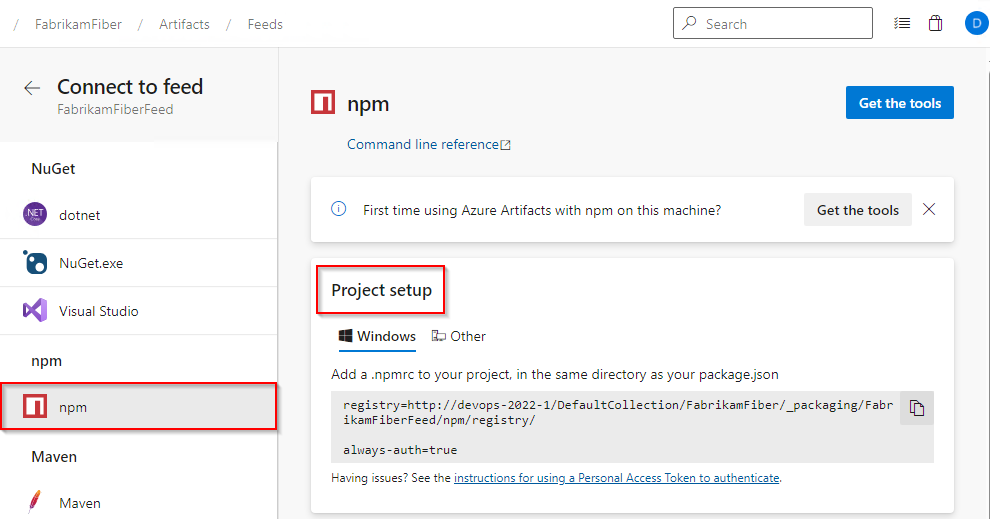
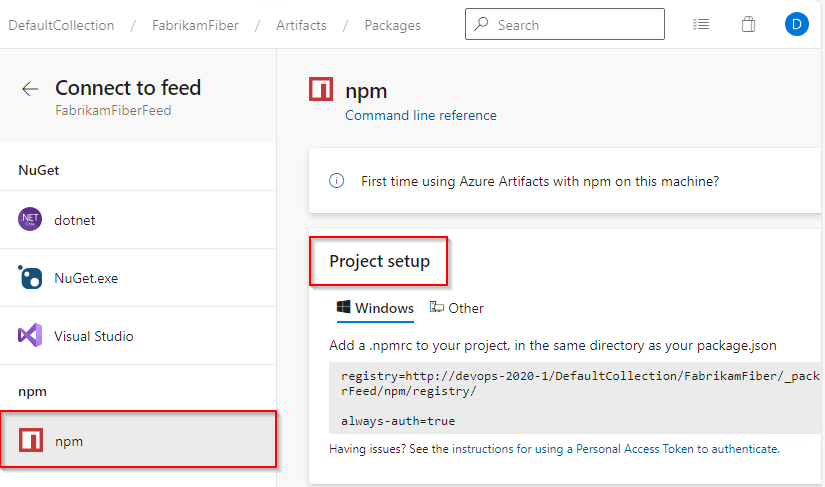
A new window will appear. From the left-hand navigation pane, select npm.
Follow the instructions to configure your project and user .npmrc files.
Tip
Using multiple registries in .npmrc files is supported with scopes and upstream sources.
Pipeline authentication
To authenticate with your pipeline, Azure Artifacts recommends using the npm authenticate task.
When using task runners such as gulp or Grunt, it's important to include your npm authenticate task at the start of your pipeline. This action ensures that your credentials are injected into your project's .npmrc file and retained throughout the pipeline run, enabling subsequent steps to access the credentials in the configuration file.
Navigate to your project, select Pipelines, and then select your pipeline definition.
Select Edit to modify your pipeline.
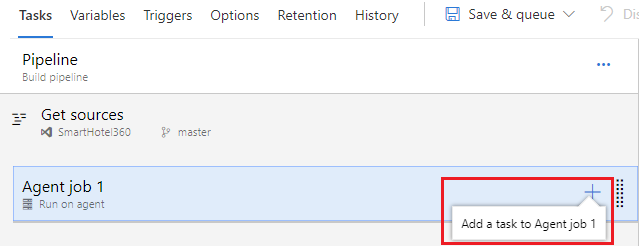
Select + to add a new task to your pipeline.
Navigate to your project, select Pipelines > Builds, and then select your build definition.
Select Edit to modify your build pipeline.
Select + to add a new task to your build pipeline.
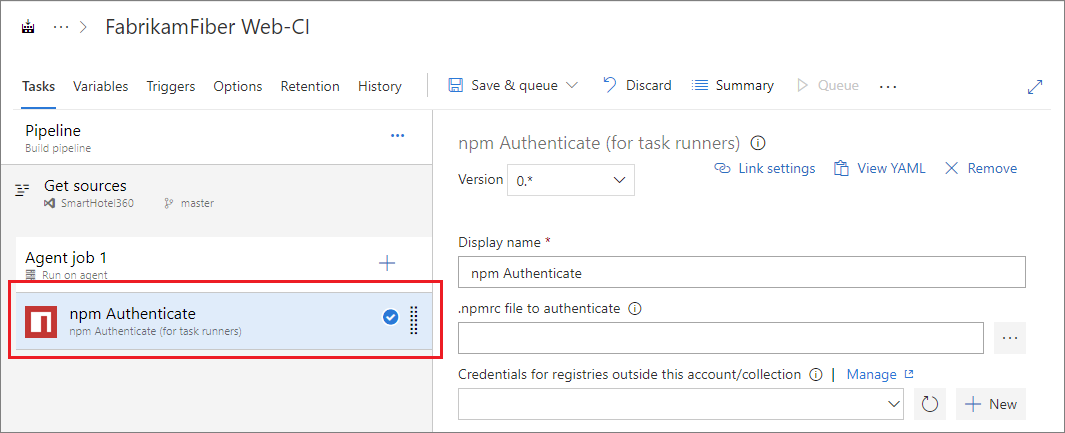
Search for the npm Authenticate task, and then select Add.
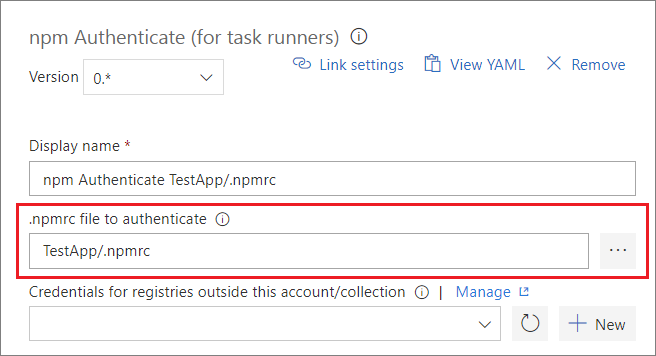
Select your .npmrc file, and then select Save & queue when you're done.
- task: npmAuthenticate@0
  inputs:
    workingFile: .npmrc                ## Path to the npmrc file
    customEndpoint: #Optional          ## Comma-separated list of npm service connection names for registries from external organizations. For registries in your org, leave this blank
Note
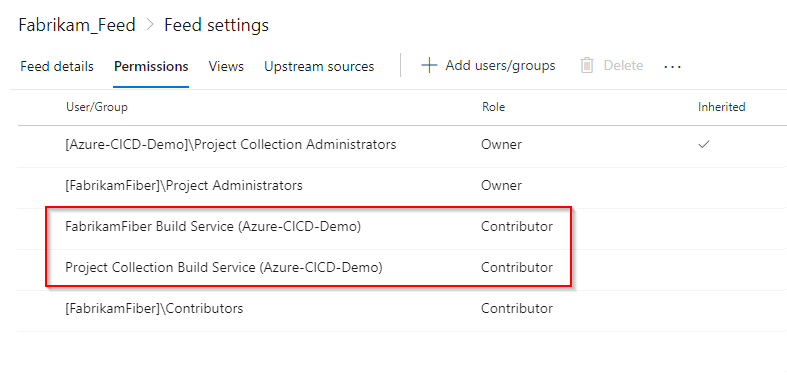
For your pipeline to access your feed, ensure that the build service role is set to Feed And Upstream Reader (Contributor) in your feed settings.
Note
If your organization is using a firewall or a proxy server, make sure you allow the appropriate domain URLs. See Allowed IP addresses and domain URLs for details.
Troubleshoot
vsts-npm-auth is not recognized
If you encounter the following error during project execution:
Cmd: 'vsts-npm-auth' is not recognized as an internal or external command, operable program or batch file.
PowerShell: vsts-npm-auth : The term 'vsts-npm-auth' is not recognized as the name of a cmdlet, function, script file, or operable program.
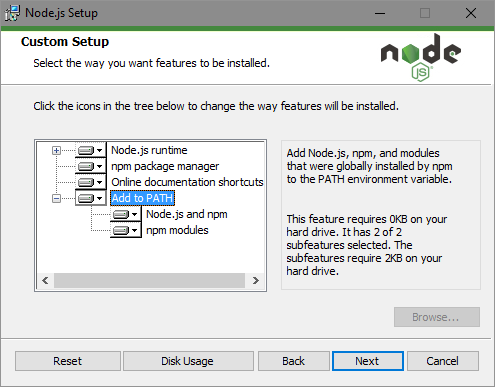
Then it's probable that the npm modules folder hasn't been added to your path. To address this, rerun the Node.js setup and make sure to select the Add to PATH option.
Alternatively, you can add the npm modules folder to your path by modifying the PATH variable to %APPDATA%\npm in Command Prompt or $env:APPDATA\npm in PowerShell.
Unable to authenticate
If you're running into an E401 error: code E401 npm ERR! Unable to authenticate. Run the vsts-npm-auth command with -F flag to reauthenticate.
vsts-npm-auth -config .npmrc -F
Reset vsts-npm-auth
Follow these steps to reset your vsts-npm-auth credentials:
Coming soon: Throughout 2024 we will be phasing out GitHub Issues as the feedback mechanism for content and replacing it with a new feedback system. For more information see: https://aka.ms/ContentUserFeedback.