Note
Access to this page requires authorization. You can try signing in or changing directories.
Access to this page requires authorization. You can try changing directories.
Azure DevOps Services | Azure DevOps Server | Azure DevOps Server 2022 | Azure DevOps Server 2020
Stakeholders are users with free but limited access to Azure DevOps features and functions. With Stakeholder access, you can add and modify work items, manage build and release pipelines, and view dashboards. You can check project status and provide direction, feedback, feature ideas, and business alignment to a team. For more information, see Create your first pipeline and Supported source repositories.
Stakeholders are users with free but limited access to Azure DevOps features and functions. With Stakeholder access, you can add and modify work items, view and approve pipelines, and view dashboards. You can check project status and provide direction, feedback, feature ideas, and business alignment to a team.
For more information, see the Stakeholder access quick reference and the feature matrix.
Prerequisites
| Category | Requirements |
|---|---|
| Private project: | |
| Access levels | Stakeholder access. To get access as a Stakeholder, ask your organization owner or Project Collection Administrator to add you to a project with Stakeholder access. For more information, see Add organization users and manage access. |
| Permissions | Member of the Contributors or Project Administrators group. You can view boards, open and modify work items, and add child tasks to a checklist. You can't reorder or reparent a backlog item by using the drag-and-drop method. You can't update a field on a card. |
| Public project: | |
| Access levels | Stakeholder access. |
| Permissions | Member of the Contributors or Project Administrators group for full access. For more information, see Default permissions quick reference. |
| Category | Requirements |
|---|---|
| Private project: | |
| Access levels | Stakeholder access. To get access as a Stakeholder, ask your server administrator to add you to a security group that has Stakeholder access. For more information, see Change access levels. |
| Permissions | Member of the Contributors or Project Administrators group. You can view boards, open and modify work items, and add child tasks to a checklist. You can't reorder or reparent a backlog item by using the drag-and-drop method. You can't update a field on a card. |
| Public project: | |
| Access levels | Stakeholder access. |
| Permissions | Member of the Contributors or Project Administrators group for full access. For more information, see Default permissions quick reference. |
Sign in to a project
Select the link provided in your email invitation or open a browser window and enter the URL for the web portal.
https://dev.azure.com/OrganizationName/ProjectNamehttp://ServerName:8080/tfs/DefaultCollection/ProjectNameFor example, to connect to the server named FabrikamPrime and the project named Contoso, enter
http://FabrikamPrime:8080/tfs/DefaultCollection/Contoso.Enter your credentials. If you can't sign in, ask the organization owner or Project Administrator to add you as a member of the project with Stakeholder access.
Understand work items and types
Work items support planning and tracking work. Each work item is based on a work item type. Each work item is assigned an identifier, which is unique in an organization or project collection.
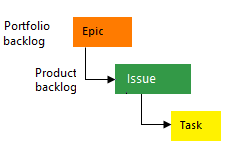
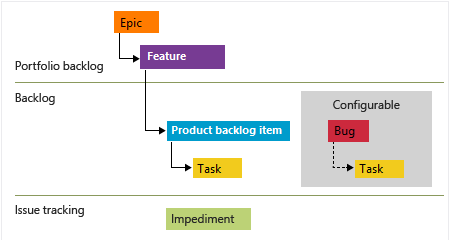
Different work items track different types of work. The work item types available are based on the process that was used when your project was created. The options are Agile, Basic, Scrum, or Capability Maturity Model Integration (CMMI), as illustrated in the following images. For more information, see About work items and work item types.
The following image shows the hierarchy for the Agile process backlog work item:
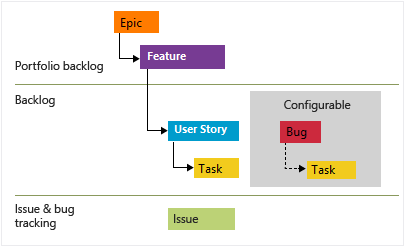
- User Stories and tasks are used to track work.
- Bugs track code defects.
- Epics and features are used to group work under larger scenarios.
Each team can configure how they manage Bug work items at the same level as User Story or Task work items. Use the Working with bugs setting. For more information about using these work item types, see Agile process.

Open your board
After you connect to a project, you can view work items.
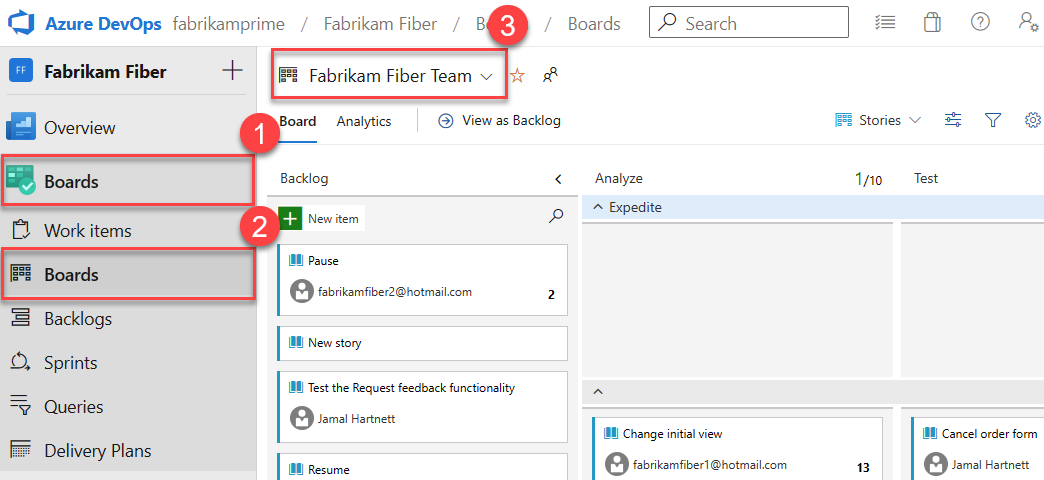
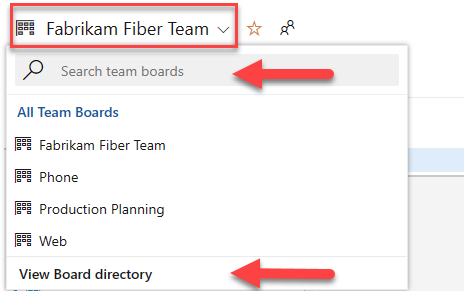
In your project, select Boards > Boards. From the dropdown menu, select a team board.
You can also enter a keyword in the search box or select View Board directory to see a list of available team boards.
Tip
Select the
 star icon to make a team board a favorite. Favorite artifacts (
 favorite icon) appear at the top of the team selector list.
Ensure that for the backlog level, you select:
- Stories for Agile.
- Issues for Basic.
- Backlog items for Scrum.
- Requirements for CMMI.

In your project, select Boards > Boards. From the dropdown menu, select a team board.
To select another team's board, open the selector. Then select a different team, or select the
 Browse all team boards option. Or, you can enter a keyword in the search box to filter the list of team backlogs for the project.
Tip
Select the
star icon to make a team board a favorite. Favorite artifacts (
favorite icon) appear at the top of the team selector list.Check that for the backlog level you selected:
- Stories for Agile.
- Issues for Basic.
- Backlog items for Scrum.
- Requirements for CMMI.

Add work items
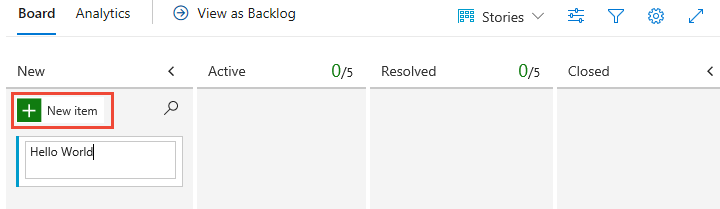
From your board, select the ![]() plus sign, enter a title, and then select Enter.
plus sign, enter a title, and then select Enter.
From the board, you can't add work items, but you can open them and annotate them. To add work items, open the backlog by selecting the Backlog link. Also, you can't update the status of a work item by using the drag-and-drop method to move a different column or reorder cards within a column.
For more information, see View and add work items.
Update work items
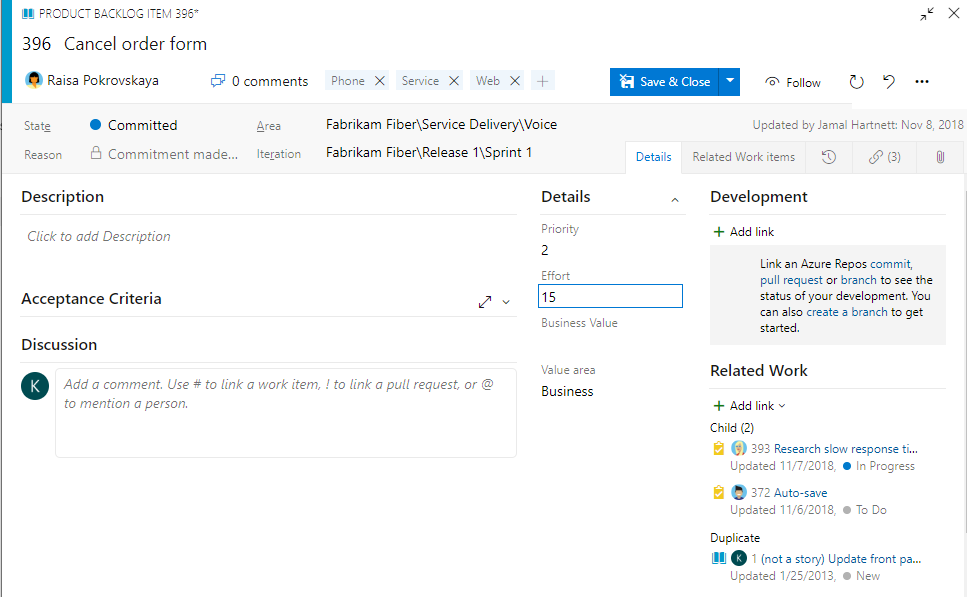
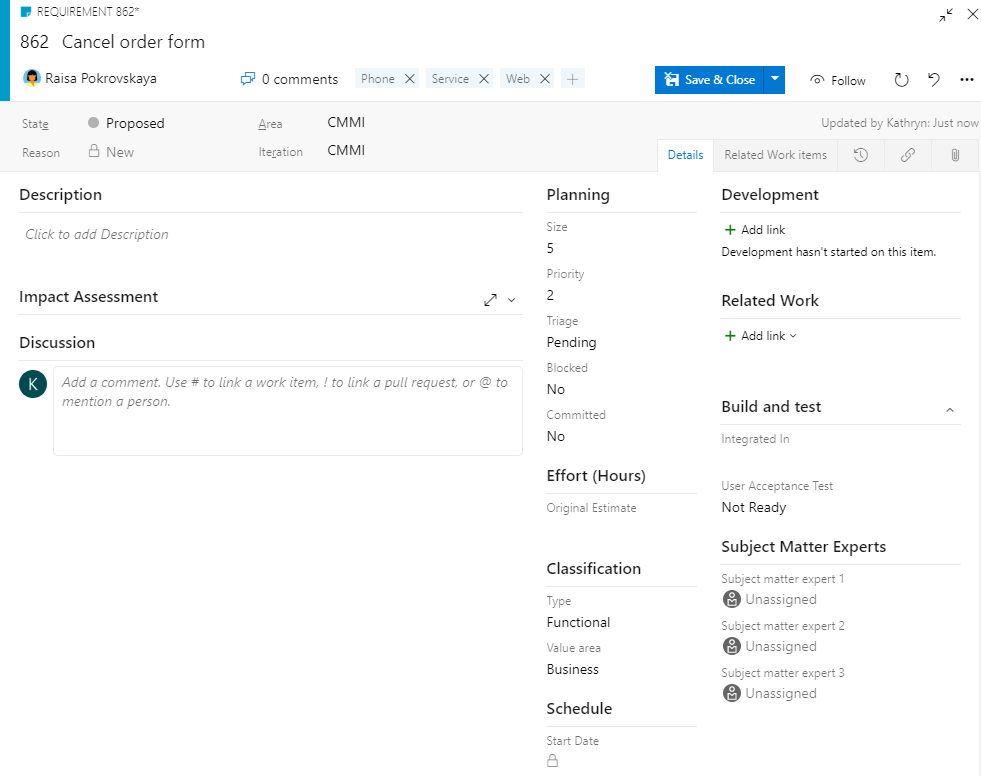
Your work item forms might differ from the following images, but the functionality is the same.
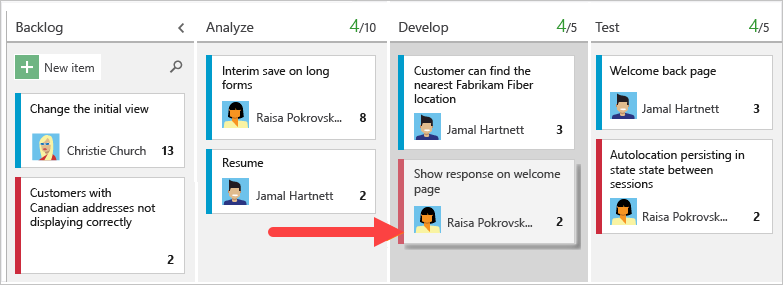
Change status
Drag a work item downstream as you finish work.
Note
Stakeholders can only use the drag-and-drop method to move cards to different columns with the Azure DevOps Server 2020.1 update. For more information, see the Release Notes.
Add details
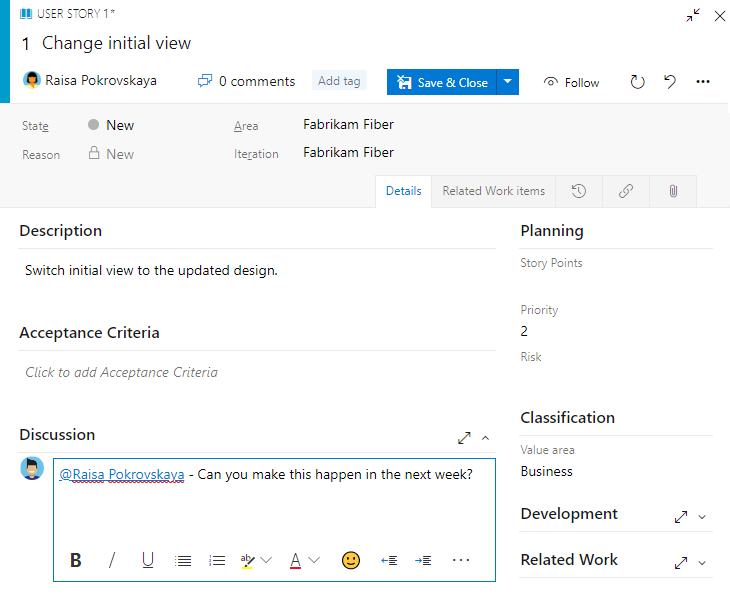
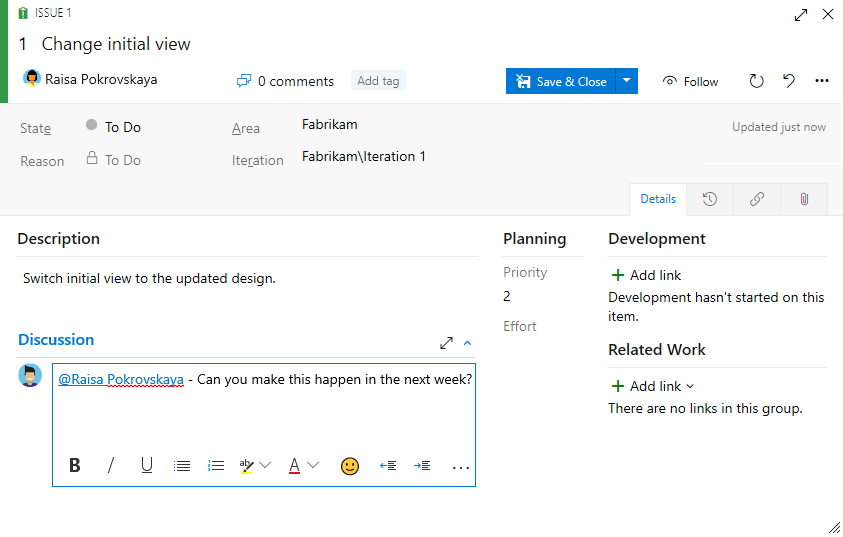
To open a work item, double-click the title or highlight it, and then select Enter. This example shows how to assign work. You can only assign work to a user who was added to the project.
This example assigns the story to Raisa Pokrovskaya and at-mentions Raisa in a discussion note. When you're finished, select Save & Close.
To add more details, change field values, add a description or tags, and add comments. For more information, see:
- Plan and track work in Azure Boards.
- Add tags to work items. As a Stakeholder, you can add existing tags to a work item, but you can't add new tags.
- Capture comments in the Discussion section.
View as backlog
Check the product backlog to see how the team prioritized their work. Backlog items appear in priority order. Work item types might include bugs, depending on the process used when your project was created. For more information, see About default processes and process templates.
From the board, select View as backlog.

From the board, select View as backlog.

The list of backlog items appears in priority order. You can add a backlog item, which goes to the bottom of the list. With Stakeholder access, you can't reprioritize work.
Find work items
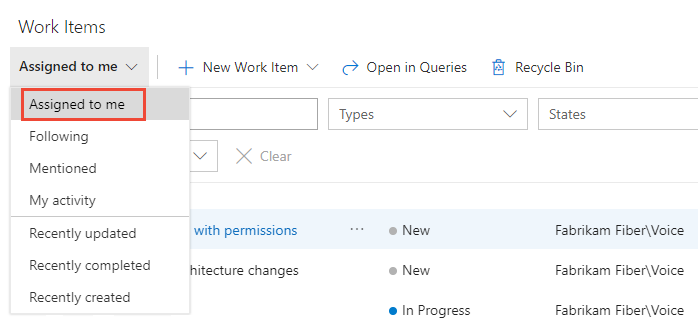
Select Boards > Work Items. Then select an option from the dropdown menu. For example, select Assigned to me.
For more information, see: