Events
Mar 17, 11 PM - Mar 21, 11 PM
Join the meetup series to build scalable AI solutions based on real-world use cases with fellow developers and experts.
Register nowThis browser is no longer supported.
Upgrade to Microsoft Edge to take advantage of the latest features, security updates, and technical support.
Azure DevOps Services | Azure DevOps Server 2022 - Azure DevOps Server 2019
To improve collaboration between development and IT teams, Azure Pipelines supports integration with ServiceNow. Teams can reduce the risks associated with changes and follow service management methodologies such as Information Technology Infrastructure Library (ITIL) by including change management gates in release pipelines.
In this tutorial, you learn how to:
Install the Azure Pipelines extension on your ServiceNow instance. See Buying Overview for more details on installing apps from the ServiceNow store. You need HI credentials to complete the installation.
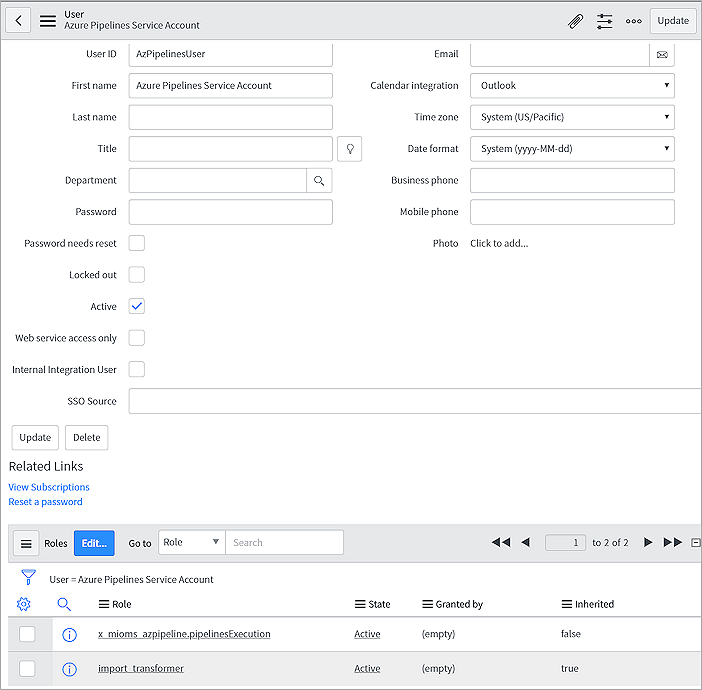
In ServiceNow, create a new user for the Azure Pipelines Service Account and grant it the x_mioms_azpipeline.pipelinesExecution role.
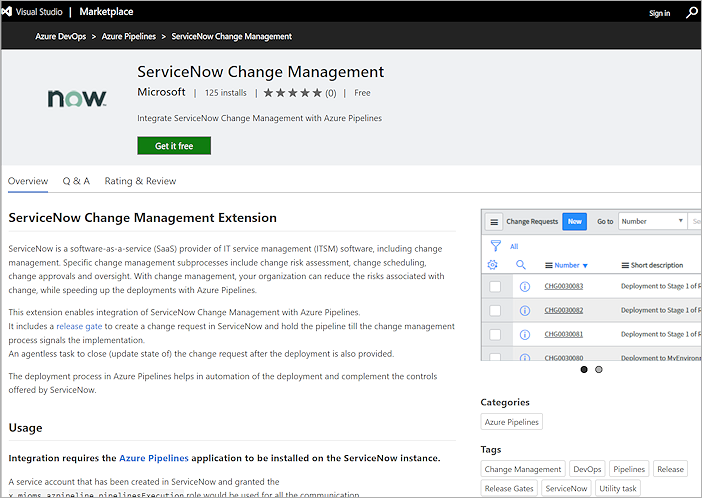
In your Azure DevOps organization, install the ServiceNow Change Management extension.
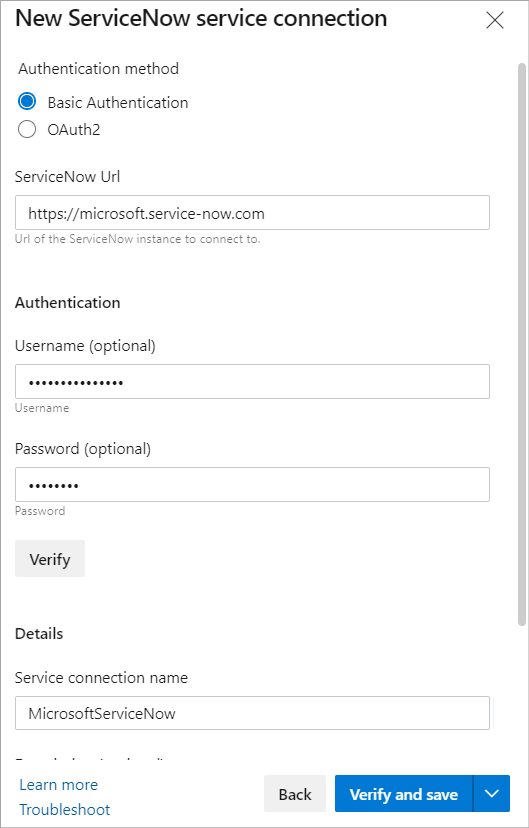
In your Azure DevOps project, create a new ServiceNow service connection by using either Basic authentication or OAuth2 authentication. For more information, see Create a service connection.
You can add ServiceNow integration to a Classic release pipeline or to a YAML pipeline that deploys to an environment.
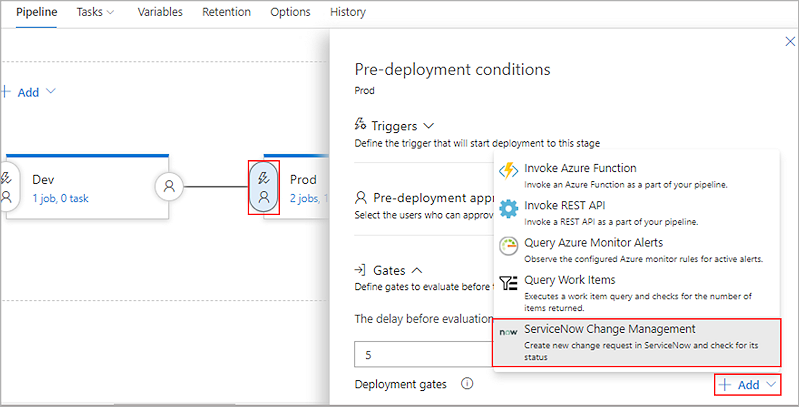
In your Azure Pipelines release pipeline, select the Pre-deployment conditions icon.
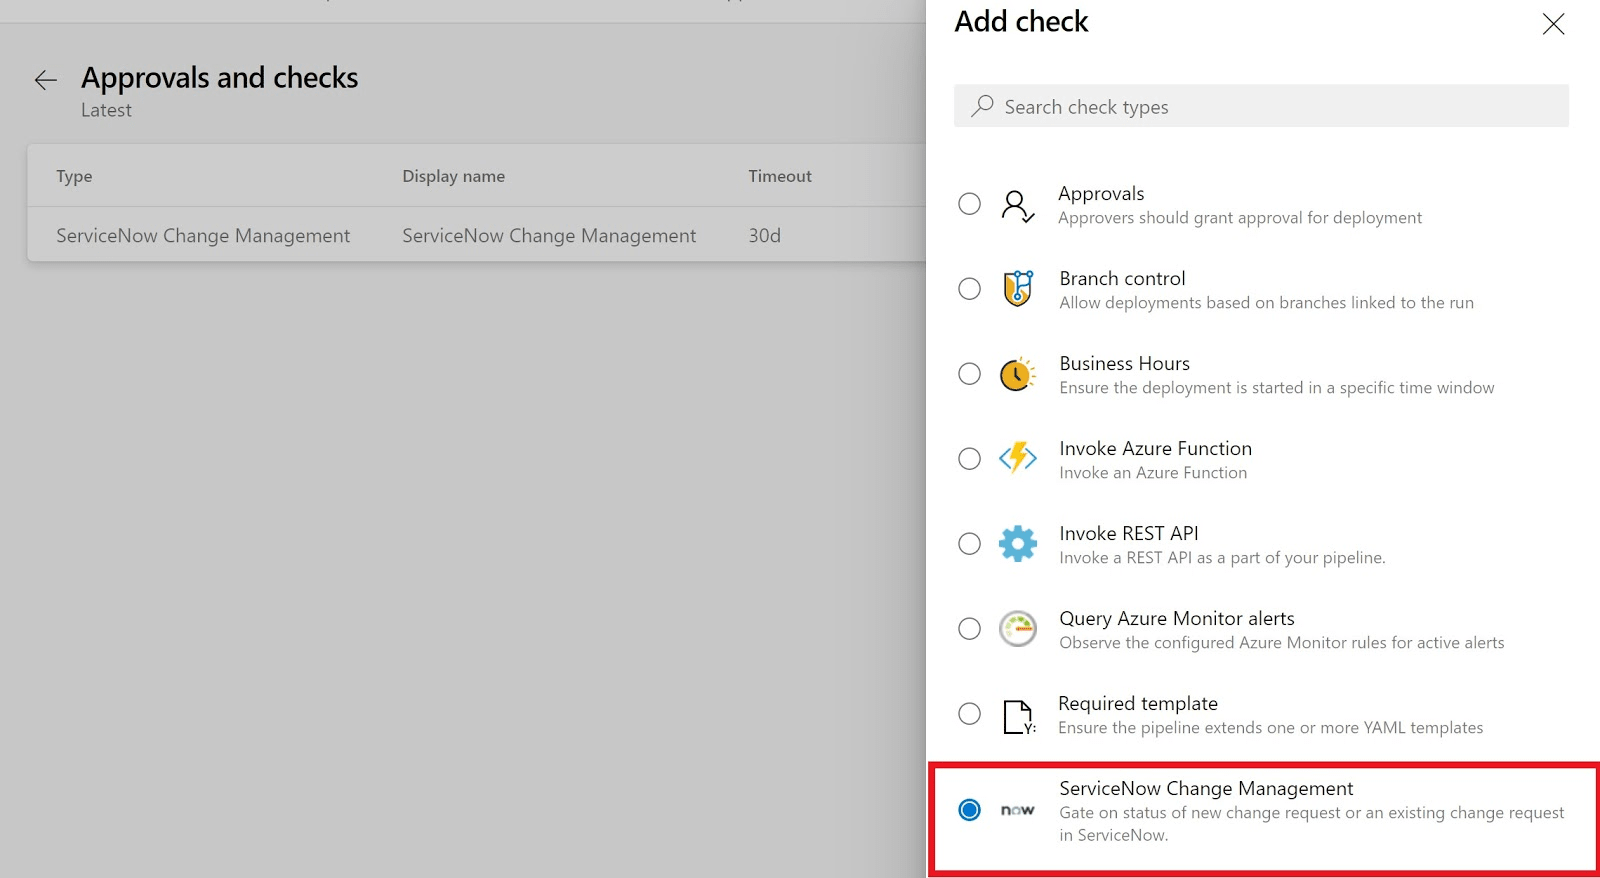
On the Pre-deployment conditions screen, expand and enable Gates, select Add next to Deployment gates, and select the ServiceNow Change Management pre-deployment gate.
On the ServiceNow Change Management settings screen, under ServiceNow connection, select the ServiceNow service connection you created earlier.
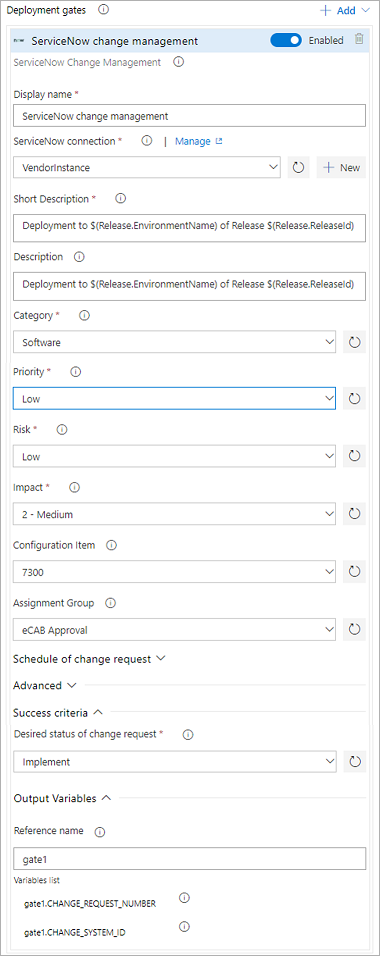
Complete the rest of the form as follows:
| Setting | Description |
|---|---|
| Action | Select Create new change request or Use existing change request. |
| Change type | Select Normal, Standard, or Emergency. |
| Short description | Enter a summary of the change. |
| Schedule of change request | Optionally, enter the schedule of the change as honored by the ServiceNow workflow. Under Planned start date and Planned end date, enter UTC date and time in format yyyy-MM-ddTHH:mm:ssZ. |
| Description | Optionally, enter a detailed description of the change. |
| Category | Optionally select the category of the change, such as Hardware, Network, or Software. |
| Priority | Optionally select the priority of the change. |
| Risk | Optionally select the risk level for the change. |
| Impact | Optionally select the effect that the change has on business. |
| Configuration item | Optionally select the configuration item that the change applies to. |
| Assignment group | Optionally select the group that the change is assigned to. |
| Advanced > Additional change request parameters | Select the ellipsis next to the field and then select Add to add more parameters. Names must be field names, not labels, prefixed with u_, such as u_backout_plan. Values must be valid in ServiceNow. Invalid entries are ignored. |
| Success criteria | Select either Desired state of change request or Advanced success criteria. |
| Desired state of change request | Select the change request status value necessary for the gate to succeed and the pipeline to continue. |
| Advanced success criteria | Enter an expression that controls when the gate should succeed. The change request is defined as root['result'] in the response from ServiceNow. For example, and(eq(root['result'].state, 'New'),eq(root['result'].risk, 'Low')). For more information, see Expressions. |
| Output Variables > Reference name | To be able to use output variables in your deployment workflow, specify a reference name. You can access gate variables by using PREDEPLOYGATE as a prefix in an agentless job. For example, when the reference name is set to gate1, you can get the change request number by using the variable $(PREDEPLOYGATE.gate1.CHANGE_REQUEST_NUMBER). |
| Variables list | CHANGE_REQUEST_NUMBER is the number of the change request. CHANGE_SYSTEM_ID is the System ID of the change request. |
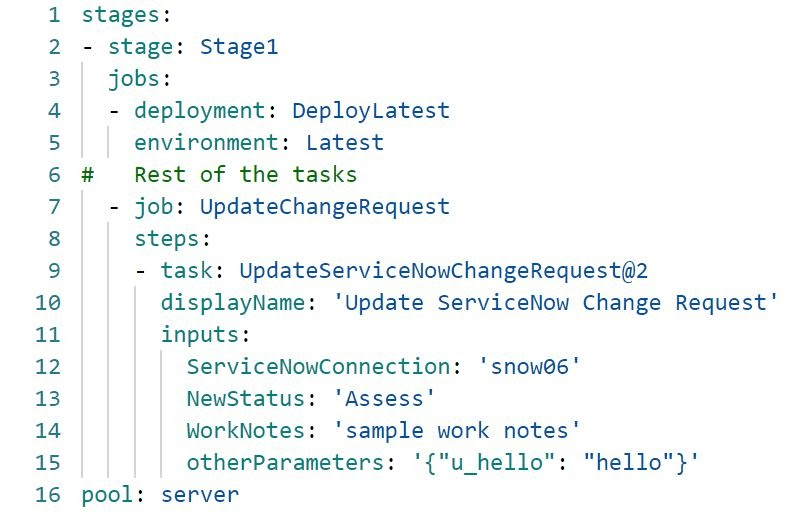
At the end of your release pipeline, add an Agentless job with the task Update ServiceNow Change Request.
In the task settings form, under ServiceNow connection, select your ServiceNow service connection.
Under Change request number, enter the ServiceNow change request number to update.
Select Update status, and then under Updated status of change request, choose or enter the status to set for the change request.
In Work Notes under Advanced, optionally enter any work notes to be added for the change request update.

Note
The Update ServiceNow Change Request task fails if none of the change request fields are updated during execution. ServiceNow ignores invalid fields and values passed to the task.
Select Create release to start a new release.
Your pipeline should create a new change request in ServiceNow as part of the pre-deployment conditions you created earlier.
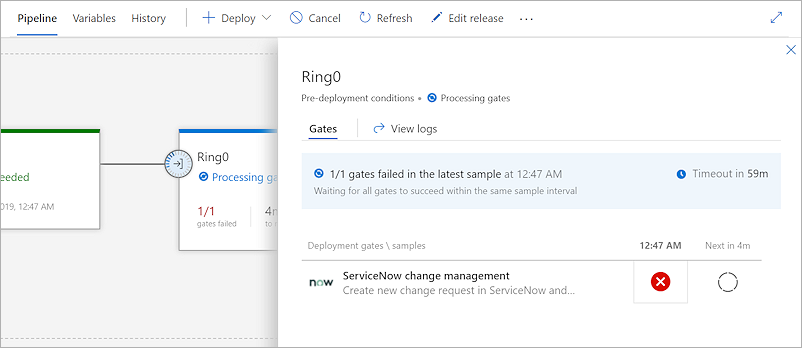
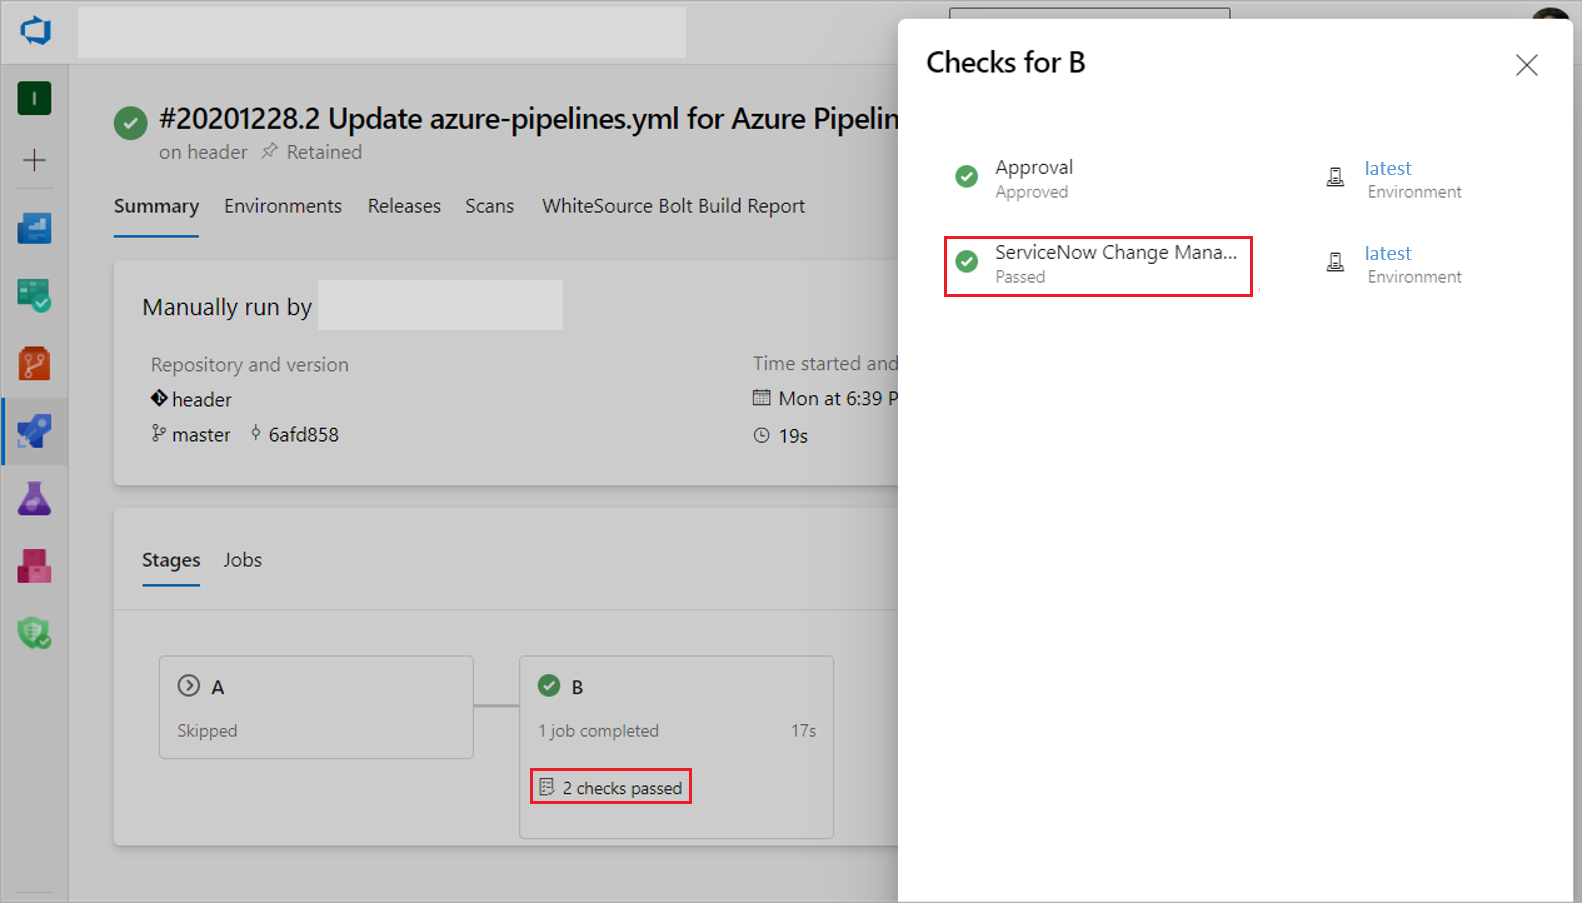
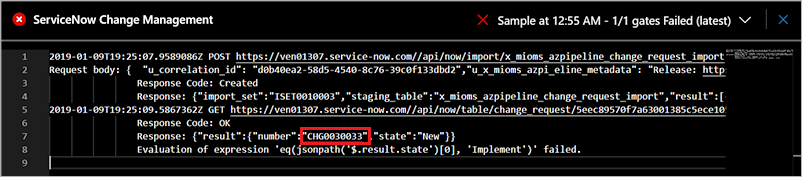
The pipeline waits for all the gates to succeed within the same sample interval. To check the change number, select the status icon to view your pipeline logs.
The change request is queued in ServiceNow, and the change owner can view it.
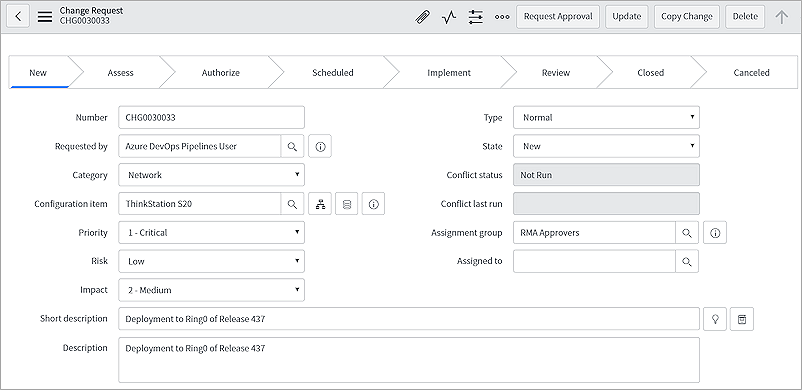
You can find the release pipeline that triggered the new change request under the Azure DevOps Pipeline metadata section.

When the change is ready for implementation and moved to Implement state, the pipeline resumes execution and the gate status should return succeeded.
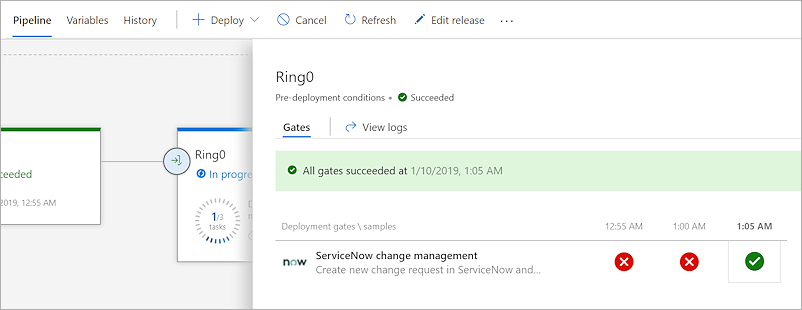
The change request closes automatically after deployment.
The Azure Pipelines ServiceNow extension supports the Kingston, London, New York, Paris, Quebec, Rome, San Diego, Tokyo, and Utah releases.
The Azure Pipelines ServiceNow extension supports the Kingston, London, New York, Paris, Quebec, San Diego, Tokyo, and Utah releases.
The Azure Pipelines ServiceNow extension supports the Kingston, London, New York, Paris, and Quebec releases.
Azure Pipelines ServiceNow integration supports normal, standard, and emergency change requests.
You can specify more change properties from the Additional change request parameters field or in otherParameters. Use a key-value pairs JSON format, with the name being the field name, not the label, prefixed with u_.
If you define custom fields in the change request, you must add mapping for custom fields in Import set transform map.
Change Management Core and Change Management - State Model plugins must be active on your ServiceNow instance for the dropdowns to work. For more information, see Upgrade change management and Update change request states.
Events
Mar 17, 11 PM - Mar 21, 11 PM
Join the meetup series to build scalable AI solutions based on real-world use cases with fellow developers and experts.
Register nowTraining
Certification
Microsoft Certified: Dynamics 365 Customer Service Functional Consultant Associate - Certifications
Improve business processes for customer service functions, such as automatic case creation and queue management with Microsoft Dynamics 365 Customer Service.