Note
Access to this page requires authorization. You can try signing in or changing directories.
Access to this page requires authorization. You can try changing directories.
Azure DevOps Services | Azure DevOps Server 2022 - Azure DevOps Server 2019
This article explains how to share your Power BI Desktop file, along with its datasets, measures, and charts, by creating a dashboard in Power BI.
Prerequisites
| Category | Requirements |
|---|---|
| Access levels | - Project member. - At least Basic access. |
| Permissions | By default, project members have permission to query Analytics and create views. For more information about other prerequisites regarding service and feature enablement and general data tracking activities, see Permissions and prerequisites to access Analytics. |
Publish to Power BI
If you're using an Analytics view, make sure the view is set to Shared, not Private.
Open your Power BI Desktop file that contains the data you want to publish.
On the Home tab, select Publish.
Follow the prompts for signing in. If you don't have a Power BI account, create one when prompted. Select Sign in.
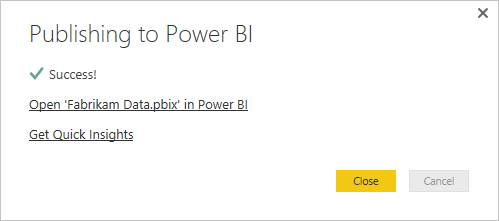
After publishing, to view your report in Power BI, select the Open 'file name' in Power BI link.
Configure refresh schedule
Scheduled refresh allows datasets to be updated automatically at specified intervals, ensuring that reports and dashboards reflect the most current data.
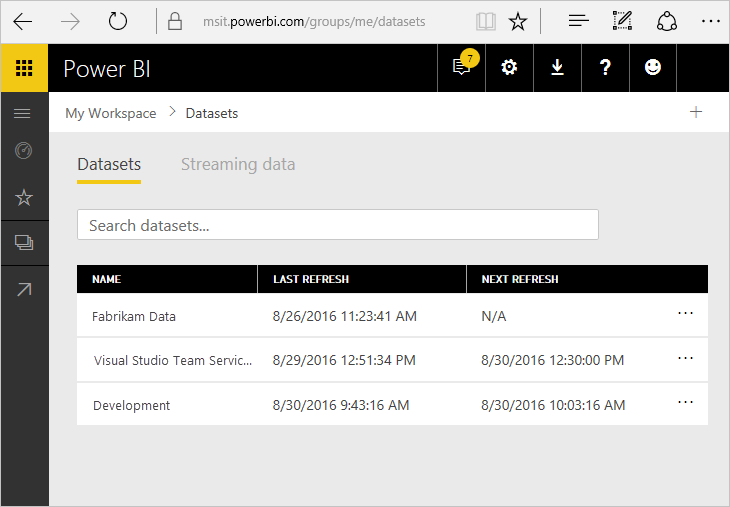
Ensure that your Power BI report is saved to your Power BI workspace.
In your Power BI workspace, select the ellipsis (...) next to your dataset and select Schedule Data Refresh.
On the schedule refresh page, choose which data connections you want to refresh.
Set the refresh frequency and specify the time of day for the refresh to occur. The refresh can start as early as five minutes before the scheduled time, but delays of up to one hour might occur.
Find the dataset for your report, named after your file, and select the ellipsis ... next to it.
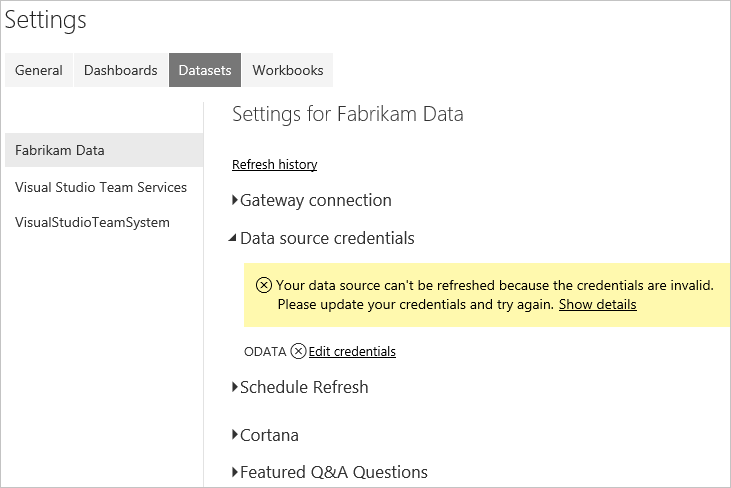
Under Data source credentials, select the Edit credentials link next to ODATA.
Choose the appropriate authentication method:
Important
We recommend the more secure Microsoft Entra tokens over higher-risk personal access tokens. Learn more about our efforts to reduce PAT usage. Review our authentication guidance to choose the right authentication mechanism for your needs.
- oAuth2 (recommended) for Microsoft Entra ID.
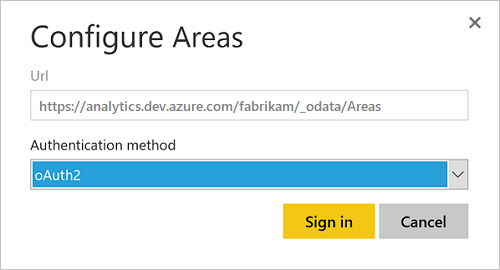
- Basic for Personal Access Token (PAT) credentials.
Important
If you use a PAT, remember it expires after a set interval. When it expires, update the credentials. Otherwise, the report stops updating with the latest data, even though it still displays existing data.
Select Sign in.
After you complete these steps, Power BI refreshes your data on the schedule you configure, using the credentials you provided.
Important
Any data included in the Analytics view and published to Power BI is accessible to all users with access to the report, regardless of the project permissions set in Azure DevOps.