Note
Access to this page requires authorization. You can try signing in or changing directories.
Access to this page requires authorization. You can try changing directories.
This article provides information on how to create an environment with a self-contained Service Fabric cluster in Azure DevTest Labs.
Overview
DevTest Labs can create self-contained test environments as defined by Azure Resource Manager templates. These environments contain both IaaS resources, like virtual machines, and PaaS resources, like Service Fabric. DevTest Labs allows you to manage virtual machines in an environment by providing commands to control the virtual machines. These commands give you the ability to start or stop a virtual machine on a schedule. Similarly, DevTest Labs can also help you manage Service Fabric clusters in an environment. You can start or stop a Service Fabric cluster in an environment either manually or via a schedule.
Note
Azure Deployment Environments (ADE) is highly recommended for creating environments. ADE empowers developers to rapidly deploy app infrastructure using project-based templates, ensuring consistent and secure environments for your development teams.
To learn more about Azure Deployment Environments, see Azure Deployment Environments documentation.
Create a Service Fabric cluster
Service Fabric clusters are created using environments in DevTest Labs. Each environment is defined by an Azure Resource Manager template in a Git repository. The public Git repository for DevTest Labs contains the Resource Manager template to create a Service Fabric cluster in the ServiceFabric-Cluster folder.
First, create a lab in Azure DevTest Labs by using instructions in the following article: Create a lab. Notice that the Public environments option is On by default.
Confirm that the Service Fabric provider is registered for your subscription by following these steps:
- Select Subscriptions on the left navigational menu, and select your Subscription
- On the Subscription page, select Resource providers in the Settings section on the left menu.
- If Microsoft.ServiceFabric isn't registered, select Register.
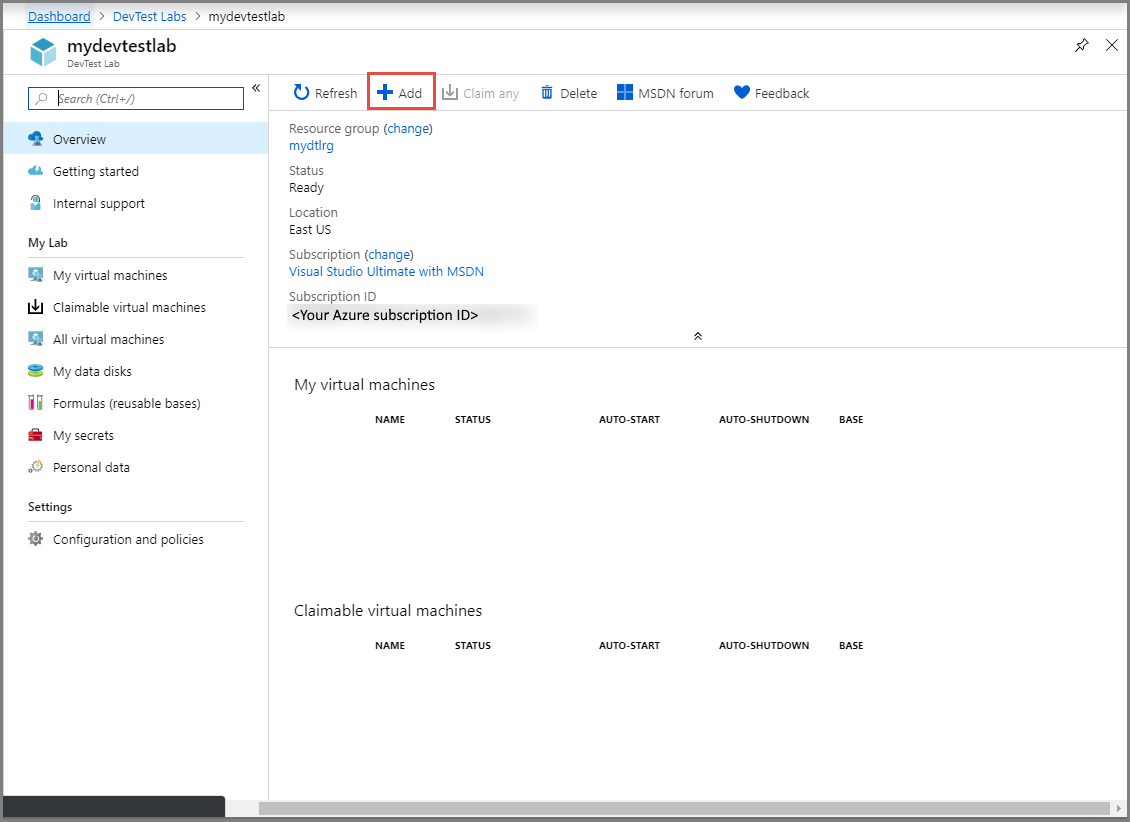
On the DevTest Lab page for your lab, select + Add on the toolbar.
On the Choose a base page, select Service Fabric Lab Cluster in the list.

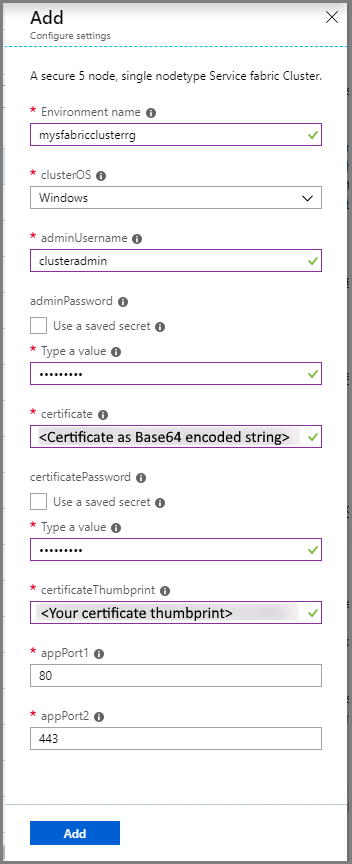
On the Configure settings page, do the following steps:
Specify a name for your cluster environment, which is the Azure resource group for the Service Fabric cluster.
Select the operating system (OS) for the cluster virtual machines. The default value is: Windows.
Specify a name for the administrator for the cluster.
Specify a password for the administrator.
For the certificate, enter your certificate information as a Base64 encoded string. To create a certificate, do the following steps:
- Download the Create-ClusterCertificate.ps1 file from the Git repository. Or clone the repository on your machine.
- Launch PowerShell.
- Run the ps1 file using the command
.\Create-ClusterCertificate.ps1. You see a text file opened in notepad with the information you need to fill in the certificate-related fields on this page.
Enter the password for the certificate.
Specify the thumbprint for your certificate.
Select Add on the Configure Settings page.
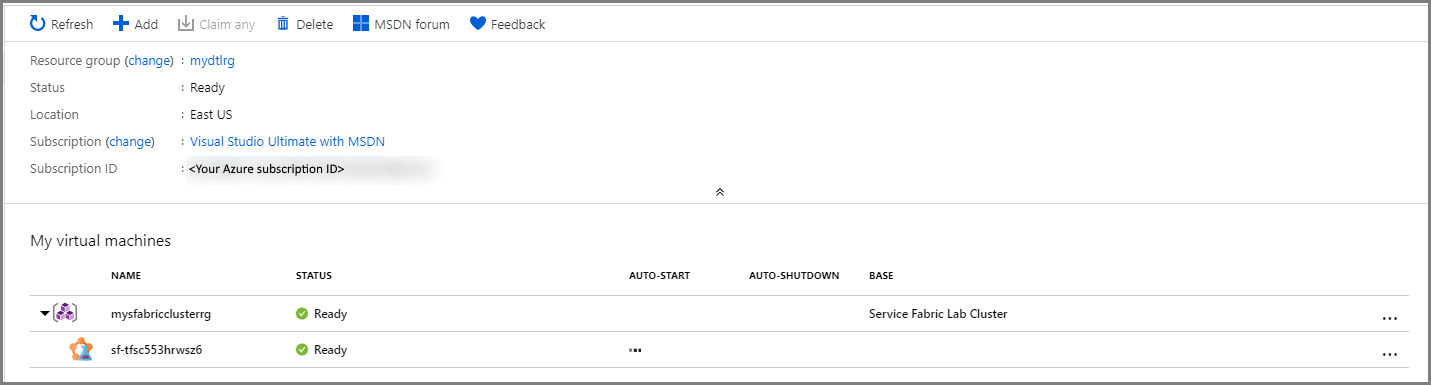
After the cluster is created, you see a resource group with the name of the environment you provided in the previous step. When you expand, you see the Service Fabric cluster in it. If the status of resource group is stuck at Creating, select Refresh on the toolbar. The Service Fabric cluster environment creates a 5-node 1-nodetype cluster on either Linux or Windows.
In the following example, mysfabricclusterrg is the name of the resource group you created for the Service Fabric cluster. Remember that lab environments are self-contained in the resource group you created them in. This limitation means that the template that defines the environment can access resources only within the newly created resource group or the virtual networks that the lab uses. This sample creates all the required resources in the same resource group.
Start or stop the cluster
You can start or stop the cluster from either the DevTest Labs page itself or from the Service Fabric Cluster page provided by DevTest Labs.
From the DevTest Labs page
You can start or stop the cluster on the DevTest Labs page for your lab.
Select three dots (...) for the Service Fabric cluster as shown in the following image:

You see two commands in the context menu to start and stop the cluster. The start command starts all nodes in a cluster. The stop command stops all nodes in a cluster. Once you stop a cluster, the Service Fabric cluster itself remains in a ready state. But no nodes are available until you reissue the start command on the cluster in the lab.
There are a few considerations to note when using a Service Fabric cluster in a test environment. It may take some time for the Service Fabric cluster to fully rehydrate after the nodes have been restarted. To keep data from shutdown to startup, you must save the data on a managed disk attached to the virtual machine. There are performance implications when using an attached managed disk, so it's recommended for test environments only. If the disk used for data storage isn't backed up, you lose the data when you issue the stop command on the cluster.
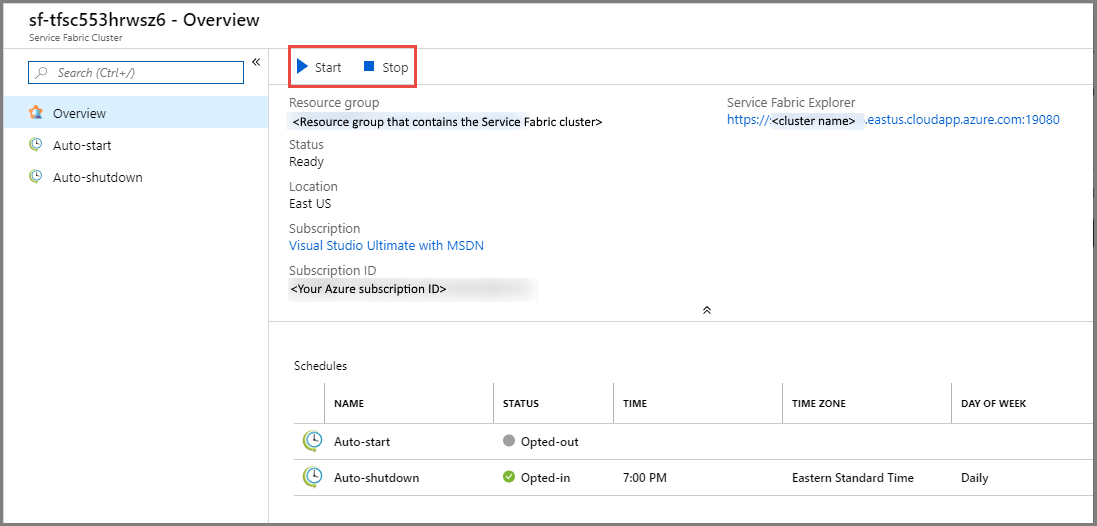
From the Service Fabric Cluster page
There's another way to start or stop the cluster.
Select your Service Fabric cluster in the tree view on the DevTest Labs page.

On the Service Fabric Cluster page for the cluster, you see commands on the toolbar to start or stop the cluster.
Configure auto startup and auto shutdown schedule
Service Fabric clusters can also be started or stopped on a schedule. This experience is similar to the experience for virtual machines in a lab. To save money, by default, every cluster created in a lab automatically shuts down at the time defined by the lab shutdown policy. You can override by specifying whether the cluster should be shut down or by specifying the time the cluster is shut down.
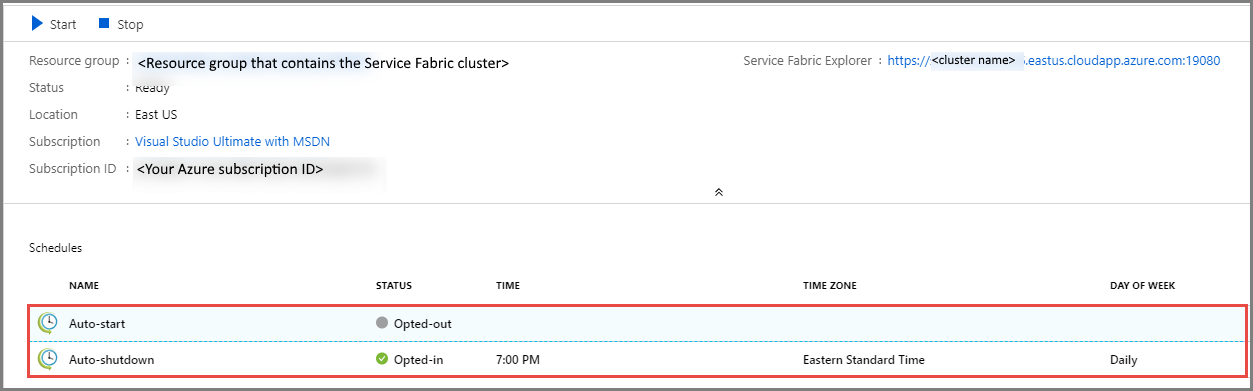
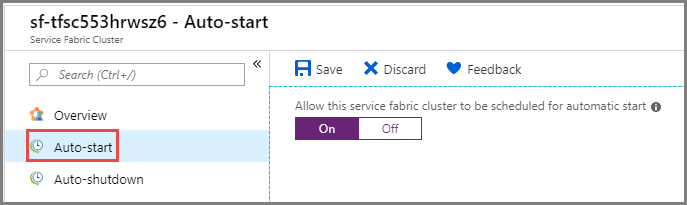
Opt in to the auto start schedule
To opt in to the startup schedule, do the following steps:
Select Auto-start on the left menu
Select On for Allow this service fabric cluster to be scheduled for automatic start. This page is enabled only if the lab owner has allowed users to autostart their virtual machines or Service Fabric clusters.
Select Save on the toolbar.
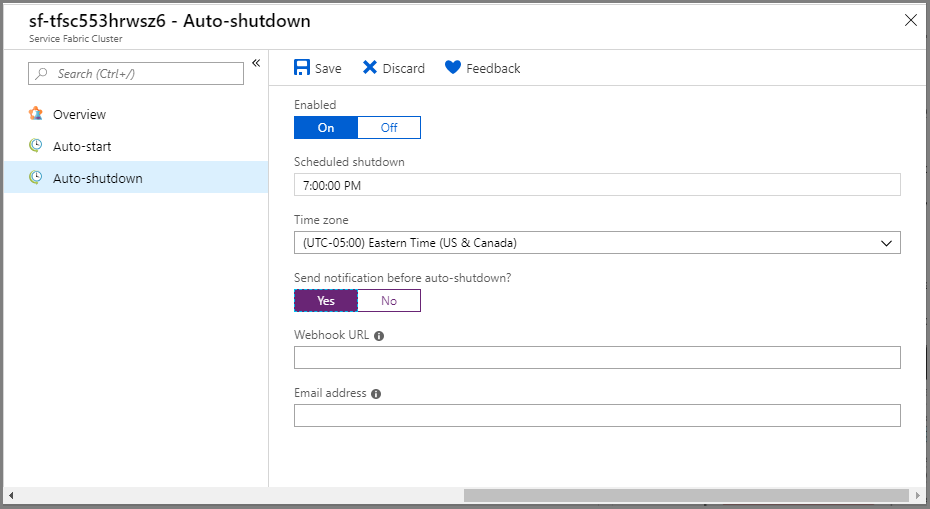
Configure auto shutdown settings
To change settings for shutdown, do the following steps:
- Select Auto-shutdown on the left menu.
- On this page, you can opt out of automatic shutdown by selecting Off for Enabled.
- If you selected On for Enabled, follow these steps:
Specify the time for shutdown.
Specify the timezone for the time.
Specify whether you want DevTest Labs to send notifications before auto shutdown.
If you selected Yes for the notification option, specify the Webhook URL and/or email address to send notifications.
Select Save on the toolbar.
To view nodes in the Service Fabric cluster
The Service Fabric cluster page in the previous steps is a DevTest Labs page. This page doesn't show you the nodes in the cluster. To see more information about the cluster, follow these steps:
On the DevTest Lab page for your lab, select the resource group in the tree view in the My virtual machines section.

On the Resource Group page, you see all the resources in the resource group in a list. Select your Service Fabric cluster from the list.
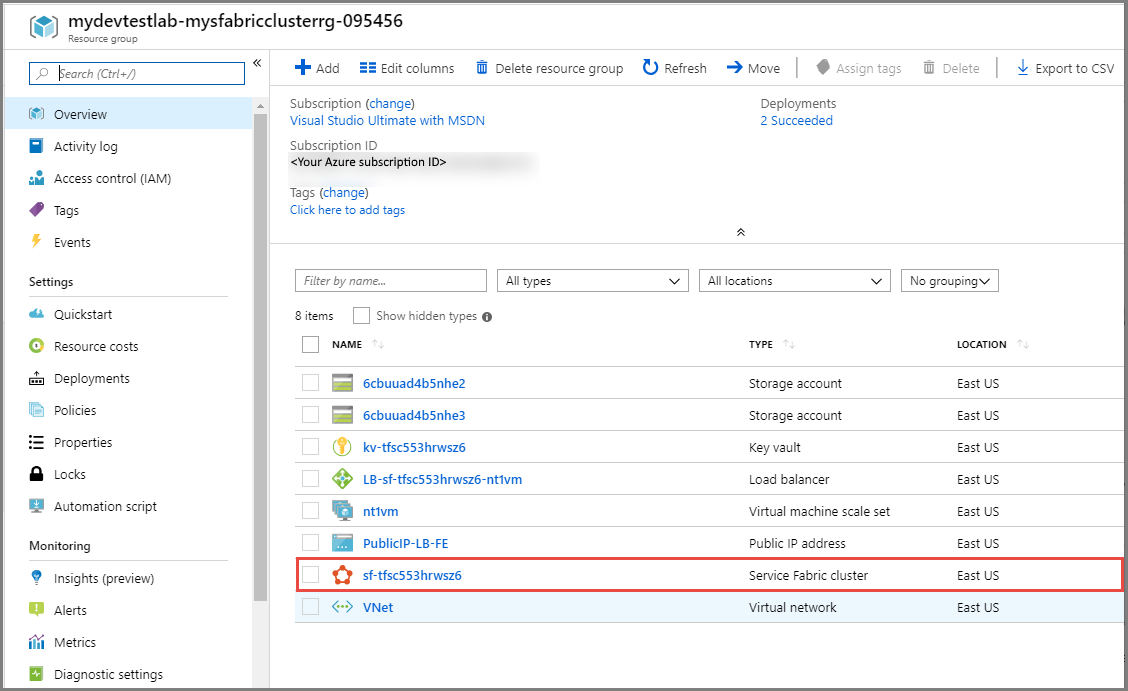
You see the Service Fabric Cluster page that Service Fabric provides for your cluster. The page shows all the information about the cluster, such as nodes and node types.

Next steps
See the following articles for details about environments: