Note
Access to this page requires authorization. You can try signing in or changing directories.
Access to this page requires authorization. You can try changing directories.
Currently viewing:  New Foundry portal version - Switch to version for the classic Foundry portal
In this quickstart, you create a provisioned throughput deployment in Microsoft Foundry, make an inference call to confirm it works, and view its utilization metric.
A provisioned throughput deployment gives your application dedicated model processing throughput with predictable latency. Billing is done per provisioned throughput unit (PTU) per hour. For long-term workloads, Azure Reservations offer financial discounts compared to hourly billing. For a full conceptual introduction, see What is provisioned throughput for Foundry Models?.
Prerequisites
- An Azure subscription with a valid payment method. If you don't have an Azure subscription, create a paid Azure account to begin.
- Azure Contributor or Cognitive Services Contributor role on the subscription or resource group where you plan to create the deployment.
- A Microsoft Foundry project in the region where you have PTU quota. A Foundry project is managed under a Foundry resource.
- Optionally, for deployment using Azure CLI, have Azure CLI installed.
Check model and region availability
Before creating a deployment, confirm that your model supports provisioned throughput in your target region.
- Go to the model and region availability table to see if your model supports provisioned throughput deployment in your target region.
- Filter by your region and verify that the model appears in a Provisioned deployment type.
Also note the model's minimum PTU count, as you need this information when you configure the deployment. Minimums vary by model and are listed in Deployment parameters and throughput values by model.
Check PTU quota
Before following this quickstart, check that you have quota for your target region and deployment type. To check your quota:
-
Sign in to Microsoft Foundry. Make sure the New Foundry toggle is on. These steps refer to Foundry (new).

Select the subscription and the Foundry resource in the region where you have PTU quota.
Select Operate in the upper-right navigation, then select Quota in the left pane.
Select Provisioned throughput unit to see your available quota. If you don't have quota, select Request Quota and complete the form. Quota approval can take several days, and you receive an email notification when the request is approved.
Tip
You can also follow this direct link to the quota request form.
Create a provisioned deployment
In this section, you create a provisioned deployment using the Foundry portal or the Azure CLI.
Use the Foundry portal for deployment
Select Discover in the upper-right navigation, then select Models in the left pane.
Select the model you want to deploy to open its model card, such as
gpt-5.1.Select Deploy > Custom settings.
In the Deployment type dropdown, select a provisioned deployment type: Global Provisioned Throughput, Data Zone Provisioned Throughput, or Regional Provisioned Throughput.
Fill in the deployment fields:
Field Description Deployment name A name you choose. Use this name in your code to call the model. Model The model to deploy, e.g., gpt-5.1.Model version The version of the model. Provisioned throughput units The number of PTUs to allocate. Must meet the model's minimum, e.g., 50.Select Confirm pricing to review the hourly rate for the deployment. Billing starts immediately the deployment is created, even when no requests are being sent. You stop billing by deleting your deployment. If you're unsure of the costs, select Cancel and review PTU billing and cost management before continuing.
Confirm and create the deployment.
(Optional) Use the Azure CLI for deployment
Alternatively, you can create your deployment by using the Azure CLI.
Create a provisioned deployment for GPT-5.1 with a PTU count of 50 PTUs.
az cognitiveservices account deployment create \
--name <myResourceName> \
--resource-group <myResourceGroupName> \
--deployment-name <myDeploymentName> \
--model-name GPT-5.1 \
--model-version "2025-11-13" \
--model-format OpenAI \
--sku-capacity 50 \
--sku-name GlobalProvisionedManaged
Replace
<myResourceName>,<myResourceGroupName>,<myDeploymentName>with your values.--sku-namespecifies the deployment type:GlobalProvisionedManaged,DataZoneProvisionedManaged, orProvisionedManaged.--sku-capacityis the number of PTUs. Here, it's set to 50.
Reference: az cognitiveservices account deployment
Confirm that the deployment completed successfully:
az cognitiveservices account deployment show \
    --deployment-name <myDeploymentName> \
    --name <myResourceName> \
    --resource-group <myResourceGroupName> \
    --query "properties.provisioningState" -o tsv
The output should display
Succeeded. The model is ready to use after provisioning completes.Reference: az cognitiveservices account deployment show
REST, ARM template, Bicep, and Terraform can also be used to create deployments. See Automate deployments and replace sku.name with GlobalProvisionedManaged, DataZoneProvisionedManaged, or ProvisionedManaged.
Make an inference call
The inference code for a provisioned deployment is the same as for any other deployment type. Use your deployment name (not the model name) as the model parameter value.
The code in this section uses API key authentication. You can also use Entra ID authentication. For details on using Entra ID authentication when making an inference call, see How to generate text responses with Microsoft Foundry Models.
Before running the sample, set the following environment variable:
AZURE_OPENAI_API_KEY: your resource API key.
Important
Don't hard-code credentials in your application. For production workloads, use a secure credential store such as Azure Key Vault. See Security features for Azure AI services.
Install the OpenAI SDK:
pip install openaiConfigure the OpenAI client, specify your deployment, and generate responses. Replace
<myResourceName>with your Foundry resource name.import os from openai import OpenAI client = OpenAI( api_key=os.getenv("AZURE_OPENAI_API_KEY"), base_url="https://<myResourceName>.openai.azure.com/openai/v1/", ) response = client.responses.create( model="<myDeploymentName>", # Your deployment name, not the model name input="What is provisioned throughput?", max_output_tokens=100, ) print(response.output_text)
View deployment utilization
After making calls, confirm that traffic is reaching your deployment by checking its utilization in the Azure portal.
- Sign in to the Azure portal.
- Navigate to your Foundry resource and select Metrics in the left navigation.
- Select the Provisioned-managed utilization V2 metric.
- If you have more than one deployment in the resource, filter by the deployment name to view utilization per deployment.
A utilization reading near 0% immediately after your test call is normal — the metric updates on a monitoring window.
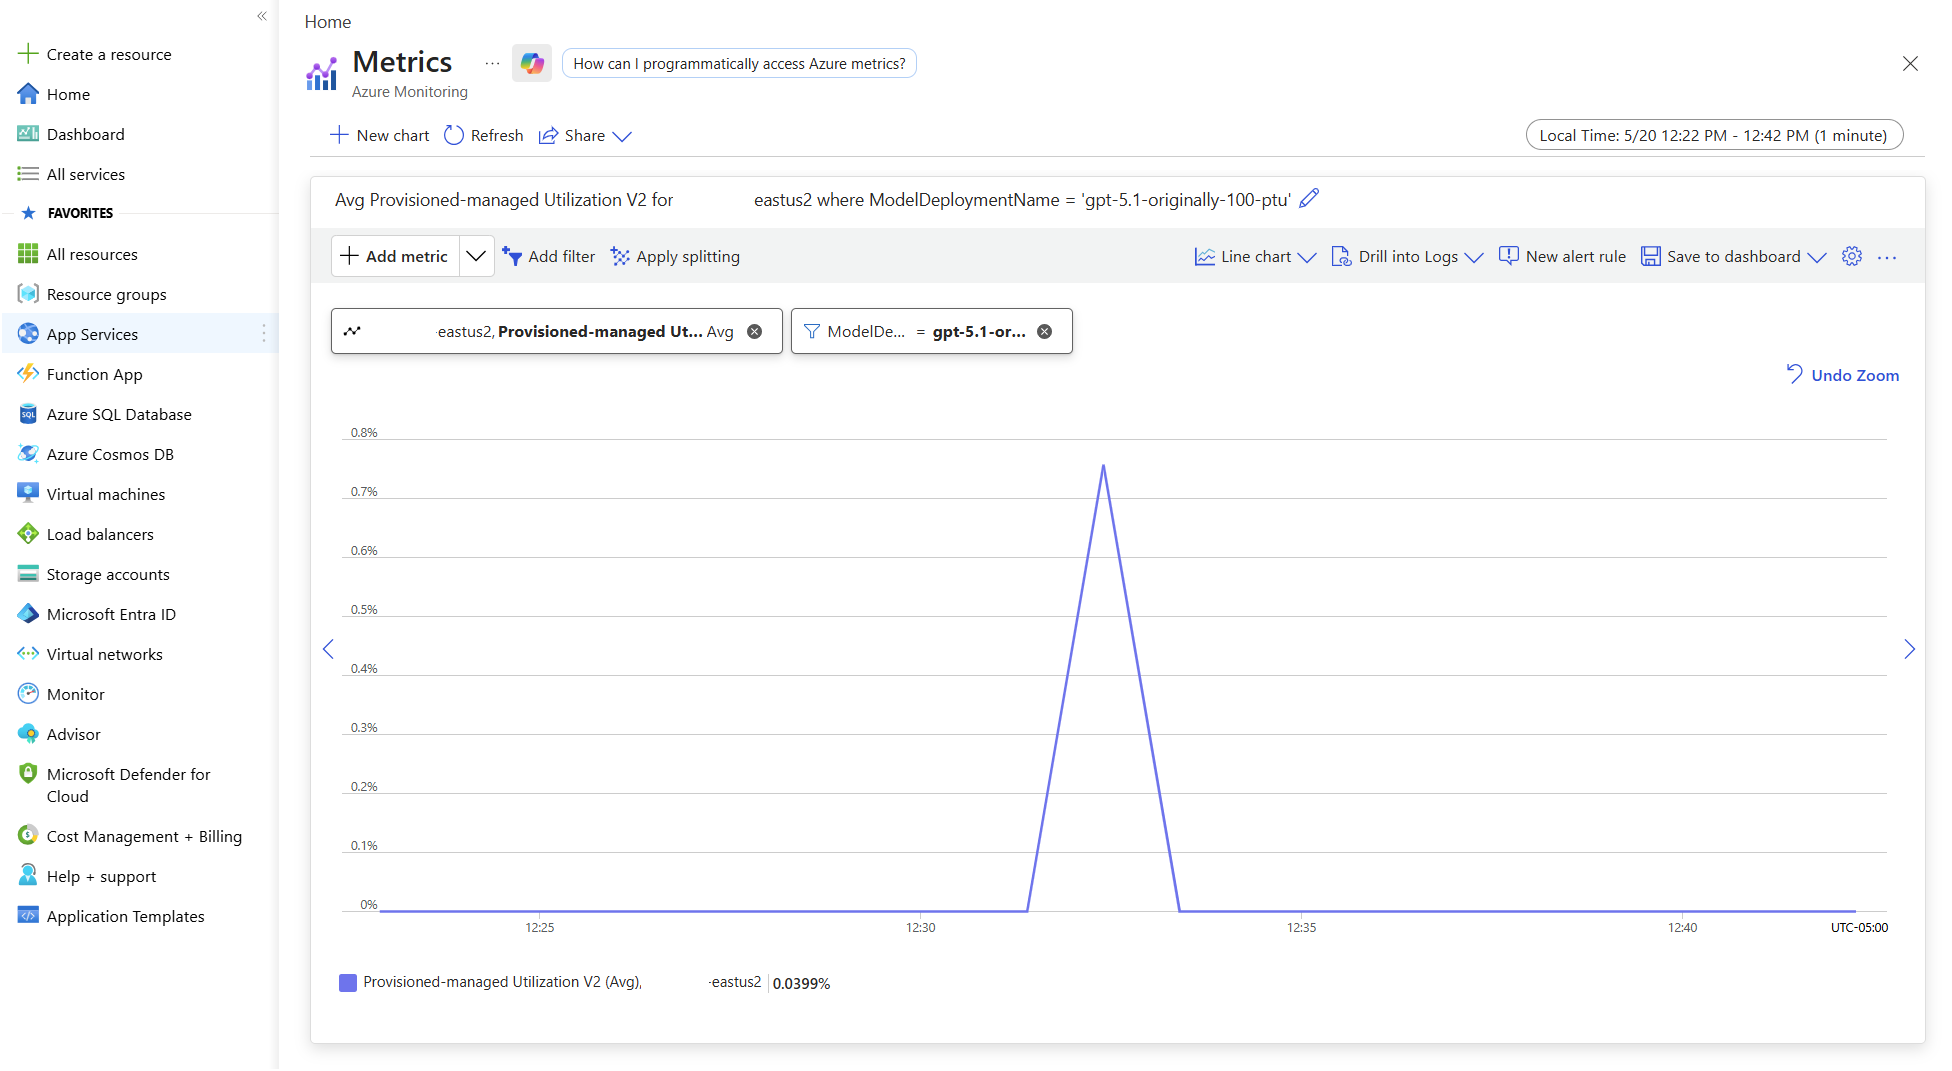
For a full explanation of how utilization is calculated and what to do when it reaches 100%, see Operate provisioned deployments in production.
Consider setting up spillover
Spillover automatically routes overflow requests from your provisioned deployment to a standard deployment in the same Foundry resource. When your provisioned deployment is fully utilized and returns a 429 code, spillover redirects those excess requests to the standard deployment instead of failing them, helping reduce disruptions during traffic bursts. To learn more about enabling spillover and monitoring spillover requests, see Manage traffic with spillover for provisioned deployments.
Consider purchasing a reservation
Your deployment is billed at the hourly rate. If you plan to keep it running for more than a few days, purchasing an Azure Reservation reduces your effective $/PTU/hr cost compared to hourly billing.
If you plan to purchase a reservation after creating your deployment, verify that you have the owner role or reservation purchaser role on an Azure subscription. The role needed to purchase reservations differs from the role needed to create deployments. See Provisioned Throughput reservations for role requirements.
Important
Always create and confirm your deployment before purchasing a reservation. The reservation must match your deployment's type (Global, Data Zone, or Regional), region, and subscription scope. Committing to a reservation for capacity you haven't confirmed is available can result in a financial commitment you can't use.
For sizing guidance, purchase steps, and management, see Azure Reservations for provisioned throughput.
Clean up resources
Deleting the Foundry resource doesn't automatically delete its deployments. Always delete all deployments before deleting the resource, as charges for deployments on a deleted resource continue until the resource is purged. See Clean up resources.
Note
Deleting a deployment doesn't cancel an Azure Reservation. If you purchased one, cancel or exchange it separately on the Reservations page in the Azure portal. Cancellation might incur an early termination fee.
Follow these steps to stop hourly billing by deleting the deployment.
Delete deployment in the Foundry portal
- In the Foundry portal, navigate to your deployments.
- Select the deployment, then select Delete and confirm.
(Optional) Delete deployment with the Azure CLI
az cognitiveservices account deployment delete \
    --deployment-name <myDeploymentName> \
    --name <myResourceName> \
    --resource-group <myResourceGroupName>
Reference: az cognitiveservices account deployment delete