Note
Access to this page requires authorization. You can try signing in or changing directories.
Access to this page requires authorization. You can try changing directories.
Important
Azure Lab Services will be retired on June 28, 2027. For more information, see the retirement guide.
This article shows you how to set up a class to emulate, configure, test, and troubleshoot networks with GNS3 software in Azure Lab Services.
This article has two sections. The first section covers how to create the lab. The second section covers how to configure the template machine with nested virtualization enabled and with GNS3 installed and configured.
Prerequisites
-
To set up this lab, you need access to an Azure subscription. Discuss with your organization's administrator to see if you can get access to an existing Azure subscription. If you don't have an Azure subscription, create a free account before you begin.
-
After you have an Azure subscription, you can create a lab plan in Azure Lab Services. For more information about creating a new lab plan, see Quickstart: Set up resources to create labs. You can also use an existing lab plan.
Configure your lab
For instructions on how to create a lab, see Tutorial: Set up a lab. Use the following settings when creating the lab.
| Lab settings | Value |
|---|---|
| Virtual machine (VM) size | Medium (Nested Virtualization) |
| VM image | Windows 10 Pro, Version 1909 |
Note
This article references features available in lab plans, which replaced lab accounts.
Configure your template virtual machine
After you create a lab, create a template VM that is based on the virtual machine size and image you choose. Configure the template VM with everything you want to provide to your students for this class. For more information, see Create and manage a template in Azure Lab Services.
To configure the template VM, complete the following tasks:
- Prepare the template machine for nested virtualization.
- Install GNS3.
- Create a nested GNS3 VM in Hyper-V.
- Configure GNS3 to use Windows Hyper-V VM.
- Add appropriate appliances.
- Publish the template.
Prepare template machine for nested virtualization
To prepare the template virtual machine for nested virtualization, follow the detailed steps in Enable Nested Virtualization.
If you create a lab template VM with an account without administrator privileges, add that account to the Hyper-V Administrators group. For more information about using nested virtualization with such an account, see these best practices.
Install GNS3
Connect to the template VM by using Remote Desktop.
To install GNS3 on Windows, follow the detailed instructions on the GNS3 website.
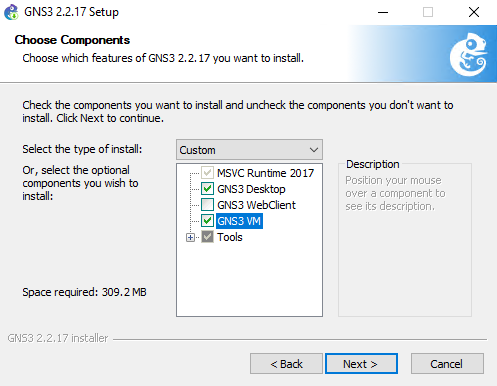
Make sure to select GNS3 VM in the Choose Components page:
On the GNS3 VM page, select the Hyper-V option:
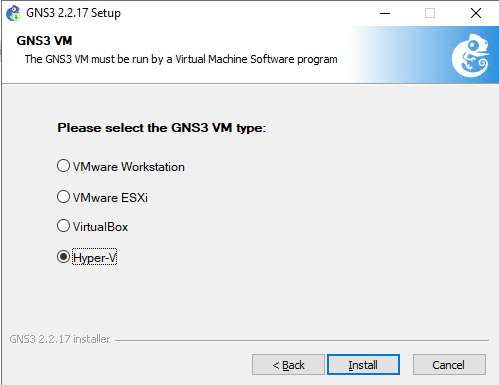
When you select the Hyper-V option, the installer downloads the PowerShell script and VHD files to create the GNS3 VM in the Hyper-V manager.
Continue the installation with the default values.


Important
After the setup completes, don't start GNS3.
Create GNS3 VM
When the setup finishes, you see a zip file GNS3.VM.Hyper-V.2.2.x.zip in the same folder as the installation file. The zip file contains the virtual disks and the PowerShell script to create the Hyper-V virtual machine.
To create the GNS 3 VM:
Connect to the template VM by using Remote Desktop.
Extract all files in the GNS3.VM.Hyper-V.2.2.x.zip file. If the template VM has a non-admin account for lab users, extract the files in a location accessible to the non-admin account.
Right-select the create-vm.ps1 PowerShell script, and then select Run with PowerShell.
When the
Execution Policy Changerequest appears, enter Y to execute the script.
After the script completes, confirm that the GNS3 VM virtual machine is available in Hyper-V Manager.

Configure GNS3 to use Hyper-V VM
After you install GNS3 and add the GNS3 VM, configure GNS 3 to use the Hyper-V virtual machine.
Connect to the template VM by using Remote Desktop.
Start GNS3. The GNS3 Setup wizard opens.
Select the Run appliances from a virtual machine option, and select Next.
Use the default values in the following pages.
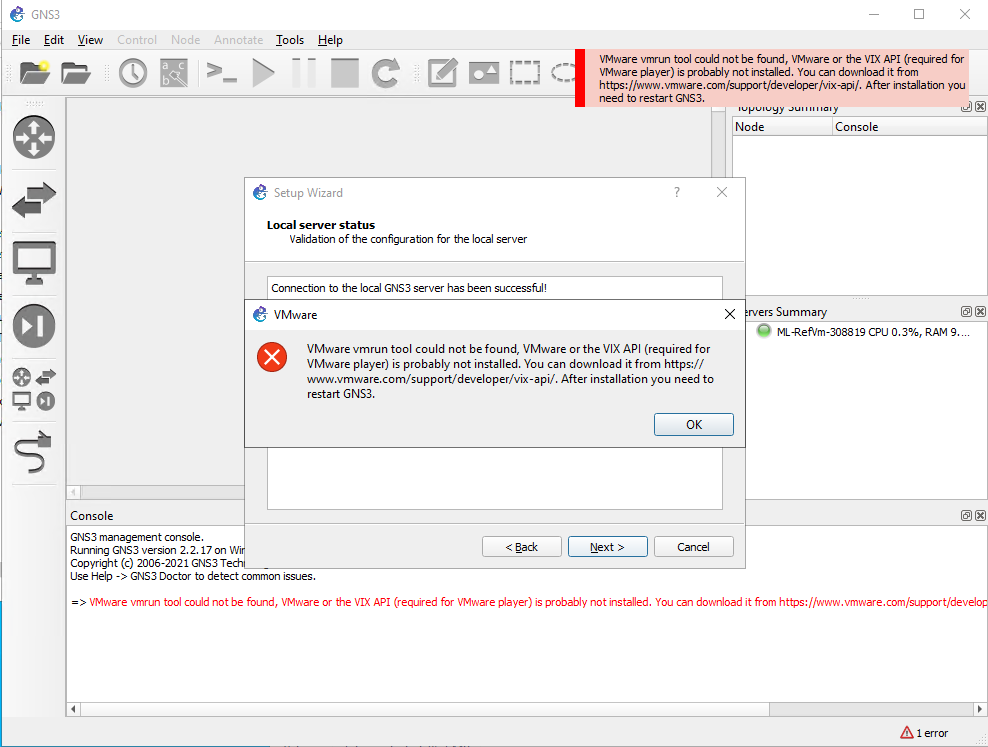
When you get the VMware vmrun tool cannot be found error, select Ok, and then Cancel out of the wizard.
To complete the connection to the Hyper-V VM, select Edit > Preferences > GNS3 VM.
Select Enable the GNS3 VM. Then, under Virtualization engine, select the Hyper-V option.
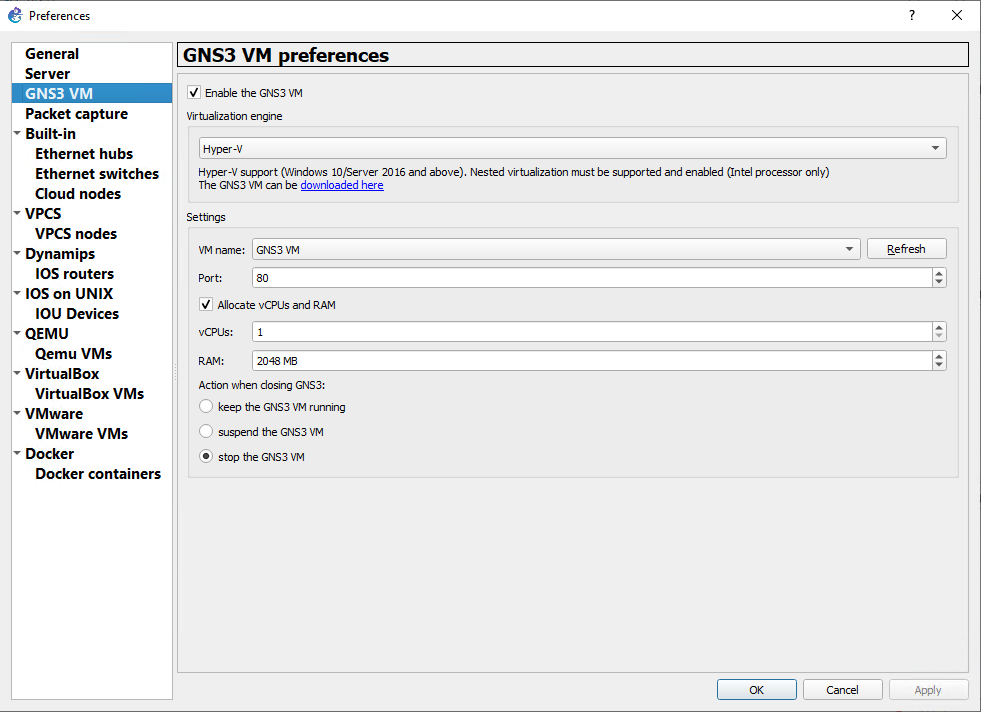
Select OK.


Add appropriate appliances
Next, you can add appliances for the class. To install appliances from the GNS3 marketplace, follow the detailed steps from the GNS3 documentation.
If the template VM has a non-admin account for lab users, install the appliances to a location accessible to the account. Optionally, you can set the preferences for the administrator and non-admin user to look for appliances and projects in a location accessible by both users.
Prepare to publish template
After you set up the template virtual machine, verify the following key points before you publish the template:
- Make sure that the GNS3 VM is shut down or turned off. Publishing while the VM is still running corrupts the virtual machine.
- Stop GNS3. Publishing while GNS3 is running can lead to unintended side effects.
- Clean up any installation files or other unnecessary files from the template VM.
Important
Publishing while the VM is still running corrupts the template virtual machine and creates unusable lab virtual machines.
Related content
The template image can now be published to the lab. For more information, see Publish the template VM.
As you set up your lab, see the following articles: