Note
Access to this page requires authorization. You can try signing in or changing directories.
Access to this page requires authorization. You can try changing directories.
This article explains how to manage Azure Machine Learning resources by using the Visual Studio Code extension.
Important
This feature is currently in public preview. This preview version is provided without a service-level agreement, and we don't recommend it for production workloads. Certain features might not be supported or might have constrained capabilities.
For more information, see Supplemental Terms of Use for Microsoft Azure Previews.
Prerequisites
- An Azure subscription. If you don't have one, sign up to try the free or paid version of Azure Machine Learning.
- Visual Studio Code. If you don't have it, see Setting up Visual Studio Code.
- The Azure Machine Learning extension. To learn how to set up the extension, see Set up Visual Studio Code desktop with the Azure Machine Learning extension.
Create resources
The quickest way to create resources is by using the extension's toolbar.
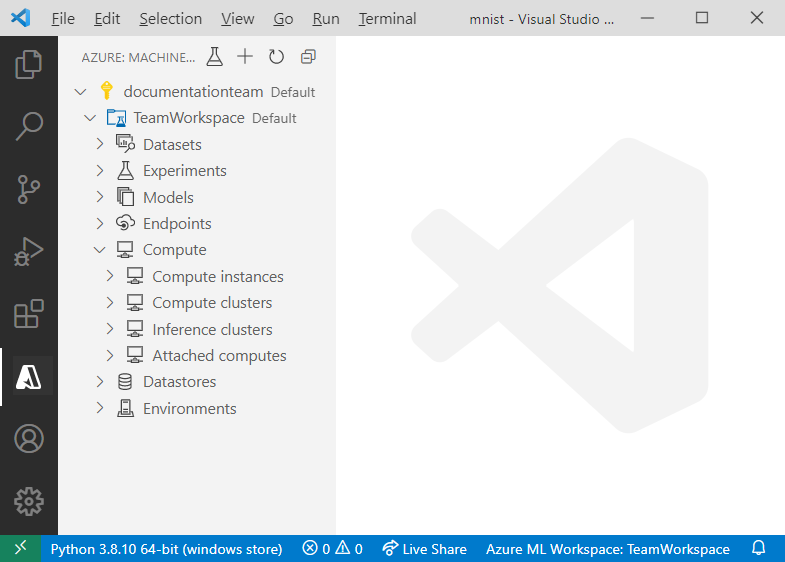
- Open the Azure Machine Learning view from the activity bar.
- Select your Azure subscription under Machine Learning.
- Select + to choose your resource from the dropdown list.
- Configure the specification file. The information required depends on the type of resource you want to create.
- Select AzureML: Execute YAML from the menu bar, or by right-clicking the specification file.
Alternatively, you can create a resource by using the command palette:
- Open the command palette by selecting View > Command Palette.
- Enter
> Azure ML: Create <RESOURCE-TYPE>into the text box. ReplaceRESOURCE-TYPEwith the type of resource you want to create. - Configure the specification file.
- Open the command palette by selecting View > Command Palette.
- Enter
> Azure ML: Create Resourceinto the text box.
Version resources
Some resources, like environments and models, allow you to make changes to a resource and store the different versions.
To version a resource:
- Use the existing specification file that created the resource or follow the create resources process to create a new specification file.
- Increment the version number in the template.
- Select AzureML: Execute YAML from the menu bar, or by right-clicking the specification file.
As long as the name of the updated resource is the same as the previous version, Azure Machine Learning picks up the changes and creates a new version.
Workspaces
For more information, see What is an Azure Machine Learning workspace?
Create a workspace
- In the Azure Machine Learning view, right-click your subscription node and select Create workspace.
- A specification file appears. Configure the specification file.
- Select AzureML: Execute YAML from the menu bar, or by right-clicking the specification file.
Alternatively, use the > Azure ML: Create workspace command in the command palette.
Remove workspace
- Expand the subscription node that contains your workspace.
- Right-click the workspace you want to remove.
- Select whether you want to remove:
- Only the workspace: This option deletes only the workspace Azure resource. The resource group, storage accounts, and any other resources the workspace was attached to are still in Azure.
- With associated resources: This option deletes the workspace and all resources associated with it.
Alternatively, use the > Azure ML: Remove workspace command in the command palette.
Datastores
The extension currently supports datastores of the following types:
- Azure Blob
- Azure Data Lake Gen 1
- Azure Data Lake Gen 2
- Azure File
For more information, see Datastore.
For more information, see Data concepts.
Create datastore
- Expand the subscription node that contains your workspace.
- Expand the workspace node you want to create the datastore under.
- Right-click the Datastores node and select Create datastore.
- Choose the datastore type.
- A specification file appears. Configure the specification file.
- Select AzureML: Execute YAML from the menu bar, or by right-clicking the specification file.
Alternatively, use the > Azure ML: Create datastore command in the command palette.
Manage datastore
- Expand the subscription node that contains your workspace.
- Expand your workspace node.
- Expand the Datastores node inside your workspace.
- Right-click the datastore you want to:
- Unregister datastore: Removes datastore from your workspace.
- View datastore: Display read-only datastore settings
Alternatively, use the > Azure ML: Unregister datastore and > Azure ML: View datastore commands respectively in the command palette.
Datasets
The extension currently supports the following dataset types:
- Tabular: Allows you to materialize data into a DataFrame.
- File: A file or collection of files. Allows you to download or mount files to your compute.
For more information, see Data in Azure Machine Learning v1
Create dataset
- Expand the subscription node that contains your workspace.
- Expand the workspace node you want to create the dataset under.
- Right-click the Datasets node and select Create dataset.
- A specification file appears. Configure the specification file.
- Select AzureML: Execute YAML from the menu bar, or by right-clicking the specification file.
Alternatively, use the > Azure ML: Create dataset command in the command palette.
Manage dataset
- Expand the subscription node that contains your workspace.
- Expand your workspace node.
- Expand the Datasets node.
- Right-click the dataset you want to:
- View dataset properties: Lets you view metadata associated with a specific dataset. If you have multiple versions of a dataset, you can choose to only view the dataset properties of a specific version by expanding the dataset node and performing the same steps described in this section on the version of interest.
- Preview dataset: View your dataset directly in the VS Code Data Viewer. Note that this option is only available for tabular datasets.
- Unregister dataset: Removes a dataset and all versions of it from your workspace.
Alternatively, use the > Azure ML: View Dataset Properties and > Azure ML: Unregister Dataset commands respectively in the command palette.
Environments
For more information, see What are Azure Machine Learning environments?
Create environment
- Expand the subscription node that contains your workspace.
- Expand the workspace node you want to create the datastore under.
- Right-click the Environments node and select Create environment.
- A specification file appears. Configure the specification file.
- Select AzureML: Execute YAML from the menu bar, or by right-clicking the specification file.
Alternatively, use the > Azure ML: Create environment command in the command palette.
View environment configurations
To view the dependencies and configurations for a specific environment in the extension:
- Expand the subscription node that contains your workspace.
- Expand your workspace node.
- Expand the Environments node.
- Right-click the environment you want to view and select View environment.
Alternatively, use the > Azure ML: View environment command in the command palette.
Experiments
For more information, see experiments.
Jobs
Create job
The quickest way to create a job is by clicking the Create job icon in the extension's activity bar.
Using the resource nodes in the Azure Machine Learning view:
- Expand the subscription node that contains your workspace.
- Expand your workspace node.
- Right-click the Jobs node in your workspace and select Create job.
- Choose your job type.
- A specification file appears. Configure the specification file.
- Select AzureML: Execute YAML from the menu bar, or by right-clicking the specification file.
Alternatively, use the > Azure ML: Create job command in the command palette.
View job
To view your job in Azure Machine Learning studio:
- Expand the subscription node that contains your workspace.
- Expand the Jobs node inside your workspace.
- Right-click the job you want to view and select View Job in Studio.
- A prompt appears asking you to open the job URL in Azure Machine Learning studio. Select Open.
Alternatively, use the > Azure ML: View Experiment in Studio command respectively in the command palette.
Track job progress
As you're running your job, you might want to see its progress. To track the progress of a job in Azure Machine Learning studio from the extension:
- Expand the subscription node that contains your workspace.
- Expand the Jobs node inside your workspace.
- Expand the job node you want to track progress for.
- Right-click the job and select View Job in Studio.
- A prompt appears asking you to open the job URL in Azure Machine Learning studio. Select Open.
Download job logs & outputs
Once a job is complete, you might want to download the logs and assets such as the model generated as part of a job.
- Expand the subscription node that contains your workspace.
- Expand the Jobs node inside your workspace.
- Expand the job node you want to download logs and outputs for.
- Right-click the job:
- To download the outputs, select Download outputs.
- To download the logs, select Download logs.
Alternatively, use the > Azure ML: Download outputs and > Azure ML: Download logs commands respectively in the command palette.
Compute instances
For more information, see What is an Azure Machine Learning compute instance?
Create compute instance
- Expand the subscription node that contains your workspace.
- Expand your workspace node.
- Expand the Compute node.
- Right-click the Compute instances node in your workspace and select Create compute instance.
- A specification file appears. Configure the specification file.
- Select AzureML: Execute YAML from the menu bar, or by right-clicking the specification file.
Alternatively, use the > Azure ML: Create compute instance command in the command palette.
Connect to compute instance
To use a compute instance as a development environment or remote Jupyter server, see Connect to a compute instance.
Stop or restart compute instance
- Expand the subscription node that contains your workspace.
- Expand your workspace node.
- Expand the Compute instances node inside your Compute node.
- Right-click the compute instance you want to stop or restart and select Stop compute instance or Restart compute instance respectively.
Alternatively, use the > Azure ML: Stop compute instance and Restart compute instance commands respectively in the command palette.
View compute instance configuration
- Expand the subscription node that contains your workspace.
- Expand your workspace node.
- Expand the Compute instances node inside your Compute node.
- Right-click the compute instance you want to inspect and select View compute instance properties.
Alternatively, use the AzureML: View compute instance properties command in the command palette.
Delete compute instance
- Expand the subscription node that contains your workspace.
- Expand your workspace node.
- Expand the Compute instances node inside your Compute node.
- Right-click the compute instance you want to delete and select Delete compute instance.
Alternatively, use the AzureML: Delete compute instance command in the command palette.
Compute clusters
For more information, see Training compute targets.
Create compute cluster
- Expand the subscription node that contains your workspace.
- Expand your workspace node.
- Expand the Compute node.
- Right-click the Compute clusters node in your workspace and select Create compute cluster.
- A specification file appears. Configure the specification file.
- Select AzureML: Execute YAML from the menu bar, or by right-clicking the specification file.
Alternatively, use the > Azure ML: Create compute cluster command in the command palette.
View compute configuration
- Expand the subscription node that contains your workspace.
- Expand your workspace node.
- Expand the Compute clusters node inside your Compute node.
- Right-click the compute you want to view and select View compute properties.
Alternatively, use the > Azure ML: View compute properties command in the command palette.
Delete compute cluster
- Expand the subscription node that contains your workspace.
- Expand your workspace node.
- Expand the Compute clusters node inside your Compute node.
- Right-click the compute you want to delete and select Delete compute cluster.
Alternatively, use the > Azure ML: Delete compute cluster command in the command palette.
Inference clusters
For more information, see Compute targets for inference.
Manage inference clusters
- Expand the subscription node that contains your workspace.
- Expand your workspace node.
- Expand the Inference clusters node inside your Compute node.
- Right-click the compute you want to:
- View compute properties: Displays read-only configuration data about your attached compute.
- Detach compute: Detaches the compute from your workspace.
Alternatively, use the > Azure ML: View compute properties and > Azure ML: Detach compute commands respectively in the command palette.
Delete inference clusters
- Expand the subscription node that contains your workspace.
- Expand your workspace node.
- Expand the Attached computes node inside your Compute node.
- Right-click the compute you want to delete and select Delete compute.
Alternatively, use the > Azure ML: Delete compute command in the command palette.
Attached compute
For more information, see Unmanaged compute.
Manage attached compute
- Expand the subscription node that contains your workspace.
- Expand your workspace node.
- Expand the Attached computes node inside your Compute node.
- Right-click the compute you want to:
- View compute properties: Displays read-only configuration data about your attached compute.
- Detach compute: Detaches the compute from your workspace.
Alternatively, use the > Azure ML: View compute properties and > Azure ML: Detach compute commands respectively in the command palette.
Models
For more information, see Train models with Azure Machine Learning.
For more information, see Train models with Azure Machine Learning (v1).
Create model
- Expand the subscription node that contains your workspace.
- Expand your workspace node.
- Right-click the Models node in your workspace and select Create model.
- A specification file appears. Configure the specification file.
- Right-click the specification file and select AzureML: Execute YAML.
Alternatively, use the > Azure ML: Create model command in the command palette.
View model properties
- Expand the subscription node that contains your workspace.
- Expand the Models node inside your workspace.
- Right-click the model whose properties you want to see and select View model properties. A file opens in the editor containing your model properties.
Alternatively, use the > Azure ML: View model properties command in the command palette.
Download model
- Expand the subscription node that contains your workspace.
- Expand the Models node inside your workspace.
- Right-click the model you want to download and select Download model file.
Alternatively, use the > Azure ML: Download model file command in the command palette.
Delete a model
- Expand the subscription node that contains your workspace.
- Expand the Models node inside your workspace.
- Right-click the model you want to delete and select Delete model.
- A prompt appears confirming you want to remove the model. Select Ok.
Alternatively, use the > Azure ML: Delete model command in the command palette.
Endpoints
For more information, see Endpoints for inference in production.
For more information, see How Azure Machine Learning works: Architecture and concepts.
Create endpoint
- Expand the subscription node that contains your workspace.
- Expand your workspace node.
- Right-click the Models node in your workspace and select Create endpoint.
- Choose your endpoint type.
- A specification file appears. Configure the specification file.
- Select AzureML: Execute YAML from the menu bar, or by right-clicking the specification file.
Alternatively, use the > Azure ML: Create endpoint command in the command palette.
Delete endpoint
- Expand the subscription node that contains your workspace.
- Expand the Endpoints node inside your workspace.
- Right-click the deployment you want to remove and select Delete endpoint.
- A prompt appears confirming you want to remove the service. Select Ok.
Alternatively, use the > Azure ML: Delete online endpoint command in the command palette.
View endpoint properties
In addition to creating and deleting deployments, you can view and edit settings associated with the deployment.
- Expand the subscription node that contains your workspace.
- Expand the Endpoints node inside your workspace.
- Right-click the deployment you want to manage, then select View endpoint properties.
Alternatively, use the > Azure ML: View online endpoint properties command in the command palette.