Note
Access to this page requires authorization. You can try signing in or changing directories.
Access to this page requires authorization. You can try changing directories.
In this guide, learn how to connect an instance of Apache Kafka® & Apache Flink® on Confluent Cloud™ - An Azure Native ISV Service, to Azure compute services, using Service Connector.
Service Connector is an Azure service designed to simplify the process of connecting Azure resources together. Service Connector manages your connection's network and authentication settings to simplify the operation.
This guide shows step by step instructions to connect an app deployed to Azure App Service to a Confluent organization. You can apply a similar method to connect your Confluent organization to other compute services supported by Service Connector.
Prerequisites
- An Azure account with an active subscription. Create an account for free
- An existing Confluent organization. If you don't have one yet, refer to create a Confluent organization
- An app deployed to Azure App Service, Azure Container Apps, Azure Spring Apps, or Azure Kubernetes Services (AKS).
Create a new connection
Follow these steps to connect an app to Apache Kafka & Apache Flink on Confluent Cloud.
Open your App Service, Container Apps, Azure Spring Apps, or AKS resource. If using Azure Spring Apps, you must then open the Apps menu and select your app.
Open Service Connector from the left menu and select Create.
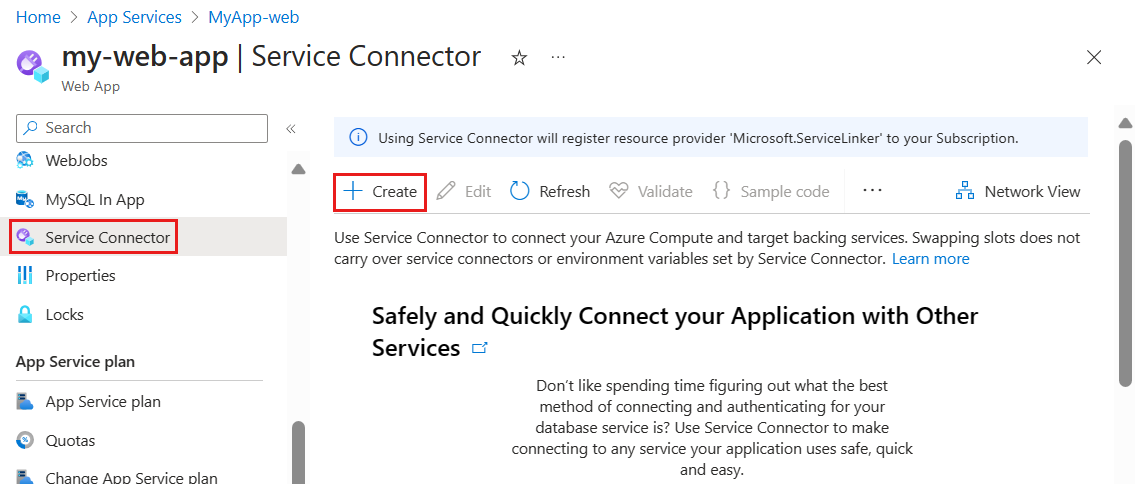
Enter or select the following information.
Setting Example Description Service type Apache Kafka on Confluent Cloud Select Apache Kafka on Confluent Cloud to generate a connection to a Confluent. organization. Connection name Confluent_d0fcp The connection name that identifies the connection between your App Service and Confluent organization service. Use the connection name provided by Service Connector or enter your own connection name. Connection names can only contain letters, numbers (0-9), periods ("."), and underscores ("_"). Source Azure Marketplace Confluent resource (preview) Select Azure Marketplace Confluent resource (preview). 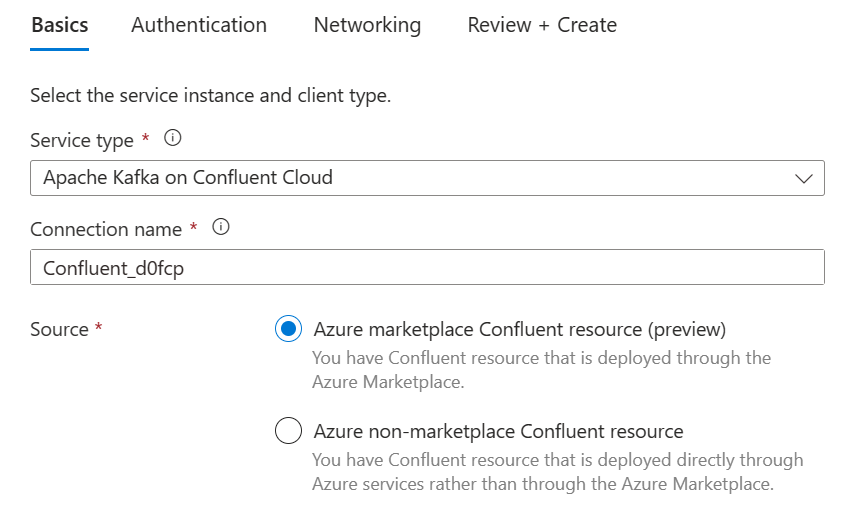
Refer to the two tabs below for instructions to connect to a Confluent resource deployed via Azure Marketplace or deployed directly on the Confluent user interface.
Important
Service Connector for Azure Marketplace Confluent resources is currently in PREVIEW. See the Supplemental Terms of Use for Microsoft Azure Previews for legal terms that apply to Azure features that are in beta, preview, or otherwise not yet released into general availability.
If your Confluent resource is deployed through Azure Marketplace, enter or select the following information.
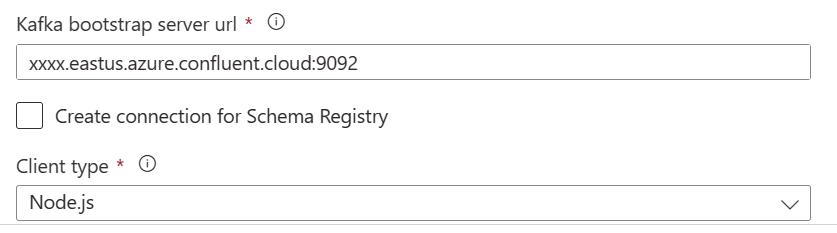
Setting Example Description Subscription my subscription Select the subscription that holds your Confluent organization. Confluent Service my-confluent-org Select the subscription that holds your Confluent organization. Environment demoenv1 Select your Confluent organization environment. Cluster ProdKafkaCluster Select your Confluent organization cluster. Create connection for Schema Registry Unchecked This option is unchecked by default. Optionally check the box to create a connection for the schema registry. Client type Node.js Select the app stack that's on your compute service instance. 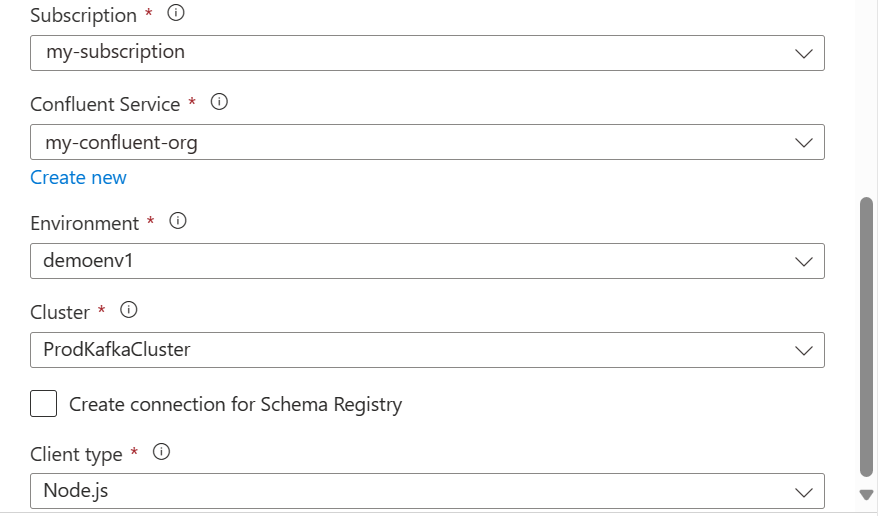
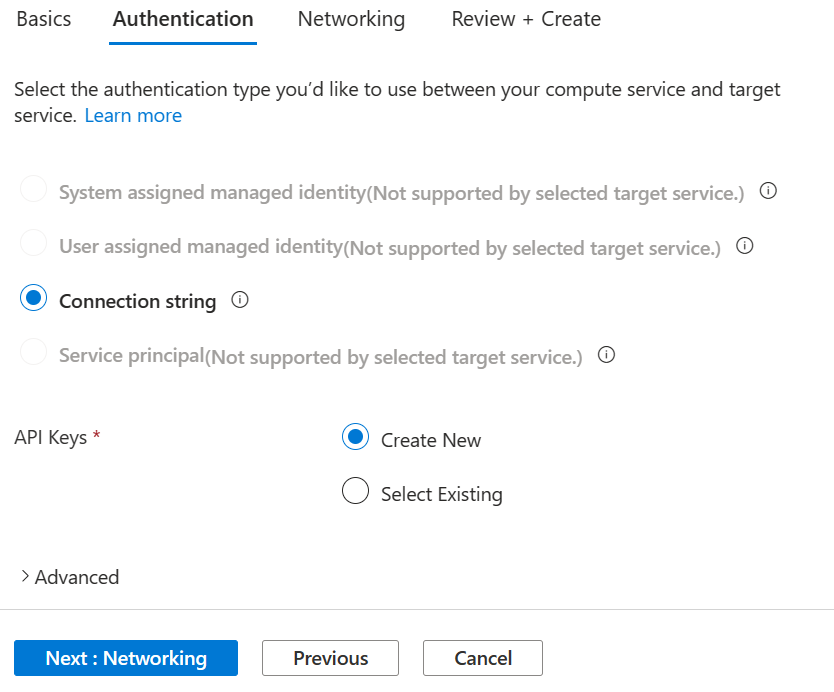
Select Next: Authentication.
- The Connection string authentication type is selected by default.
- For API Keys, choose Create New. If you already have an API key, alternatively select Select Existing, then enter the Kafka API key and secret. If you're using an existing API key and selected the option to enable schema registry in the previous tab, enter the schema registry URL, schema registry API key and schema registry API secret.
- An Advanced option also lets you edit the configuration variable names.
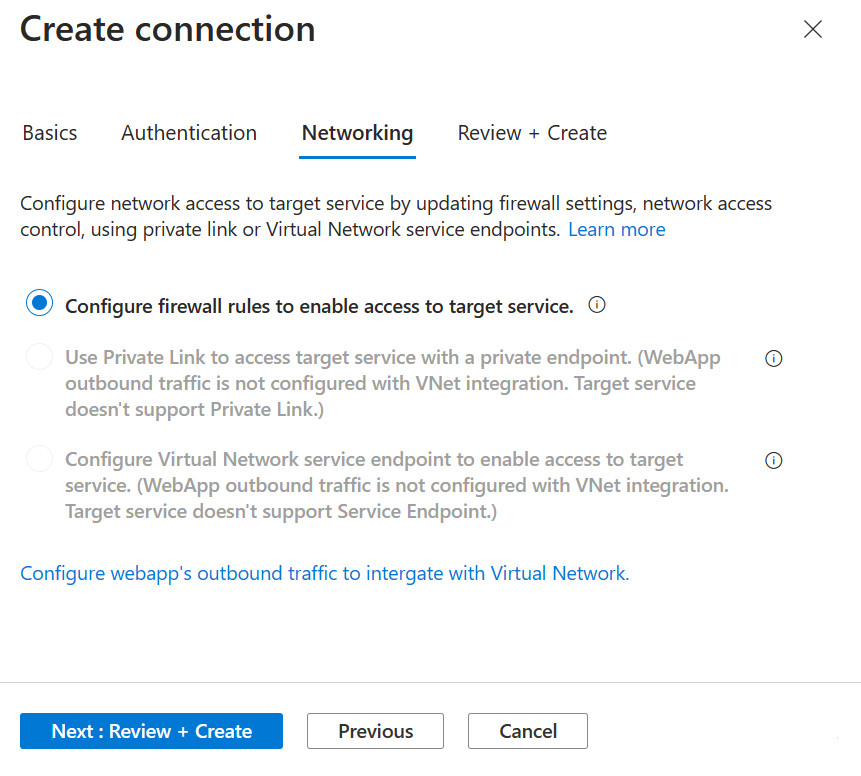
Select Next: Networking to configure the network access to your Confluent organization. Configure firewall rules to enable access to your target service is selected by default. Optionally also configure the webapp's outbound traffic to integrate with Virtual Network.
Select Next: Review + Create to review the provided information and select Create.
View and edit connections
To review your existing connections, in the Azure portal, go to your application deployed to Azure App Service, Azure Container Apps, Azure Spring Apps, or AKS and open Service Connector from the left menu.
Select a connection's checkbox and explore the following options:
- Select > to access connection details.
- Select Validate to prompt Service Connector to check your connection.
- Select Edit to edit connection details.
- Select Delete to remove a connection.
Next step
For help with troubleshooting, see Troubleshooting Apache Kafka & Apache Flink on Confluent Cloud solutions.