Note
Access to this page requires authorization. You can try signing in or changing directories.
Access to this page requires authorization. You can try changing directories.
Note
Please note that Azure Remote Rendering (ARR) will be retired on September 30, 2025. It is no longer possible to create new accounts if your subscription did not have an active ARR account previously. More details here.
This chapter guides you through the steps to create an account for the Azure Remote Rendering service. A valid account is mandatory for completing any of the quickstarts or tutorials.
Create an account
The following steps are needed to create an account for the Azure Remote Rendering service:
- Go to the Azure portal portal.azure.com
- Click the 'Create a resource' button
- In the search field ("Search the marketplace"), type in "Remote Rendering" and hit 'enter'.
- In the result list, click on the "Remote Rendering" tile
- In the next screen, click the "Create" button. A form opens to create a new Remote Rendering account:
- Set 'Resource Name' to the name of the account
- Update 'Subscription' if needed
- Set 'Resource group' to a resource group of your choice
- Select a region from the 'Location' dropdown where this resource should be created in. See remarks on account regions.
- Once the account is created, navigate to it and:
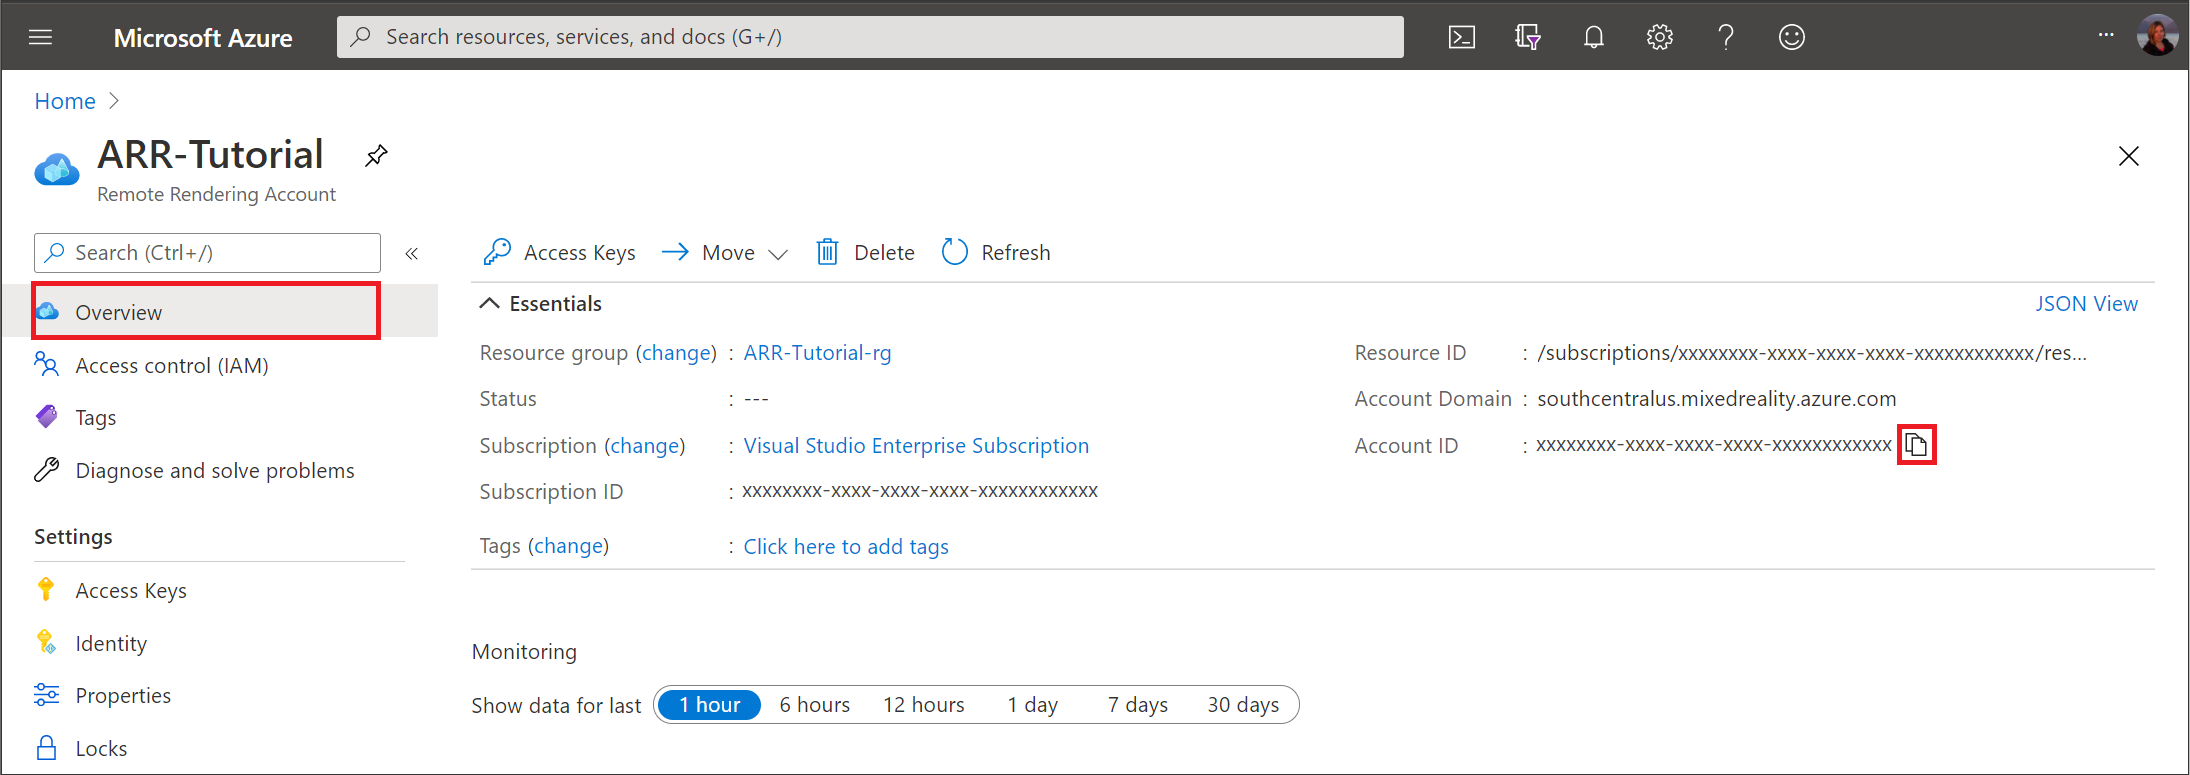
- In the Overview tab, note the 'Account ID'
- In the Settings > Access Keys tab, note the 'Primary key' - this value is the account's secret account key
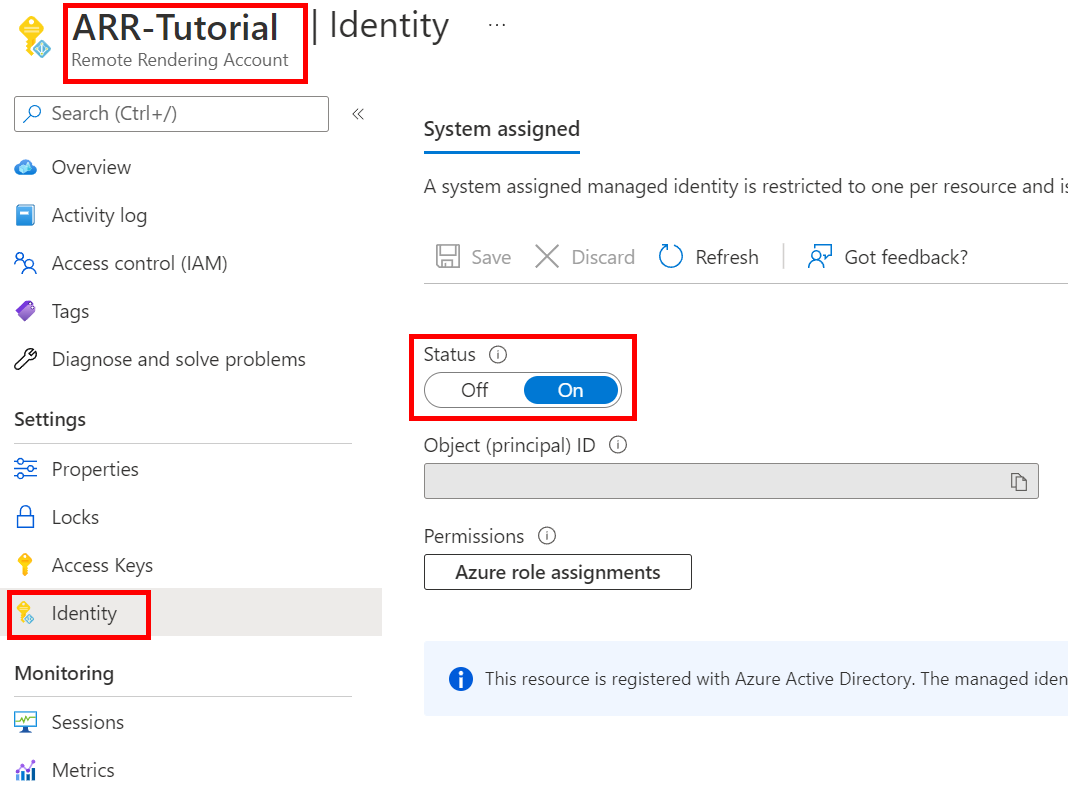
- Make sure, that in the Settings > Identity tab, the option System assigned > Status is turned on.
Account regions
The location that is specified during account creation time of an account determines which region the account resource is assigned to. The location can't be changed after creation. However, the account can be used to connect to a Remote Rendering session in any supported region, regardless of the account's location.
Retrieve the account information
The samples and tutorials require that you provide the account ID and a key. For instance in the arrconfig.json file that is used for the PowerShell sample scripts:
"accountSettings": {
    "arrAccountId": "<fill in the account ID from the Azure portal>",
    "arrAccountKey": "<fill in the account key from the Azure portal>",
    "arrAccountDomain": "<select from available regions: australiaeast, eastus, eastus2, japaneast, northeurope, southcentralus, southeastasia, uksouth, westeurope, westus2 or specify the full url>"
},
See the list of available regions for filling out the arrAccountDomain option.
The values for arrAccountId and arrAccountKey can be found in the portal as described in the following steps:
- Go to the Azure portal
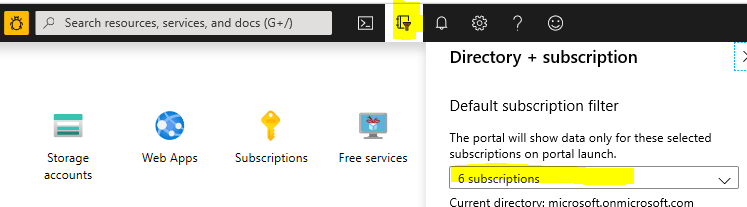
- Find your "Remote Rendering Account" - it should be in the "Recent Resources" list. You can also search for it in the search bar at the top. In that case, make sure that the subscription you want to use is selected in the Default subscription filter (filter icon next to search bar):
Clicking on your account brings you to this screen, which shows the Account ID right away:
For the key, select Access Keys in the panel on the left. The next page shows a primary and a secondary key:
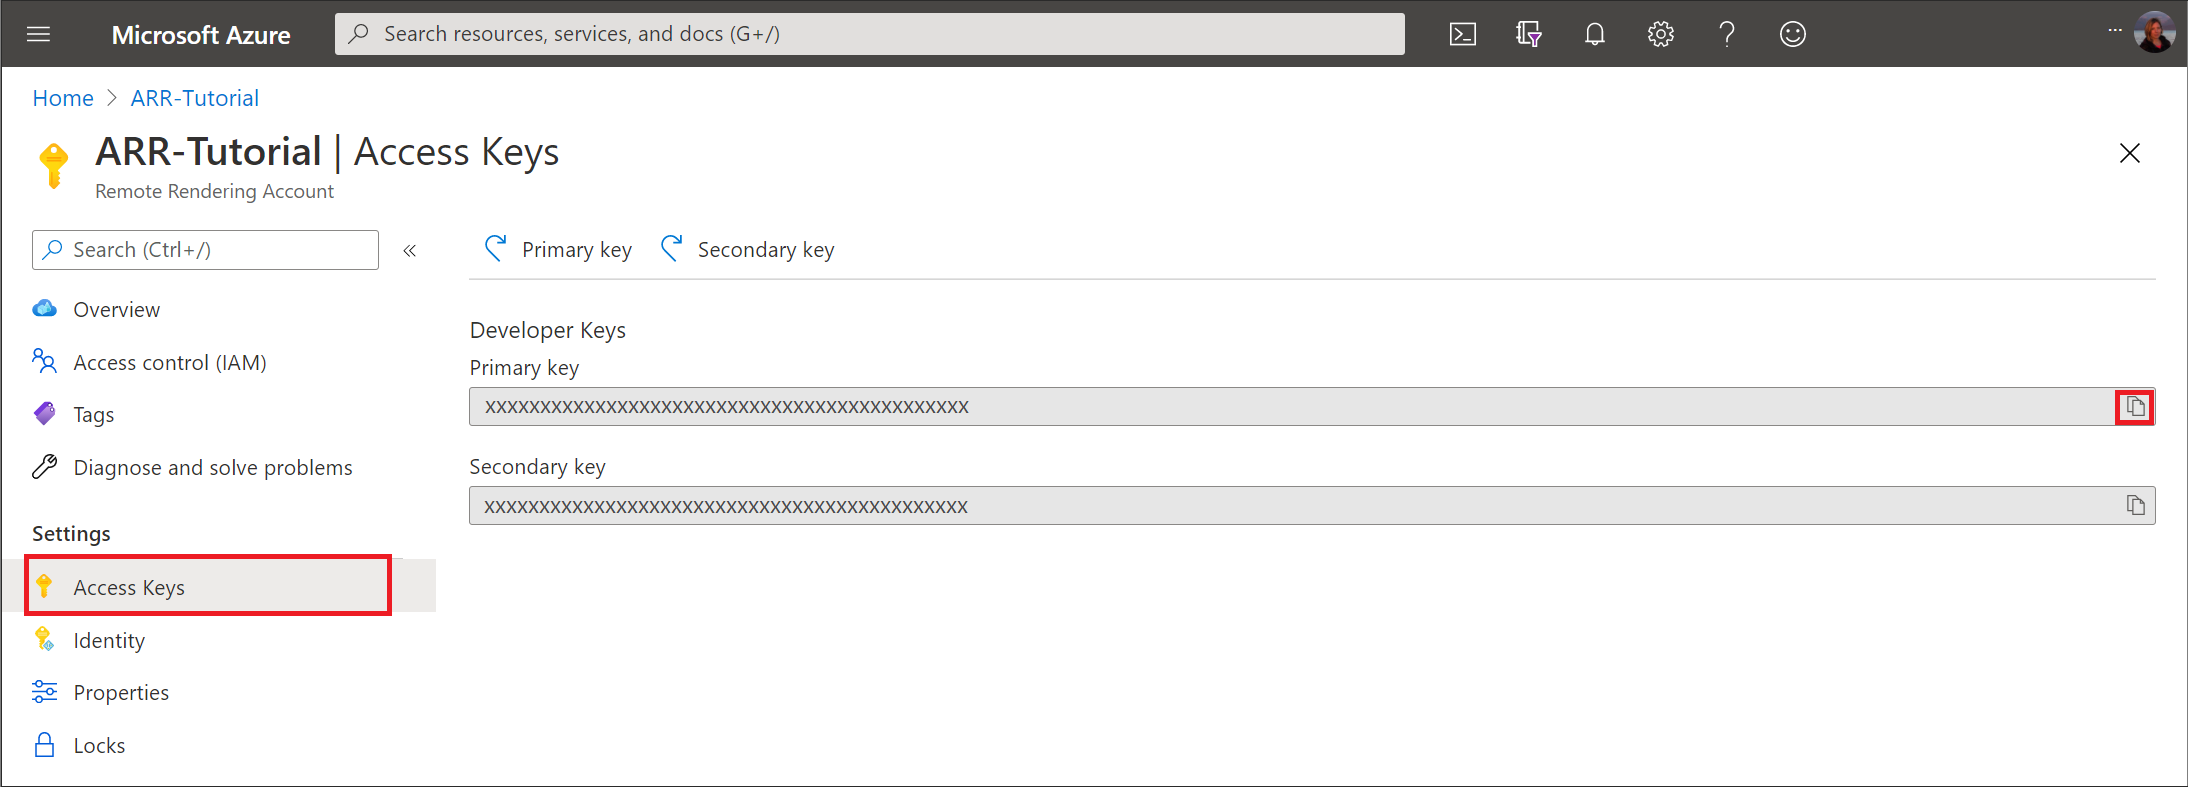
The value for arrAccountKey can either be primary or secondary key.
Link storage accounts
This paragraph explains how to link storage accounts to your Remote Rendering account. With a linked account, it isn't necessary anymore to generate a SAS URI every time you want to interact with the data in your account. Instead, you can use the storage account names directly as described in the loading a model section.
Another advantage of this approach is that the storage access level can be limited to private endpoints as described in the Azure documentation how to configure Storage firewalls and virtual networks. Loading from blob storage through a SAS token on the other hand only works if the blob storage has been configured with the "Enabled from all networks" option.
The steps in this paragraph have to be performed for each storage account that should use this access method. If you haven't created storage accounts yet, you can walk through the respective step in the convert a model for rendering quickstart.
Navigate to your storage account in the Azure portal
Select Access control (IAM).
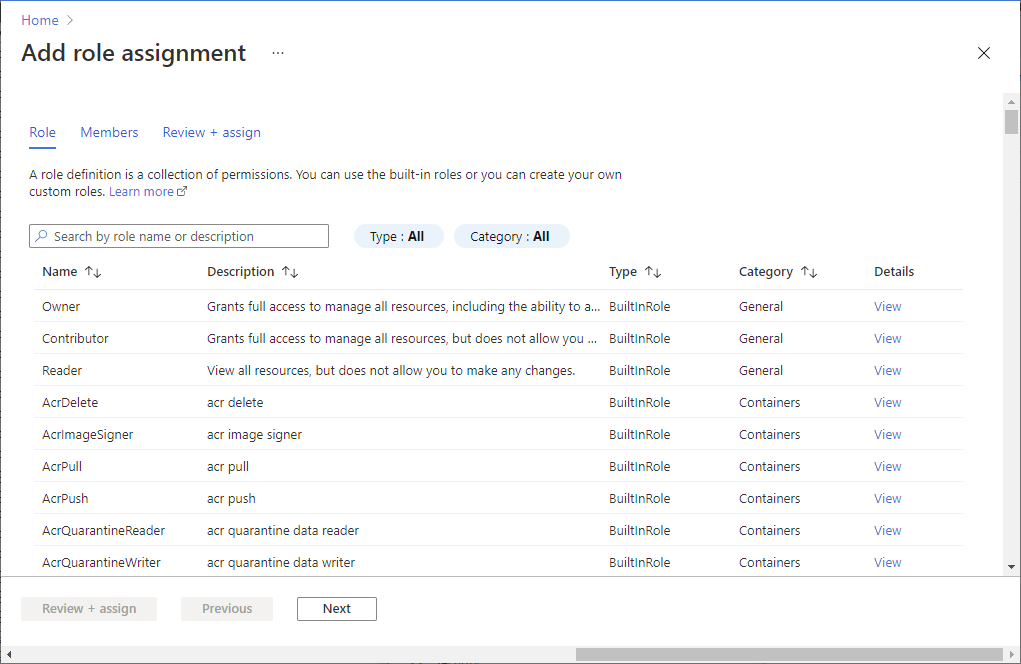
Select Add > Add role assignment to open the Add role assignment page.
If the Add a role assignment option is disabled, you probably don't have owner permissions to this storage account.
Assign the following role. For detailed steps, see Assign Azure roles using the Azure portal.
- Select the Storage Blob Data Contributor role and click Next.
- Choose to assign access to a Managed Identity.
- Select Select members, select your subscription, select Remote Rendering Account, select your remote rendering account, and then click Select.
- Select Review + assign and select Review + assign again.
Warning
If your Remote Rendering account is not listed, refer to this troubleshoot section.
Important
Azure role assignments are cached by Azure Storage, so there may be a delay of up to 30 minutes between when you grant access to your remote rendering account and when it can be used to access your storage account. See the Azure role-based access control (Azure RBAC) documentation for details.