Note
Access to this page requires authorization. You can try signing in or changing directories.
Access to this page requires authorization. You can try changing directories.
In this quickstart, you use the Import data (new) wizard in the Azure portal to get started with integrated vectorization. The wizard chunks your content and calls an embedding model to vectorize the chunks at indexing and query time.
This quickstart uses text-based PDFs from the azure-search-sample-data repo. However, you can use images and still complete this quickstart.
Prerequisites
An Azure account with an active subscription. Create an account for free.
An Azure AI Search service. We recommend the Basic tier or higher.
Familiarity with the wizard. See Import data wizards in the Azure portal.
Supported data sources
The wizard supports a wide range of Azure data sources. However, this quickstart only covers the data sources that work with whole files, which are described in the following table.
| Supported data source | Description |
|---|---|
| Azure Blob Storage | This data source works with blobs and tables. You must use a standard performance (general-purpose v2) account. Access tiers can be hot, cool, or cold. |
| Azure Data Lake Storage (ADLS) Gen2 | This is an Azure Storage account with a hierarchical namespace enabled. To confirm that you have Data Lake Storage, check the Properties tab on the Overview page.
|
| Microsoft OneLake | This data source connects to OneLake files and shortcuts. |
Supported embedding models
For integrated vectorization, use one of the following embedding models. Deployment instructions are provided in a later section.
| Provider | Supported models |
|---|---|
| Azure OpenAI in Foundry Models resource 1, 2 | For text: text-embedding-ada-002 text-embedding-3-small text-embedding-3-large |
| Microsoft Foundry project | For text: text-embedding-ada-002 text-embedding-3-small text-embedding-3-large |
| Foundry hub-based project | For text: text-embedding-ada-002 text-embedding-3-small text-embedding-3-large For text and images: Cohere-embed-v3-english 3 Cohere-embed-v3-multilingual 3 |
| Foundry resource 4 | For text and images: Azure Vision in Foundry Tools multimodal 5 |
1 The endpoint of your Azure OpenAI resource must have a custom subdomain, such as https://my-unique-name.openai.azure.com. If you created your resource in the Azure portal, this subdomain was automatically generated during resource setup.
2 Azure OpenAI resources (with access to embedding models) that were created in the Foundry portal aren't supported. You must create an Azure OpenAI resource in the Azure portal.
3 To use this model in the wizard, you must deploy it as a serverless API deployment.
4 For billing purposes, you must attach your Foundry resource to the skillset in your Azure AI Search service. Unless you use a keyless connection (preview) to create the skillset, both resources must be in the same region.
5 The Azure Vision multimodal embeddings APIs are available in select regions.
Public endpoint requirements
For this quickstart, all of the preceding resources must have public access enabled so that the Azure portal nodes can access them. Otherwise, the wizard fails. After the wizard runs, you can enable firewalls and private endpoints on the integration components for security. For more information, see Secure connections in the import wizards.
If private endpoints are already present and you can't disable them, the alternative option is to run the respective end-to-end flow from a script or program on a virtual machine. The virtual machine must be on the same virtual network as the private endpoint. Here's a Python code sample for integrated vectorization. The same GitHub repo has samples in other programming languages.
Role-based access
You can use Microsoft Entra ID with role assignments or key-based authentication with full-access connection strings. For Azure AI Search connections to other resources, we recommend role assignments. This quickstart assumes roles.
Free search services support role-based connections to Azure AI Search. However, they don't support managed identities on outbound connections to Azure Storage or Azure Vision. This lack of support requires key-based authentication on connections between free search services and other Azure resources. For more secure connections, use the Basic tier or higher, and then enable roles and configure a managed identity.
To configure the recommended role-based access:
On your search service, enable roles and configure a system-assigned managed identity.
Assign the following roles to yourself.
Search Service Contributor
Search Index Data Contributor
Search Index Data Reader
On your data source and embedding model provider, create role assignments that allow your search service to access data and models. See Prepare sample data and Prepare embedding models.
Note
If you can't progress through the wizard because options aren't available (for example, you can't select a data source or an embedding model), revisit the role assignments. Error messages indicate that models or deployments don't exist, when the real cause is that the search service doesn't have permission to access them.
Check for space
If you're starting with the free service, you're limited to three indexes, data sources, skillsets, and indexers. Basic limits you to 15. This quickstart creates one of each object, so make sure you have room for extra items before you begin.
Prepare sample data
In this section, you use a supported data source to prepare sample data. Before you proceed, make sure you completed the prerequisites for role-based access.
Sign in to the Azure portal and select your Azure Storage account.
From the left pane, select Data storage > Containers.
Create a container, and then upload the health-plan PDF documents used for this quickstart.
To assign roles:
From the left pane, select Access Control (IAM).
Select Add > Add role assignment.
Under Job function roles, select Storage Blob Data Reader, and then select Next.
Under Members, select Managed identity, and then select Select members.
Select your subscription and the managed identity of your search service.
(Optional) Synchronize deletions in your container with deletions in the search index. To configure your indexer for deletion detection:
Enable soft delete on your storage account. If you're using native soft delete, the next step isn't required.
Add custom metadata that an indexer can scan to determine which blobs are marked for deletion. Give your custom property a descriptive name. For example, you can name the property "IsDeleted" and set it to false. Repeat this step for every blob in the container. When you want to delete the blob, change the property to true. For more information, see Change and delete detection when indexing from Azure Storage.
Prepare embedding model
In this section, you deploy a supported embedding model for later use in this quickstart. Before you proceed, make sure you completed the prerequisites for role-based access.
The wizard supports several embedding models. Internally, the wizard calls the Azure OpenAI Embedding skill to connect to Azure OpenAI.
To assign roles:
Sign in to the Azure portal and select your Azure OpenAI resource.
From the left pane, select Access control (IAM).
Select Add > Add role assignment.
Under Job function roles, select Cognitive Services OpenAI User, and then select Next.
Under Members, select Managed identity, and then select Select members.
Select your subscription and the managed identity of your search service.
To deploy an embedding model:
Sign in to the Foundry portal and select your Azure OpenAI resource.
Deploy a supported embedding model.
Start the wizard
To start the wizard for vector search:
Sign in to the Azure portal and select your Azure AI Search service.
On the Overview page, select Import data (new).

Select your data source: Azure Blob Storage, ADLS Gen2, or OneLake.
Select RAG.


Connect to your data
In this step, you connect Azure AI Search to your chosen data source for content ingestion and indexing.
On the Connect to your data page, select your Azure subscription.
Select the storage account and container that provide the sample data.
If you enabled soft delete and added custom metadata in Prepare sample data, select the Enable deletion tracking checkbox.
On subsequent indexing runs, the search index is updated to remove any search documents based on soft-deleted blobs on Azure Storage.
Blobs support either Native blob soft delete or Soft delete using custom metadata.
If you configured your blobs for soft delete, provide the metadata property name-value pair. We recommend IsDeleted. If IsDeleted is set to true on a blob, the indexer drops the corresponding search document on the next indexer run.
The wizard doesn't check Azure Storage for valid settings or throw an error if the requirements aren't met. Instead, deletion detection doesn't work, and your search index is likely to collect orphaned documents over time.
Select the Authenticate using managed identity checkbox. Leave the identity type as System-assigned.

Select Next.


Vectorize your text
During this step, the wizard uses your chosen embedding model to vectorize chunked data. Chunking is built in and nonconfigurable. The effective settings are:
"textSplitMode": "pages",
"maximumPageLength": 2000,
"pageOverlapLength": 500,
"maximumPagesToTake": 0, #unlimited
"unit": "characters"
On the Vectorize your text page, select Azure OpenAI for the kind.
Select your Azure subscription.
Select your Azure OpenAI resource, and then select the model you deployed in Prepare embedding model.
For the authentication type, select System assigned identity.
Select the checkbox that acknowledges the billing effects of using these resources.

Select Next.


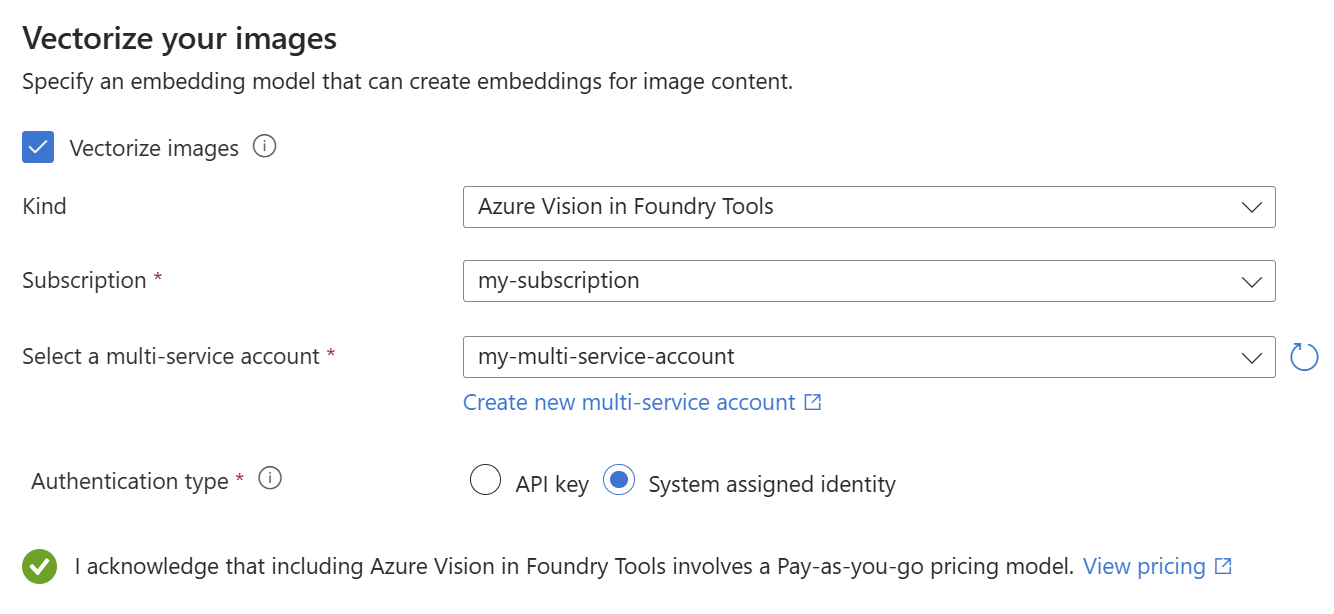
Vectorize and enrich your images
The health-plan PDFs include a corporate logo, but otherwise, there are no images. You can skip this step if you're using the sample documents.
However, if your content includes useful images, you can apply AI in one or both of the following ways:
Use a supported image embedding model from the Foundry model catalog or the Azure Vision multimodal embeddings API (via a Foundry resource) to vectorize images.
Use optical character recognition (OCR) to extract text from images. This option invokes the OCR skill.
On the Vectorize and enrich your images page, select the Vectorize images checkbox.
For the kind, select your model provider: Foundry Hub catalog models or AI Vision vectorization.
If Azure Vision is unavailable, make sure your search service and Foundry resource are both in a region that supports the Azure Vision multimodal APIs.
Select your Azure subscription, resource, and embedding model deployment (if applicable).
For the authentication type, select System assigned identity if you're not using a hub-based project. Otherwise, leave it as API key.
Select the checkbox that acknowledges the billing effects of using these resources.
Select Next.


Add semantic ranking
On the Advanced settings page, you can optionally add semantic ranking to rerank results at the end of query execution. Reranking promotes the most semantically relevant matches to the top.
Map new fields
Key points about this step:
The index schema provides vector and nonvector fields for chunked data.
You can add fields, but you can't delete or modify generated fields.
Document parsing mode creates chunks (one search document per chunk).
On the Advanced settings page, you can optionally add new fields, assuming the data source provides metadata or fields that aren't picked up on the first pass. By default, the wizard generates the fields described in the following table.
| Field | Applies to | Description |
|---|---|---|
| chunk_id | Text and image vectors | Generated string field. Searchable, retrievable, and sortable. This is the document key for the index. |
| parent_id | Text vectors | Generated string field. Retrievable and filterable. Identifies the parent document from which the chunk originates. |
| chunk | Text and image vectors | String field. Human readable version of the data chunk. Searchable and retrievable, but not filterable, facetable, or sortable. |
| title | Text and image vectors | String field. Human readable document title or page title or page number. Searchable and retrievable, but not filterable, facetable, or sortable. |
| text_vector | Text vectors | Collection(Edm.single). Vector representation of the chunk. Searchable and retrievable, but not filterable, facetable, or sortable. |
You can't modify the generated fields or their attributes, but you can add new fields if your data source provides them. For example, Azure Blob Storage provides a collection of metadata fields.
Select Add field.
Select a source field from the available fields, enter a field name for the index, and accept (or override) the default data type.
Note
Metadata fields are searchable but not retrievable, filterable, facetable, or sortable.
If you want to restore the schema to its original version, select Reset.
Schedule indexing
On the Advanced settings page, you can also specify an optional run schedule for the indexer. After you choose an interval from the dropdown list, select Next.
Finish the wizard
On the Review your configuration page, specify a prefix for the objects that the wizard creates. A common prefix helps you stay organized.
Select Create.
When the wizard completes the configuration, it creates the following objects:
A data source connection.
An index with vector fields, vectorizers, vector profiles, and vector algorithms. You can't design or modify the default index during the wizard workflow. Indexes conform to the 2024-05-01-preview REST API.
A skillset with the Text Split skill for chunking and an embedding skill for vectorization. The embedding skill is either the Azure OpenAI Embedding skill, AML skill, or Azure Vision multimodal embeddings skill. The skillset also has the index projections configuration, which maps data from one document in the data source to its corresponding chunks in a "child" index.
An indexer with field mappings and output field mappings (if applicable).
Tip
Wizard-created objects have configurable JSON definitions. To view or modify these definitions, select Search management from the left pane, where you can view your indexes, indexers, data sources, and skillsets.
Check results
Search Explorer accepts text strings as input and then vectorizes the text for vector query execution.
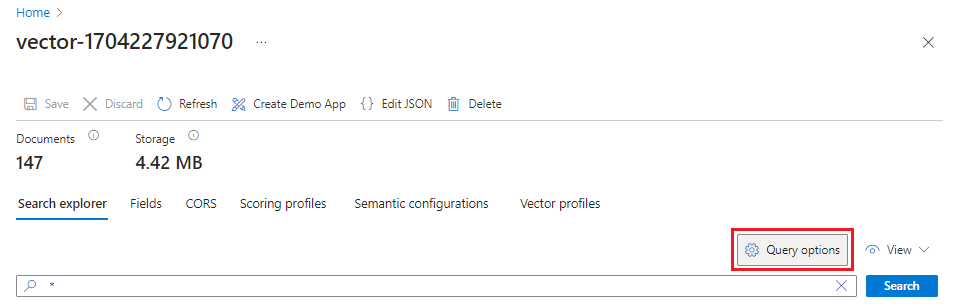
In the Azure portal, go to Search Management > Indexes, and then select your index.
Select Query options, and then select Hide vector values in search results. This step makes the results more readable.
From the View menu, select JSON view so you can enter text for your vector query in the
textvector query parameter.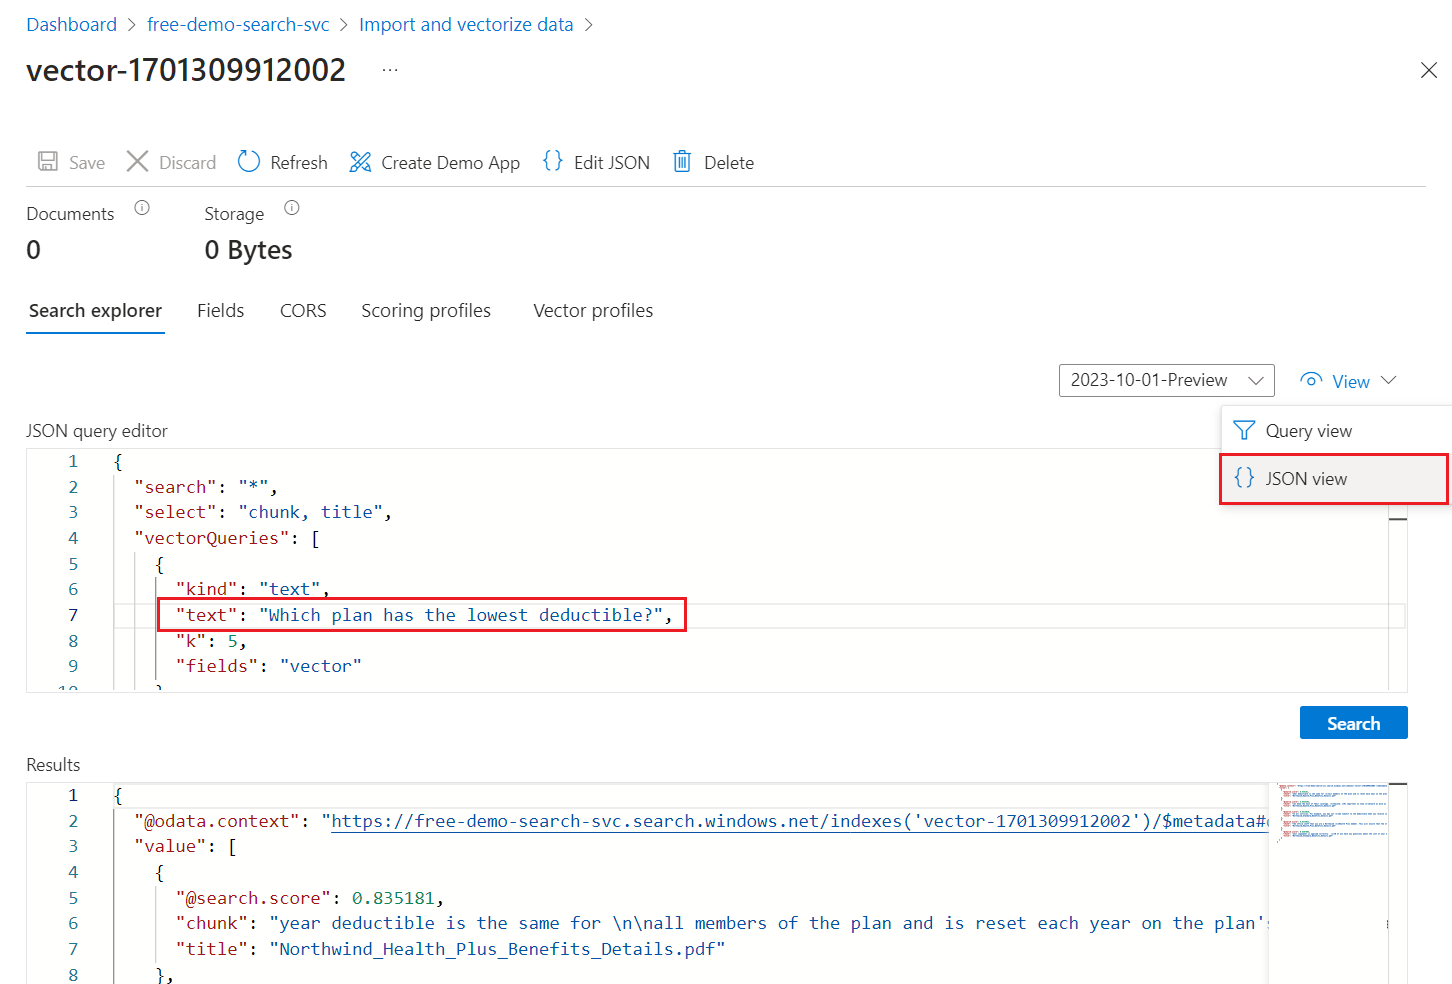
The default query is an empty search (
"*") but includes parameters for returning the number matches. It's a hybrid query that runs text and vector queries in parallel. It also includes semantic ranking and specifies which fields to return in the results through theselectstatement.{ "search": "*", "count": true, "vectorQueries": [ { "kind": "text", "text": "*", "fields": "text_vector,image_vector" } ], "queryType": "semantic", "semanticConfiguration": "my-demo-semantic-configuration", "captions": "extractive", "answers": "extractive|count-3", "queryLanguage": "en-us", "select": "chunk_id,text_parent_id,chunk,title,image_parent_id" }Replace both asterisk (
*) placeholders with a question related to health plans, such asWhich plan has the lowest deductible?.{ "search": "Which plan has the lowest deductible?", "count": true, "vectorQueries": [ { "kind": "text", "text": "Which plan has the lowest deductible?", "fields": "text_vector,image_vector" } ], "queryType": "semantic", "semanticConfiguration": "my-demo-semantic-configuration", "captions": "extractive", "answers": "extractive|count-3", "queryLanguage": "en-us", "select": "chunk_id,text_parent_id,chunk,title" }To run the query, select Search.
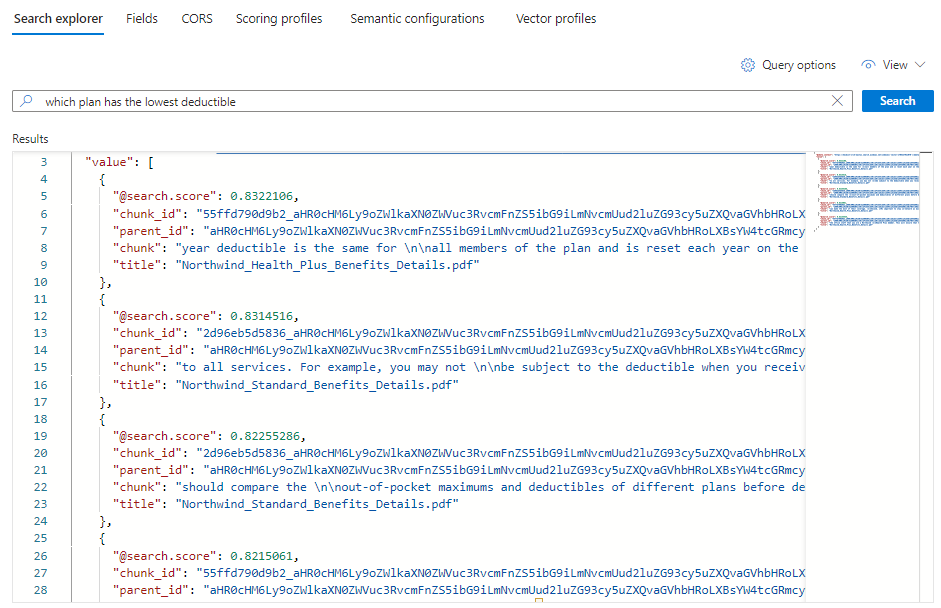
Each document is a chunk of the original PDF. The
titlefield shows which PDF the chunk comes from. Eachchunkis long. You can copy and paste one into a text editor to read the entire value.To see all of the chunks from a specific document, add a filter for the
title_parent_idfield for a specific PDF. You can check the Fields tab of your index to confirm the field is filterable.{ "select": "chunk_id,text_parent_id,chunk,title", "filter": "text_parent_id eq 'aHR0cHM6Ly9oZWlkaXN0c3RvcmFnZWRlbW9lYXN0dXMuYmxvYi5jb3JlLndpbmRvd3MubmV0L2hlYWx0aC1wbGFuLXBkZnMvTm9ydGh3aW5kX1N0YW5kYXJkX0JlbmVmaXRzX0RldGFpbHMucGRm0'", "count": true, "vectorQueries": [ { "kind": "text", "text": "*", "k": 5, "fields": "text_vector" } ] }


Clean up resources
This quickstart uses billable Azure resources. If you no longer need the resources, delete them from your subscription to avoid charges.
Next step
This quickstart introduced you to the Import data (new) wizard, which creates all of the necessary objects for integrated vectorization. To explore each step in detail, see Set up integrated vectorization in Azure AI Search.