Configure SAP authorizations and deploy optional SAP Change Requests
This article describes how to prepare your environment for the installation of the SAP agent so that it can properly connect to your SAP systems. Preparation includes configuring required SAP authorizations and, optionally, deploying extra SAP change requests (CRs).
- Microsoft Sentinel is now generally available within the Microsoft unified security operations platform in the Microsoft Defender portal. For more information, see Microsoft Sentinel in the Microsoft Defender portal.
Deployment milestones
Track your SAP solution deployment journey through this series of articles:
Prepare SAP environment (You are here)
Optional deployment steps
Configure the Microsoft Sentinel role
Upload role authorizations from the /MSFTSEN/SENTINEL_RESPONDER file in GitHub.
This creates the /MSFTSEN/SENTINEL_RESPONDER role, which includes all the authorizations required to retrieve logs from the SAP systems and run attack disruption response actions.
Alternately, create a role manually with the relevant authorizations required for the logs you want to ingest. For more information, see Required ABAP authorizations. The examples in this procedure use the /MSFTSEN/SENTINEL_RESPONDER name.
The next step is to generate an active role profile for Microsoft Sentinel to use. Run the PFCG transaction:
In the SAP Easy Access screen, enter
PFCGin the field in the upper left corner of the screen and then press ENTER.In the Role Maintenance window, type the role name
/MSFTSEN/SENTINEL_RESPONDERin the Role field and select the Change button (the pencil).In the Change Roles window that appears, select the Authorizations tab.
In the Authorizations tab, select Change Authorization Data.
In the Information popup, read the message and select the green checkmark to confirm.
In the Change Role: Authorizations window, select Generate.
See that the Status field has changed from Unchanged to generated.
Select Back (to the left of the SAP logo at the top of the screen).
Back in the Change Roles window, verify that the Authorizations tab displays a green box, then select Save.
Create a user
The Microsoft Sentinel solution for SAP® applications requires a user account to connect to your SAP system. Use the following instructions to create a user account and assign it to the role that you created in the previous step.
In the examples shown here, we use the role name /MSFTSEN/SENTINEL_RESPONDER.
Run the SU01 transaction:
In the SAP Easy Access screen, enter
SU01in the field in the upper left corner of the screen and press ENTER.In the User Maintenance: Initial Screen screen, type in the name of the new user in the User field and select Create Technical User from the button bar.
In the Maintain Users screen, select System from the User Type drop-down list. Create and enter a complex password in the New Password and Repeat Password fields, then select the Roles tab.
In the Roles tab, in the Role Assignments section, enter the full name of the role -
/MSFTSEN/SENTINEL_RESPONDERin our example - and press Enter.After pressing Enter, verify that the right-hand side of the Role Assignments section populates with data, such as Change Start Date.
Select the Profiles tab, verify that a profile for the role appears under Assigned Authorization Profiles, and select Save.
Required ABAP authorizations
This section lists the ABAP authorizations required to ensure that the SAP user account used by Microsoft Sentinel's SAP data connector can correctly retrieve logs from the SAP systems and run attack disruption response actions.
The required authorizations are listed here by their purpose. You only need the authorizations that are listed for the kinds of logs you want to bring into Microsoft Sentinel and the attack disruption response actions you want to apply.
Tip
To create a role with all the required authorizations, load the role authorizations from the /MSFTSEN/SENTINEL_RESPONDER file.
Alternately, to enable only log retrieval, without attack disruption response actions, deploy the SAP NPLK900271 CR on the SAP system to create the /MSFTSEN/SENTINEL_CONNECTOR role, or load the role authorizations from the /MSFTSEN/SENTINEL_CONNECTOR file.
If needed, you can remove the user role and the optional CR installed on your ABAP system.
Deploy optional CRs
This section presents a step-by-step guide to deploying extra, optional CRs. It's intended for SOC engineers or implementers who might not necessarily be SAP experts.
Experienced SAP administrators that are familiar with the CR deployment process might prefer to get the appropriate CRs directly from the SAP environment validation steps section of the guide and deploy them.
We strongly recommend that deploying SAP CRs is done by an experienced SAP system administrator.
The following table describes the optional CRs available to deploy:
| CR | Description |
|---|---|
| NPLK900271 | Creates and configures a sample role with the basic authorizations required to allow the SAP data connector to connect to your SAP system. Alternatively, you can load authorizations directly from a file or manually define the role according to the logs you want to ingest. For more information, see Required ABAP authorizations and Create and configure a role (required). |
| NPLK900201 or NPLK900202 | Retrieves additional information from SAP. Select one of these CRs according to your SAP version. |
Prerequisites for deploying CRs
Make sure you've copied the details of the SAP system version, System ID (SID), System number, Client number, IP address, administrative username, and password before beginning the deployment process. For the following example, the following details are assumed:
- SAP system version:
SAP ABAP Platform 1909 Developer edition - SID:
A4H - System number:
00 - Client number:
001 - IP address:
192.168.136.4 - Administrator user:
a4hadm, however, the SSH connection to the SAP system is established withrootuser credentials.
- SAP system version:
Make sure you know which CR you want to deploy.
If you're deploying the NPLK900202 CR to retrieve additional information, make sure you've installed the relevant SAP note.
Set up the files
Sign in to the SAP system using SSH.
Transfer the CR files to the SAP system or download the files directly onto the SAP system from the SSH prompt. Use the following commands:
Download NPLK900271
wget https://raw.githubusercontent.com/Azure/Azure-Sentinel/master/Solutions/SAP/CR/K900271.NPL
wget https://raw.githubusercontent.com/Azure/Azure-Sentinel/master/Solutions/SAP/CR/R900271.NPL
Alternatively, you can load these authorizations directly from a file.
Download NPLK900202
wget https://raw.githubusercontent.com/Azure/Azure-Sentinel/master/Solutions/SAP/CR/K900202.NPL
wget https://raw.githubusercontent.com/Azure/Azure-Sentinel/master/Solutions/SAP/CR/R900202.NPL
Download NPLK900201
wget https://raw.githubusercontent.com/Azure/Azure-Sentinel/master/Solutions/SAP/CR/K900201.NPL
wget https://raw.githubusercontent.com/Azure/Azure-Sentinel/master/Solutions/SAP/CR/R900201.NPL
Each CR consists of two files, one beginning with K and one with R.
Change the ownership of the files to user
<sid>adm and group sapsys. (Substitute your SAP system ID for<sid>.)chown <sid>adm:sapsys *.NPLIn our example:
chown a4hadm:sapsys *.NPLCopy the cofiles (those beginning with K) to the
/usr/sap/trans/cofilesfolder. Preserve the permissions while copying, using thecpcommand with the-pswitch.cp -p K*.NPL /usr/sap/trans/cofiles/Copy the data files (those beginning with R) to the
/usr/sap/trans/datafolder. Preserve the permissions while copying, using thecpcommand with the-pswitch.cp -p R*.NPL /usr/sap/trans/data/
Import the CRs
Launch the SAP Logon application and sign in to the SAP GUI console.
Run the STMS_IMPORT transaction:
In the SAP Easy Access screen, enter
STMS_IMPORTin the field in the upper left corner of the screen and then press ENTER.
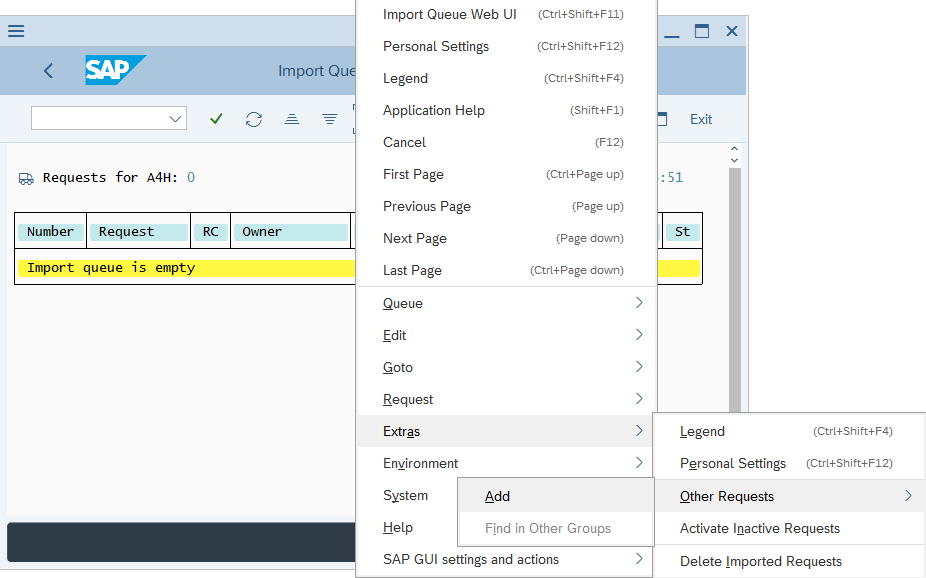
In the Import Queue window that appears, select More > Extras > Other Requests > Add.
In the Add Transport Requests to Import Queue pop-up that appears, select the Transp. Request field.
The Transport requests window will appear and display a list of CRs available to be deployed. Select a CR and select the green checkmark button.
Back in the Add Transport Request to Import Queue window, select Continue (the green checkmark) or press ENTER.
In the Add Transport Request confirmation dialog, select Yes.
If you plan to deploy more CRs, repeat the procedure in the preceding five steps for the remaining CRs.
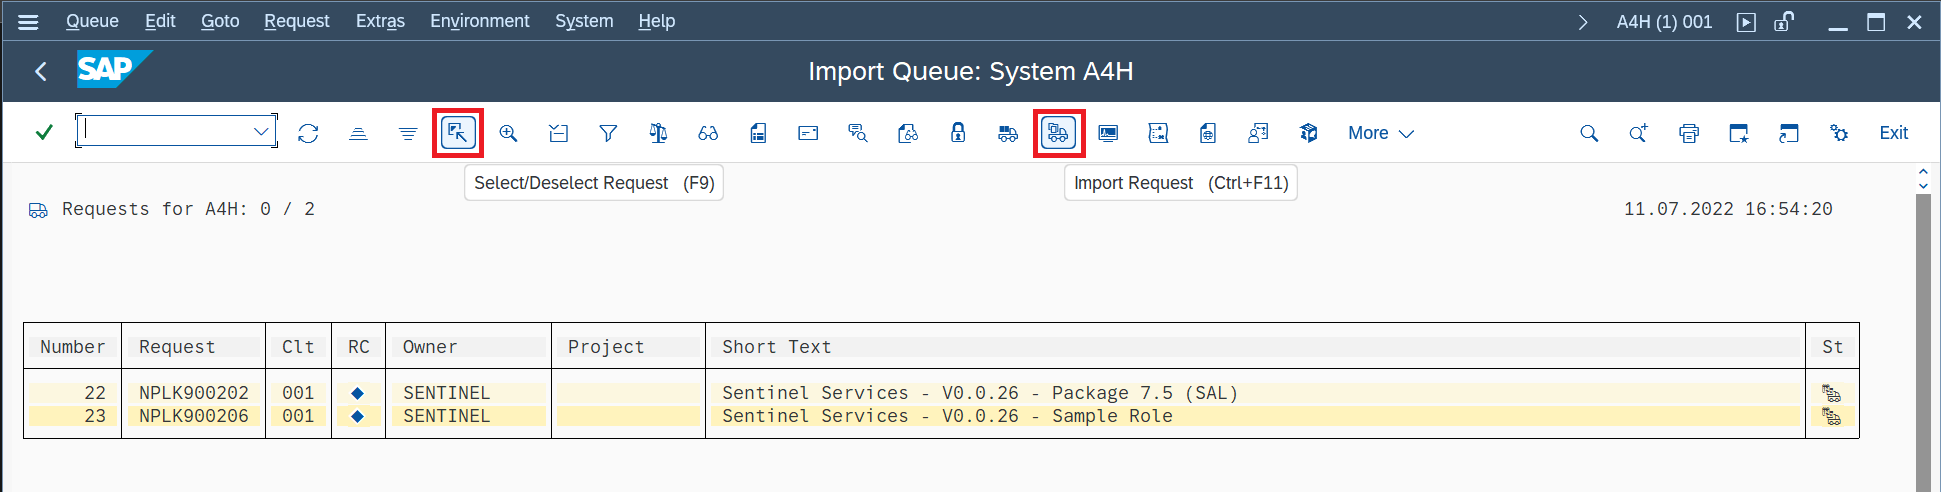
In the Import Queue window, select the relevant Transport Request once, and then select F9 or Select/Deselect Request icon.
If you have remaining Transport Requests to add to the deployment, repeat step 9.
Select the Import Requests icon:
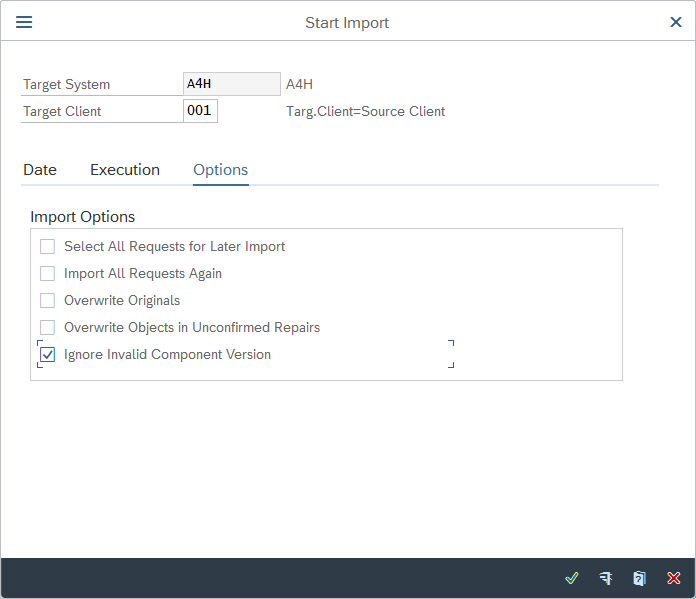
In Start Import window, select the Target Client field.
The Input Help.. dialog appears. Select the number of the client you want to deploy the CRs to (
001in our example), then select the green checkmark to confirm.Back in the Start Import window, select the Options tab, mark the Ignore Invalid Component Version checkbox, and select the green checkmark to confirm.
In the Start import confirmation dialog, select Yes to confirm the import.
Back in the Import Queue window, select Refresh, wait until the import operation completes and the import queue shows as empty.
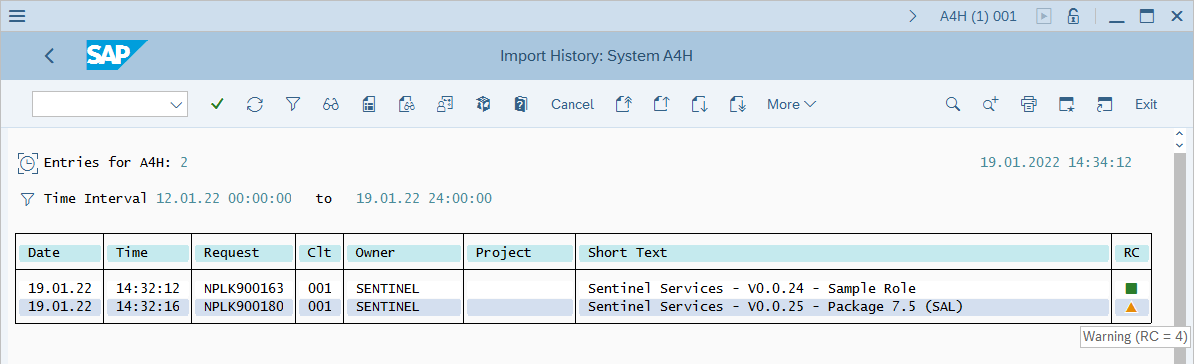
To review the import status, in the Import Queue window select More > Go To > Import History.
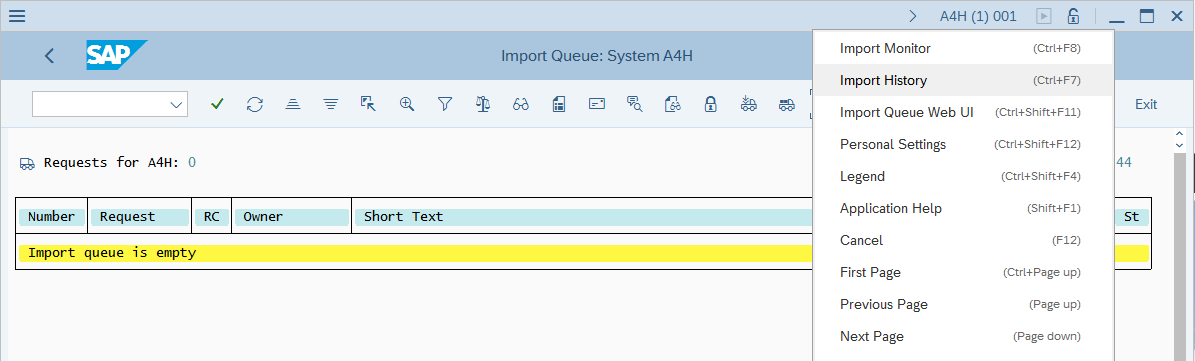
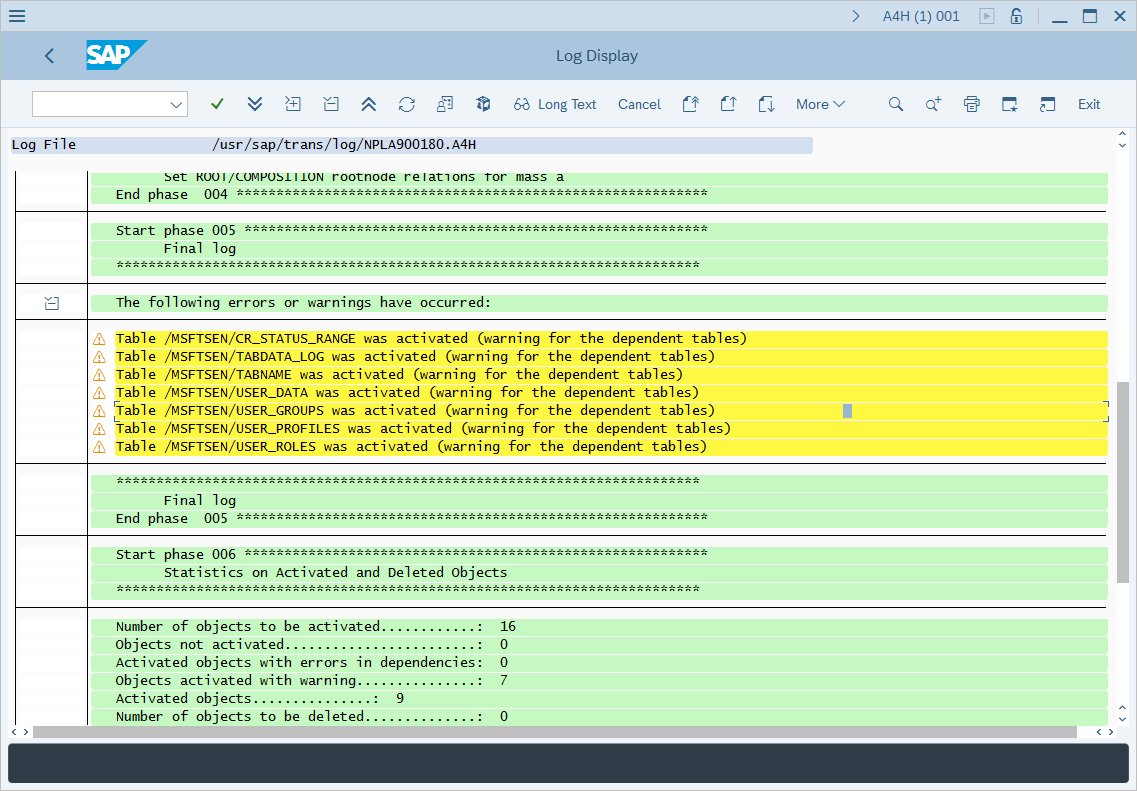
If you deployed the NPLK900202 CR, it's expected to display a Warning. Select the entry to verify that the warnings displayed are of type "Table <tablename> was activated."
The CRs and versions in the following screenshots might change according to your installed CR version.


Verify that the PAHI table (history of system, database, and SAP parameters) is updated at regular intervals
The SAP PAHI table includes data on the history of the SAP system, the database, and SAP parameters. In some cases, the Microsoft Sentinel solution for SAP® applications can't monitor the SAP PAHI table at regular intervals, due to missing or faulty configuration (see the SAP note with more details on this issue). It's important to update the PAHI table and to monitor it frequently, so that the Microsoft Sentinel solution for SAP® applications can alert on suspicious actions that might happen at any time throughout the day.
Learn more about how the Microsoft Sentinel solution for SAP® applications monitors suspicious configuration changes to security parameters.
Note
For optimal results, in your machine's systemconfig.ini file, under the [ABAP Table Selector] section, enable both the PAHI_FULL and the PAHI_INCREMENTAL parameters.
To verify that the PAHI table is updated at regular intervals:
- Check whether the
SAP_COLLECTOR_FOR_PERFMONITORjob, based on the RSCOLL00 program, is scheduled and running hourly, by the DDIC user in the 000 client. - Check whether the
RSHOSTPH,RSSTATPHandRSDB_PARreport names are maintained in the TCOLL table.RSHOSTPHreport: Reads the operating system kernel parameters and stores this data in the PAHI table.RSSTATPHreport: Reads the SAP profile parameters and stores this data in the PAHI table.RSDB_PARreport: Reads the database parameters and stores them in the PAHI table.
If the job exists and is configured correctly, no further steps are needed.
If the job doesn’t exist:
Sign in to your SAP system in the 000 client.
Execute the SM36 transaction.
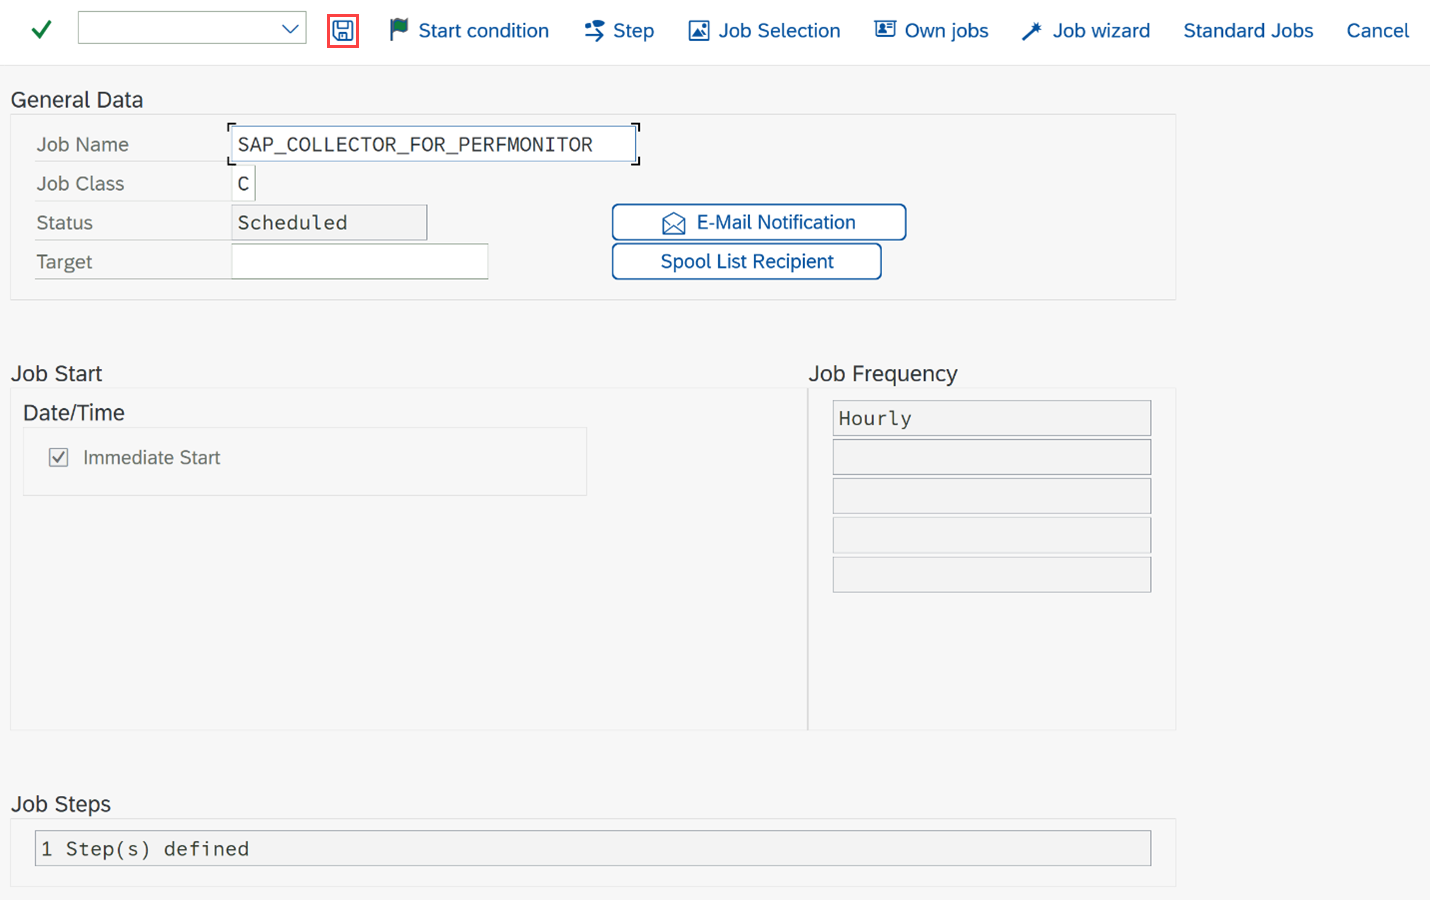
Under Job Name, type SAP_COLLECTOR_FOR_PERFMONITOR.
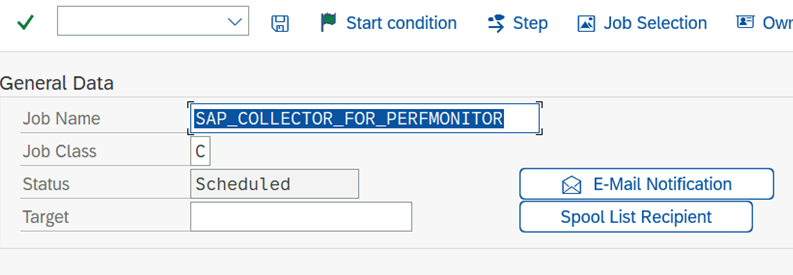
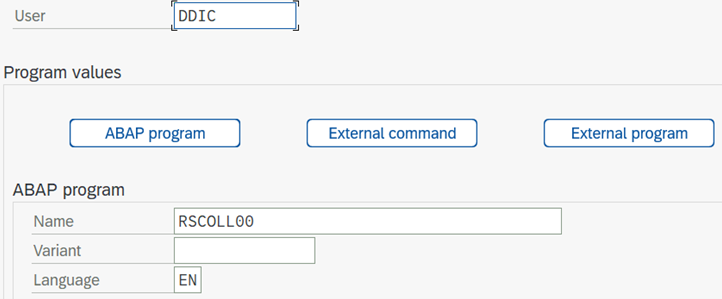
Select Step and fill in this information:
- Under User, type DDIC.
- Under ABAP Program Name, type RSCOLL00.
Save the configuration.
Select F3 to go back to the previous screen.
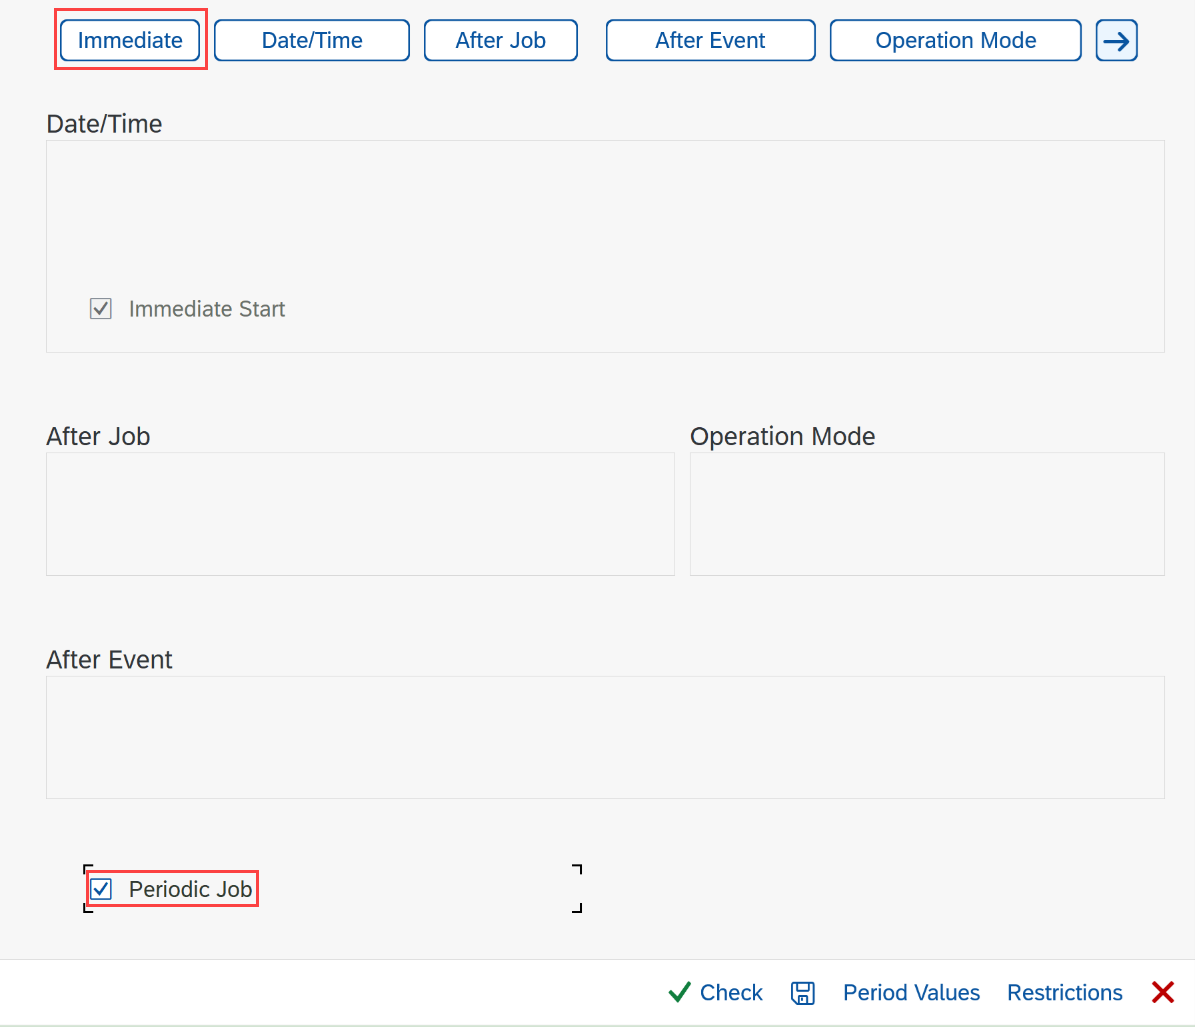
Select Start Condition to define the start condition.
Select Immediate and select the Periodic job checkbox.
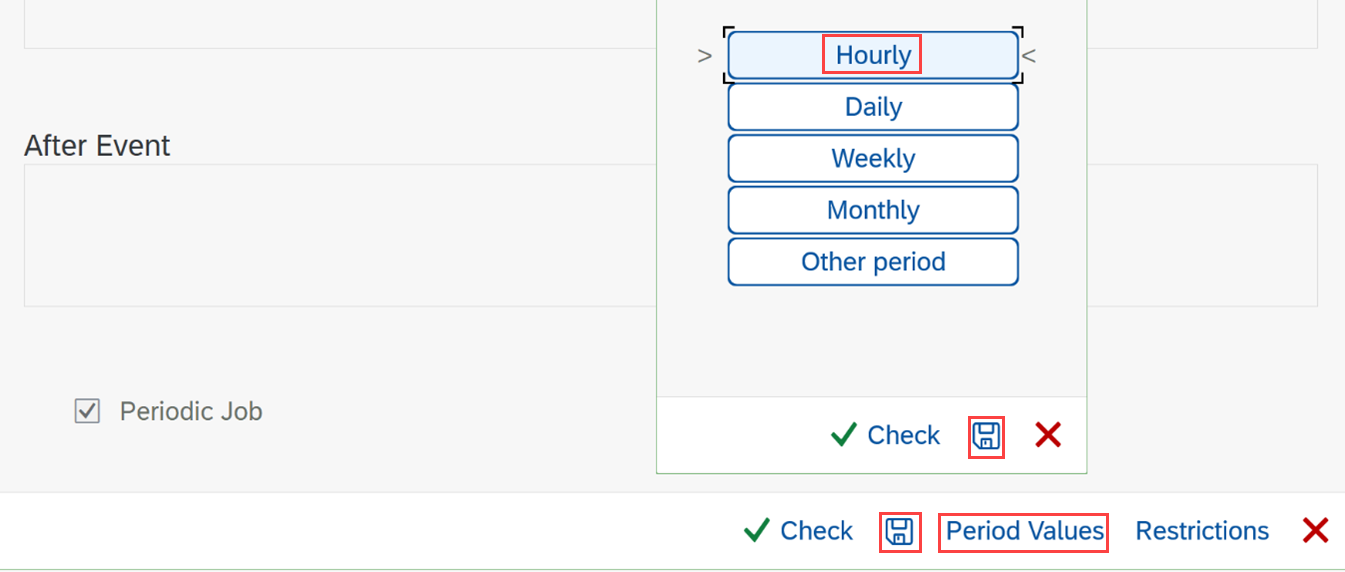
Select Period values and select Hourly.
Select Save inside the dialog, and then select Save at the bottom.
To release the job, select Save at the top.
Next steps
Your SAP environment is now fully prepared to deploy a data connector agent. A role and profile are provisioned, a user account is created and assigned the relevant role profile, and CRs are deployed as needed for your environment.
Now, you're ready to enable and configure SAP auditing for Microsoft Sentinel.
Feedback
Coming soon: Throughout 2024 we will be phasing out GitHub Issues as the feedback mechanism for content and replacing it with a new feedback system. For more information see: https://aka.ms/ContentUserFeedback.
Submit and view feedback for