Note
Access to this page requires authorization. You can try signing in or changing directories.
Access to this page requires authorization. You can try changing directories.
Get started with Service Connector to connect your Azure Container Apps to databases, storage accounts, and other Azure services. Service Connector simplifies authentication and configuration, enabling you to connect to resources using managed identities or other authentication methods.
This article provides step-by-step instructions for both the Azure portal and Azure CLI. Choose your preferred method using the tabs above.
Important
Support for Service Connector (preview) on Azure Container Apps ends on March 30, 2026. After that date, new service connections using Service Connector (preview) aren't available through any interface. For more information, see RETIREMENT: Service Connector (Preview) on Azure Container Apps.
Prerequisites
- An Azure account with an active subscription. Create an account for free.
- An application deployed to Container Apps in a region supported by Service Connector.
- A target resource to connect your Container Apps to, such as a Blob Storage account.
- The necessary permissions to create and manage service connections.
Use the Bash environment in Azure Cloud Shell. For more information, see Get started with Azure Cloud Shell.

If you prefer to run CLI reference commands locally, install the Azure CLI. If you're running on Windows or macOS, consider running Azure CLI in a Docker container. For more information, see How to run the Azure CLI in a Docker container.
If you're using a local installation, sign in to the Azure CLI by using the az login command. To finish the authentication process, follow the steps displayed in your terminal. For other sign-in options, see Authenticate to Azure using Azure CLI.
When you're prompted, install the Azure CLI extension on first use. For more information about extensions, see Use and manage extensions with the Azure CLI.
Run az version to find the version and dependent libraries that are installed. To upgrade to the latest version, run az upgrade.
- This quickstart requires version 2.30.0 or higher of the Azure CLI. To upgrade to the latest version, run
az upgrade. If using Azure Cloud Shell, the latest version is already installed.
Set up your environment
If you're using Service Connector for the first time, start by running the command az provider register to register the Service Connector resource provider.
az provider register -n Microsoft.ServiceLinkerTip
You can check if the resource provider has already been registered by running the command
az provider show -n "Microsoft.ServiceLinker" --query registrationState. If the output isRegistered, then Service Connector has already been registered.Optionally, run the command az containerapp connection list-support-types to get a list of supported target services for Container Apps.
az containerapp connection list-support-types --output table
Create a service connection (preview)
Use Service Connector to create a service connection between your Azure Container Apps and Azure Blob Storage. This example demonstrates connecting to Blob Storage, but you can use the same process for other supported Azure services.
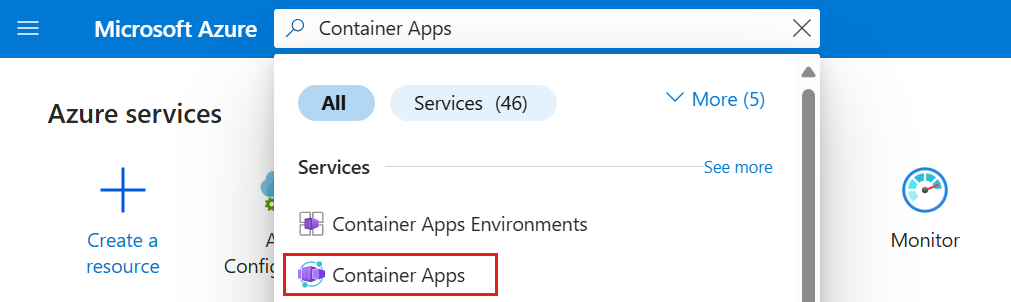
Select the Search resources, services and docs (G +/) search bar at the top of the Azure portal, type Container Apps in the filter and select Container Apps.
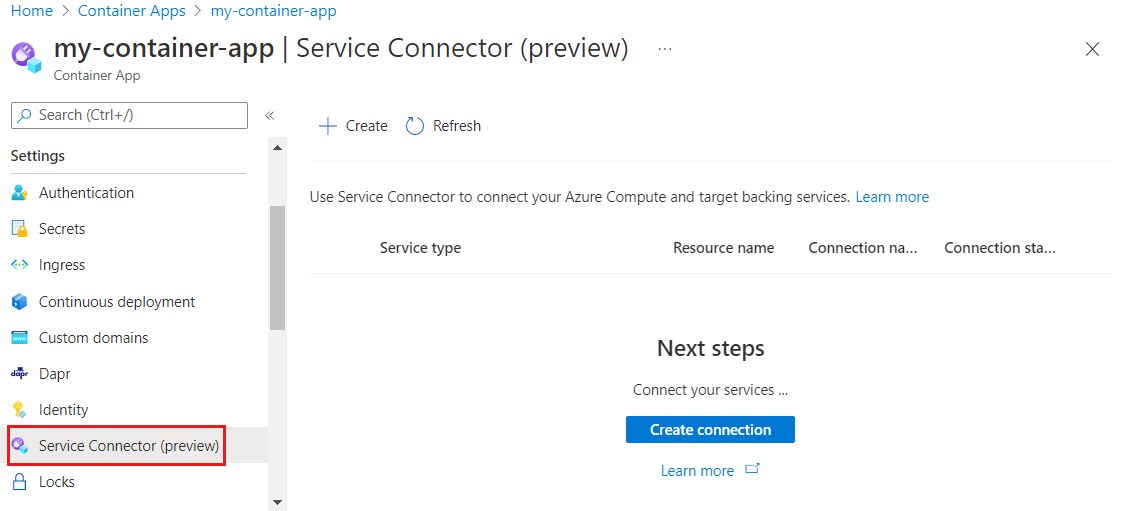
Select the name of the Container Apps resource you want to connect to a target resource.
Select Service Connector (preview) from the left table of contents. Then select Create.
On the Basics tab, select or enter the following settings.
Setting Example Description Container my-container-app The container in your container app. Service type Storage - Blob The type of service you want to connect to your container app. Subscription my-subscription The subscription that contains the service you want to connect to. The default value is the subscription that contains this container app. Connection name storageblob_700ae The connection name that identifies the connection between your container app and target service. Use the connection name provided by Service Connector or choose your own connection name. Storage account my-storage-account The target storage account you want to connect to. If you choose a different service type, select the corresponding target service instance. Client type .NET The application stack that works with the target service you selected. The default value is None, which generates a list of configurations. If you know the app stack or client SDK in your selected, select the same app stack for the client type. Select Next: Authentication to choose an authentication method: system-assigned managed identity (SMI), user-assigned managed identity (UMI), connection string, or service principal.
- System-assigned managed identity (recommended)
- User-assigned managed identity
- Service principal
- Connection string
Select System-assigned managed identity to connect through an identity that's automatically generated in Microsoft Entra ID and tied to the lifecycle of the service instance. This is the recommended authentication option.
Select Next: Networking to select the network configuration and select Configure firewall rules to enable access to target service so that your container app can access the Blob Storage.

Select Next: Review + Create to review the provided information. Running the final validation takes a few seconds.
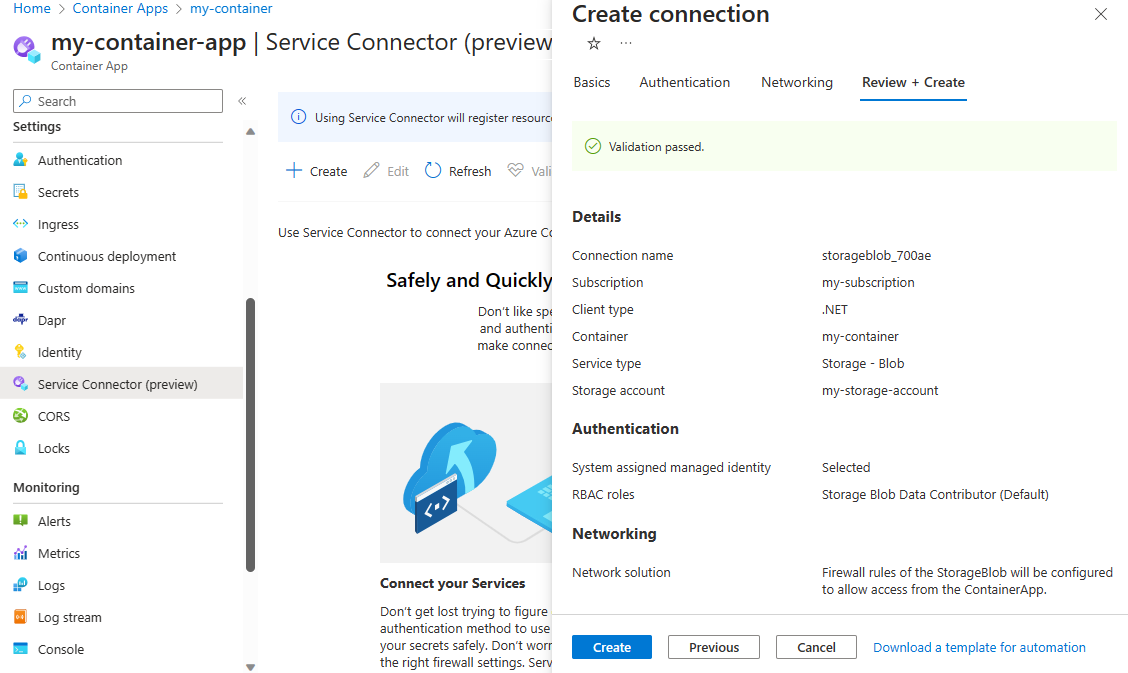
Select Create to create the service connection. The operation can take up to a minute to complete.
Run the az containerapp connection create command to create a service connection from Container Apps to a Blob Storage with a system-assigned managed identity. You can run this command in two different ways:
Generate the new connection step by step.
az containerapp connection create storage-blob --system-identityGenerate the new connection at once. Replace the placeholders with your own information:
<source-subscription>,<source_resource_group>,<app>,<target-subscription>,<target_resource_group>, and<account>.az containerapp connection create storage-blob \ --source-id /subscriptions/<source-subscription>/resourceGroups/<source_resource_group>/providers/Microsoft.App/containerApps/<app> \ --target-id /subscriptions/<target-subscription>/resourceGroups/<target_resource_group>/providers/Microsoft.Storage/storageAccounts/<account>/blobServices/default \ --system-identity
Tip
If you don't have a Blob Storage account, run az containerapp connection create storage-blob --new --system-identity to create one and connect it to your container app using a managed identity.
View service connections
Container Apps connections are displayed under Settings > Service Connector (preview). Select > to expand the list and see the properties required by your application.
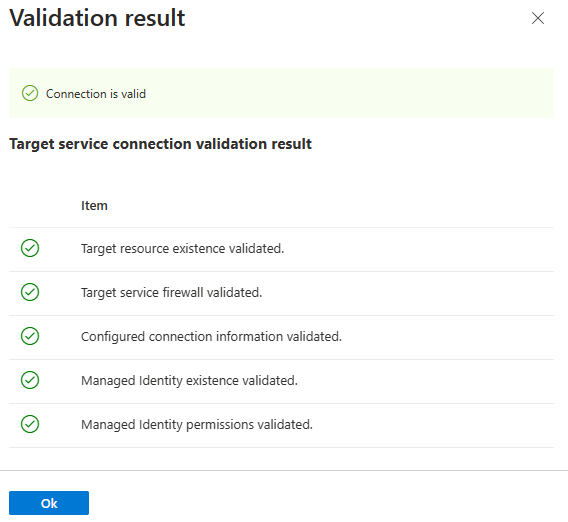
Select your connection and then Validate to prompt Service Connector to check your connection.
Select Learn more to review the connection validation details.
Run the az containerapp connection list command to list all your container app's provisioned connections. Replace the placeholders <container-app-resource-group> and <container-app-name> from the command below with your own information. You can also remove the --output table option to view more information about your connections.
az containerapp connection list --resource-group "<container-app-resource-group>" --name "<container-app-name>" --output table
The output also displays the provisioning state of your connections.
Related content
Check the following guides for more information about Service Connector: