Note
Access to this page requires authorization. You can try signing in or changing directories.
Access to this page requires authorization. You can try changing directories.
This article provides guidance for Visual Studio users migrating Azure Stream Analytics (ASA) projects to Visual Studio Code (VS Code). Please note that the ASA Tools extension for Visual Studio is no longer maintained. We recommend that you use the ASA tools extension in VS Code for local testing before you submit and start an ASA job.
If you have a local ASA project in Visual Studio, follow these steps to submit your ASA project to Azure portal.
Install VS Code and ASA Tools extension
Install Visual Studio Code
Open Visual Studio Code, select Extensions on the left pane, search for Stream Analytics and select Install on the Azure Stream Analytics Tools extension.
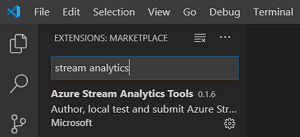
After the extension is installed, verify that Azure Stream Analytics Tools is visible in Enabled Extensions.
Select the Azure icon on the Visual Studio Code activity bar. Under Stream Analytics on the side bar, select Sign in to Azure.
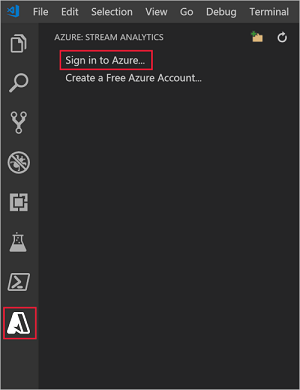
When you're signed in, your Azure account name appears on the status bar in the lower-left corner of the Visual Studio Code window.
Export an ASA Job and open in VS Code
If you've created an ASA job in the Azure portal, you can export the ASA job to VS Code in your local machine. Two ways to export an ASA job:
Option 1 – Export from the Azure portal
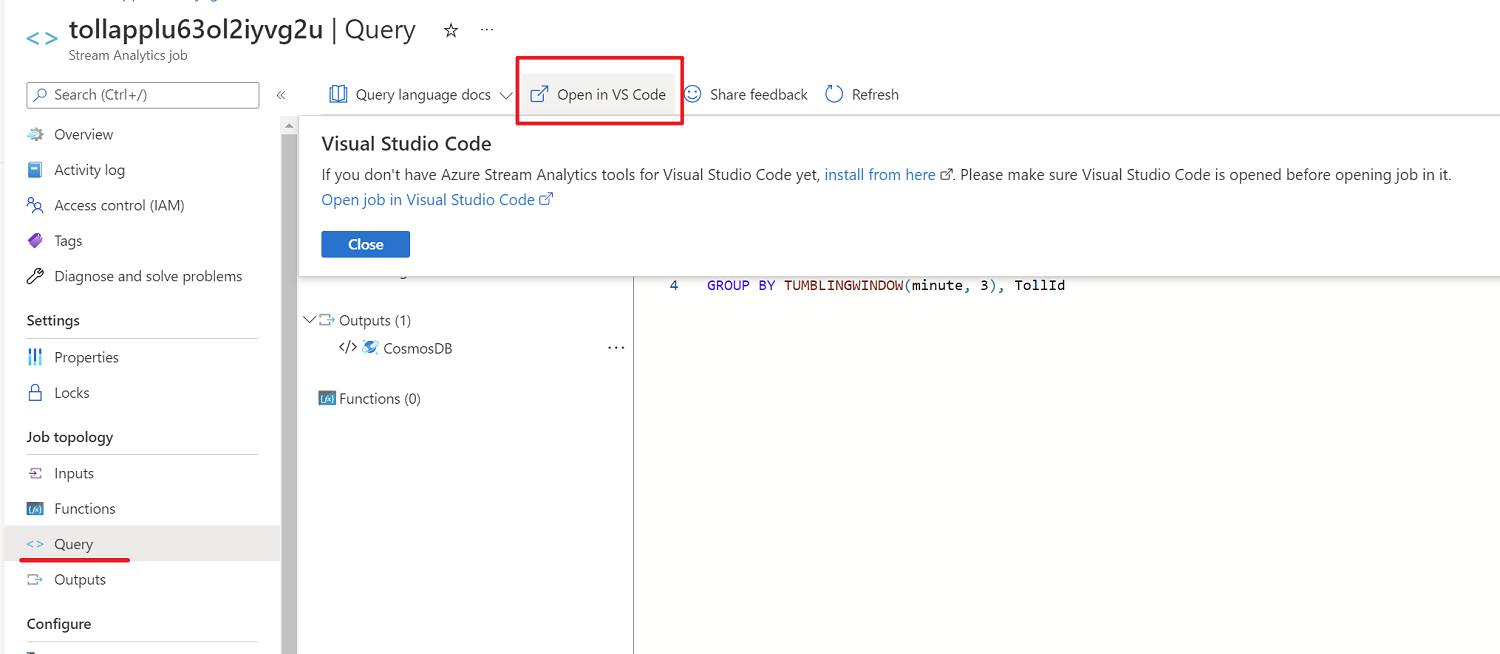
Sign in to Azure portal and open your ASA job. Under Query page, select Open in VS Code to export job.
Select a folder where you want to export the ASA project.
Then it will automatically create an ASA project and add it to your workspace in VS Code. You should see a folder with the same name as your ASA job.
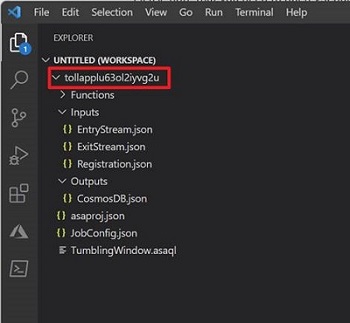
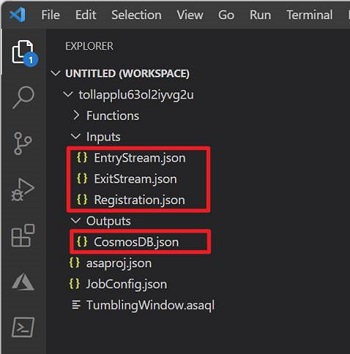
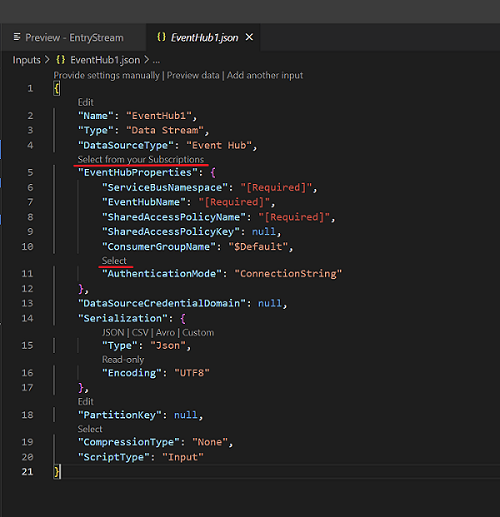
A Stream Analytics project consists of three folders: Inputs, Outputs, and Functions. It also has the query script (*.asaql), a JobConfig.json file, and an asaproj.json configuration file. If you have configured multiple Input and Output sources for the job, it will create JSON files for each source under the folders respectively.

Option 2 - Export an ASA job in VS Code
Select the Azure icon on the VS Code activity bar. Find the Subscription where your ASA job is created, select Export to export the ASA job.
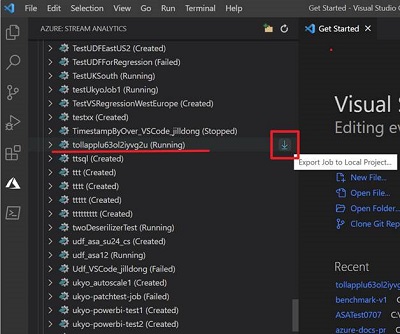
Once the export is completed, you'll see an ASA project created in your workspace.
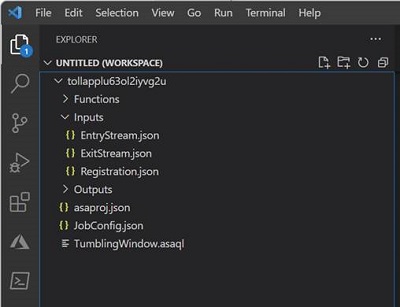
If your ASA job has configured multiple input and output sources, it will create JSON files for each source under the Inputs and Outputs folders respectively.
Run an ASA job in VS Code
After an ASA job is exported, you can run your query on the local machine. For input, data can be ingested from local files or live sources. Output results are either sent as files to a local folder, or to the live sinks. For more detail, visit Run jobs locally with VS Code.
Follow these steps to run your job with live input and save output results locally:
Before you begin, install .NET core SDK and restart Visual Studio Code.
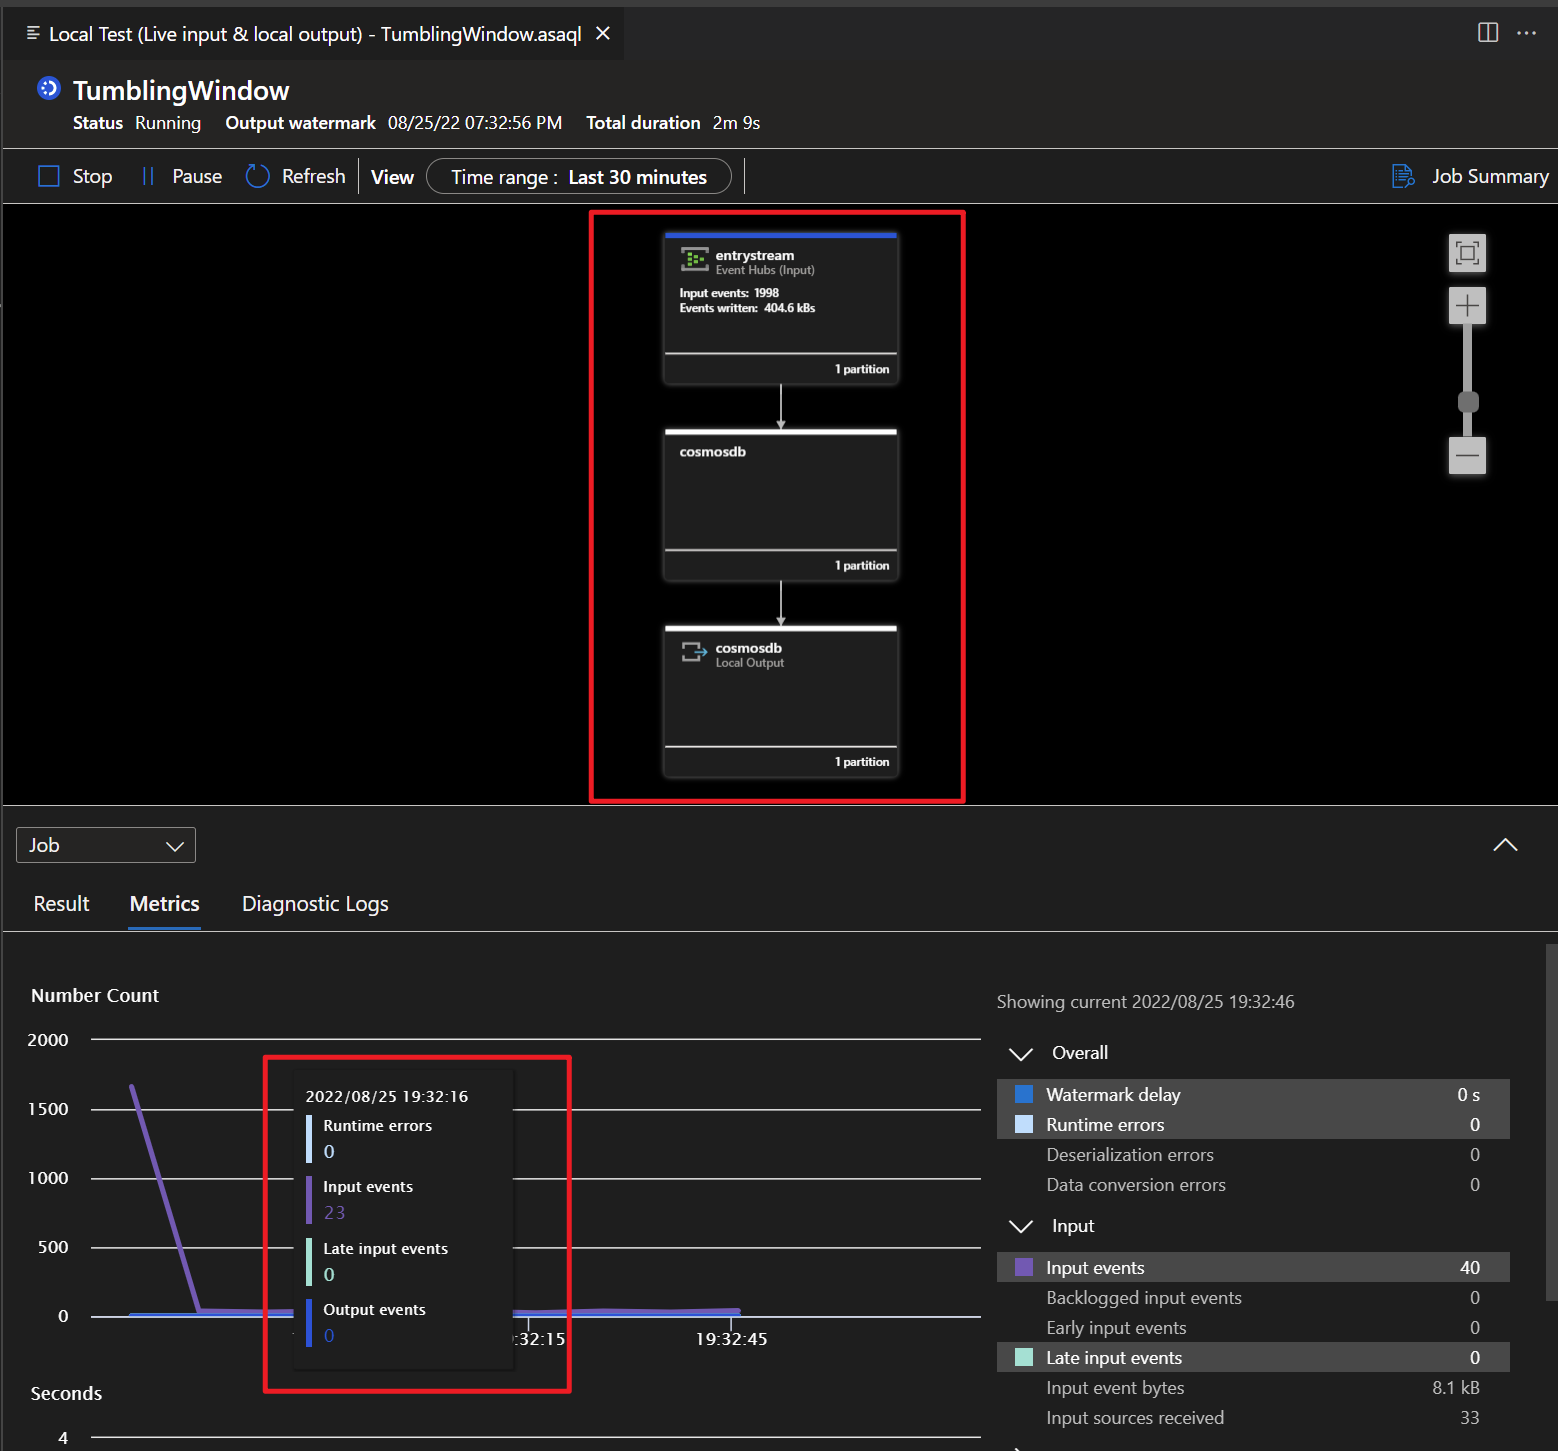
Go to. *.asaql file, select Run Locally.
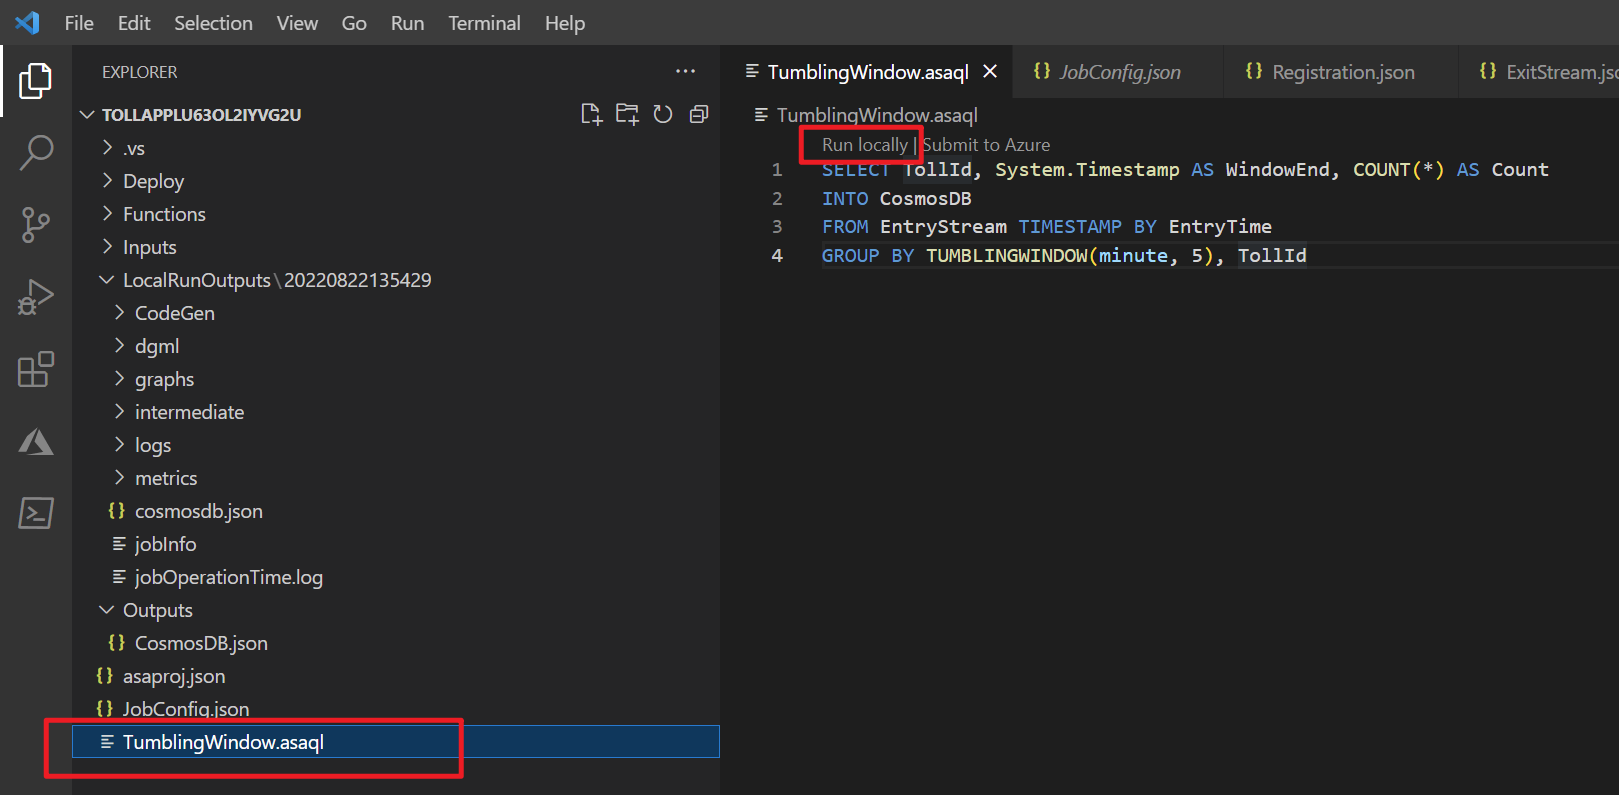
Then select Use Live Input and Local Output under the Command Palette.

If your job started successfully, you can view the output results, job diagram, and metrics for your ASA job.


For more details about debugging, visit Debug ASA queries locally using job diagram
FAQs
How to migrate a local ASA project from Visual Studio to VS Code?
If you have a local ASA project in Visual Studio and not yet submitted, follow these steps to submit your ASA project to Azure.
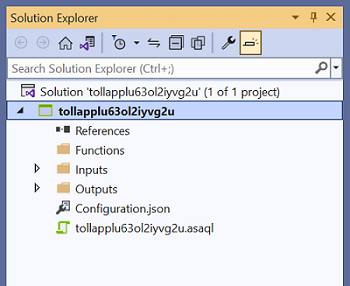
Open your ASA project in Visual Studio, you should see the Functions, Inputs and Outputs folders in the Solution Explorer.
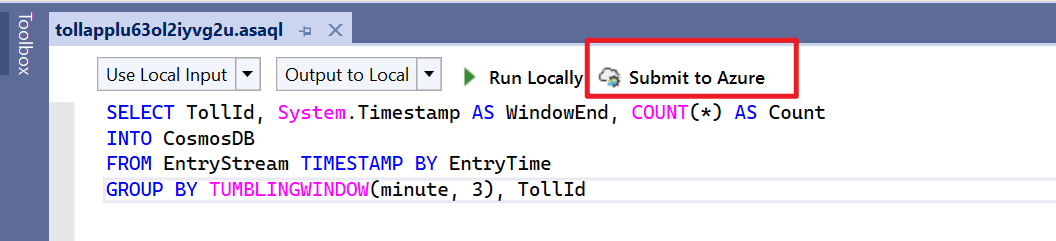
Open the script (*.asaql), select Submit to Azure in the editor.
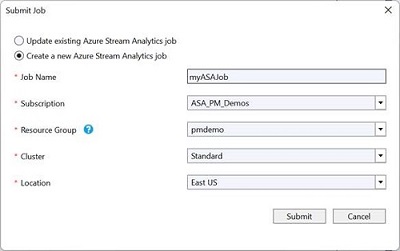
Select Create a New Azure Stream Analytics job and enter a Job Name. Choose the Subscription, Resource Group, and Location for the ASA project.
Then you can go to the Azure portal and find the ASA job under your Resource Group.
To learn how to export an ASA job in VS Code, see here.
Do I need to configure the input and output sources after an ASA job is exported?
No, if your ASA job has configured multiple Inputs and Outputs sources in the Azure portal, it will create JSON files for each source under the folders respectively.
How to add a new input source in VS Code?
Right-click the Inputs folder in your Stream Analytics project. Then select ASA: Add Input from the context menu.
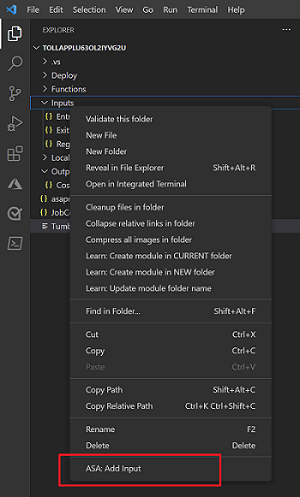
Choose the input type and follow the instructions to edit your input JSON files.
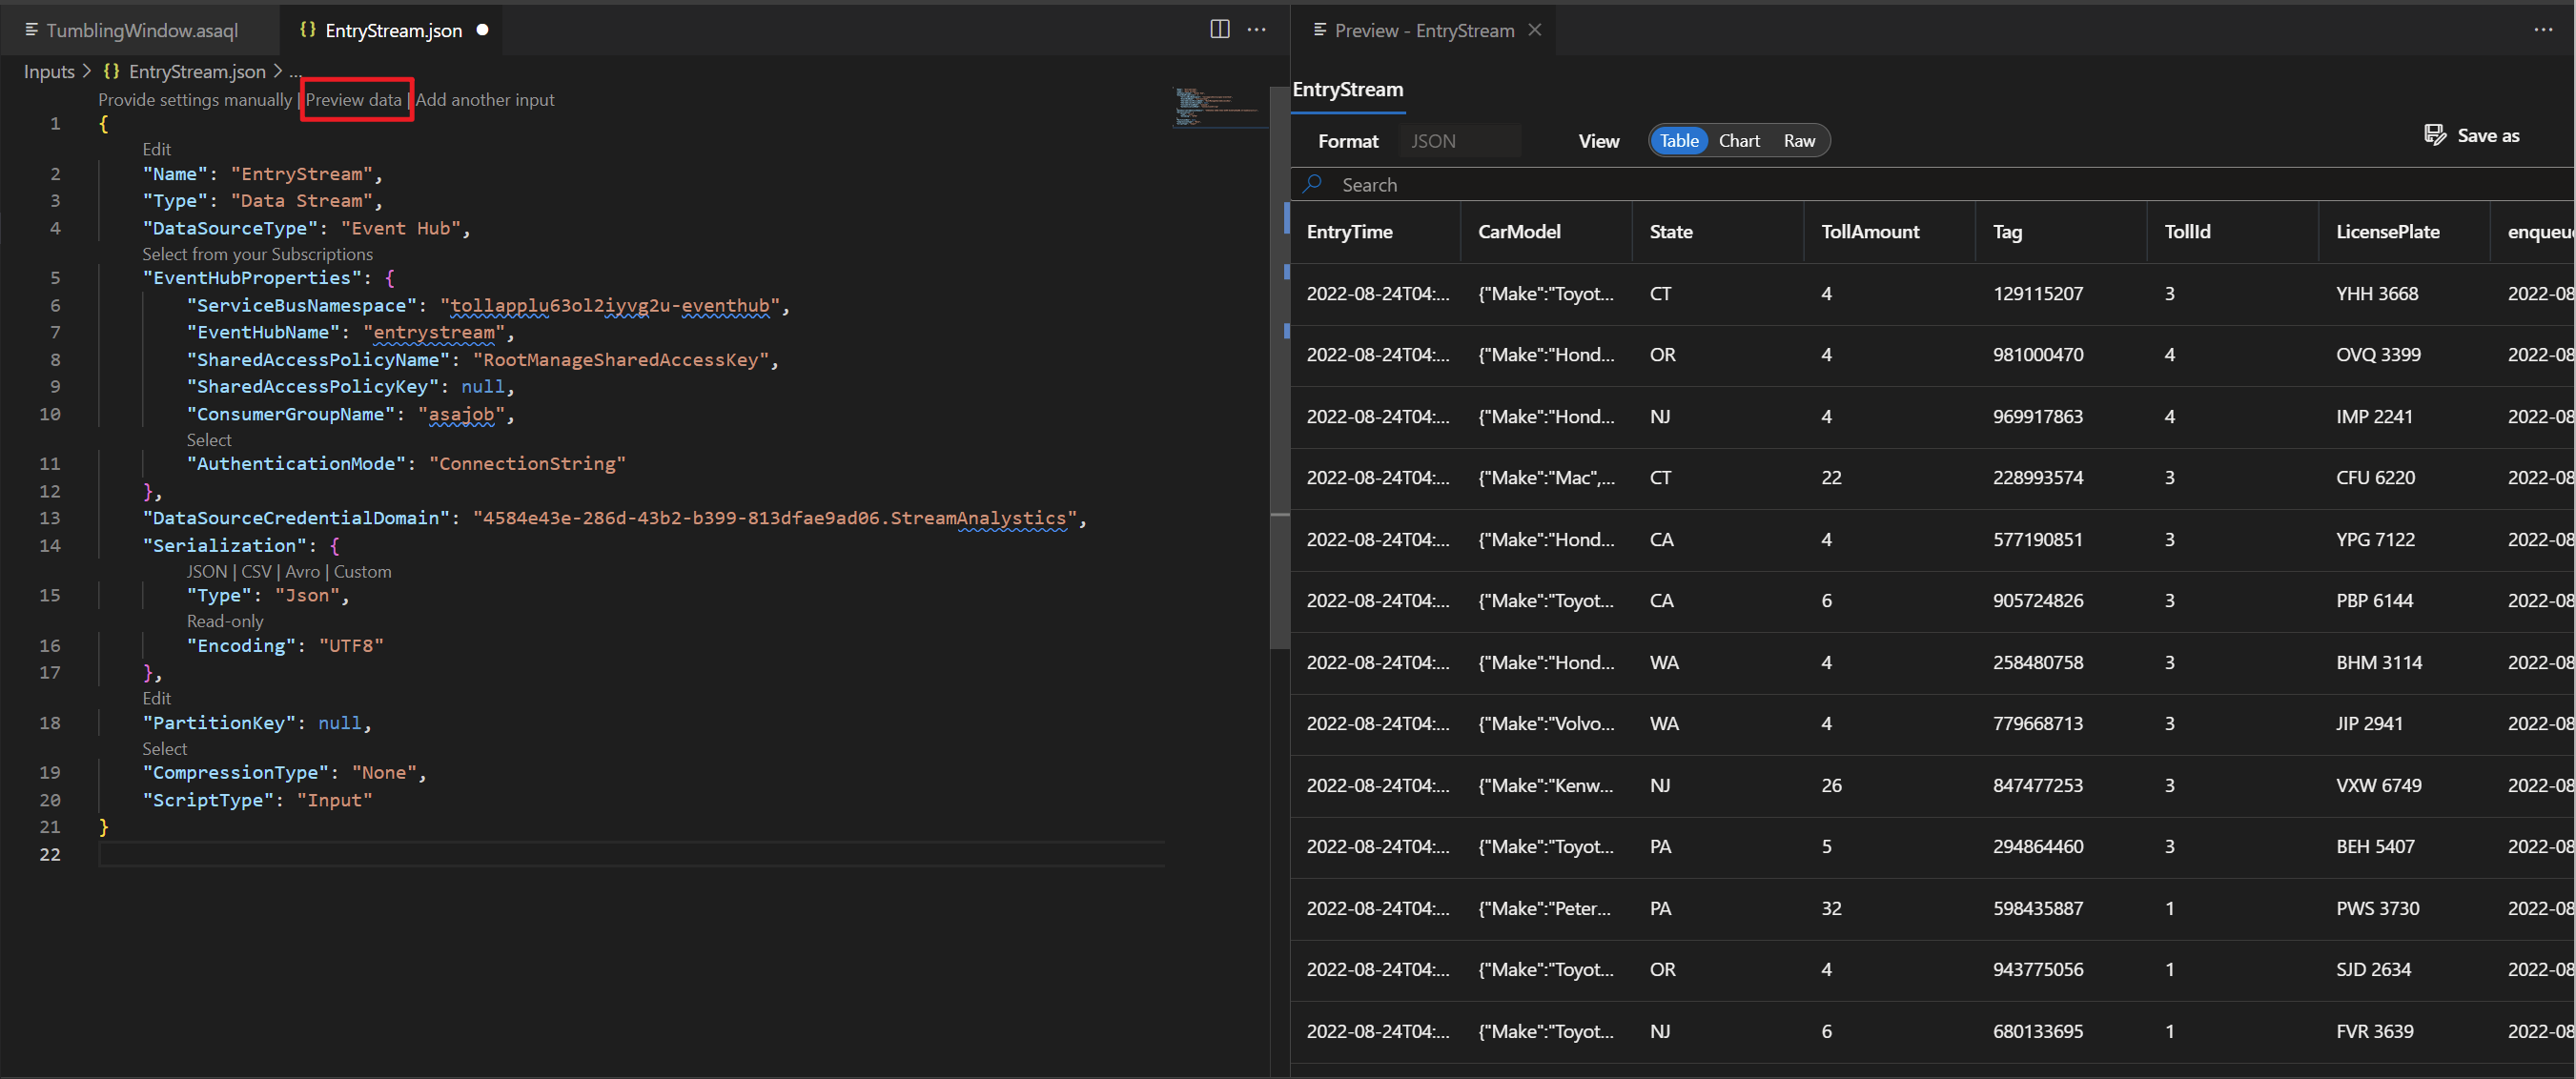
Then you can preview data and verify if the new input source is added.

Next steps
To learn about Azure Stream Analytics Tools for Visual Studio Code, continue to the following articles: