Note
Access to this page requires authorization. You can try signing in or changing directories.
Access to this page requires authorization. You can try changing directories.
Testing your Stream Analytics query locally against live stream input is a crucial step in ensuring the accuracy and efficiency of your query logic. With the Azure Stream Analytics (ASA) extension for Visual Studio Code (VS Code), you have the necessary tools to perform this testing seamlessly. This article guides you through the steps of setting up your environment, configuring the live stream input, and executing your query locally for thorough testing.
Prerequisites
- Install the .NET Core SDK and restart Visual Studio Code.
- Follow this quickstart to install and create a Stream Analytics job using Visual Studio Code.
Define a live stream input
Right-click the Inputs folder in your Stream Analytics project and select ASA: Add Input.
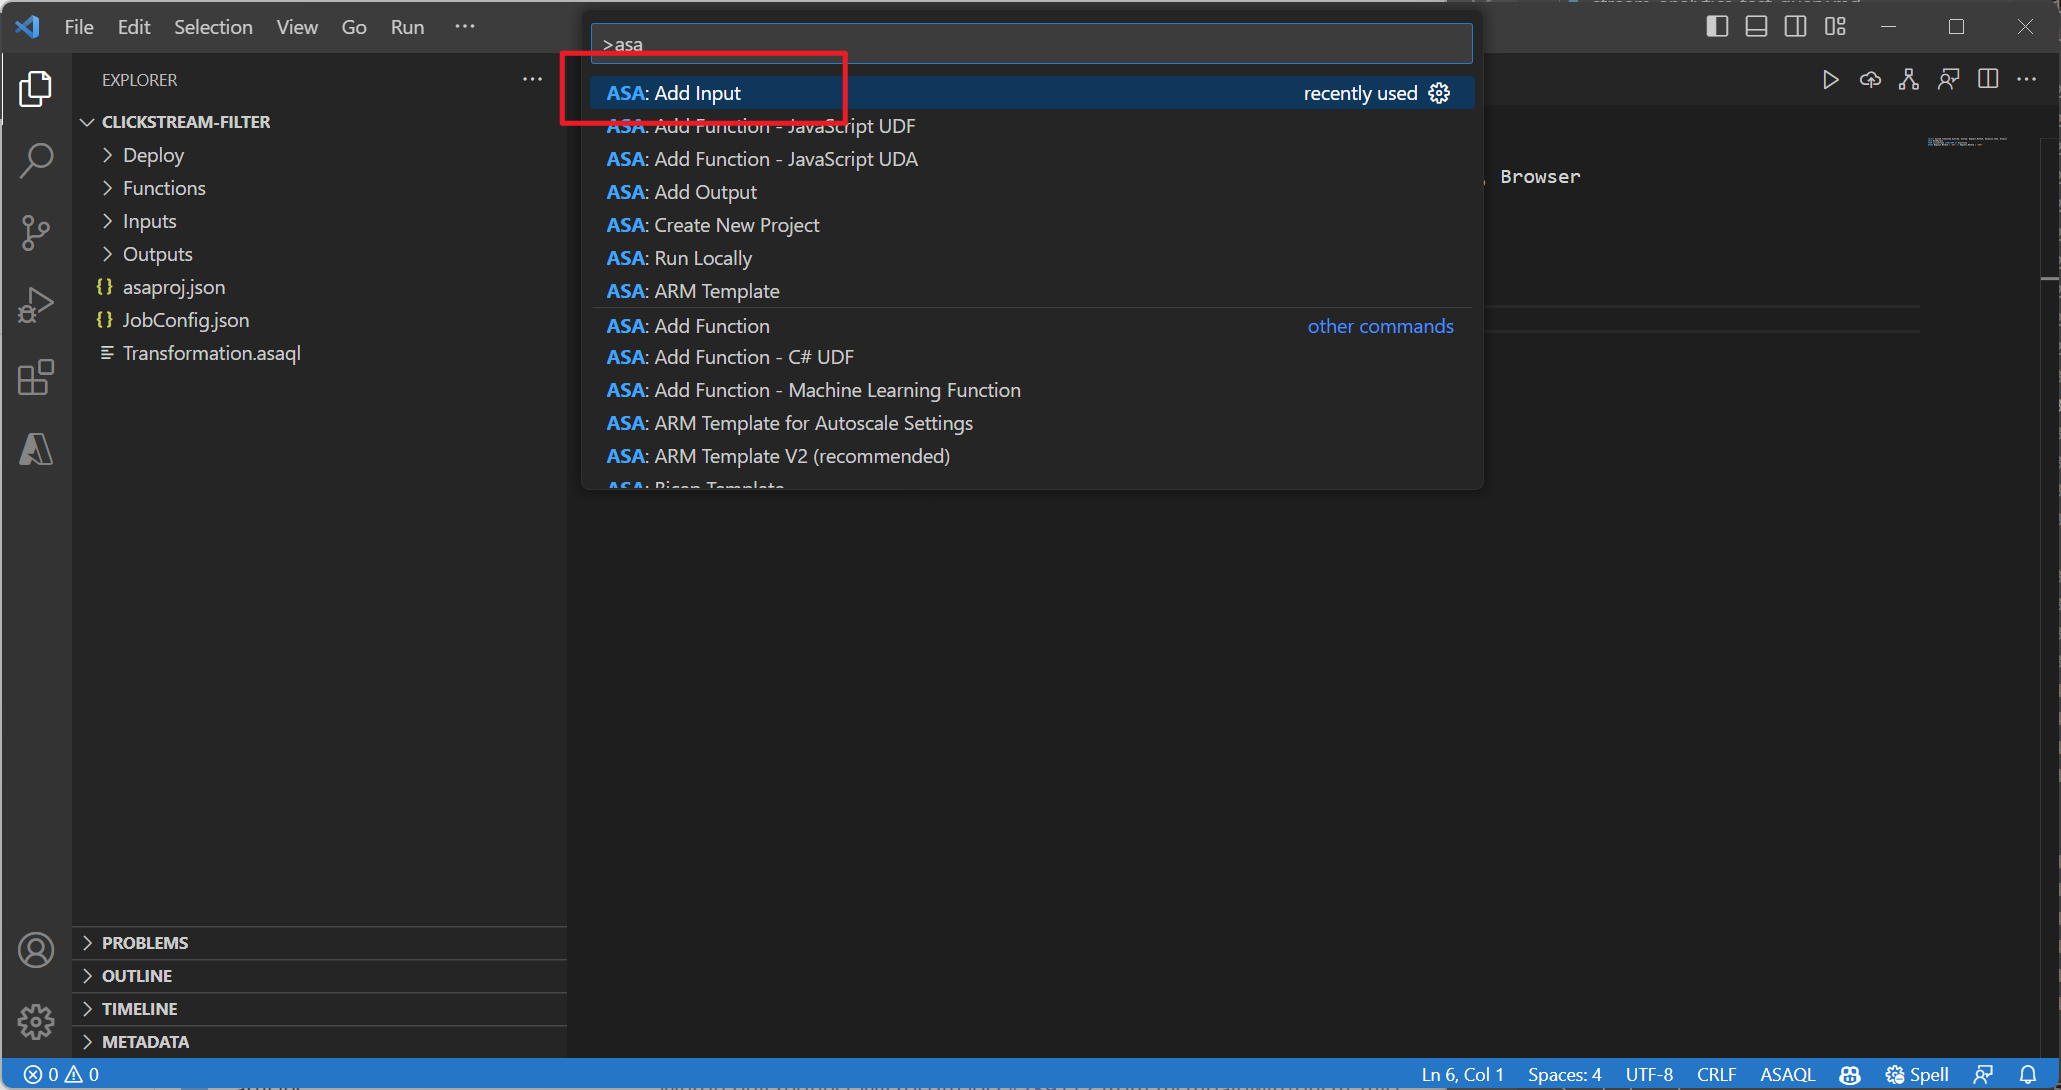
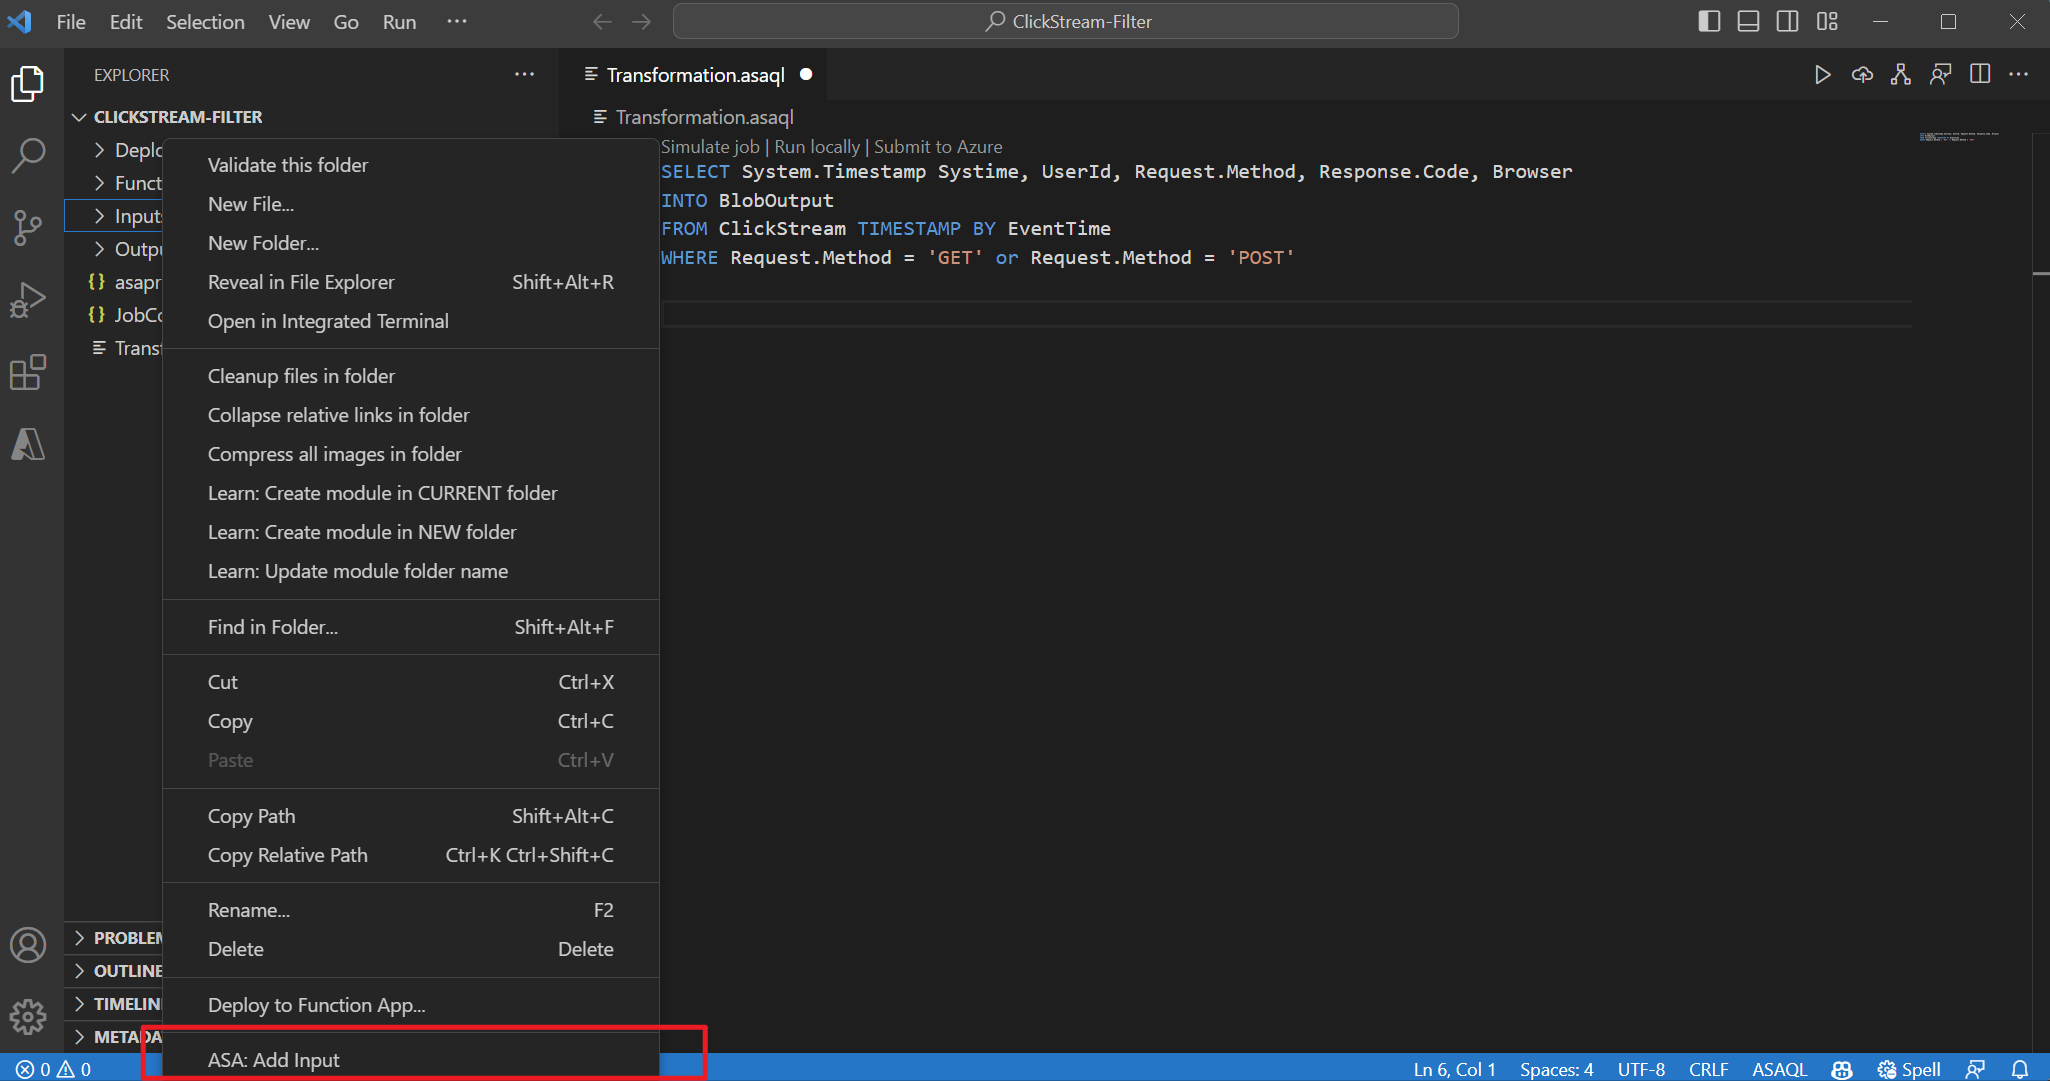 OR press Ctrl+Shift+P to open the command palette and enter ASA: Add Input. Then choose the query script for processing the input stream.
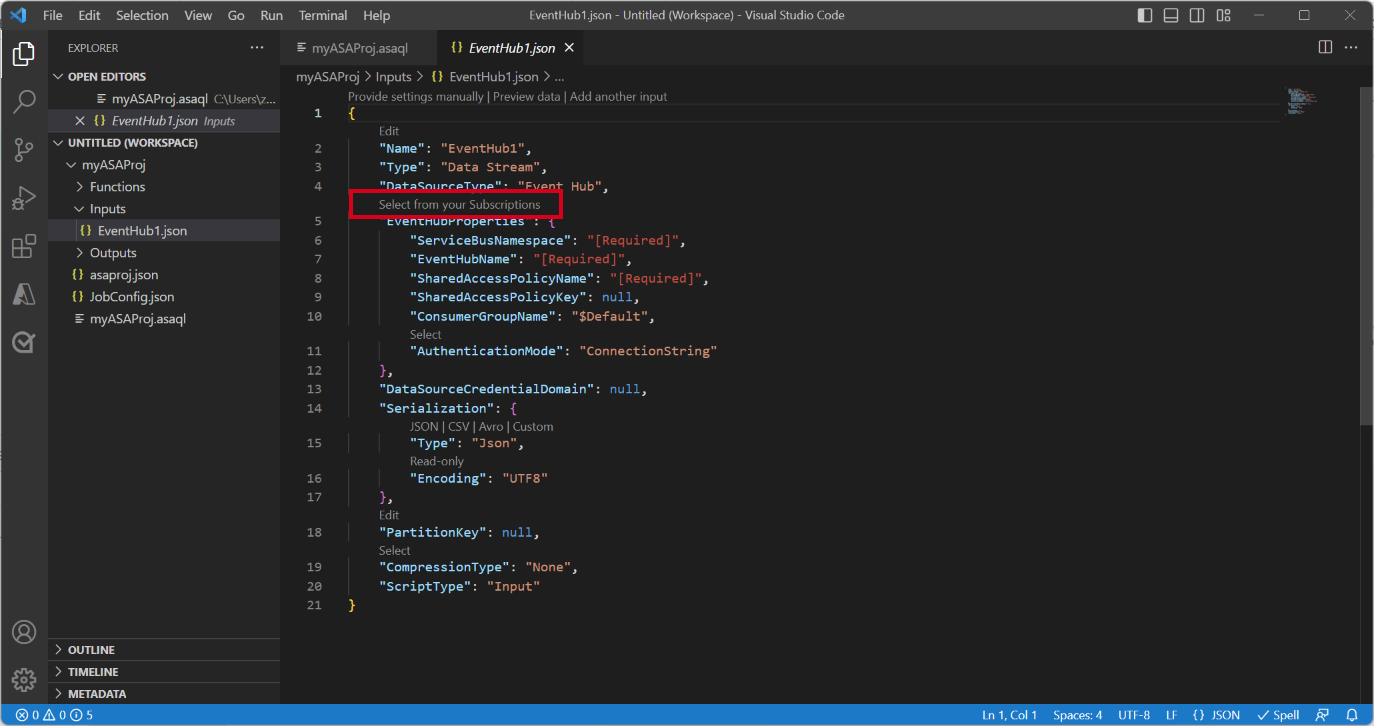
Choose a live input source type from the drop-down list, Select from your Azure Subscriptions and enter a name for the input source.
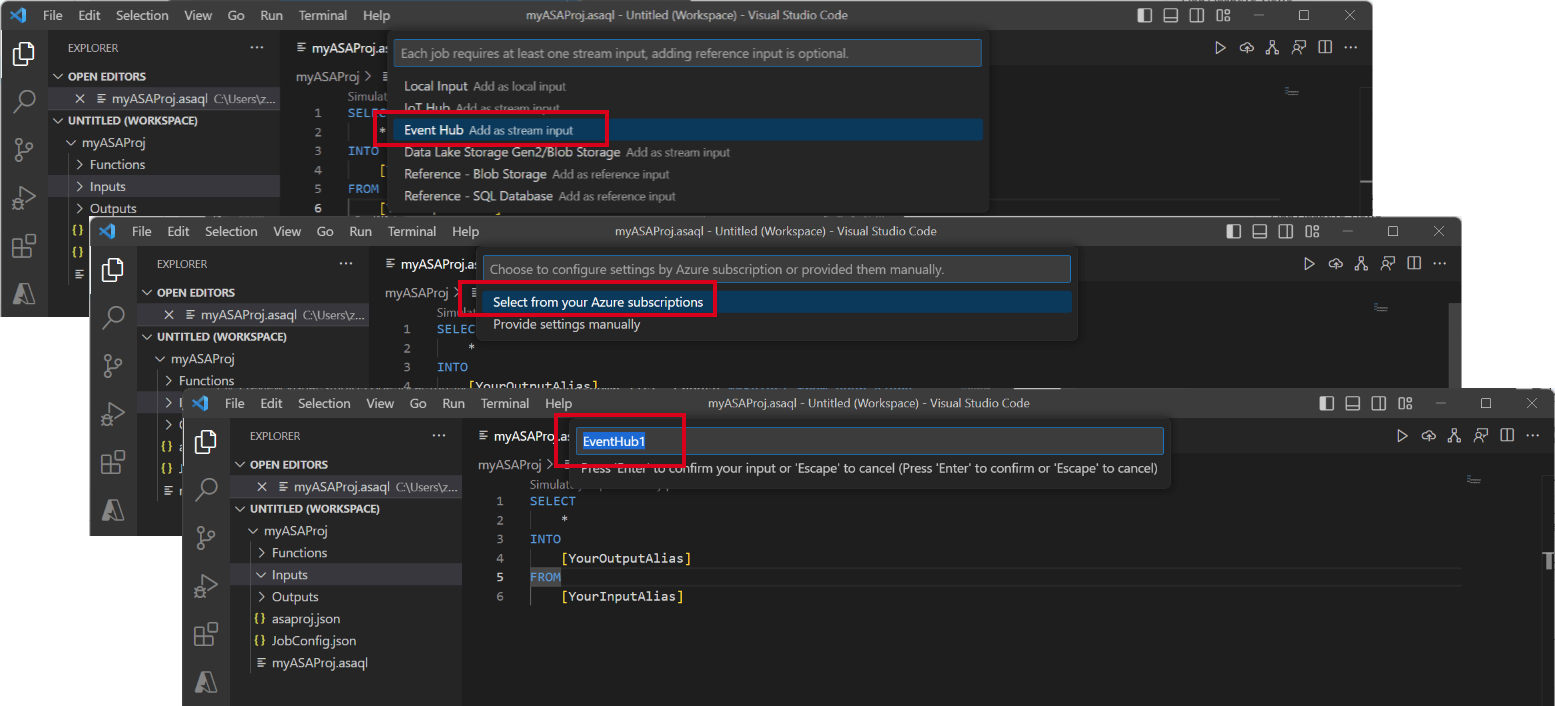
You see a new JSON file created under the Input folder. Open the file and Select from your subscriptions to help you configure your Event Hubs input.
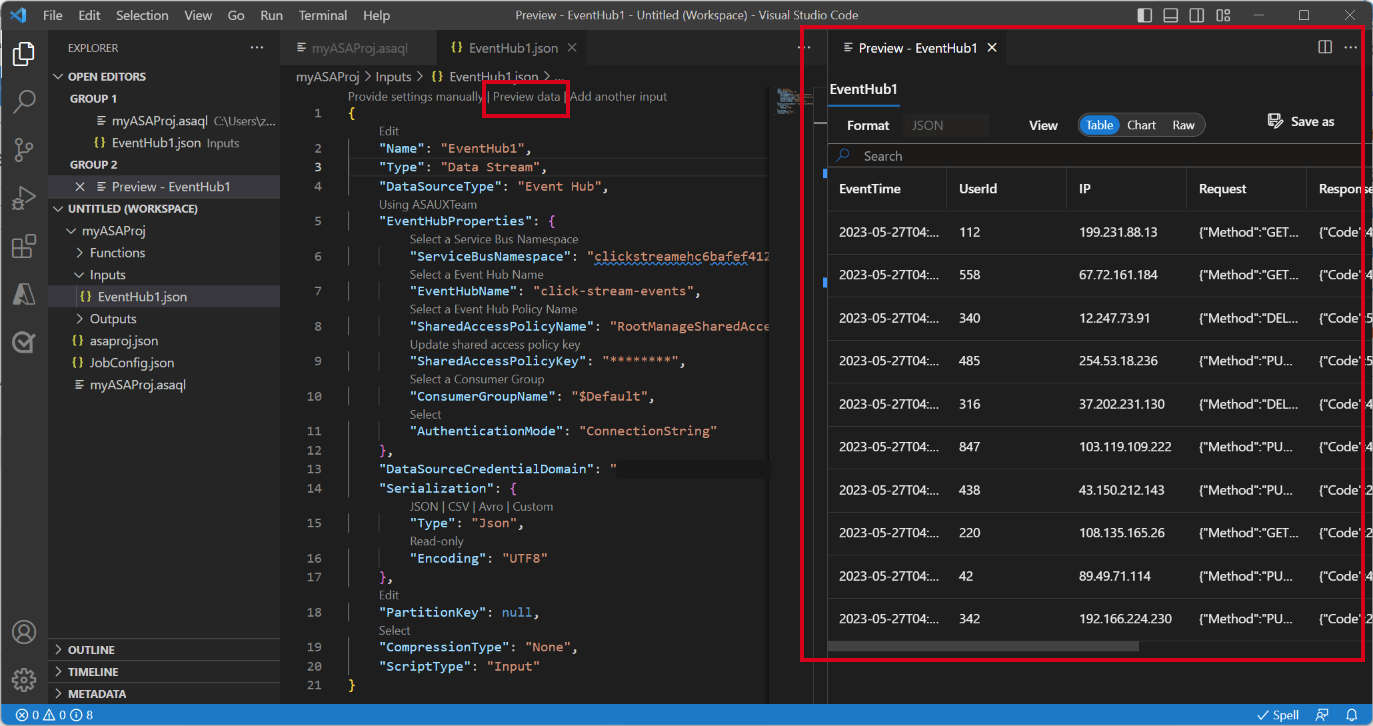
Select Preview data to validate if the live input is successfully configured.
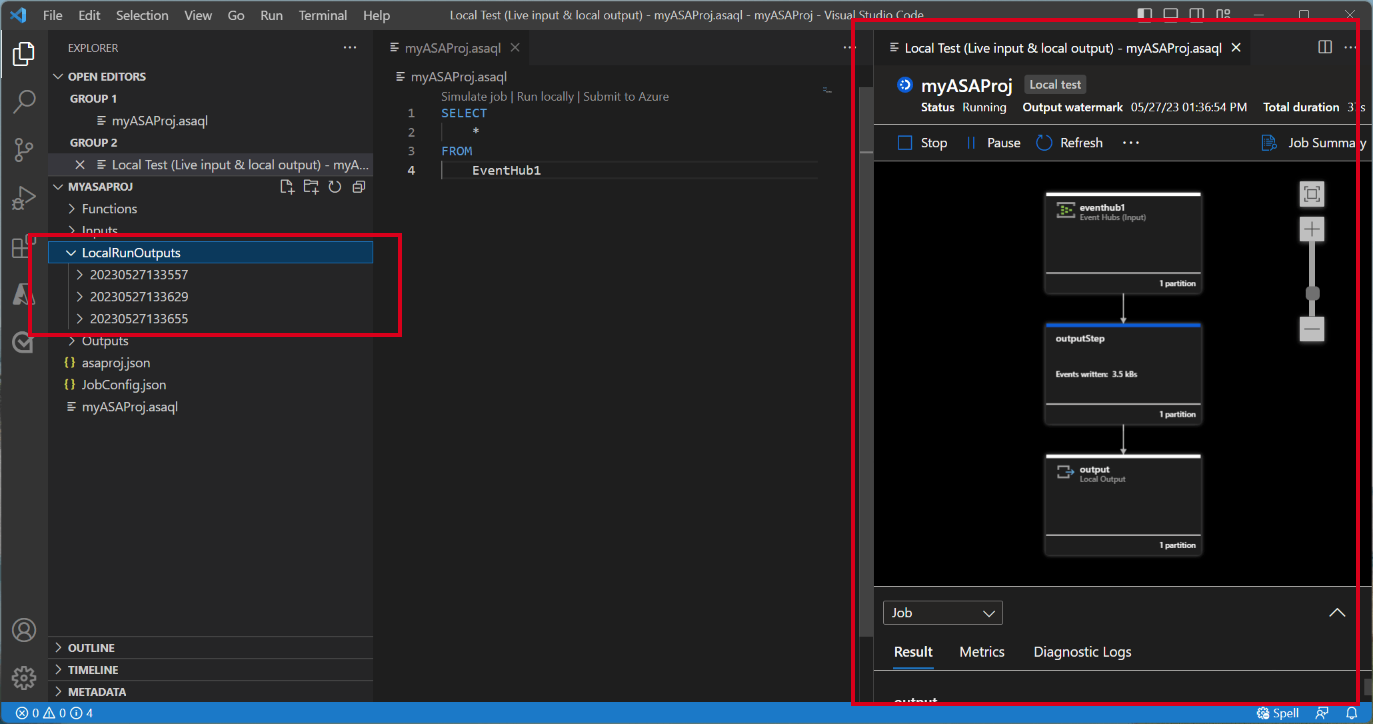
Run query locally
Open your query file, select Run locally or the Play button on the menu bar to open a Local run option window for configuring local run mode.
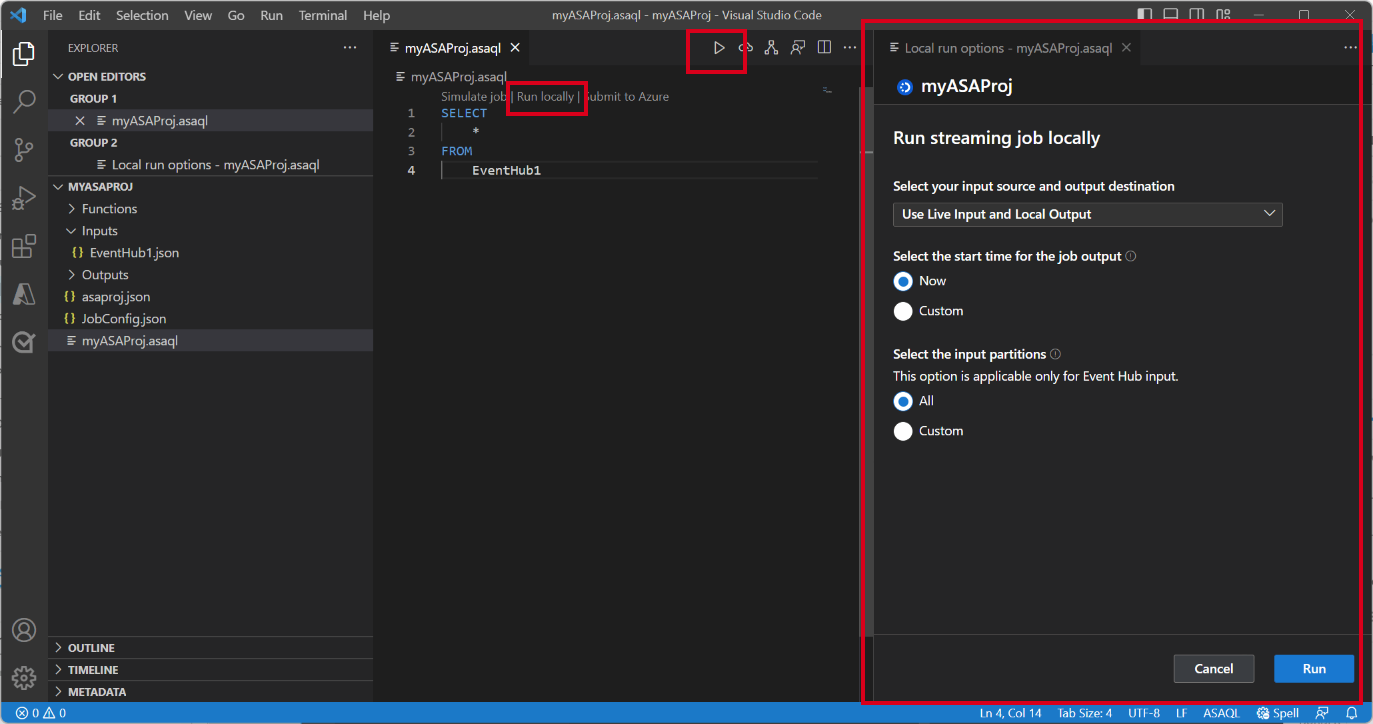
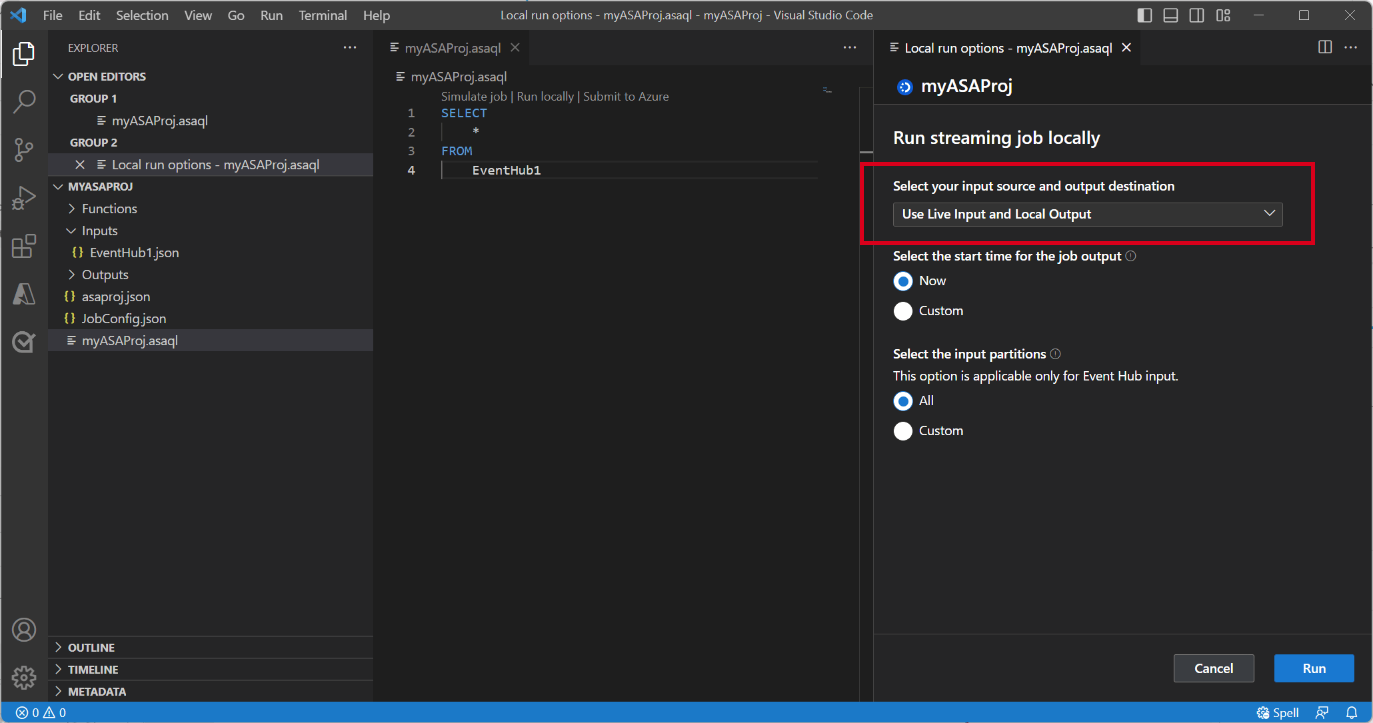
Choose Use Live Input and Local Output to run job locally against live input stream and produce output results to a local folder. Then select Run to start running job locally.
You can see a Local test window is opened and refreshed every 3 seconds. The output results are stored as JSON format in LocalRunOutputs folder.
Specify input partitions for local testing
To avoid ingesting all data from Event Hubs, you can specify specific partitions for your Event Hubs during local testing.
- Select Run locally to open the local run option window.
- Under Select the input partitions section and choose Custom.
- Enter the specific partition numbers that you want to ingest data from for your local testing.
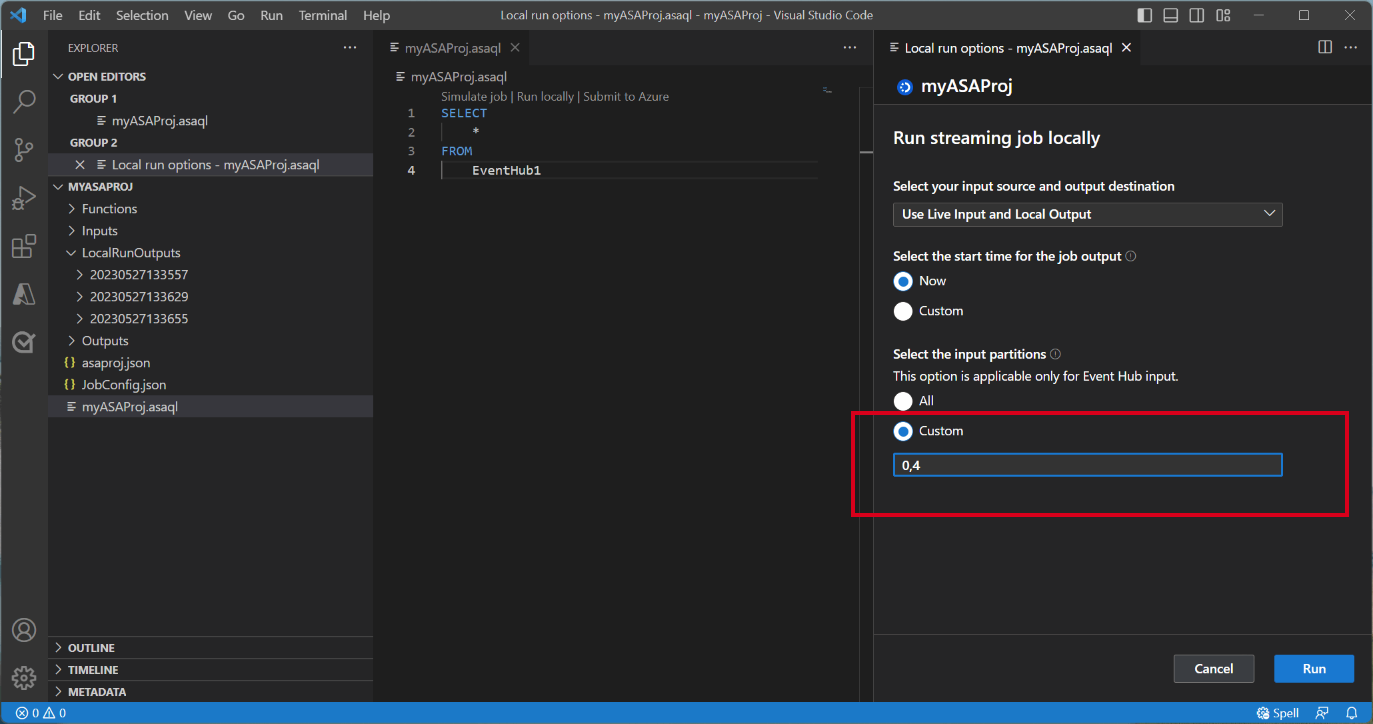
By specifying the partitions, you can focus on testing your query logic without worrying about a large volume of data. This feature allows for more efficient and targeted testing of your Stream Analytics job.
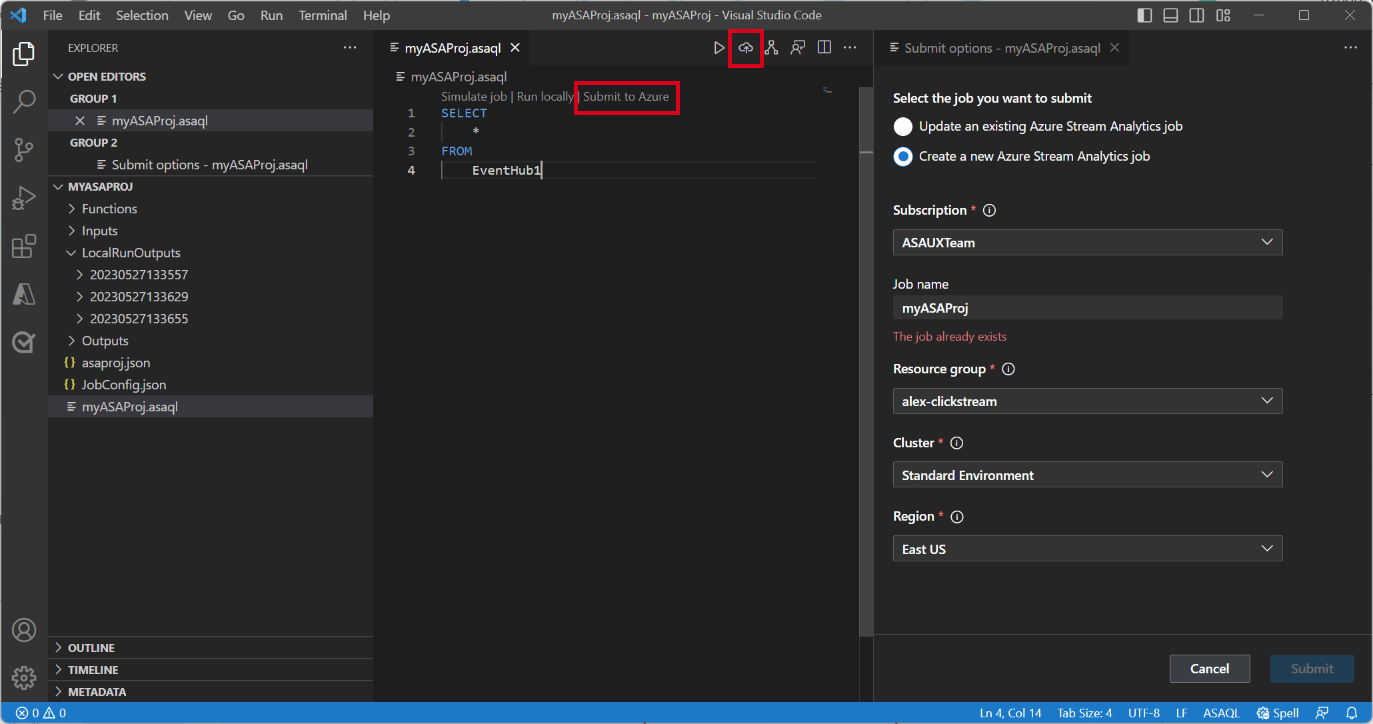
Submit job to Azure
Once you have completed testing your query locally, you can submit your Stream Analytics project to Azure and start running the job in the cloud.
- Select the Submit to Azure option or select the Upload button on the query file.
- In the submit options window, you can update an existing job in Azure or create a new job for the upload.
- Provide the necessary details, including your subscription, resource group, and region for the deployment.
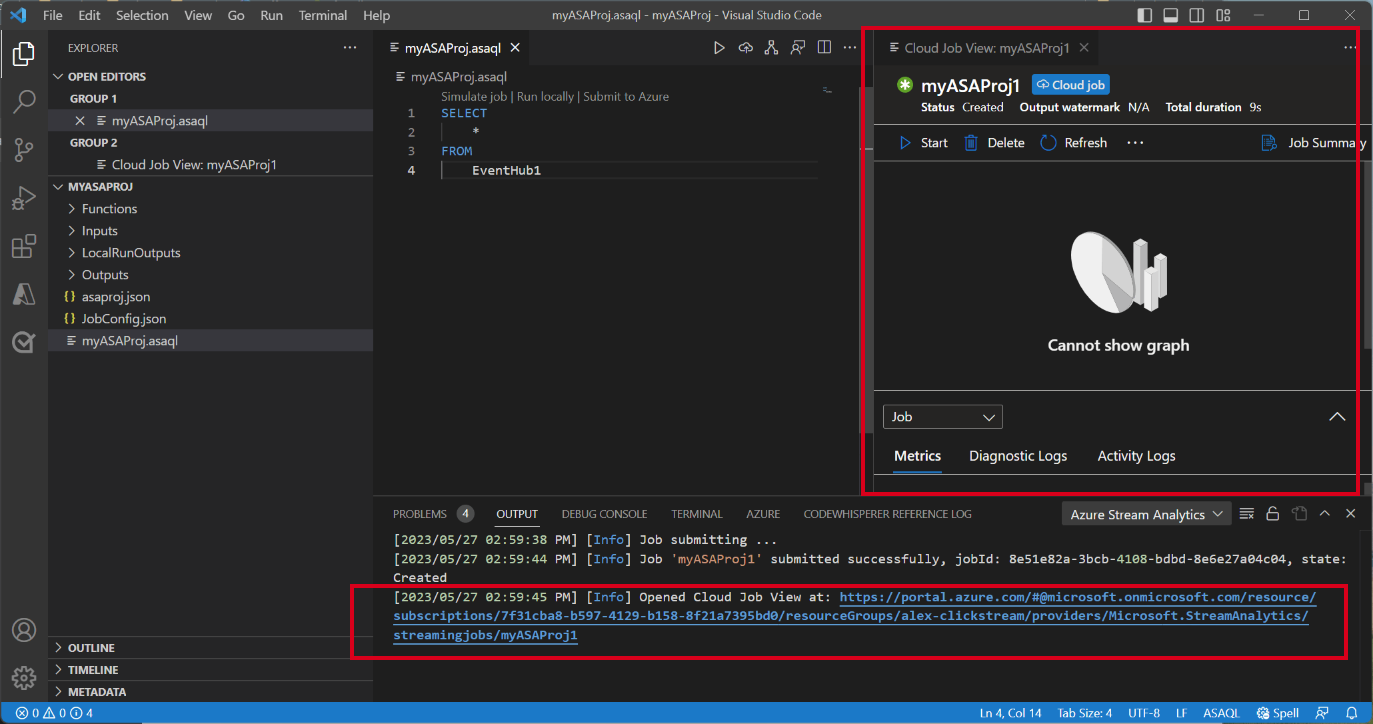
Once the submission process is complete, you can view your cloud job in a new window. From there, you can monitor its performance and manage its configurations as needed. You can also open the job in your browser by clicking on the link provided in the OUTPUT panel.