Note
Access to this page requires authorization. You can try signing in or changing directories.
Access to this page requires authorization. You can try changing directories.
Important
The following features are currently in preview:
Azure Virtual Desktop on Azure Local for Azure Government and for Azure operated by 21Vianet (Azure in China).
Managing session hosts using a session host configuration. This limited preview is provided as-is, with all faults and as available, and is excluded from the service-level agreements (SLAs) or any limited warranties Microsoft provides for Azure services in general availability.
For legal terms that apply to Azure features that are in beta, in preview, or otherwise not yet released into general availability, see Supplemental Terms of Use for Microsoft Azure Previews.
After you create a host pool, a workspace, and an application group, you need to add session hosts to the host pool for your users to connect to. You might also need to add more session hosts for extra capacity.
When you add session hosts to a host pool, the method you use depends on your host pool's management approach:
For a host pool using a session host configuration (preview), you use the Azure portal to specify the number of session hosts you want to add, then Azure Virtual Desktop automatically creates them based on the session host configuration.
For a host pool using standard management, you can create new virtual machines (VMs) to use as session hosts and add them to a host pool natively by using the Azure Virtual Desktop service in the Azure portal. Alternatively, you can create VMs outside the Azure Virtual Desktop service, such as using an automated pipeline, the Azure CLI, or Azure PowerShell, and then add them as session hosts to a host pool separately.
For Azure Local, you can create new VMs to use as session hosts and add them to a host pool natively by using the Azure Virtual Desktop service in the Azure portal. If you want to create the VMs outside the Azure Virtual Desktop service, follow the steps in Create Azure Arc virtual machines on Azure Local, and then add the VMs as session hosts to a host pool separately.
Tip
Select a button at the top of this article to choose between host pools using standard management or host pools using session host configuration to see the relevant documentation.
This article shows you how to add session hosts to a host pool using the Azure portal. Azure PowerShell isn't available for adding session hosts to a host pool with a session host configuration.
This article shows you how to generate a registration key by using the Azure portal, the Azure CLI, or Azure PowerShell. It also shows you how to add session hosts to a host pool by using the Azure Virtual Desktop service or add them to a host pool separately.
Prerequisites
For a general idea of what's required, such as supported operating systems, virtual networks, and identity providers, review the prerequisites for Azure Virtual Desktop. In addition:
- You need an existing host pool with standard management. Each host pool must only contain session hosts on Azure or on Azure Local. You can't mix session hosts on Azure and on Azure Local in the same host pool.
- If you have existing session hosts in the host pool, make a note of the virtual machine size, the image, and name prefix that you used. All session hosts in a host pool should have the same configuration, including the same identity provider. For example, a host pool shouldn't contain some session hosts joined to Microsoft Entra ID and some session hosts joined to an Active Directory domain.
You need an existing host pool with a session host configuration.
The Azure account you use must have the following built-in role-based access control (RBAC) roles or equivalent as a minimum on the resource group:
Action RBAC role Create and add session hosts using the Azure portal Desktop Virtualization Host Pool Contributor
Virtual Machine Contributor
The Azure account you use must have the following built-in role-based access control (RBAC) roles or equivalent as a minimum on the resource group:
Action RBAC role or roles Generate a registration key for the host pool Desktop Virtualization Host Pool Contributor Create and add session hosts by using the Azure portal (Azure and Azure Extended Zones) Desktop Virtualization Host Pool Contributor
Virtual Machine ContributorCreate and add session hosts by using the Azure portal (Azure Local) Desktop Virtualization Host Pool Contributor
Azure Stack HCI VM ContributorDon't disable Windows Remote Management (WinRM) when you're creating and adding session hosts by using the Azure portal. PowerShell DSC requires it.
To add session hosts on Azure Local, you also need:
An Azure Local instance registered with Azure. Your Azure Local instances need to be running a minimum of version 23H2. For more information, see About Azure Stack HCI, version 23H2 deployment. Azure Arc VM management is installed automatically.
A stable connection to Azure from your on-premises network.
At least one Windows OS image available on the instance. For more information, see how to create VM images by using Azure Marketplace images, use images in an Azure Storage account, and use images in a local share.
The Azure Connected Machine agent on Azure Local machines created outside the Azure Virtual Desktop service, such as with an automated pipeline. The virtual machines use the agent to communicate with Azure Instance Metadata Service, which is a required endpoint for Azure Virtual Desktop.
A logical network that you created on your Azure Local instance. DHCP logical networks or static logical networks with automatic IP allocation are supported. For more information, see Create logical networks for Azure Local.
To deploy session hosts to Azure Extended Zones, you also need:
Your Azure subscription registered with the respective Azure Extended Zone. For more information, see Request access to an Azure Extended Zone.
An Azure load balancer with an outbound rule on the virtual network to which you're deploying session hosts. You can use an existing load balancer or you create a new one when adding session hosts.
If you want to use the Azure CLI or Azure PowerShell locally, see Use the Azure CLI and Azure PowerShell with Azure Virtual Desktop to make sure you have the desktopvirtualization Azure CLI extension or the Az.DesktopVirtualization Azure PowerShell module installed. Alternatively, use Azure Cloud Shell.
Important
If you want to create Microsoft Entra joined session hosts, we only support this using the AADLoginForWindows VM extension, which is added and configured automatically when using the Azure portal or ARM template with the Azure Virtual Desktop service.
Generate a registration key
When you add session hosts to a host pool, first you need to generate a registration key for that host pool. A registration key authorizes session hosts to join the host pool. It's valid only for the duration that you specify.
To generate a registration key, select the relevant tab for your scenario and follow the steps.
Here's how to generate a registration key by using the Azure portal:
Sign in to the Azure portal.
On the search bar, enter Azure Virtual Desktop and select the matching service entry.
Select Host pools, and then select the name of the host pool for which you want to generate a registration key.
On the host pool overview, select Registration key.
Select Generate new key, enter an expiration date and time, and then select OK. The registration key is created.
Select Download to download a text file that contains the newly created registration key, or copy the registration key to your clipboard to use it later. You can also retrieve the registration key later by returning to the host pool overview.
Add session hosts
You can use the Azure portal to specify the number of session hosts you want to add, then Azure Virtual Desktop automatically creates them based on the session host configuration. At this time, you can't use PowerShell to add session hosts to a host pool with a session host configuration.
Note
Diagnostics for host pools using a session host configuration are recorded with Log Analytics in Azure Monitor and won't be available in your Azure Resource Manager deployments history. We recommended that you enable Log Analytics for any host pool using a session host configuration.
You can choose to use the legacy method of using an ARM template to create session hosts through the Azure portal until September 1, 2025. To access that experience, use this link to access the Azure portal.
Here's how to add session hosts:
Sign in to the Azure portal.
In the search bar, type Azure Virtual Desktop and select the matching service entry.
Select Host pools, then select the name of the host pool you want to add session hosts to.
On the host pool overview, select Session hosts, then select + Add.
For Number of session hosts to be added, enter the number of session hosts you want to create. If you want to review the session host configuration that is used, see View session host configuration. To edit the session host configuration, see Schedule an update and edit session host configuration.
Confirm that the calculated total host pool size reflects your desired quantity of session hosts.
Optionally change the failed session host cleanup policy or drain mode policy.
Select Add. The number of session hosts you entered is created and added to the host pool.
Cancel in-progress session host creation
You can cancel in-progress session host creation using the Azure portal. Session hosts that are in the process of being created can't be canceled.
Here's how to cancel session host creation:
Return to the host pool overview where session host creation is in progress.
On the host pool overview, select Session hosts, then select Cancel.
Review the message providing cancellation details, then select Confirm.
Create and register session hosts with the Azure Virtual Desktop service
You can create session hosts and register them to a host pool in a single end-to-end process with the Azure Virtual Desktop service by using the Azure portal or an Azure Resource Manager template (ARM template). You can find some example ARM templates in this GitHub repo.
Important
If you want to create virtual machines by using an alternative method outside Azure Virtual Desktop, such as an automated pipeline, you need to register them separately as session hosts to a host pool. Skip to the section Register session hosts to a host pool.
Here's how to create session hosts and register them to a host pool by using the Azure Virtual Desktop service in the Azure portal. Make sure that you generated a registration key first.
Sign in to the Azure portal.
On the search bar, enter Azure Virtual Desktop and select the matching service entry.
Select Host pools, and then select the name of the host pool to which you want to add session hosts.
On the host pool overview, select Session hosts, and then select + Add.
The Basics tab is unavailable because you're using the existing host pool. Select Next: Virtual Machines.
On the Virtual machines tab, expand one of the following sections and complete the information, depending on whether you want to create session hosts on Azure or on Azure Local. For guidance on sizing session host virtual machines, see Session host virtual machine sizing guidelines.
To add session hosts on Azure, expand this section.
Parameter Value/Description Resource group This value defaults to the same resource group as your host pool, but you can select a different one from the dropdown list. Name prefix Enter a name prefix for your session hosts, such as hp01-sh.
Each session host has a suffix of a hyphen and then a sequential number added to the end, such as hp01-sh-0.
This name prefix can be a maximum of 11 characters and is used in the computer name in the operating system. The prefix and the suffix combined can be a maximum of 15 characters. Session host names must be unique.Virtual machine location Select the Azure region where you want to deploy your session hosts. It must be the same region that contains your virtual network. Availability options Select from availability zones, availability set, or No infrastructure redundancy required. If you select availability zones or availability set, complete the extra parameters that appear. Security type Select from Standard, Trusted launch virtual machines, or Confidential virtual machines.
- If you select Trusted launch virtual machines, options for secure boot and vTPM are automatically selected.
- If you select Confidential virtual machines, options for secure boot, vTPM, and integrity monitoring are automatically selected. You can't opt out of vTPM when using a confidential VM.Image Select the OS image that you want to use from the list, or select See all images to see more. The full list includes any images that you created and stored as an Azure Compute Gallery shared image or a managed image. Virtual machine size Select a size. If you want to use a different size, select Change size, and then select from the list. Hibernate Select the box to enable hibernation. Hibernation is available only for personal host pools. For more information, see Hibernation in virtual machines. If you're using Microsoft Teams media optimizations, you should update the WebRTC redirector service to 1.45.2310.13001.
FSLogix and App Attach currently don't support hibernation. Don't enable hibernation if you're using FSLogix or App Attach for your personal host pools.Number of VMs Enter the number of virtual machines that you want to deploy. You can deploy up to 400 session hosts at this point if you want (depending on your subscription quota), or you can add more later.
For more information, see Azure Virtual Desktop service limits and Virtual Machines limits.OS disk type Select the disk type to use for your session hosts. We recommend that you use only Premium SSD for production workloads. OS disk size Select a size for the OS disk.
If you enable hibernation, ensure that the OS disk is large enough to store the contents of the memory in addition to the OS and other applications.Confidential computing encryption If you're using a confidential VM, you must select the Confidential compute encryption checkbox to enable OS disk encryption.
This checkbox appears only if you selected Confidential virtual machines as your security type.Boot Diagnostics Select whether you want to enable boot diagnostics. Network and security Virtual network Select your virtual network. An option to select a subnet appears. Subnet Select a subnet from your virtual network. Network security group Select whether you want to use a network security group (NSG).
- None doesn't create a new NSG.
- Basic creates a new NSG for the VM network adapter.
- Advanced enables you to select an existing NSG.
We recommend that you don't create an NSG here, but create an NSG on the subnet instead.Public inbound ports You can select a port to allow from the list. Azure Virtual Desktop doesn't require public inbound ports, so we recommend that you select No. Domain to join Select which directory you would like to join Select from Microsoft Entra ID or Active Directory and complete the relevant parameters for the selected option.
To learn more about joining session hosts to Microsoft Entra ID, see Microsoft Entra joined session hosts.Virtual Machine Administrator account Username Enter a name to use as the local administrator account for the new session hosts. Password Enter a password for the local administrator account. Confirm password Reenter the password. Custom configuration Custom configuration script URL If you want to run a PowerShell script during deployment, you can enter the URL here. To add session hosts on Azure Local, expand this section.
Parameter Value/Description Resource group This value defaults to the resource group that you chose to contain your host pool on the Basics tab, but you can select an alternative. Name prefix Enter a name prefix for your session hosts, such as hp01-sh.
Each session host has a suffix of a hyphen and then a sequential number added to the end, such as hp01-sh-0.
This name prefix can be a maximum of 11 characters and is used in the computer name in the operating system. The prefix and the suffix combined can be a maximum of 15 characters. Session host names must be unique.Virtual machine type Select Azure Local. Custom location In the dropdown list, select the Azure Local instance where you want to deploy your session hosts. Images Select the OS image that you want to use from the list, or select Manage VM images to manage the images available on the instance that you selected. Number of VMs Enter the number of virtual machines that you want to deploy. You can add more later. Virtual processor count Enter the number of virtual processors that you want to assign to each session host. This value isn't validated against the resources available in the instance. Memory type Select Static for a fixed memory allocation, or select Dynamic for a dynamic memory allocation. Memory (GB) Enter a number for the amount of memory, in gigabytes, that you want to assign to each session host. This value isn't validated against the resources available in the instance. Network and security Network dropdown Select an existing network to connect each session to. Domain to join Select which directory you would like to join Active Directory is the only available option. AD domain join UPN Enter the user principal name (UPN) of an Active Directory user who has permission to join the session hosts to your domain. Password Enter the password for the Active Directory user. Specify domain or unit Select yes if you want to join session hosts to a specific domain or be placed in a specific organizational unit (OU). If you select no, the suffix of the UPN is used as the domain. Virtual Machine Administrator account Username Enter a name to use as the local administrator account for the new session hosts. Password Enter a password for the local administrator account. Confirm password Reenter the password. To add session hosts on Azure Extended Zones, expand this section.
Parameter Value/Description Resource group This value defaults to the resource group that you chose to contain your host pool on the Basics tab, but you can select an alternative. Name prefix Enter a name prefix for your session hosts, such as hp01-sh.
Each session host has a suffix of a hyphen and then a sequential number added to the end, such as hp01-sh-0.
This name prefix can be a maximum of 11 characters and is used in the computer name in the operating system. The prefix and the suffix combined can be a maximum of 15 characters. Session host names must be unique.Virtual machine type Select Azure virtual machine. Virtual machine location Select Deploy to an Azure Extended Zone. Azure Extended Zone Select the Extended Zone you require. Network and security Select a load balancer Select an existing Azure load balancer on the same virtual network you want to use for your session hosts, or select Create a load balancer to create a new load balancer. Select a backend pool Select a backend pool on the load balancer you want to use for your session hosts. If you're creating a new load balancer, select Create new to create a new backend pool for the new load balancer. Add outbound rule If you're creating a new load balancer, select Create new to create a new outbound rule for it. After you complete this tab, select Next: Tags.
On the Tags tab, you can optionally enter any name/value pairs that you need, and then select Next: Review + create.
On the Review + create tab, ensure that validation passes and review the information that will be used during deployment. If validation doesn't pass, review the error message and check what you entered on each tab.
Select Create. After your deployment is complete, the session hosts should appear in the host pool.
Important
After you add session hosts by using the Azure Virtual Desktop service, skip to the section Post-deployment tasks for some extra configuration that you might need to do.
Register session hosts to a host pool
If you created virtual machines by using an alternative method outside Azure Virtual Desktop, such as an automated pipeline, you need to register them separately as session hosts to a host pool.
To register session hosts to a host pool, you need to install the Azure Virtual Desktop Agent and the Azure Virtual Desktop Agent Boot Loader on each virtual machine and use the registration key that you generated. You can register session hosts to a host pool by using the agent installers' graphical user interface (GUI) or by using msiexec from a command line.
After you finish, four applications are listed as installed applications:
- Remote Desktop Agent Boot Loader
- Remote Desktop Services Infrastructure Agent
- Remote Desktop Services Infrastructure Geneva Agent
- Remote Desktop Services SxS Network Stack
Select the relevant tab for your scenario and follow the steps.
Make sure the virtual machines that you want to use as session hosts are joined to Microsoft Entra ID or an Active Directory domain (Active Directory Domain Services or Microsoft Entra Domain Services).
If your virtual machines are running a Windows Server OS, you need to install the Remote Desktop Session Host role and then restart the virtual machine. For more information, see Install roles, role services, and features by using the Add Roles and Features Wizard.
Sign in to your virtual machine as an administrator.
Download the installation files for the Agent and the Agent Boot Loader by using the following links. If you need to unblock them, right-click each file, select Properties, select Unblock, and finally select OK.
Tip
The Azure Virtual Desktop Agent download link is for the latest production version in non-validation environments. This download link is updated after the automatic production rollout is complete, so you might see a delay between the release of a production version and the update of the download link. After you install the Azure Virtual Desktop Agent, it's updated automatically. For more information about the rollout of new versions of the agent, see What's new in the Azure Virtual Desktop Agent?.
Run the
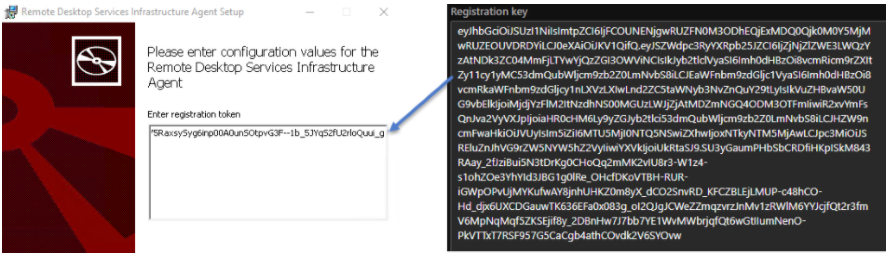
Microsoft.RDInfra.RDAgent.Installer-x64-<version>.msifile to install the Remote Desktop Services Infrastructure Agent.Follow the prompts. When the installer prompts you for the registration token, paste it into the text box, which appears on a single line. Select Next, and then complete the installation.
Run the
Microsoft.RDInfra.RDAgentBootLoader.Installer-x64-<version>.msifile to install the remaining components.Follow the prompts and complete the installation.
After a short time, the virtual machines are listed as session hosts in the host pool. The status of the session hosts might initially appear as Unavailable. If a newer agent version is available, it's upgraded automatically.
After the status of the session hosts is Available, restart the virtual machines.

Post-deployment tasks
After you add session hosts to your host pool, you might need to do some extra configuration, as described in the following sections.
Licensing
To ensure that your session hosts have licenses applied correctly, you need to do the following tasks:
If you have the correct licenses to run Azure Virtual Desktop workloads, you can apply a Windows or Windows Server license to your session hosts as part of Azure Virtual Desktop and run them without paying for a separate license. This license is automatically applied when you create session hosts by using the Azure Virtual Desktop service, but you might have to apply the license separately if you create session hosts outside Azure Virtual Desktop. For more information, see Apply a Windows license to session host virtual machines.
If your session hosts are running a Windows Server OS, you also need to issue them a Remote Desktop Services (RDS) client access license (CAL) from an RDS license server. For more information, see License your RDS deployment with client access licenses.
For session hosts on Azure Local, you must license and activate the virtual machines before you use them with Azure Virtual Desktop. For activating VMs that use Windows 10 Enterprise multi-session, Windows 11 Enterprise multi-session, and Windows Server 2022 Datacenter: Azure Edition, use Azure verification for VMs. For all other OS images (such as Windows 10 Enterprise, Windows 11 Enterprise, and other editions of Windows Server), you should continue to use existing activation methods. For more information, see Activate Windows Server VMs on Azure Local.
Microsoft Entra joined session hosts
For session hosts on Azure that are joined to Microsoft Entra ID, you also need to enable single sign-on or earlier authentication protocols, assign an RBAC role to users, and review your multifactor authentication policies so that users can sign in to the VMs. For more information, see Microsoft Entra joined session hosts.
Related content
Now that you've expanded your existing host pool, you can sign in to an Azure Virtual Desktop client to test the hosts as part of a user session. You can connect to a session by using any of the following clients: