Configure event logs for Azure Virtual Network Manager
When configurations are changed in Azure Virtual Network Manager, this can affect virtual networks that are associated with network groups in your instance. With Azure Monitor, you can monitor Azure Virtual Network Manager for virtual network changes.
In this article, you learn how to monitor Azure Virtual Network Manager for virtual network changes with Log Analytics or a storage account.
Prerequisites
- An Azure account with an active subscription. Create an account for free.
- A deployed instance of Azure Virtual Network Manager in your subscription, with managed virtual networks.
- You deployed either a Log Analytics workspace or a storage account to store event logs and observe data related to Azure Virtual Network Manager.
Configure Diagnostic Settings
Depending on how you consume event logs, you need to set up a Log Analytics workspace or a storage account for storing your log events. These are as storage targets when configuring diagnostic settings for Azure Virtual Network Manager. Once you have configured your diagnostic settings, you can view the event logs in the Log Analytics workspace or storage account.
Note
At least one virtual network must be added or removed from a network group in order to generate logs for the Network Group Membership Change schema. A log will generate for this event a couple minutes after network group membership change occurs.
Configure event logs with Log Analytics
Log analytics is one option for storing event logs. In this task, you configure your Azure Virtual Network Manager Instance to use a Log Analytics workspace. This task assumes you have already deployed a Log Analytics workspace. If you haven't, see Create a Log Analytics workspace.
Navigate to the network manager you want to obtain the logs of.
Under the Monitoring in the left pane, select the Diagnostic settings.
Select + Add diagnostic setting and enter a diagnostic setting name.
Under Logs, select Network Group Membership Change or Rule Collection Change.
Under Destination details, select Send to Log Analytics and choose your subscription and Log Analytics workspace from the dropdown menus.
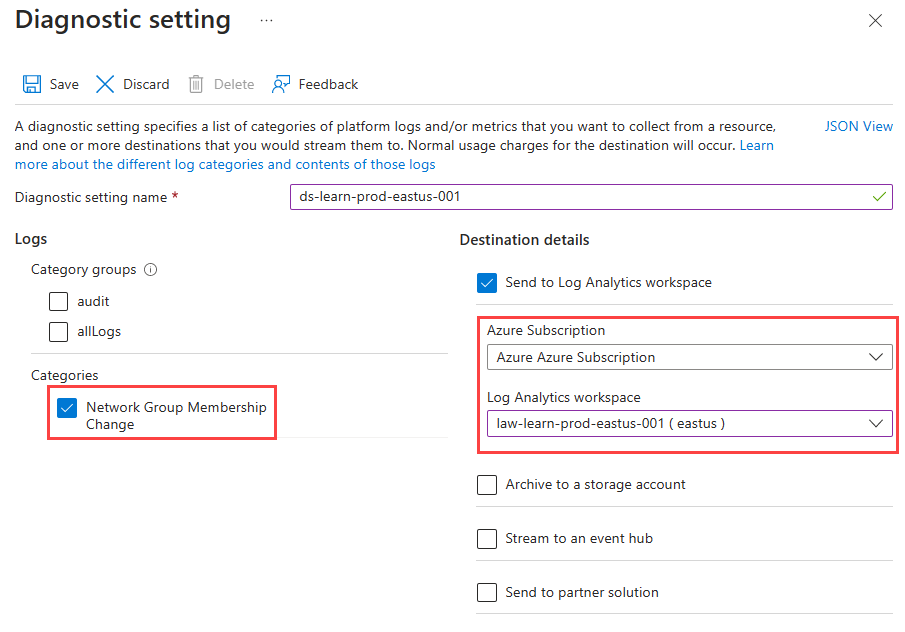
Select Save and close the window.
Configure event logs with a storage account
A storage account is another option for storing event logs. In this task, you configure your Azure Virtual Network Manager Instance to use a storage account. This task assumes you have already deployed a storage account. If you haven't, see Create a storage account.
Navigate to the network manager you want to obtain the logs of.
Under the Monitoring in the left pane, select the Diagnostic settings.
Select + Add diagnostic setting and enter a diagnostic setting name.
Under Destination details, select Send to storage account and choose your subscription and storage account from the dropdown menus.
Under Logs, select Network Group Membership Change or Rule Collection Change and enter a retention period.
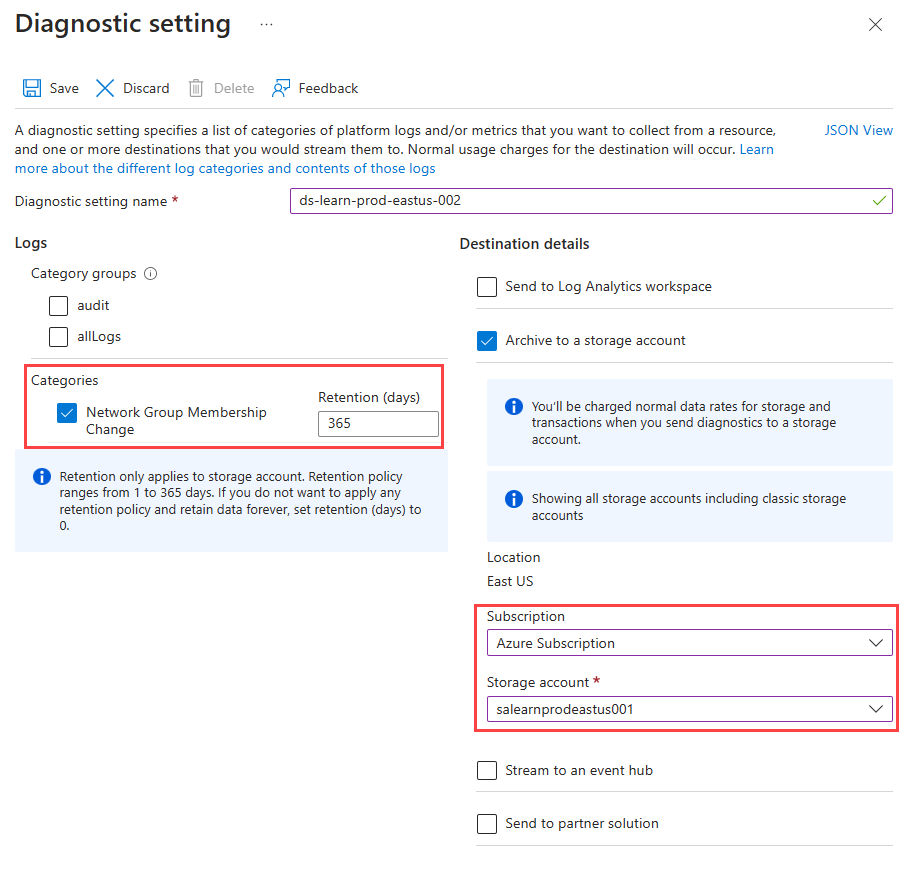
Select Save and close the window.
View Azure Virtual Network Manager event logs
In this task, you access the event logs for your Azure Virtual Network Manager instance.
Run a query in Log Analytics workspace
Under the Monitoring in the left pane, select the Logs.
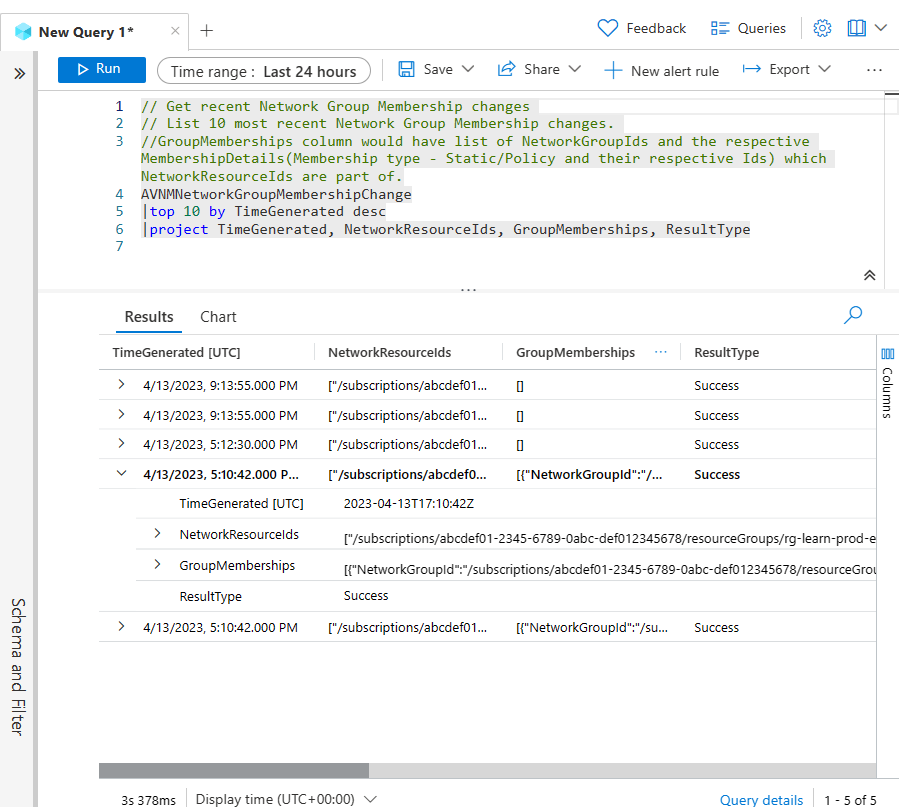
In the Diagnostics window, select Run under Get recent Network Group Membership Changes or any other preloaded query available from your selected schema(s).
When choosing Run, the Results tab displays the event logs, and you can expand each log to view the details.
When completed reviewing the logs, close the window and select ok to discard changes.
Note
When you close the Query editor window, you will be returned to the Azure Home page. If you need to return to the Logs page, browse to your virtual network manager instance, and select Logs under the Monitoring in the left pane.
Run a query in Log Analytics workspace with preloaded queries
Under the Monitoring in the left pane, select the Logs.
In the Diagnostics window, select Load to editor under Get recent Network Group Membership Changes or any other preloaded query available from your selected schema(s).
When choosing Load to editor, the Query editor window displays the query. Choose Run to display the event logs and you can expand each log to view the details.
Close the window and select ok to discard changes.
Next steps
- Learn about Security admin rules
- Learn how to Use queries in Azure Monitor Log Analytics
- Learn how to block network traffic with a SecurityAdmin configuration.