Note
Access to this page requires authorization. You can try signing in or changing directories.
Access to this page requires authorization. You can try changing directories.
Note
- Brand agents is currently in beta.
- Currently, Brand agents is available for Shopify and WooCommerce sites.
- Currently, Brand agents is available for websites and not for mobile apps.
- Refer to the Brand agents terms for detailed usage guidelines.
- By accepting the Brand agents terms, you consent to having your catalog published to Microsoft Merchant Center (MMC). This enables your products to be discovered through Bing and Copilot.
Once you're approved to join the Brand agents beta, you can configure your agent to match your brand identity and business needs. This guide walks you through customizing your agent's appearance, messaging, and behavior before publishing it live on your website.
Step 1: Get started
You'll receive an email notification when you're onboard. You can return to Clarity (through your store settings in Shopify or WooCommerce, or directly in Clarity) and configure your brand agent.
Select Configure and publish to get started.

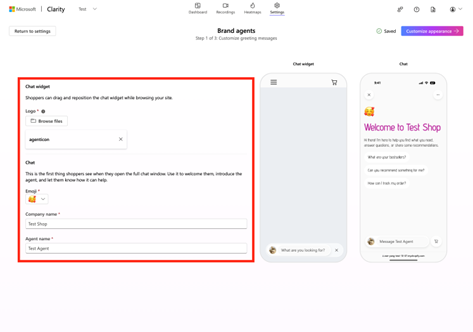
Step 2: Customize your greeting messages
Use the panel on the left to define the details of your agent greeting message. Changes are reflected in the preview on the right side.
You can modify:
- Logo
- Greeting emoji
- Company name
- Agent name
Once you're satisfied with the preview, select Customize appearance to continue.
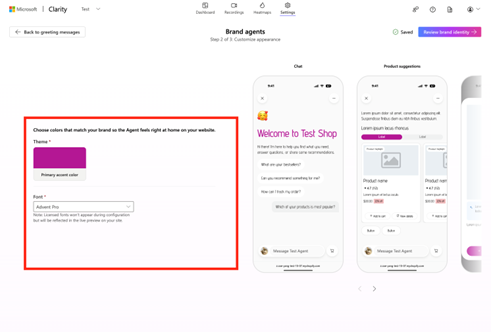
Step 3: Customize appearance
Use the panel on the left to define the details of your agent appearance. Changes are reflected in the preview on the right side.
You can modify:
- Theme color
- Font
Once you're satisfied with the preview, select Review brand identity to continue.
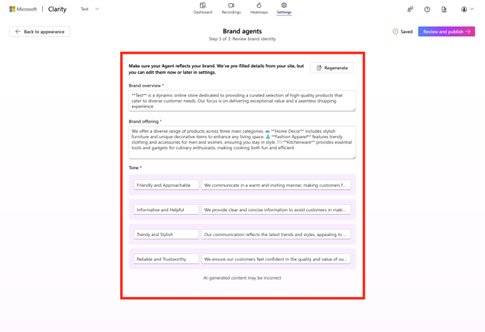
Step 4: Review brand identity
Use the central panel to provide your agent input, so it reflects your brand. This section comes pre-filled with AI-generated content. You can edit it manually to suit your needs. You can always regenerate if you want to return to the original content.
You can modify:
- Brand overview: A short description of your company.
- Brand offering: Describing your products or services.
- Tone: Instructions on how your agent should interact with the audience.
When you're satisfied with the content, select Review and publish for a final check before the agent goes live.
Step 5: Review and publish
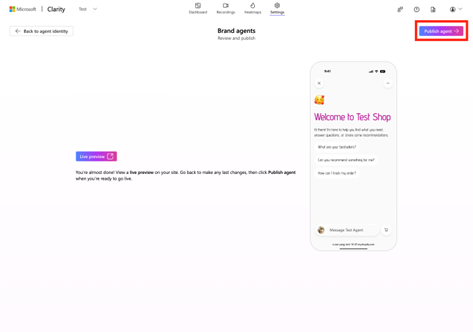
Your agent is ready to launch. Before publishing, use the Live preview to test the experience. You can always return to the previous steps if any changes are needed.
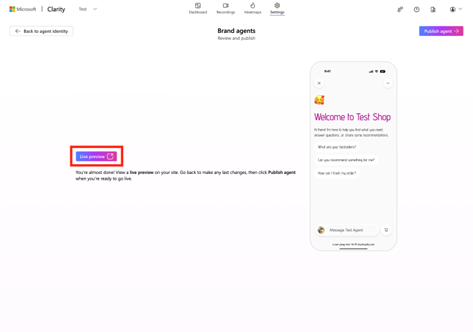
When you're ready, select Publish agent. This makes it available on your website for your users to see and interact with.
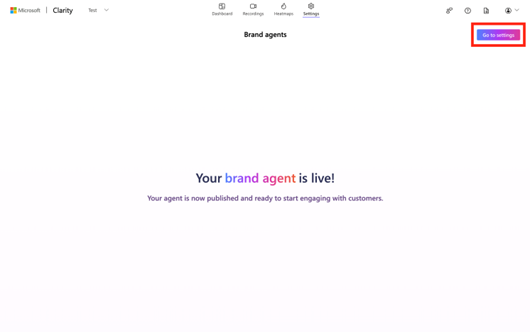
Your agent is now live. Select Go to settings.
Step 6: Edit your agent
Once your agent is live, you can edit its settings and republish it as many times as you want.
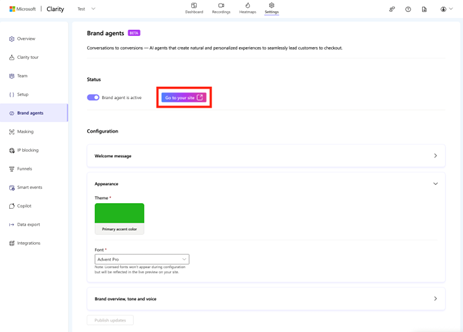
You can toggle your agent on and off. If you turn it off, it's hidden and is not available to your users.
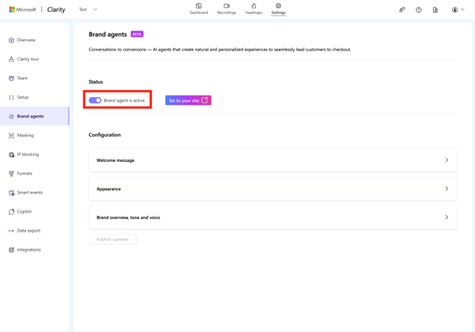
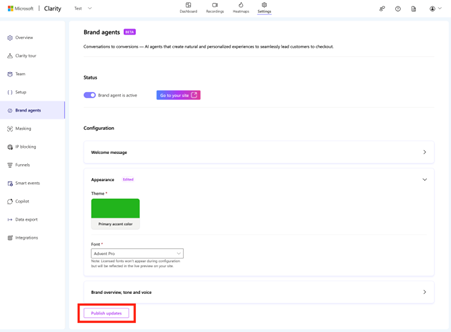
You can also modify all its settings. Expand one or more sections (Welcome message, Appearance, or Brand overview, tone, and voice) and edit as many fields as needed.
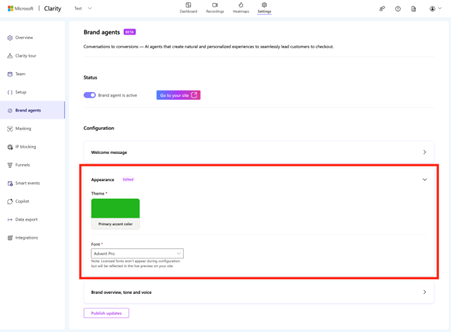
Changes are only reflected when you select Publish updates. This button is disabled if there are no changes to publish.
Finally, you can always visit your site to check and test the behavior of your agent.
FAQ
For more answers, refer to FAQ.