Update unification settings
To review or change any unification settings once a unified profile has been created, perform the following steps.
Go to Data > Unify.
The Unify page displays the number of unified customer profiles and tiles for each of the unification steps.
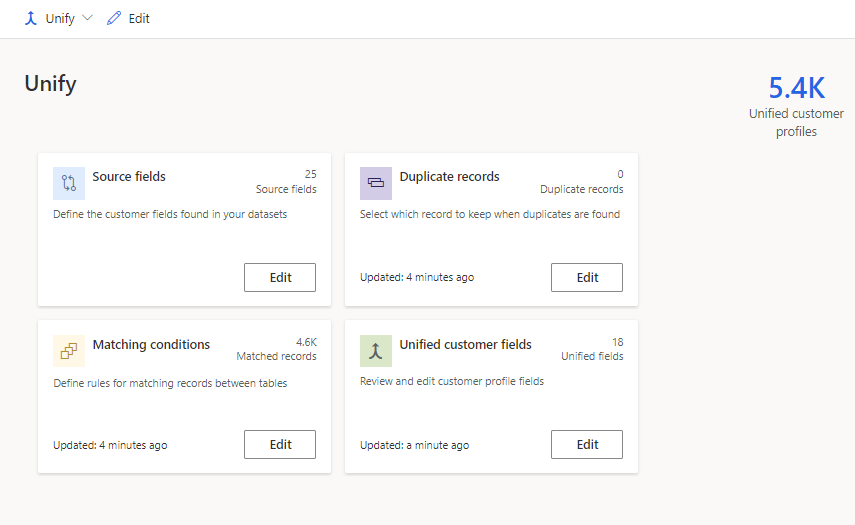
Choose what you want to update:
- Customer data to add columns or tables or change column types. To remove a column, see Remove a unified field. To remove a table, see Remove a unified table.
- Deduplication rules to manage deduplication rules or merge preferences.
- Matching rules to update matching rules across two or more tables.
- Unified data view to combine or exclude fields. You can also group related profiles into clusters.
Tip
The Matching rules tile displays only if multiple tables were selected.
After making your changes, choose your next option:
- Run matching conditions only to quickly evaluate the quality of your deduplication and match rules without updating the unified profile. The Run matching conditions only option doesn't display for a single table.
- Unify customer profiles to run deduplication and match rules and update the unified profile table without impacting dependencies (such as enrichments, segments, or measures). Dependent processes aren't run, but will be refreshed as defined in the refresh schedule.
- Unify customer profiles and dependencies to run deduplication and match rules, update the unified profile table, and update all dependencies (such as enrichments, segments, or measures). All processes are rerun automatically.

Edit customer data
Select Edit on the Customer data tile.
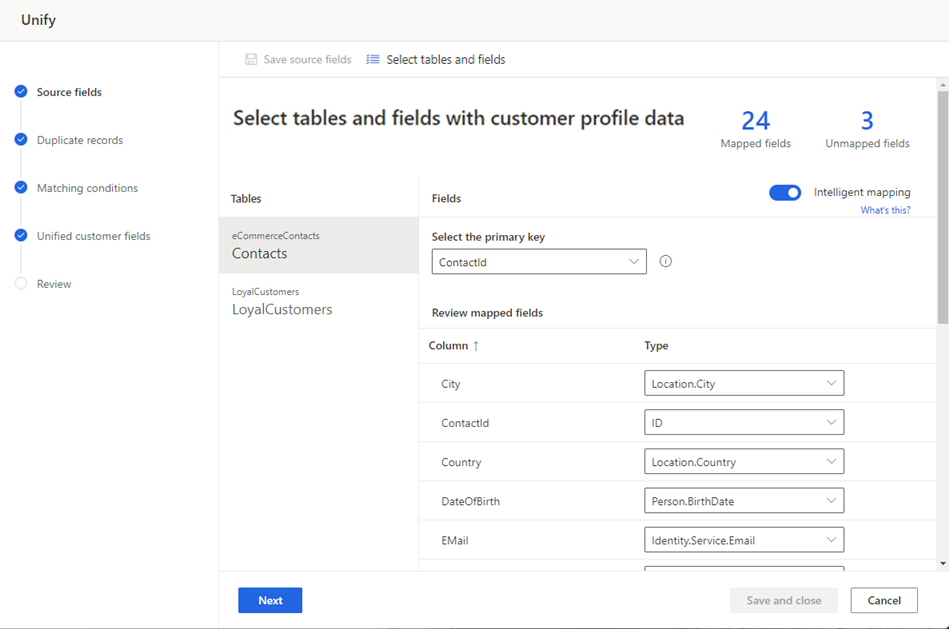
The number of mapped and unmapped fields display.
To add other columns or tables, select Select tables and columns.
Optionally, you can change the primary key for a table or the column types. For more information, see Describe customer data.
Select Next to make changes to deduplication rules, or select Save and close and return to Update unification settings.
Remove a unified field
To remove a field that has been unified, the field must be removed from any dependencies such as segments, measures, enrichments, or relationships.
Once all dependencies for the field have been removed, go to Data > Unify.
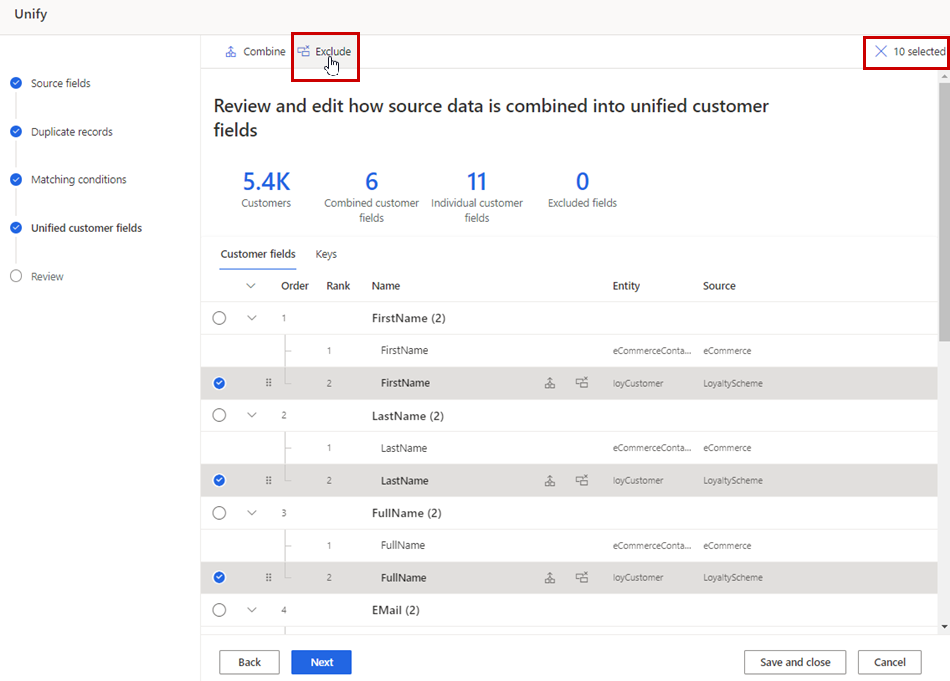
Select Edit on the Unified data view tile.
Select all occurrences of the field and then select Exclude.
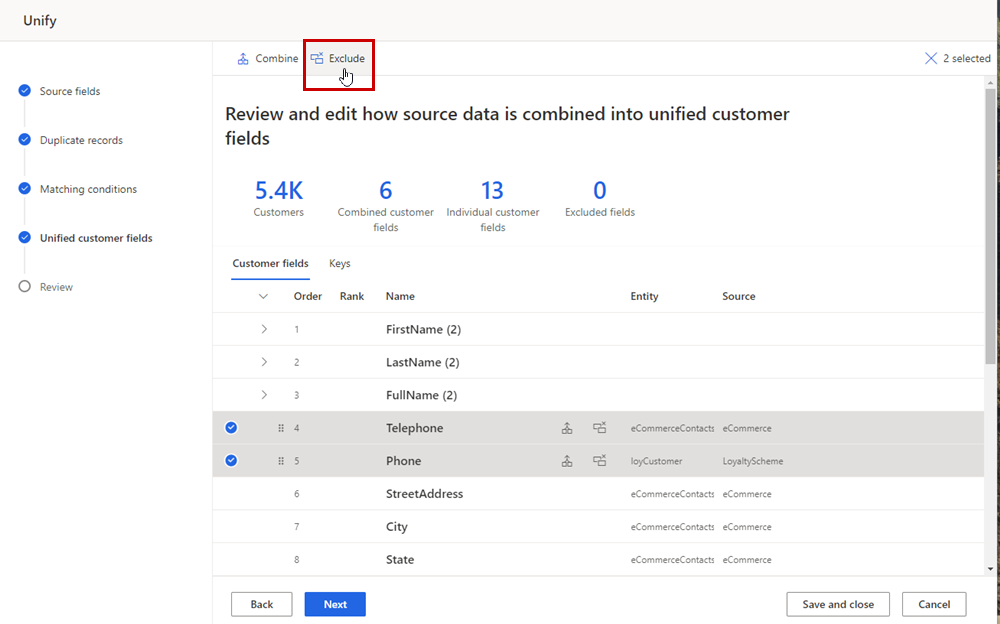
Select Done to confirm and then select Save and close.
Tip
If you see the message "Couldn't save unify. The specified resource cannot be modified or deleted due to downstream dependencies", then the field is still used in a downstream dependency.
If the field is used in a rule for deduplication rules or matching rules, perform the following steps. Otherwise, go to the next step.
- Select Edit on the Deduplication rules tile.
- Remove the field from all rules it's used in, if any, and then select Next.
- On the Matching rules page, remove the field from all rules it's used in, if any, and then select Save and close.
- Select Unify > Unify customer profiles and dependencies. Wait for unification to complete before going to the next step.
Select Edit on the Customer data tile.
Select Select tables and columns and clear the checkbox next to each occurrence of the field.
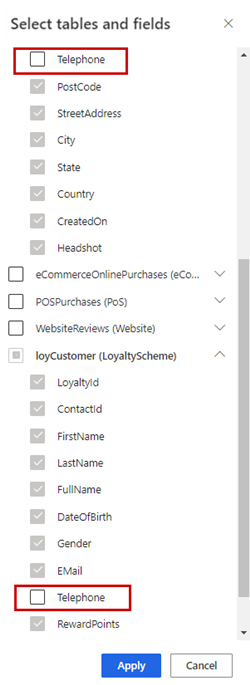
Select Apply.
Select Save and close.
Select Unify > Unify customer profiles and dependencies to update the unified profile.
Remove a unified table
To remove a table that has been unified, the table must be removed from any dependencies such as segments, measures, enrichments, or relationships.
Once all dependencies for the table have been removed, go to Data > Unify.
Select Edit on the Unified data view tile.
Select all fields for the table and then select Exclude.
Select Done to confirm and then select Save and close.
Tip
If you see the message "Couldn't save unify. The specified resource cannot be modified or deleted due to downstream dependencies", then the table is still used in a downstream dependency.
Select Edit on the Deduplication rules tile.
Remove all rules from the table, if any, and then select Next.
On the Matching rules page, select the table and then select Delete.
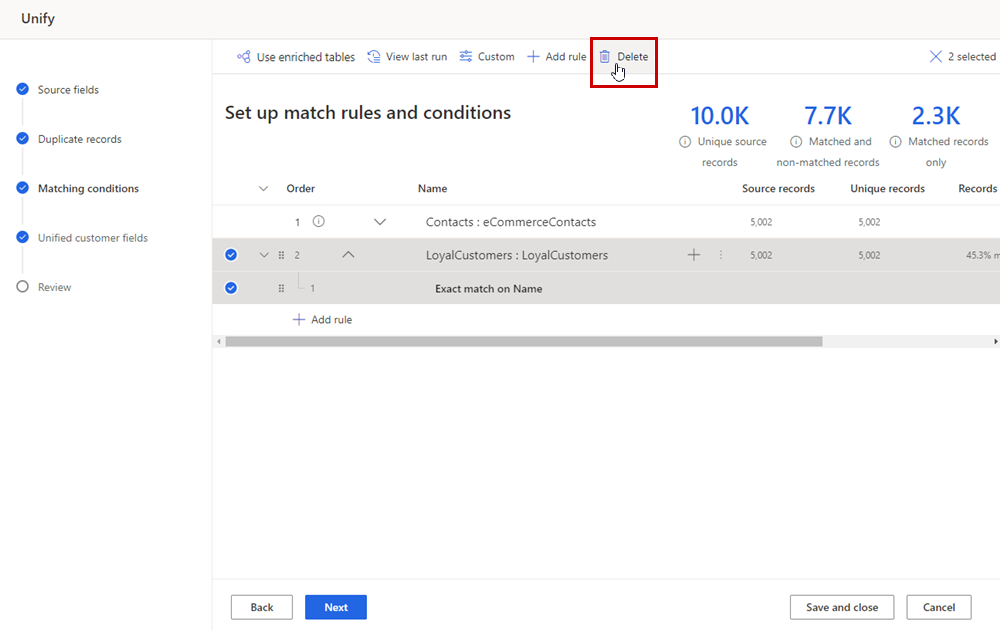
Select Save and close.
Select Edit on the Customer data tile.
Select Select tables and columns and clear the checkbox next to the table.
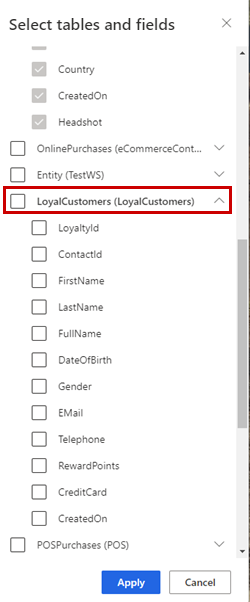
Select Apply.
Select Save and close.
Select Unify > Unify customer profiles and dependencies to update the unified profile.
Manage deduplication rules
Select Edit on the Deduplication rules tile.

The number of duplicate records found displays under Duplicates. The Records deduplicated column shows which tables had duplicate records and the percentage of duplicated records.
To use an enriched table, select Use enriched tables. For more information, see Enrichment for data sources.
To manage deduplication rules, choose any of the following options:
- Create a new rule: Select Add rule under the appropriate table. For more information, see Define deduplication rules.
- Change rule conditions: Select the rule and then Edit. Change fields, add or remove conditions, or add or remove exceptions.
- Preview: Select the rule and then Preview to view the last run results for this rule.
- Deactivate a rule: Select the rule and then Deactivate to retain a deduplication rule while excluding it from the matching process.
- Duplicate a rule: Select the rule and then Duplicate to create a similar rule with modifications.
- Delete a rule: Select the rule and then Delete.
To change merge preferences, select the table. You can only change the preferences if a rule is created.
Select Edit merge preferences and change the Record to keep option.
To change merge preferences on individual columns of a table, select Advanced and make the necessary changes.
Select Done.
Select Next to make changes to matching conditions, or select Save and close and return to Update unification settings.

Manage match rules
You can reconfigure and fine-tune most of the match parameters. You can't add or delete tables. Match rules don't apply to a single table.
Select Edit on the Matching rules tile.

The page displays the match order and defined rules and the following statistics:
- Unique source records show the number of individual source records that were processed in last match run.
- Matched and non-matched records highlight how many unique records remain after processing the match rules.
- Matched records only show the number of matches across all of your match pairs.
To view the results of all rules and their scores, select View last run. The results display, including the alternate contact IDs. You can download the results.
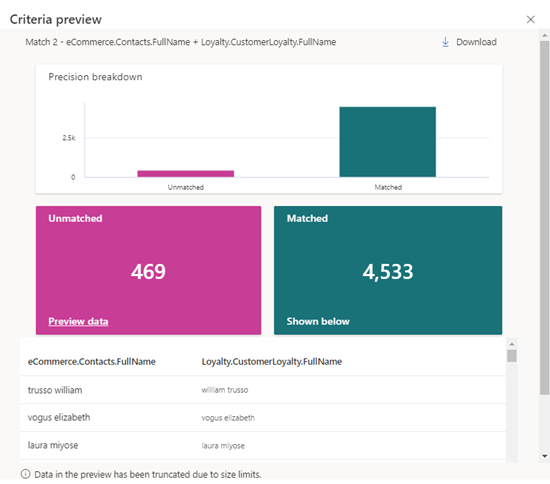
To view the results and scores of a particular rule, select the rule and then Preview. The results display. You can download the results.
To view the results of a particular condition on a rule, select the rule and then Edit. On the Edit pane, select Preview under the condition. You can download the results.
If you added an enriched table, select Use enriched tables. For more information, see Enrichment for data sources.
To manage rules, choose any of the following options:
- Create a new rule: Select Add rule under the appropriate table. For more information, see Define rules for match pairs.
- Change the order of your rules if you defined multiple rules: Drag and drop the rules into the order you want. For more information, see Specify the match order.
- Change rule conditions: Select the rule and then Edit. Change fields, add or remove conditions, or add or remove exceptions.
- Deactivate a rule: Select the rule and then Deactivate to retain a match rule while excluding it from the matching process.
- Duplicate a rule: Select the rule and then Duplicate to create a similar rule with modifications.
- Delete a rule: Select the rule and then Delete.
Select Next to make changes to unified fields, or select Save and close and return to Update unification settings.

Manage unified fields
Select Edit on the Unified data view tile.
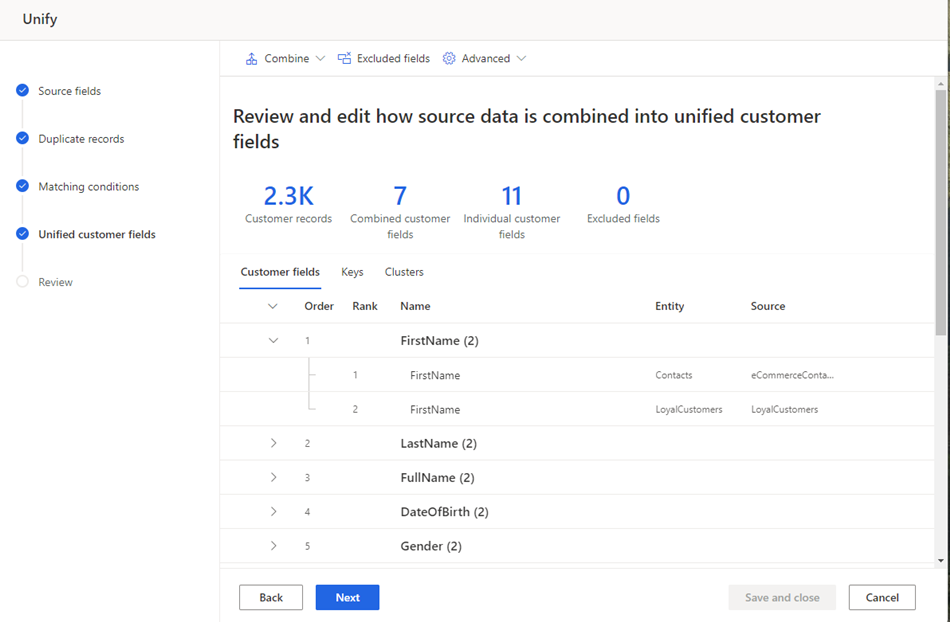
Review the combined and excluded fields, and make any changes as needed. Add or edit the CustomerID key or group profiles into clusters. For more information, see Unify customer fields.
Select Next to review and update the unified profile and dependencies. Or select Save and close and return to Update unification settings to make more changes.
Run matching conditions
Run matching conditions runs deduplication and match rules only and updates the Deduplication_* and ConflationMatchPair tables.
From the Data > Unify page, select Run matching conditions only.
The Deduplication rules and Matching rules tiles show Queued or Refreshing status.
Tip
There are statuses for tasks and processes. Most processes depend on other upstream processes, such as data sources and data profiling refreshes.
Select the status to open the Progress details pane and view the progress of the tasks. To cancel the job, select Cancel job at the bottom of the pane.
Under each task, you can select See details for more progress information, such as processing time, the last processing date, and any applicable errors and warnings associated with the task or process. Select the View system status at the bottom of the panel to see other processes in the system.
When the matching process completes, select Edit on the Matching rules tile.

To make changes, see Manage deduplication rules or Manage match rules.
Run the match process again or run updates to the profile.
Run updates to the unified profile
- To run matching conditions and update the unified profile table without impacting dependencies (such as customer cards, enrichments, segments, or measures), select Unify customer profiles. Dependent processes aren't run, but will be refreshed as defined in the refresh schedule.
- To run matching conditions, update the unified profile, and run all dependencies, select Unify customer profiles and dependencies. All processes are rerun automatically.
All tiles except Customer data show Queued or Refreshing. More data, skewed data, or data with lots of duplicates impact processing time.
Tip
There are statuses for tasks and processes. Most processes depend on other upstream processes, such as data sources and data profiling refreshes.
Select the status to open the Progress details pane and view the progress of the tasks. To cancel the job, select Cancel job at the bottom of the pane.
Under each task, you can select See details for more progress information, such as processing time, the last processing date, and any applicable errors and warnings associated with the task or process. Select the View system status at the bottom of the panel to see other processes in the system.
The results of a successful run display on the Unify page showing the number of unified profiles.