Note
Access to this page requires authorization. You can try signing in or changing directories.
Access to this page requires authorization. You can try changing directories.
Note
If you have enabled Unified Interface only mode, before using the procedures in this article do the following:
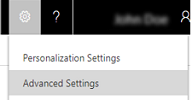
- Select Settings (
 ) on the navigation bar.
 - Select Advanced Settings.

You can set the fiscal year period, and how it’s displayed, for your organization.
Important
After you set the fiscal year options, you can’t change them. Fiscal year options affect the way in which your organization's data is stored in Dynamics 365 Customer Engagement (on-premises).
Make sure you have the System Administrator security role or equivalent permissions.
Check your security role
Follow the steps in View your user profile.
Don’t have the correct permissions? Contact your system administrator.
Go to Settings > Business Management.
Click Fiscal Year Settings.
Type information in the text boxes.
In the Start Date box, select the date to start the fiscal year.
In the Fiscal Period Template drop-down list, select how your fiscal year is divided.
In the Fiscal Year drop-down list, select how you want to display the fiscal year.
In Name Based On drop-down list, select whether the fiscal year name is displayed on the start or end of the fiscal year.
In the Fiscal Period drop-down list, select how you want to display the fiscal period.
In the Display As drop-down list, select how you want the fiscal year abbreviation and the year to appear.
Click OK.
See also
Set up sales territories to organize business markets by geographical area