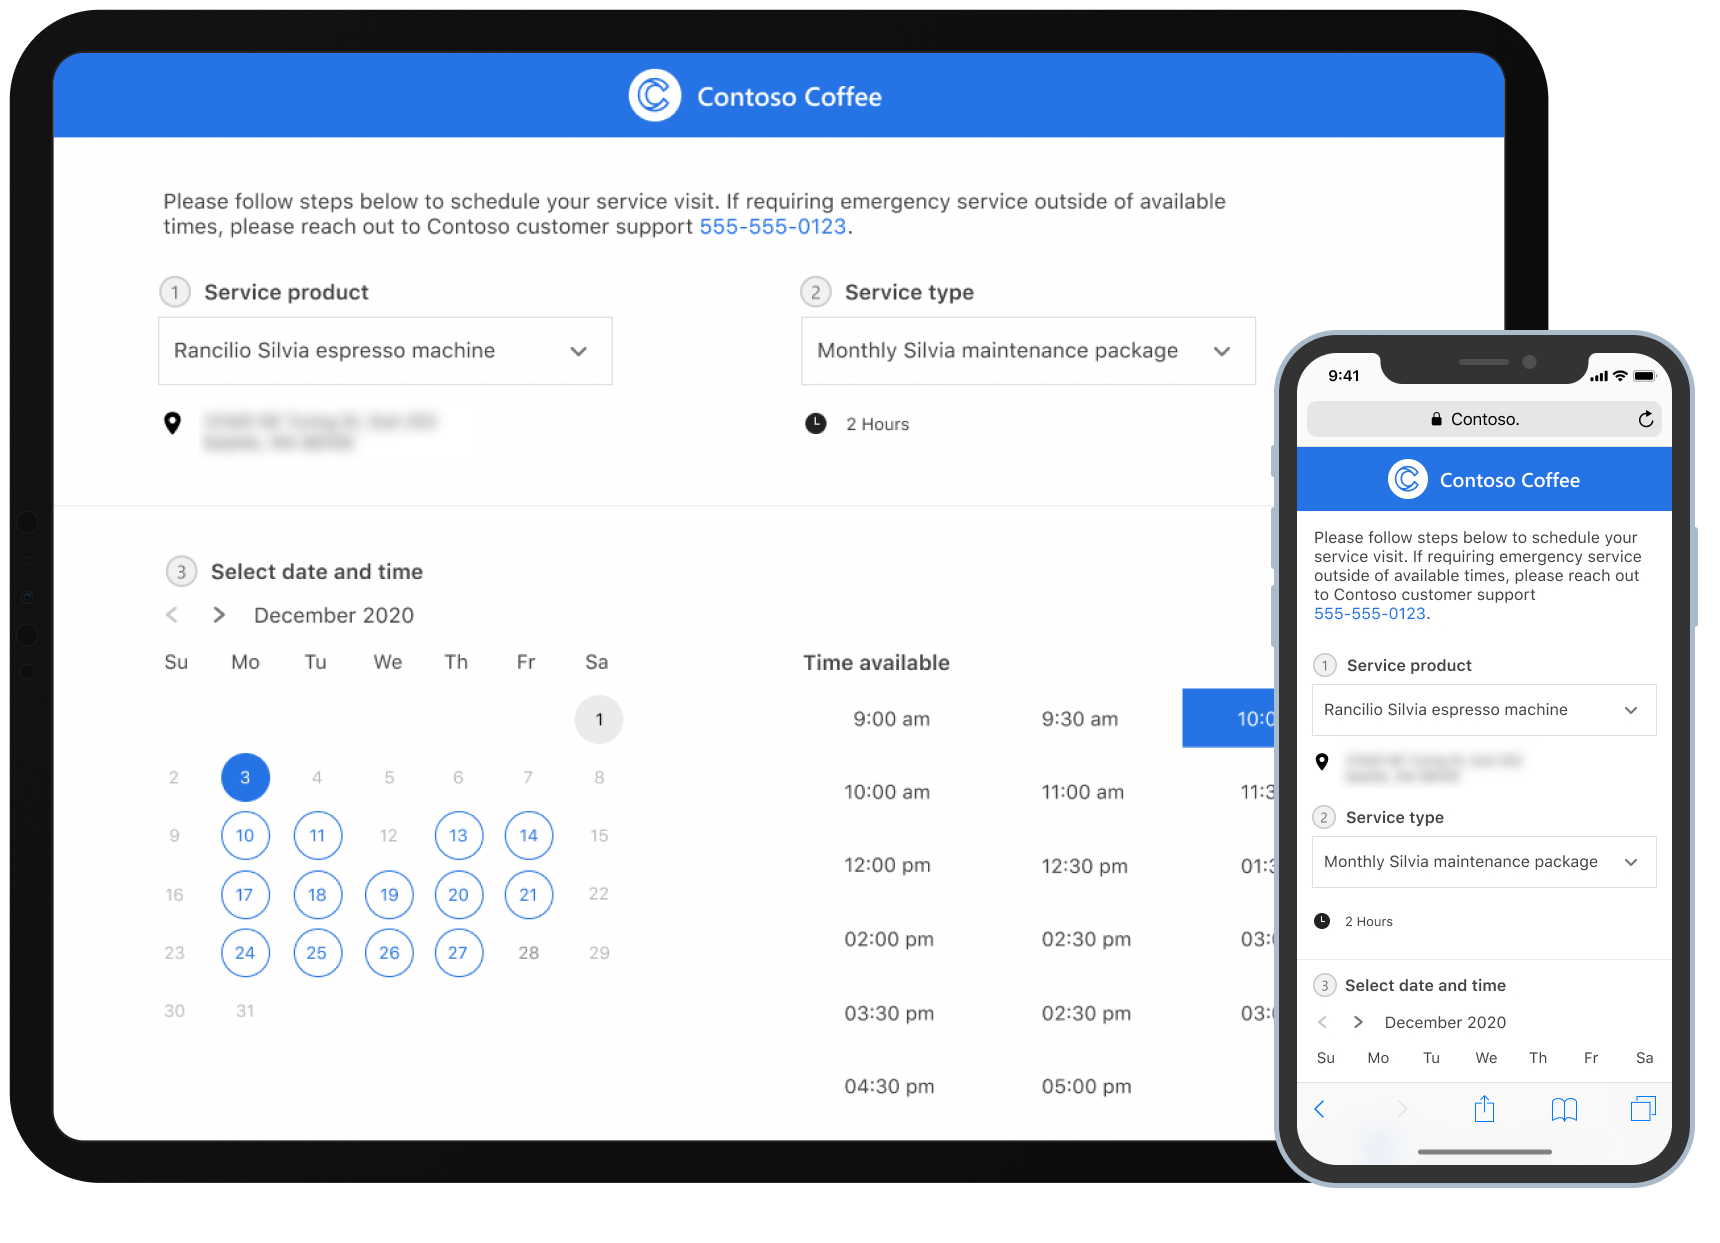
Send current technician location and arrival times to your customers with Dynamics 365 Field Service
Provide your customers with automated service reminders and notifications that include estimated technician arrival times; these reminders make it so customers can better plan their time around service visits.
With this functionality, you can:
- Send customers automated service reminders and updates by email or text message.
- Provide customers with a responsive, accessible, and customizable online portal that shows them information about their upcoming service, including:
- Technician location
- Estimated arrival time
- Service updates
In this article, we'll walk through how to set up and configure service notifications, and how to set up the customer portal.
Prerequisites
- Field Service version (8.8.30.103+)
- The Field Service mobile app
- Technician location sharing must be enabled in Field Service, and also allowed from the technician's mobile device.
- SMS provider supporting Microsoft Power Automate connector for mobile SMS communication.
- Office 365 Exchange account for email communications.
Step 1: Set up the Field Service customer experiences portal
First, we need to set up the customer experience portal with Power Apps portals.
Go to http://make.powerapps.com and select Create.
Select Field Service Portal (Preview).
Enter your portal's name and desired subdomain and display language, then select Create.
You'll get an email when the portal has been provisioned, and you can move on to the next step.
Step 2: Configure email and SMS connectors within Power Automate
Customers will be able to access their service portal with a unique link sent to their email or as a text message. To set this up, you'll need to configure one or both communication methods.
We provide a links directly to the Power Automate Flows for Email and SMS via Field Service Customer Portal Settings
Alternately, you can access the Power Automate Flows for Email and SMS within Power Automate:
Go to https://make.powerapps.com > Solutions. Select Dynamics 365 Field Service PowerApps Portal – Flow in the list.
Here you'll find three Power Automate flows. Email and SMS flows are off by default, so we'll need to configure both in order to enable them.
Note
Exchange and Twilio are used here by default as popular providers. You can substitute an alternate connector by cloning the flows and configuring desired connector.
To configure email:
- Select Field Service PowerApps Power Flow Email Notification, which will open the flow in a new tab.
- With the Flow open, select Edit.
- Select the Send an Email Exchange connector.
- Add your Office 365 Exchange account connection.
- Save and Turn On the flow.
To configure SMS:
- Select Field Service PowerApps Power Flow SMS Notification, which will open the flow in a new tab.
- With the Flow open, select Edit.
- Select the Twilio connector.
- Add your Twilio account details.
- Save and Turn On the flow.
Step 3: Set up the customer experience
Note
When enabling customer experience, messages can be sent to contacts of the account associated with bookings. If testing in non-production orgs, make sure your test data does not have real customer email addresses or phone numbers. If your org contains real data, you can prevent unnecessary communication by adding accounts to exclusion lists.
In Field Service, Go to Field Service Settings > Customer Portal > Customer Portal Settings.
General and notification settings
Note
The Field Service customer portal contains multiple customer-focused features, including a way to track technicians and self-scheduling (preview). These features are indpendnetly enabled while sharing common configuration. Some settings in the general tab only apply to one experience, while others apply to mutliple.
Configure the following settings as needed:
Messaging: Messages are sent at specific points in the Field Service customer lifecycle. These messages can be enabled or disabled independently. For details on each message see Notifications.
Communication Type: Define whether your customer will receive email, SMS, or both message types.
Send Messages To: By default messages will be sent to the "Reported By" contact in the Work Order. If there is no Reported By contact, messages will be sent to Contact noted in this field.
Exclusion lists: These lists allow you to exclude specific service accounts or service types from all messaging.
Include Survey (Preview): You can embed a Customer Voice survey, which will be presented to your customers on the portal at the conclusion of the booking. For more information, see Field Service Customer Portal Survey
Power Automate (Email & SMS links): These are direct links to the Power Automate flows where you configure the email and SMS connectors.
Branding and content
Configure the branding and content for your Field Service customer portal.
From the customer portal settings, go to the Display tab.
Here you can customize:
- Font type and color for the online portal.
- Background and foreground colors.
- Code snippets: These snippets are dynamic content strings that when updated, reflect consistent content across the portal, email, and SMS when applicable. Here are a few important code snippets to include:
- Contact email
- Contact phone
- Company name
- Page title
- Page footer
Note
The header and footer of your portal are updated in the portal designer. There is a link to the designer experience from the Display Settings tab. For more information on portal designer, see the section in this article: Portal designer.
Track my technician settings
Enable Map: When enabled the map will be shown on the portal experience.
Show Resource Name: When the technician is traveling, the portal and messaging will show the technician name as defined in their Field Service user record.
Show Resource Image: When the technician is traveling, the portal will show an image of the technician. If no image is available, only the resource initials are shown.
Show Resource Phone: When the technician is traveling, a phone icon will be shown on the portal, which the customer can select to call or text the technician. This interaction will use the Main Phone value configured for the technician. If no phone number is available for the technician, no phone icon will be shown to the customer.
Step 4: Testing the experience as an end user
To review and test changes, we recommend setting up an account and contact as if you are an end customer.
- Create an account in Field Service with an address local to your area.
- Next, create a contact in Field Service with a test email address and mobile phone number.
- Assign the contact as the primary contact of the test account you created.
- Create a work order and assign the service account you created.
- Create a booking for the work order, and set the status to Scheduled. Set the start date within the range of your Booking Reminder notifications.
- Assign a resource to the booking. The resource assigned to the booking should have access to the Field Service mobile app, with Location Sharing enabled.
- After saving the booking, you will receive an email or SMS notification to the test email address and mobile phone number associated with the test contact. Follow the link the notification to review the portal, and you'll find a map showing the location of the service account.
- Change the booking status to Traveling. You will receive a second email or SMS notification. This notification will include a map showing the current location of the technician and their estimated arrival time to the service account location.
- Finally, change the booking status to Complete, which will trigger the booking complete notification.
To test reschedule notifications and cancel notifications, perform steps 1-6; then after the scheduled booking is in place, reschedule the time slot of the booking or cancel the booking.
Configuration considerations
Notifications
After configuring your portal and enabling notifications, emails and SMS messages will be sent to the Reported By contact associated with work orders. When the Reported By contact is not defined, notifications will be sent to the contact based on the Send Messages To value under (Settings)[#general-and-notification-settings]. By default, this is the primary contact on the account record.
Messages are automatically generated by the following events:
- Booking Reminder: Reminder messages are sent within 7 days of the scheduled service time. This message will carry the scheduled service time and a link to your portal with basic details including confirmation of service account location shown on a map.
- By default, service reminders will be scheduled to send daily at 10:00 AM UTC for any bookings within your configured time period. This time can be adjusted in Power Automate. For more information, see this section: How do I change the timing of reminder messages?
- Technician Traveling: Sent when the booking status is Traveling. This message communicates estimated time of arrival while considering traffic on expected route. This message links to your customer portal with a map, so your customer can see progress to your service location.
- Booking Complete: Sent when booking status is Complete. This message confirms work was completed, along with date and time of completion.
- Booking Rescheduled: Sent when a scheduled service appointment changes by more than 10 minutes from previously scheduled start time.
- Booking Canceled: When a scheduled service appointment is canceled.
Note
Service rescheduling and service canceling messages are only sent if a reminder message had previously been sent.
Note
The booking confirmation notifications are relavent only to the self-service scheduling scenario, and are not avialable with the track my technician functionality.
Portal states
- Reminders, traveling, and completion messages include a link to an online web experience hosted on Power Portals.
- Responsive design makes this portal accessible from mobile, tablet, or desktop.
- The customer portal renders different states depending on state of the associated booking.
- When the booking is in a Traveling state, the experience includes technician details current technician location on an Azure map. The map will show near real-time location of technician based on signal from the Field Service mobile application.
Note
Technicians must be sharing their location from their Field Service mobile app to provide estimated travel time and display their near-real-time location on the portal. Under normal conditions, the technician location may be between 2-4 minutes off the location shown on the portal map. Latency between the technician's real-world location and location represented on the portal map may increase when in limited network areas or if there is disruption of the connection to the technician's mobile device. This latency may result in the technician being closer to the end location versus what is shown on the portal map.
Portal designer
You can update your portal header and footer images, adjust colors, and access more advanced configuration from the Power Apps portal designer.
There is a direct link to the portal designer from Customer Portal Settings > Design. To go there directly:
- Go to https://make.powerapps.com.
- Select Apps.
- Select Edit on the portal you created.
In the portal designer, selected content can be updated and will be reflected in the customer portal. Updating content snippets in the portal maker will also influence content in the messages when applicable.
In the portal designer, upload your mobile and desktop header images, and adjust the color theme of the header and footer areas.
Note
Elements of the portal outside of header and footer - and the highlighted content snippets - are not editable.
Notification settings
Notification settings provide a read-only view of all messages sent to customers. Here you can see which customers have received a message, the type of message, and the state of the message.
Booking notification codes
With booking notification codes, Field Service admins can extend, expire, or block access to a portal link that has been shared with a customer.
Field Service customer portal survey
You can now embed a Customer Voice survey directly within the Field Service customer experience portal. When the survey embed code is added into configuration, it will automatically render the survey on the portal when the work is complete.
Additional notes
How do I change the timing of reminder message?
Reminder messages are triggered by a flow that runs daily at 10:00 AM UTC. Any bookings that fall into your reminder message time period that are not part of exclusion lists will receive a reminder message.
To edit the reminder message:
- Go to https://make.powerapps.com > Solutions and find the solution Dynamics 365 Field Service PowerApps Portal – Flow.
- Edit the flow called Create notification items for bookings.
- Find the location recurrence connector and edit the Flow Recurrence value to new desired time.
Can I still provision this Field Service customer experience portal if I already have an existing Power Apps portal?
Yes, you can have multiple portals; however, you can only have one copy of the Field Service customer experience portal per environment.
Can I integrate this experience within an existing Power Apps portal?
Currently the Field Service customer portal is deployed as a standalone experience and cannot be integrated into an existing Power Apps portal.
Will the Field Service customer experiences portal receive updates?
When we make updates to the customer experience portal, new features or enhancements will be unpublished and require the org admin to publish the update before they reflect on the live experience.
Can I customize the portal by including my own entities and fields?
No. At this time, the portal is not customizable and configuration is limited to what is defined in the Field Service customer experience settings..
Does the Field Service customer experiences portal support all languages?
The portal will support Field Service languages with the exception of Arabic and Hebrew.
I don't have a Twilio or Office 365 Exchange account. Are there other services I can use for messaging?
Yes, you can use alterative SMS or email providers as long as they have connectors supported by Power Automate. Clone the existing email and SMS flows, remove the current connectors, and add desired connectors.
How can I manually enter a resource location without sharing location from the Field Service mobile app?
To inject a new location, use advanced find in Field Service and search for Geolocation Tracking. Choose New Geolocation Tracking. Enter the resource and the desired latitude and longitude values.
Note
Be sure to enable Geolocation Tracking in Field Service settings.
How do I edit email and SMS content?
General content and format of the notifications are following a fixed template and cannot be changed. You can update individual words within the email and SMS content with content snippets found in Field Service settings.
How do I update my Field Service customer experiences portal?
We will publish updates over time to introduce new features and functionality for the customer portal. Updates are not automatically published to your portal; they must be applied by the organization administrator for your environment. To apply an update, go to https://admin.powerplatform.microsoft.com/, select the environment that has the Field Service customer experiences portal installed, and select Portals. If an update is available, you'll see a message saying so, with an option to Update now. Select your portal and apply the update to our environment.
I had the preview version of Track My Technician,and after upgrade to GA my navigation bar is now offset. How do I fix this?
There were changes to some of the content snippets between the Preview and GA versions of Track My Technician. One of these changes can impact the navigation bar of the portal interface. To correct this issue, update the Mobile Header content snippet from the following old value to the new value:
- Old value:
<div style="text-align:center; padding:5px"><img src="/contoso.png" alt="Contoso Limited" style="width: 132px; height: auto;"></div>
- New value:
<div class="navbar-brand-centered"><img src="/contoso.png" alt="Contoso Limited" style="width: 132px; height: auto;"></div>
Feedback
Submit and view feedback for