Note
Access to this page requires authorization. You can try signing in or changing directories.
Access to this page requires authorization. You can try changing directories.
After getting access to Resource Scheduling Optimization either by purchasing a license or through your Microsoft representative, deploy it to your Dynamics 365 Field Service environment.
You can deploy multiple instances of the Resource Scheduling Optimization add-in on the same Microsoft 365 tenant, however, a Resource Scheduling Optimization instance can connect to one Dynamics 365 organization only. If you need to have concurrent instances, for example in production and development organizations, see Get licenses for multiple instances.
Deployment steps
Verify Field Service is installed in your environment. The Field Service app appears in the Dynamics 365 main menu when logged in as a system administrator.
Go to the Power Platform admin center: https://admin.powerplatform.microsoft.com/. In the left pane, select Resources > Dynamics 365 apps.
Scroll through the list of apps or use the search field in the Power Platform admin center to find Resource Scheduling Optimization and select Manage.
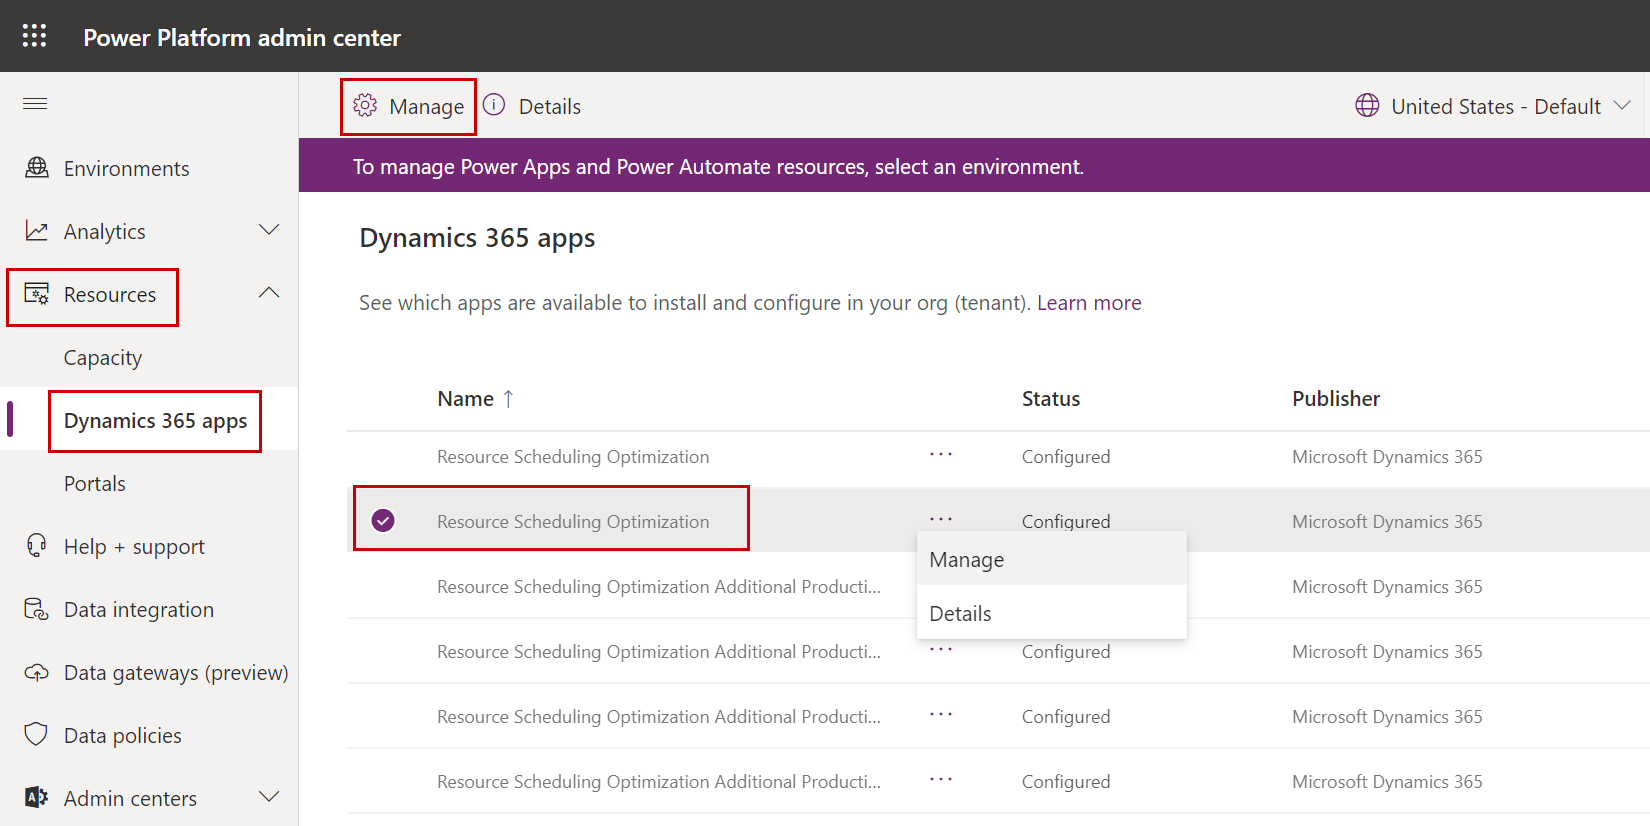
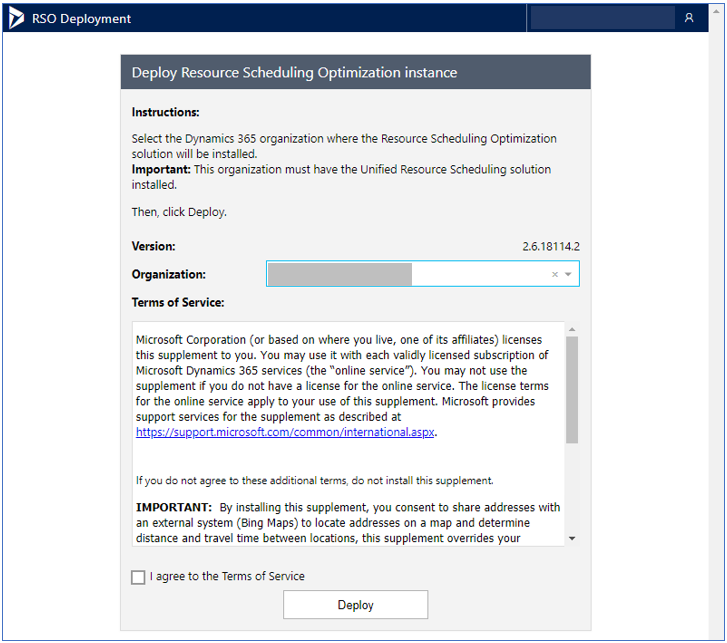
Select the organization where the Resource Scheduling Optimization solution will be installed, review the Terms of Service and select the agreement box, and then select Deploy to start the Resource Scheduling Optimization deployment.
Note
It may take several hours between the time the subscription appears in Microsoft 365 Admin Center and Power Platform Admin Center.
Manage the Resource Scheduling Optimization instance
After the initial deployment, you can manage the deployed instance.
Go to the Power Platform admin center: https://admin.powerplatform.microsoft.com/. In the left pane, select Resources > Dynamics 365 apps.
Find Resource Scheduling Optimization and select Manage.
Choose one of the following options:
Select Upgrade to new version to get the latest version. This option only shows if a newer version is available.
Select Change Organization to change the Resource Scheduling Optimization deployment from a Dynamics 365 organization to another. This action will not delete data inside of the original Dynamics 365 organization and you can always change it back.
Select Delete current deployment to delete Resource Scheduling Optimization Azure resources. The Resource Scheduling Optimization solution will remain, which will not impact anything inside of the Dynamics 365 organization.
Bulk deletion jobs
Resource Scheduling Optimization includes two built-in system jobs:
- Delete Resource Scheduling Optimization Requests
- Delete Resource Scheduling Optimization Simulation Bookings
These system jobs run daily and delete tables related to Resource Scheduling Optimization that are older than two weeks. Each time an optimization job runs, the service creates records that help with monitoring them. These records are meant to be purged periodically.
While a system administrator or users with sufficient privilege can modify system jobs, we advise against doing so. Changed system jobs could lead to accumulated stale records that decrease system performance and delay or block updates.
Configuration and security roles
Learn how to configure Resource Scheduling Optimization in your environment. The scheduling parameter updates and the data changes are unlikely to get modified over time. We recommend that you review security roles periodically because these roles might get modified or deleted.
Privacy notice
By enabling Resource Schedule Optimization, information, including schedule configuration information and work order details (location-relevant address information, such as account address and resource address) will be sent from Dynamics 365 for Customer Engagement to Bing Maps to allow for:
Determining the geo location (latitude, longitude) of a specific address.
Calculating the distance and travel time between locations.
Bing Maps then returns the information to Dynamics 365 for Customer Engagement. An administrator can subsequently disable Resource Schedule Optimization to prevent address information from being sent to Bing Maps.