Note
Access to this page requires authorization. You can try signing in or changing directories.
Access to this page requires authorization. You can try changing directories.
The Resource Scheduling Optimization Add-in for Dynamics 365 Field Service automatically schedules work orders to the resources that are most available and best qualified. Many field service organizations that perform work orders at their customers' locations benefit from automatic scheduling because it optimizes the routes and travel times of field technicians as they travel from work order to work order.
This article guides you through configuration of Resource Scheduling Optimization to schedule and optimize a group of work orders to a predefined list of resources. You're going to set up a scope, goal, and schedule to assign work orders to resources.
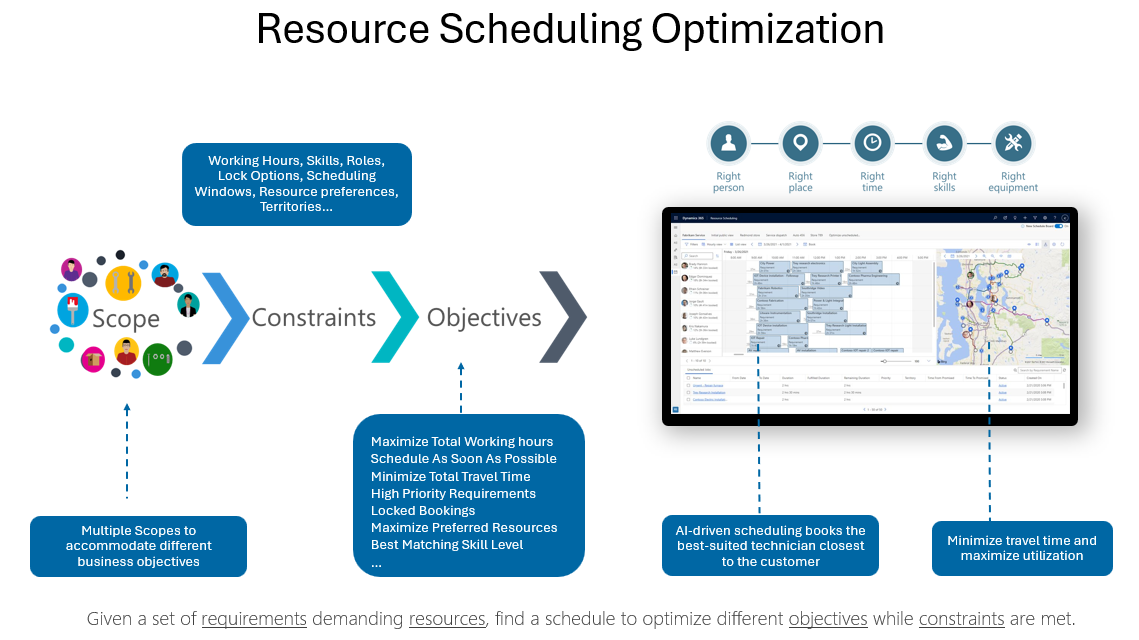
The video walks you through setting up Resource Scheduling Optimization to minimize travel time for work orders and resources in the Washington State territory.
Prerequisites
Resource Scheduling Optimization is deployed to your Field Service environment.
Resource Scheduling Optimization is enabled.
You have Field Service-Administrator and Resource Scheduling Optimization security roles and the Field Service-Administrator and Resource Scheduling Optimization-Administrator field security profiles. For more information, go to Add required security roles.
Views are set up that filter the records you want in your optimization scope.
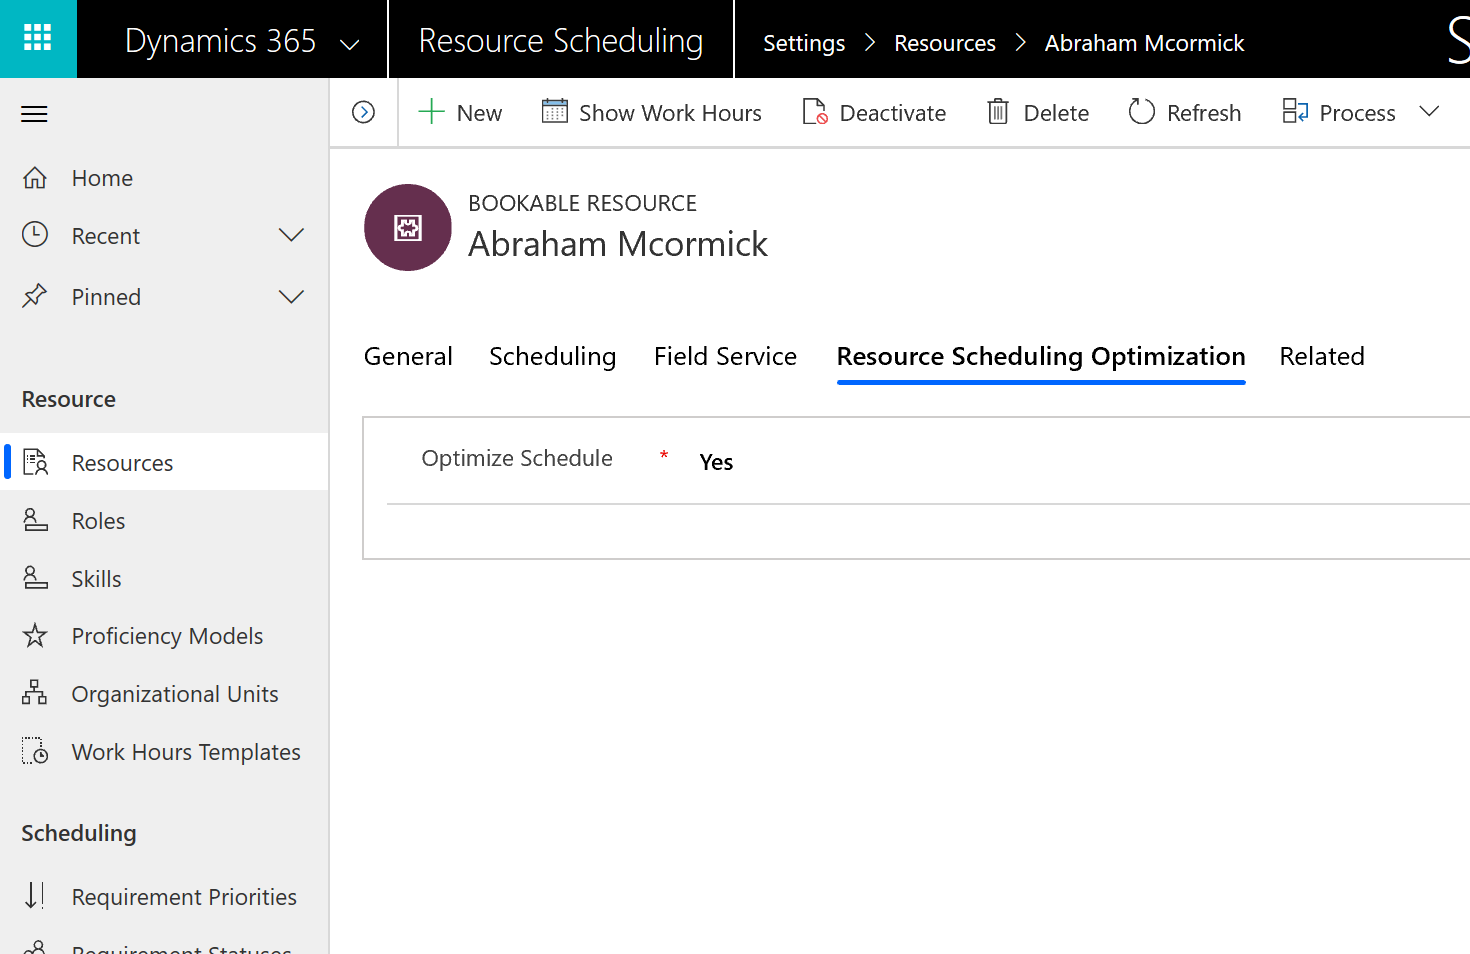
Step 1: Set resources and work orders to optimize
Choose the resources and work orders you want to optimize and enable them for optimization. For more information, go to Prepare resources and work orders for optimizations.
Step 2: Verify booking statuses
Field Service uses booking statuses, and Resource Scheduling Optimization adds the scheduling methods Ignore, Do Not Move, or Optimize and maps them to the booking statuses. Make sure the highlighted booking statuses match your system.
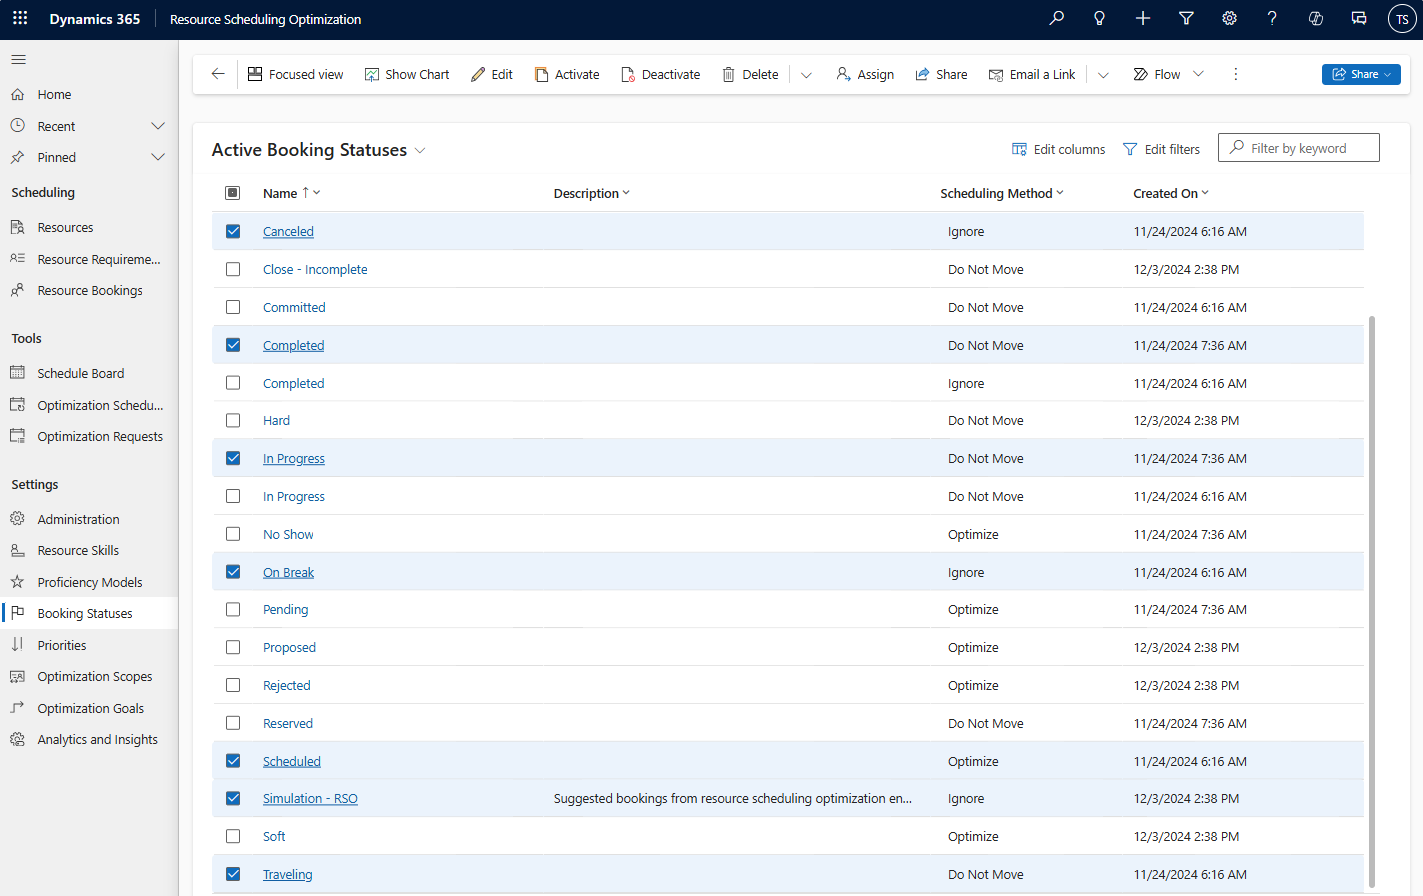
For this example, if they don't match, go to Resource Scheduling Optimization > Optimization Schedules > and select Reset.
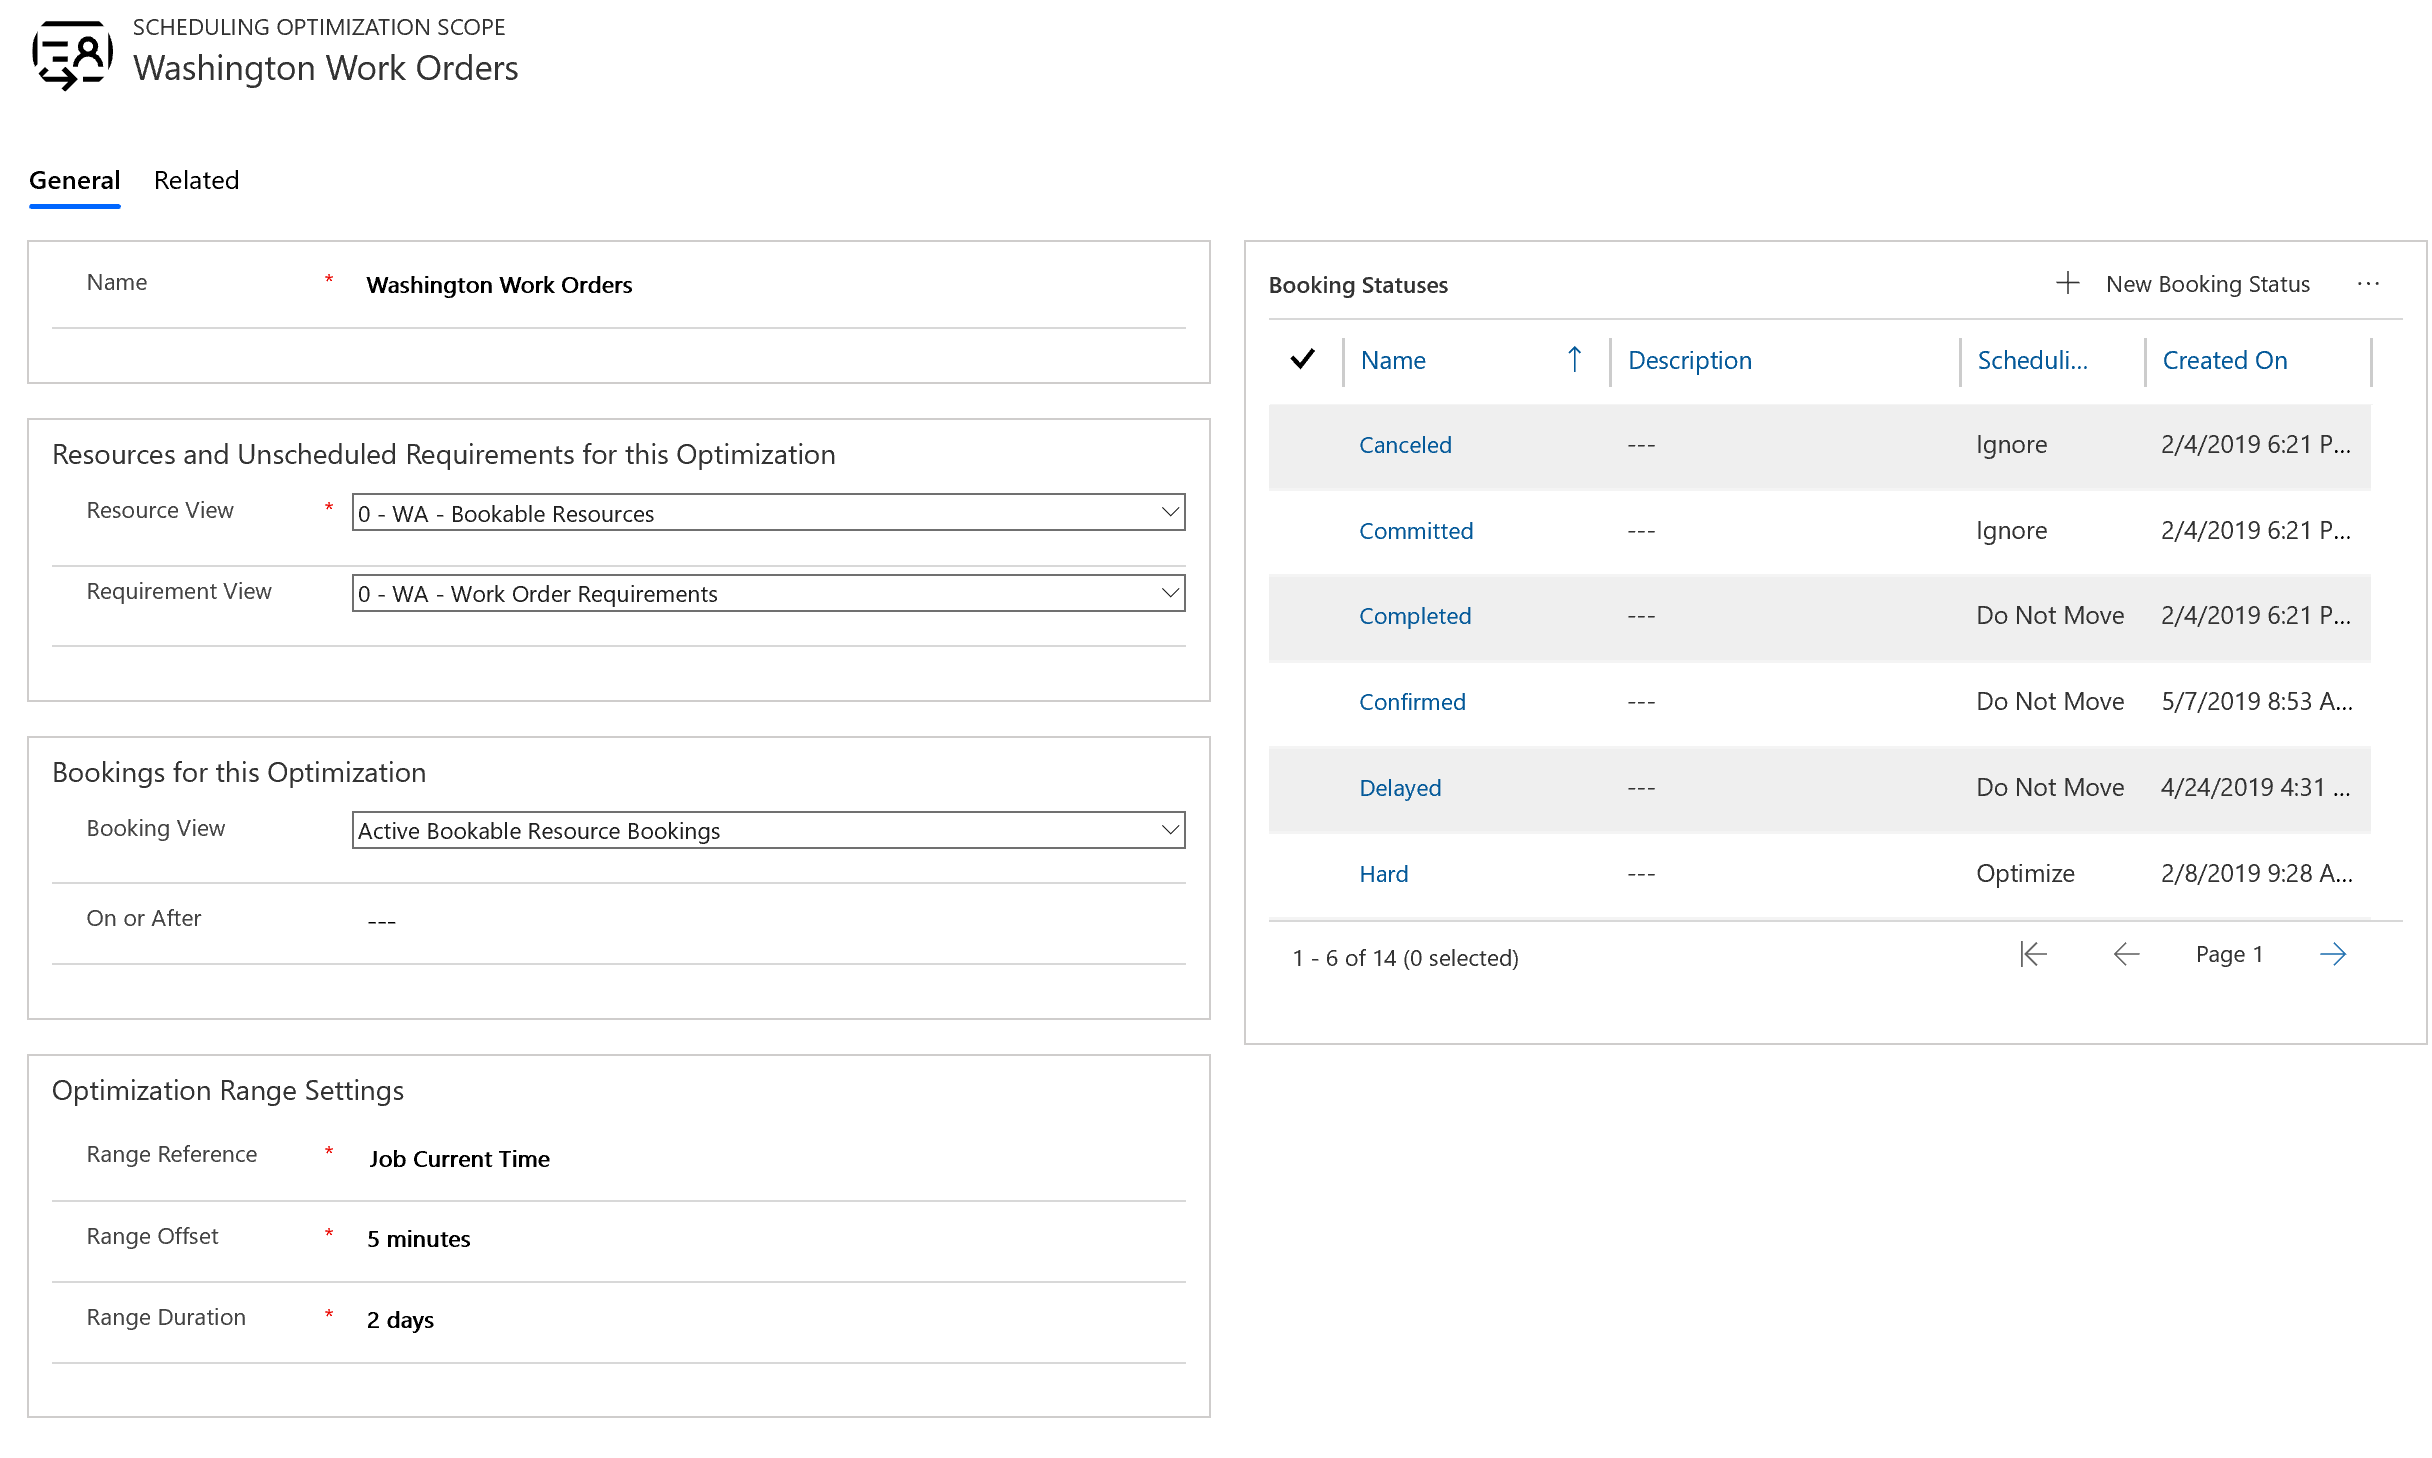
Step 3: Create an optimization scope
Create an optimization scope that defines the resources, requirements, or bookings, and the time range to consider for optimization. Make sure you select the resource and requirement views you identified that filter the records you want. In this example, you have a resource view called WA - Bookable Resources and a requirement view called WA - Work Order Requirements. Select a booking view such as Active Bookable Resource Bookings.
Step 4: Create a goal
Create an optimization goal to define how bookings should be optimized. Use the following values:
Engine Effort Level: Select Very Light, which means that the system completes the run quickly in exchange for accuracy.
Constraints: Start with fewer constraints and add more as you successfully run Resource Scheduling Optimization. This approach makes it easier to troubleshoot if Resource Scheduling Optimization produces unexpected results. For example:
- Schedule Within Working Hours if you have working hours defined.
- Meets Required Characteristics if your requirements and resources both have characteristics.
- Matches Territory if your requirements and resources both belong to the same service territory.
Objectives: Select the following order:
- Maximize Total Working Hours
- Minimize Total Travel Time
- Best Matching Skill Level
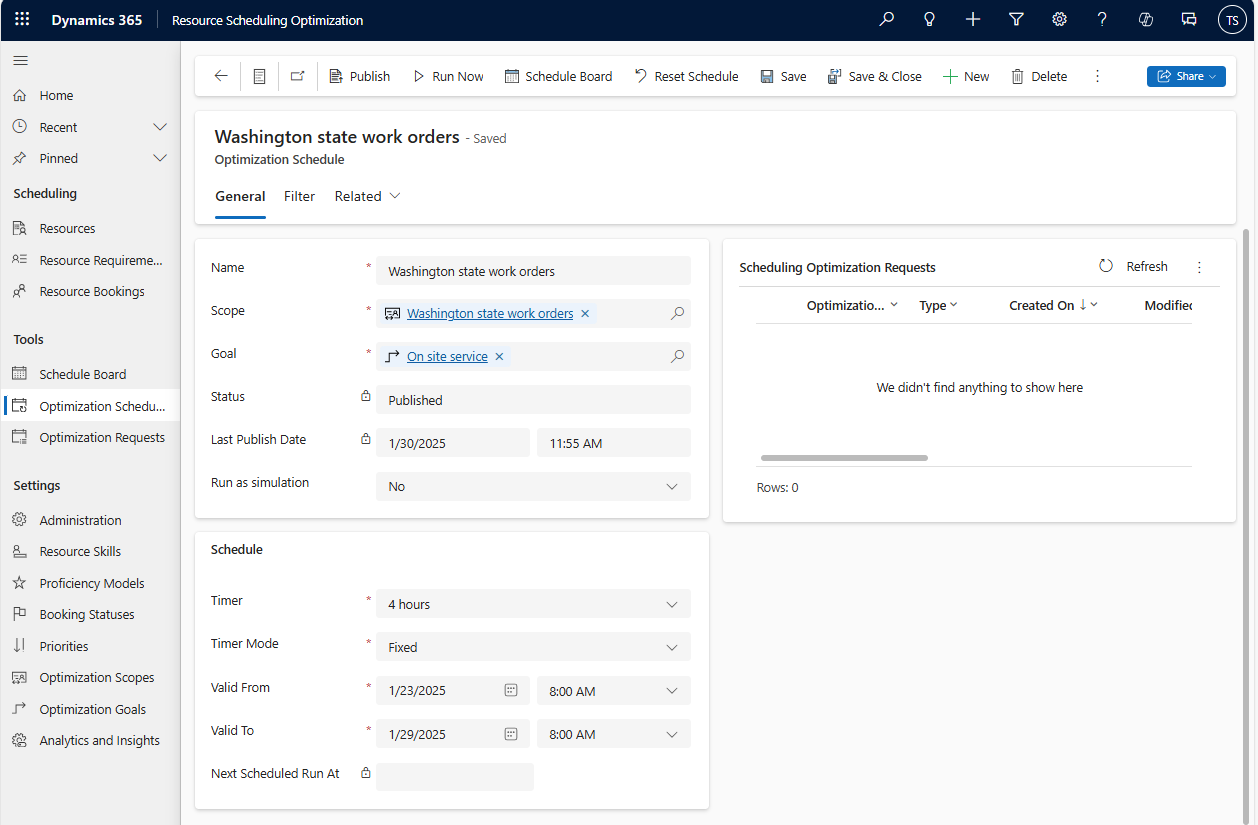
Step 5: Create a schedule
Combine the scope and goal you created into a schedule. If you plan to run Resource Scheduling Optimization manually, enter dates in the past.
Step 6: Run Resource Scheduling Optimization
After you publish the schedule, you can manually run Resource Scheduling Optimization by selecting Run Now on the optimization schedule.
Every time Resource Scheduling Optimization runs, it creates an optimization request record, whether the run is successful or not.
Step 8: Analyze results
Go to Optimization Request. When the status of the request is Completed, go to the schedule board to see the optimized board.
The system creates a new schedule board tab named after your optimization scope.
A simple example of Resource Scheduling Optimization optimizing travel time is when there's no travel time between two bookings. This condition means two work orders are at the same location with the same service account, and Resource Scheduling Optimization schedules them back-to-back.
On the completed scheduling optimization request in the Bookings tab, you see a list of bookings created or deleted, and a graph of the total travel time and working time of the optimized bookings.