Note
Access to this page requires authorization. You can try signing in or changing directories.
Access to this page requires authorization. You can try changing directories.
Note
Community interest groups have now moved from Yammer to Microsoft Viva Engage. To join a Viva Engage community and take part in the latest discussions, fill out the Request access to Finance and Operations Viva Engage Community form and choose the community you want to join.
To generate business documents, you configure an Electronic reporting (ER) solution that contains the following ER components:
- Format – This component specifies the structure of a business document.
- Format mapping – This component controls how a business document is filled in at runtime.
- Model mapping – This component specifies what the data pulls from the application into a format mapping.
- Data model – This component passes information between individual components.
When you run an ER format, every format element is run, starting from the root format element. Whenever a format element that is run contains a binding to a data source, the data source is run to deliver the expected data and use it to fill in the format element. When a data source of the Model type is called, the appropriate model mapping is called to pull data out of the application, based on the model mapping settings.
Previously, these model mapping calls could not be parameterized to make them dependent on the logic of the format that is run. Only the following data flow was supported.
|
Format Format element |
Binding > request > < value < |
Format mapping Data source |
Data model > request > < value < |
Model mapping Data source |
Binding > request > < value < |
Table Record Field |
However, in version 10.0.15 and later, you can configure data model fields that can be called only when the values of the configured parameters are provided. When such a field is configured and called from a format component, the required parameters must be provided in a format binding as arguments of the call. In these cases, the values of the arguments can be specified based on format-specific values. Therefore, you can use dynamic runtime parametrization for data model calls to support the following data flow.
|
Format Format element 1 Format element 2 |
Binding > request 1 > < value 1 < > request 2 > < value 3 < |
Format mapping Data source 1 value2=Func(value1) |
Data model > field1 > < value 1 < > field2(value2) > < value 3 < |
Model mapping Data source 1 Data source 2 |
Binding > request 1 > < value 1 < > request 2 > < value 3 < |
Table 1 Record 1 Field 1 Table 2 Record 2 Field 2 |
The new functionality lets you parametrize the call to any data model field of the Record or Record list type. The following data types are supported for the parameters of a data model field:
You can specify every parameter of a data model field for which the argument can be provided as a single value of the defined data type and the list of such values.
Note
The default value for the parameter of a data model field isn't supported. If you add a parameter to a field in a data model, and the version of that data model has already been released and published, you must rebase all corresponding model mappings and formats to the new version of this model, because this data model change isn't backward compatible.
You can configure parametrized data model fields to make model mapping calls format-specific. This approach can help you reduce the number of model mappings that must be configured for many formats of a single data model. You can also use this approach to improve the execution performance of your formats and reduce the time that is required to generate business documents. To learn more about this feature, complete the example in this article.
Example: Use parameterized calls of ER data models
The following steps explain how a user in the System Administrator or Electronic Reporting Developer role can design an ER solution that contains a data model, a model mapping, and a format ER component that are configured to call a model mapping from a format by providing an argument for the call, the value of which has been calculated at runtime by using the formula of the running format.
These steps can be completed in the DEMF company. No code modifications are required.
In this example, you will create the required ER configurations for the Litware, Inc. sample company. Make sure that the configuration provider for the Litware, Inc. (http://www.litware.com) sample company is listed for the ER framework, and that it's marked as Active. If this configuration provider isn't listed, or if it isn't marked as Active, follow the steps in Create a configuration provider and mark it as active.
Business scenario
You have an ER solution that includes a format that you can run to generate an electronic document for audit purposes. This format contains tax transactions that are related to sales orders and purchase orders, and that have the required details, such as the transaction date and tax value. As of the new fiscal year, the structure of this document has changed. You must now submit an extended document that includes additional details (names) of all parties (customers and vendors) whose transactions are presented on generated reports. Therefore, you must modify your ER solution so that it generates documents that comply with this new requirement.
Configure the ER framework
Follow the steps in Configure the ER framework to set up the minimal set of ER parameters. You must complete this setup before you start to use the ER framework to design a new ER solution.
Design a domain-specific data model
You must create a new ER configuration that contains the required data model component. This data model will be used as a data source later, when you design an ER format to generate an audit report.
Follow these steps to import the required data model from an XML file that is provided by Microsoft.
Download the Sample audit model.version.1.xml file, and save it to your local computer.
Go to Organization administration > Workspaces > Electronic reporting.
In the Electronic reporting workspace, select Reporting configurations.
On the Configurations page, on the Action Pane, select Exchange > Load from XML file.
Select Browse, and then find and select the Sample audit model.version.1.xml file.
Select OK to import the configuration.

The following illustration shows the editable version of the configured data model on the Data model designer page.
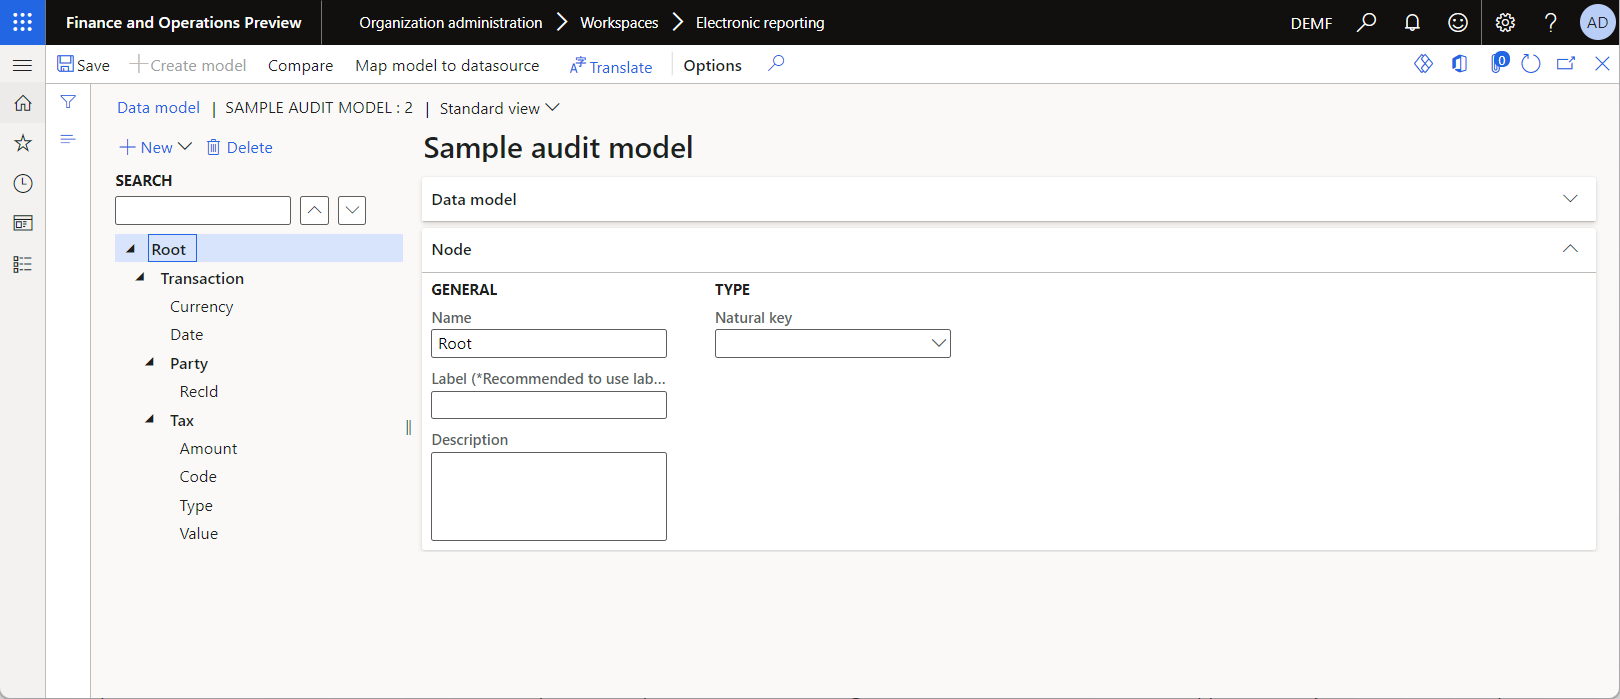
Currently, the model is designed to expose only tax transactions that have the required details.
Design a model mapping for the configured data model
As a user in the Electronic Reporting Developer role, you must create a new ER configuration that contains a model mapping component for the Sample audit data model. This component implements the configured data model for Microsoft Dynamics 365 Finance and is specific to that app. You must configure the model mapping component to specify the application objects that must be used to fill in the configured data model with application data at runtime. To complete this task, you must understand how the data structure of the tax business domain is implemented in Finance.
Follow these steps to import the required model mapping from an XML file that is provided by Microsoft.
Download the Sample audit model mapping.version.1.1.xml file, and save it to your local computer.
Go to Organization administration > Workspaces > Electronic reporting.
In the Electronic reporting workspace, select Reporting configurations.
On the Configurations page, on the Action Pane, select Exchange > Load from XML file.
Select Browse, and then find and select the Sample audit model mapping.version.1.1.xml file.
Select OK to import the configuration.
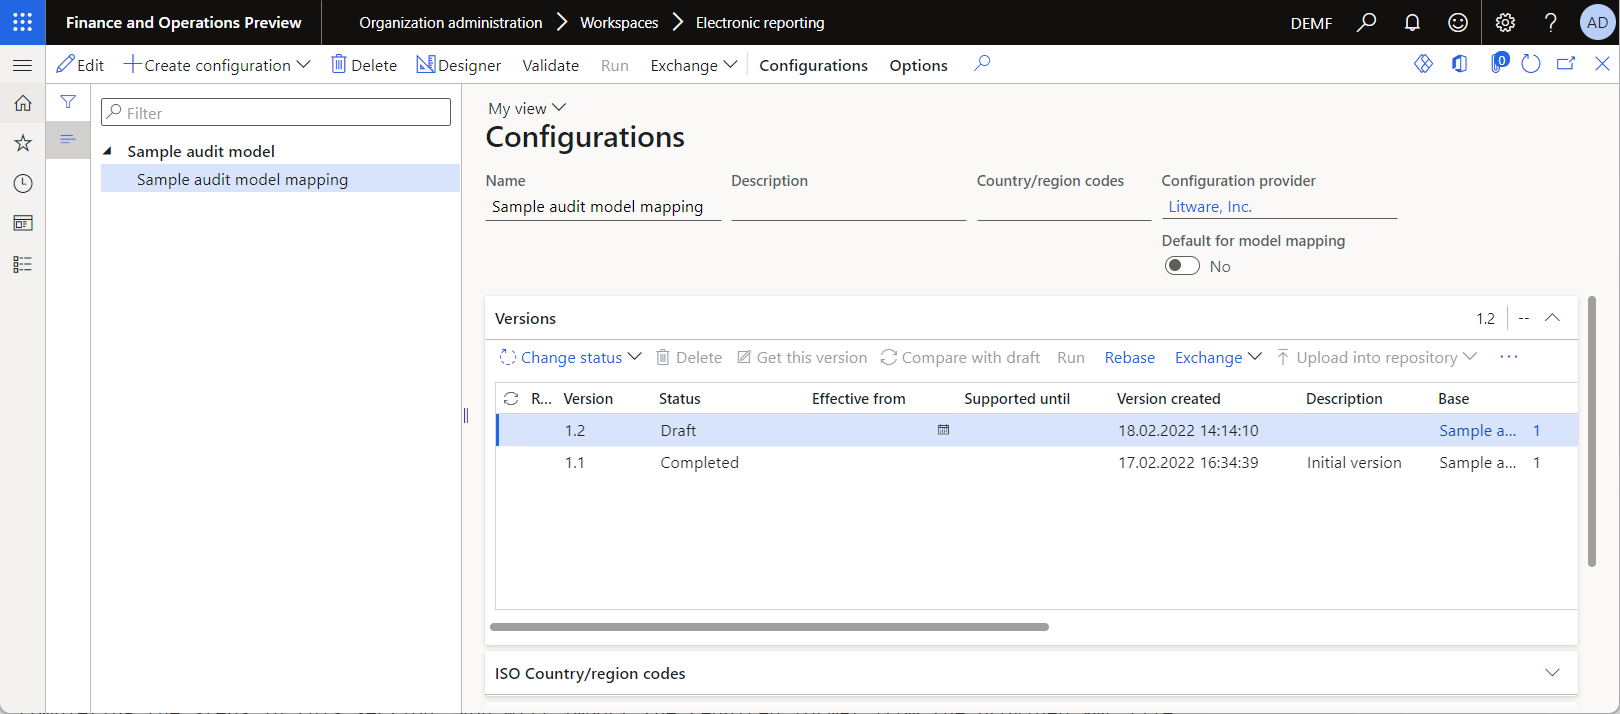
The following illustration shows the editable version of the configured model mapping on the Model mapping designer page.
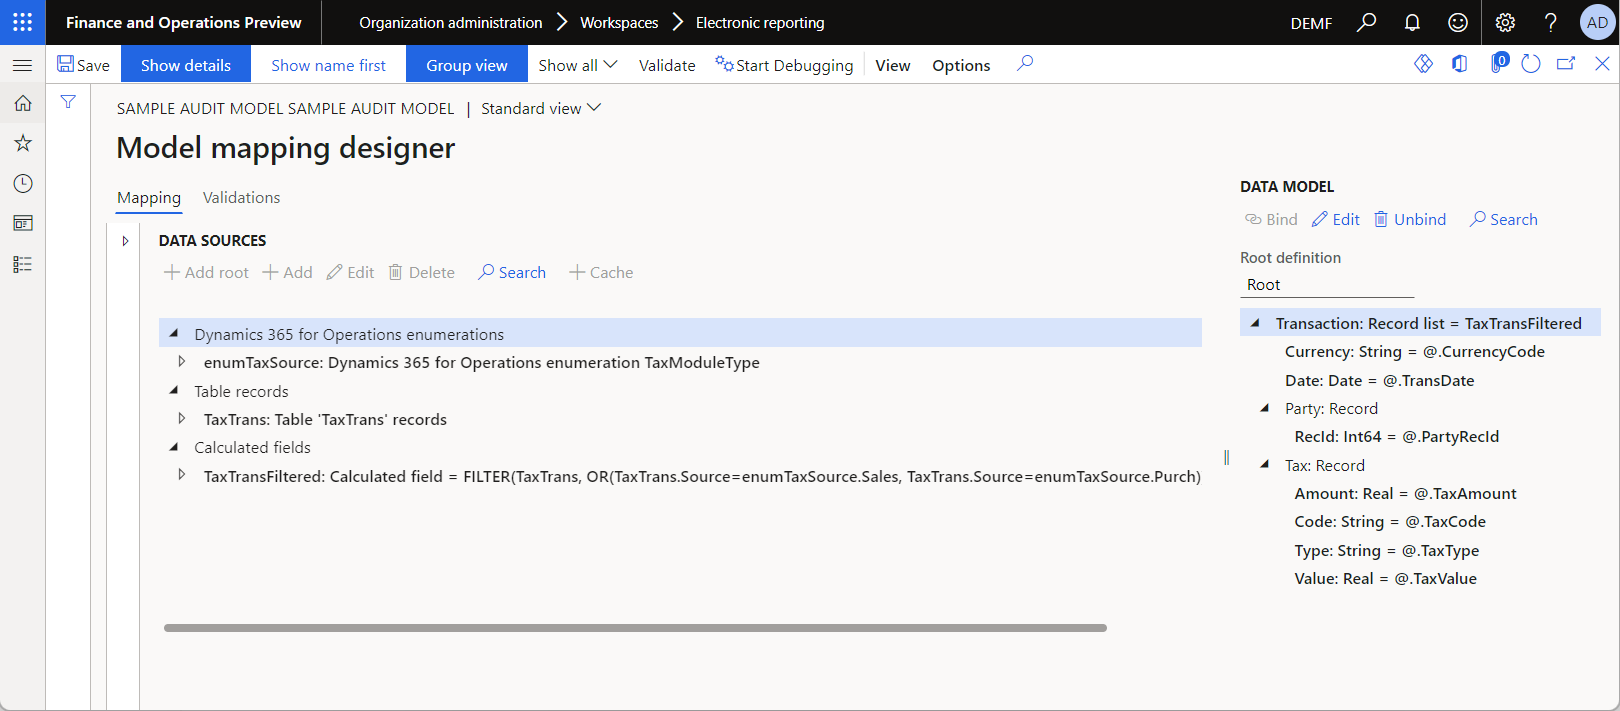
Currently, the model mapping is designed to expose tax transactions that have the required details. It fetches this information from the TaxTrans application table by using the configured TaxTrans and TaxTransFiltered ER data sources.
Design a new format
As a user in the Electronic Reporting Functional Consultant role, you must create a new ER configuration that contains a format component. You must configure the format component to fill in generated reports with tax transactions that have all the required details.
Follow these steps to import the required format from an XML file that is provided by Microsoft.
Download the Sample audit format.version.1.1.xml file, and save it to your local computer.
Go to Organization administration > Workspaces > Electronic reporting.
In the Electronic reporting workspace, select Reporting configurations.
On the Configurations page, on the Action Pane, select Exchange > Load from XML file.
Select Browse, and then find and select the Sample audit format.version.1.1.xml file.
Select OK to import the configuration.
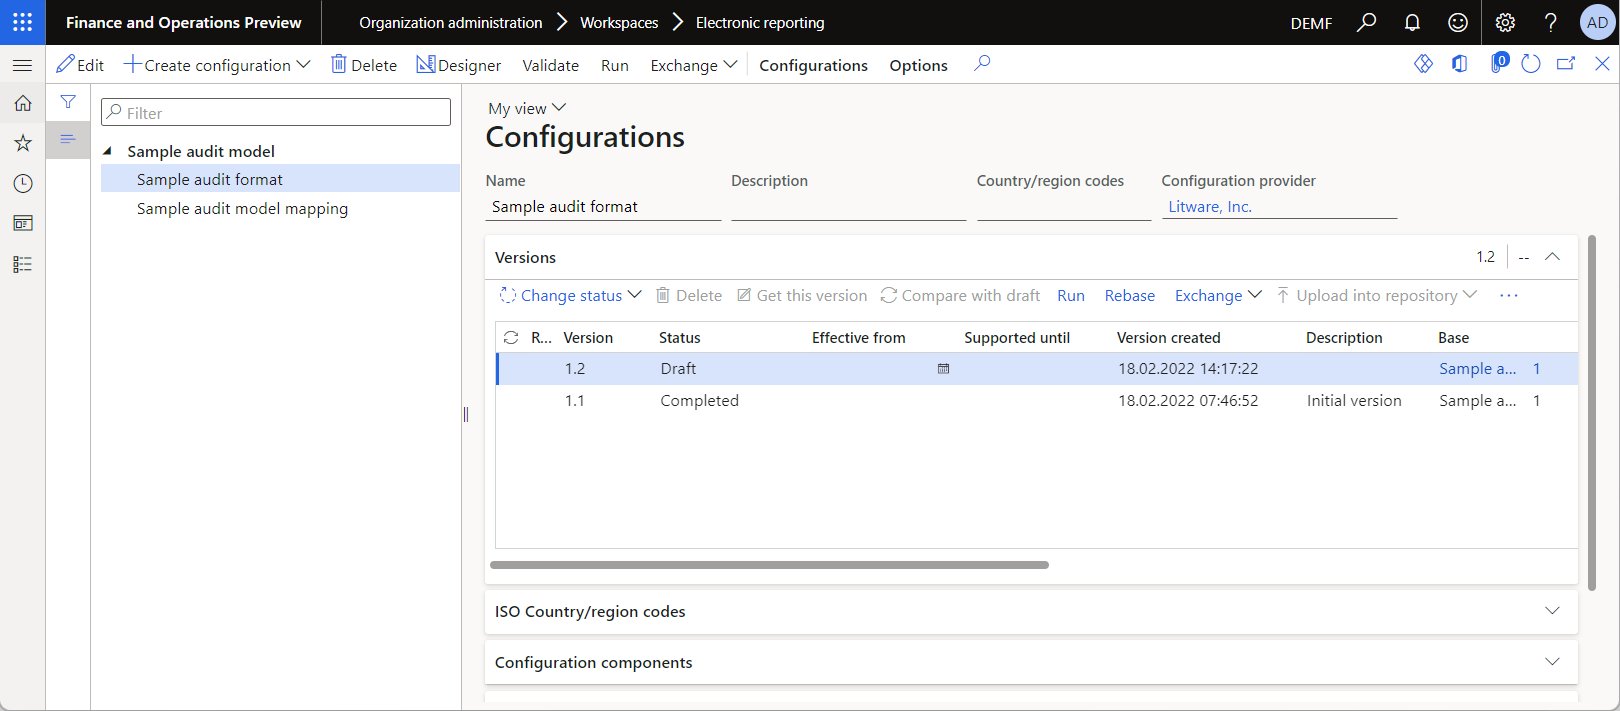
The following illustration shows the editable version of the configured format on the Format designer page.
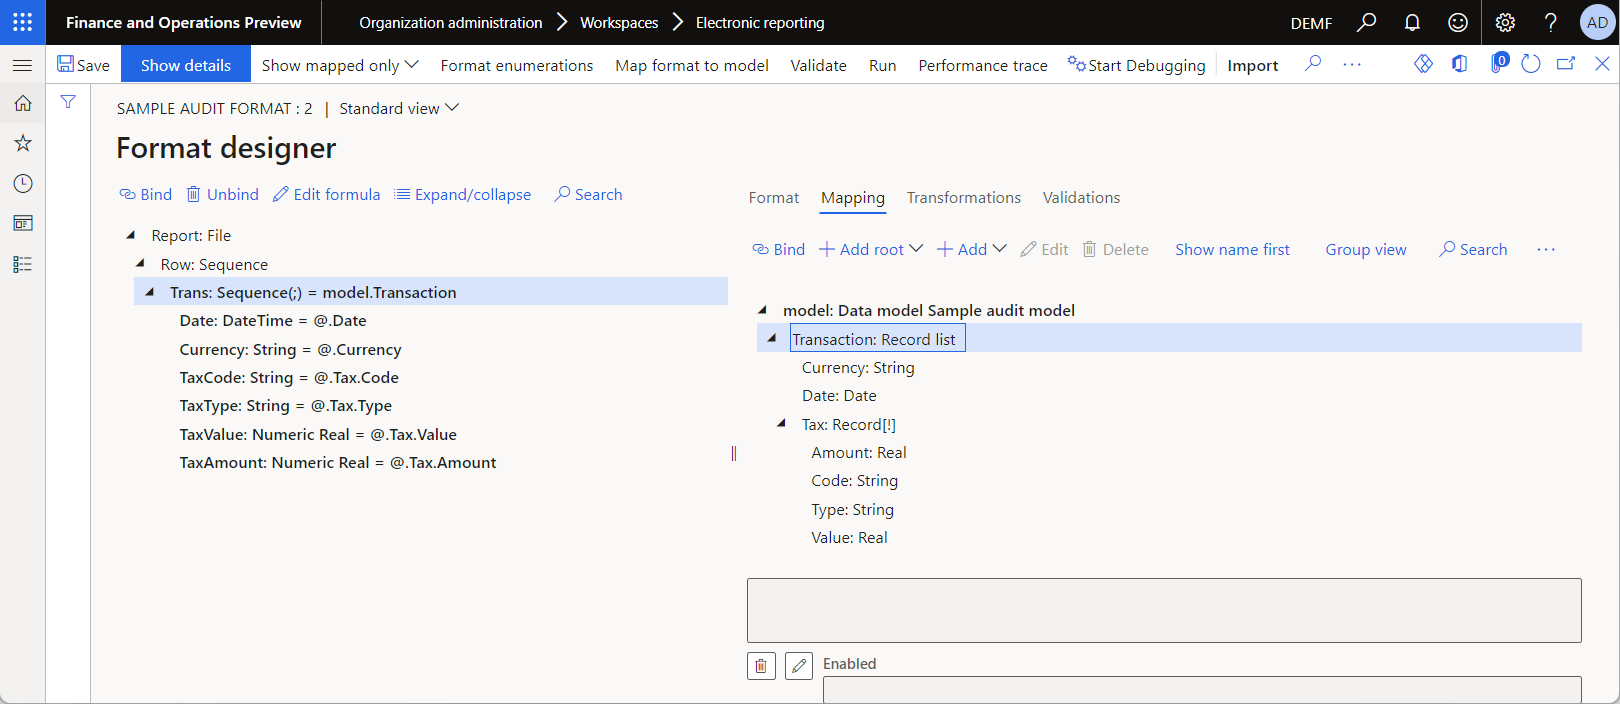
The ER format is configured to generate a report as a text file in comma-separated values (CSV) format.
Run the imported format
On the Configurations page, select the Sample audit format configuration, and then, on the Action Pane, select Run.
In the Electronic report parameters dialog box, on the Records to include tab, select Filter.
Specify the conditions to select the tax transactions of the PIV-110000004 and INV-10000001 vouchers.
Select OK.
Select OK.
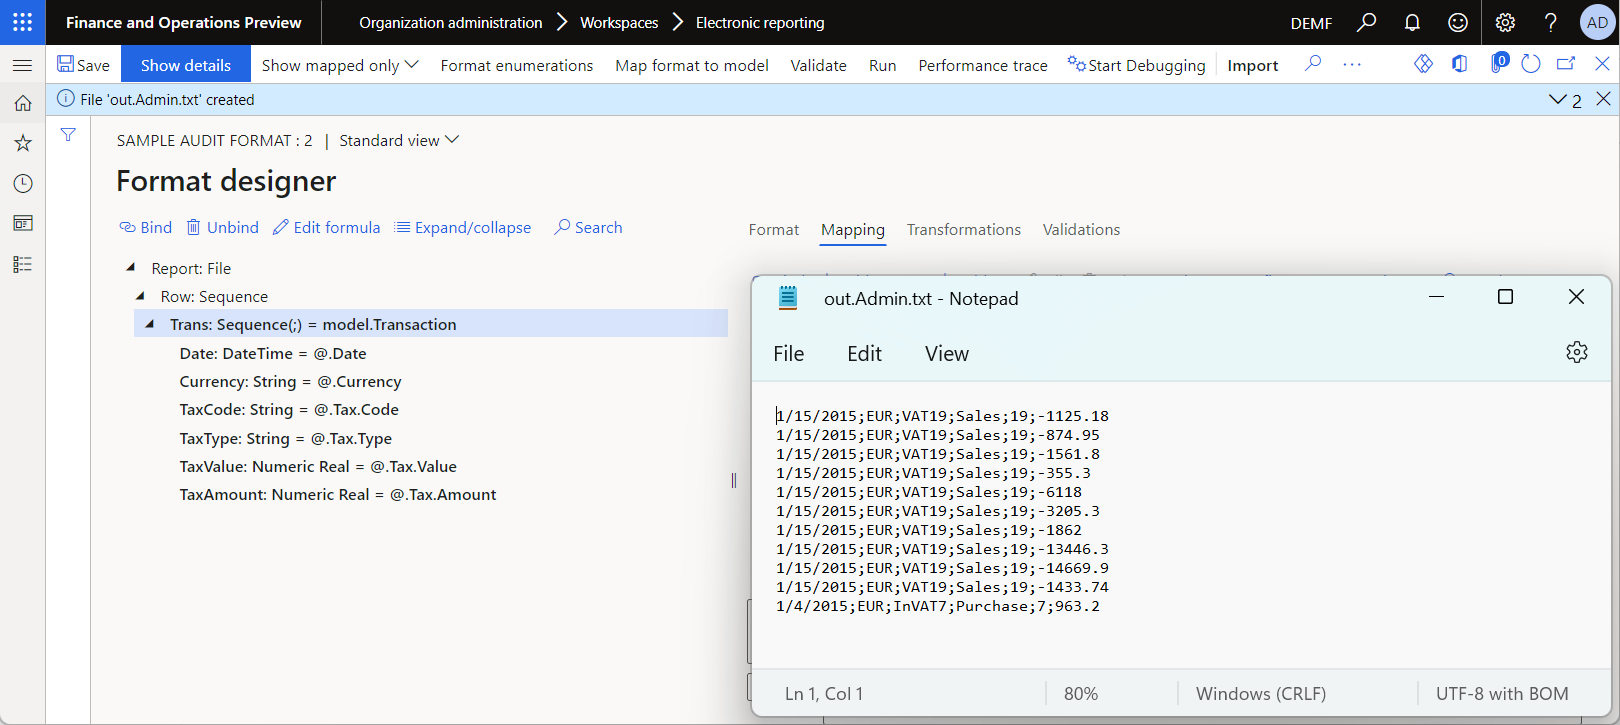
Review the generated document that contains tax transactions of the selected vouchers.
Adjust the imported ER solution
According to the new requirement, the document that you must submit must contain the names of customers and vendors whose transactions are included. Therefore, you must modify the imported ER solution so that it generates a document that complies with this new requirement.
Decide how you want to implement the required modifications of the imported ER components.
The obvious approach is to implement the following modifications:
- In your data model, add the new
Transaction.Party.Namedata model field of the String type. - In your model mapping, configure the binding for the new data model field by using available table relations to access the relevant record of the
DirPartyTableapplication table and fetch the value of theNamefield from it.
Although this approach will work, it might cause performance issues in the SQL database, because TaxTrans is the transaction table and can therefore contain a large volume of records. In this case, the number of calls to DirPartyTable must equal the number of records in the TaxTrans table that can cause performance issues.
Alternatively, you might implement the following modifications:
- In your data model, add the new
Partyroot and the newParty.Namefield. - In your model mapping, add a new data source that will join all the records of tables that are used in table relations to access the relevant record of the
DirPartyTableapplication table, starting from theTaxTranstable.
Although this approach will work, it might cause some memory consumption issues. Even when a new JOIN data source is run as a single SQL request to the application database to prevent database performance issues, the result must be fetched to the memory of the application server. Because the number of records and the number of fields in those records will be quite large, this approach might cause very heavy memory consumption. An out-of-memory runtime exception might even be thrown.
You can implement the modifications when a running format collects, in memory, the unique identification codes of customers and vendors for all tax transactions that will be presented on a generated report. Because only unique codes should be kept, the final set of codes won't be large enough to affect memory consumption. The set of codes will then be passed to the model mapping as the argument of another call of the data source of the Model type. Based on that call, the model mapping will run a new ER data source that makes a single SQL request to the application database to fetch, from the DirPartyTable table, records only for those parties whose codes are presented in the provided set of codes.
Adjust the imported data model
Go to Organization administration > Electronic reporting > Configurations.
On the Configurations page, in the configurations tree in the left pane, select Sample audit model.
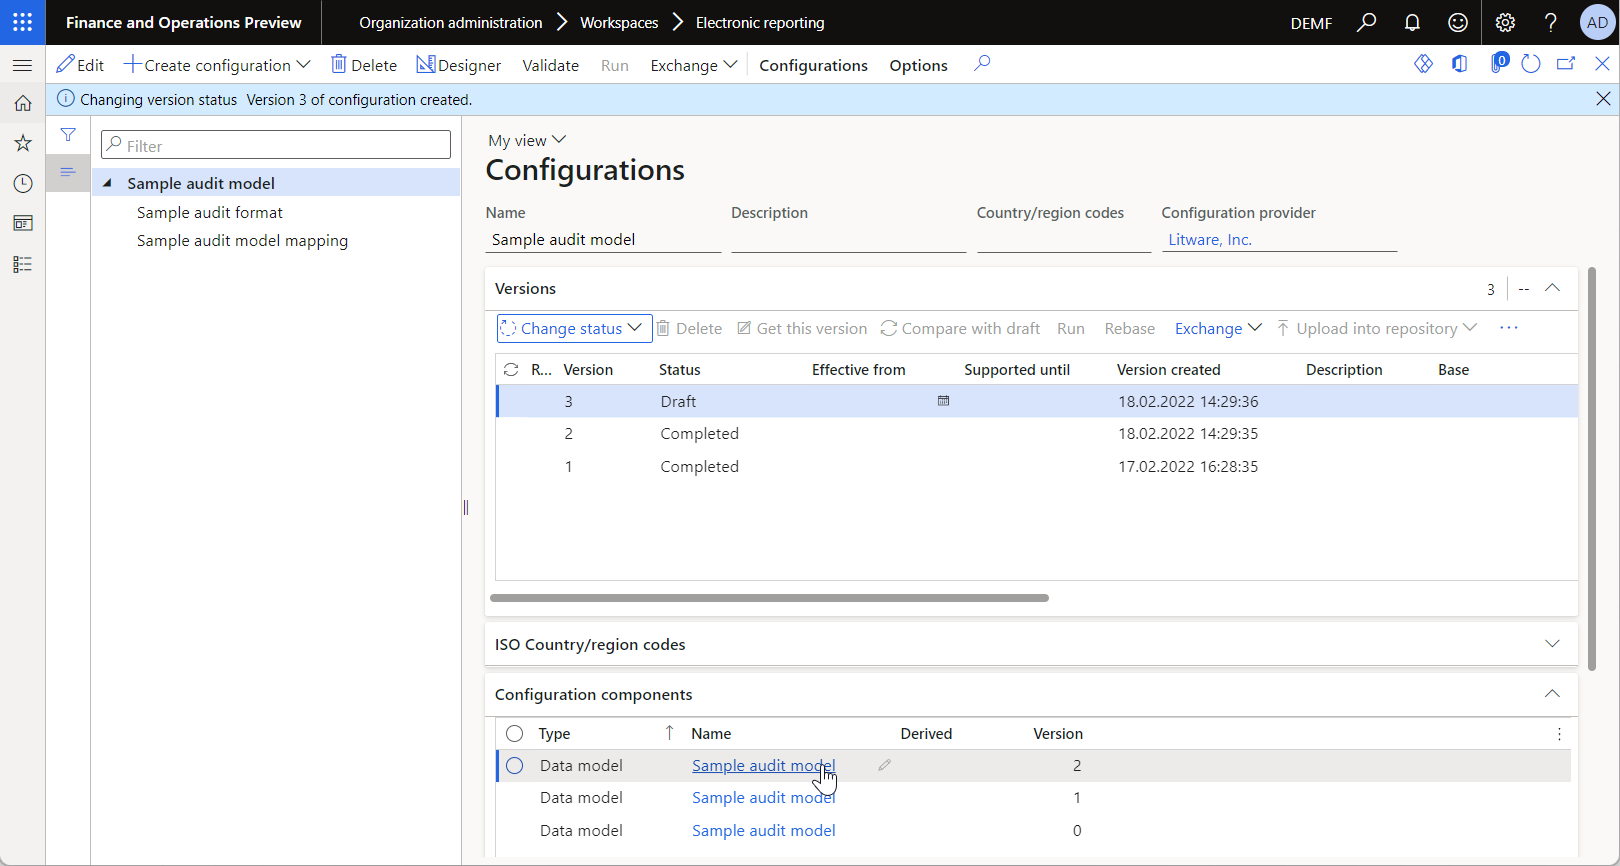
On the Versions FastTab, select version 2 that has a status of Draft.
Select the Configuration components FastTab.
Select Designer to open the data model for editing.
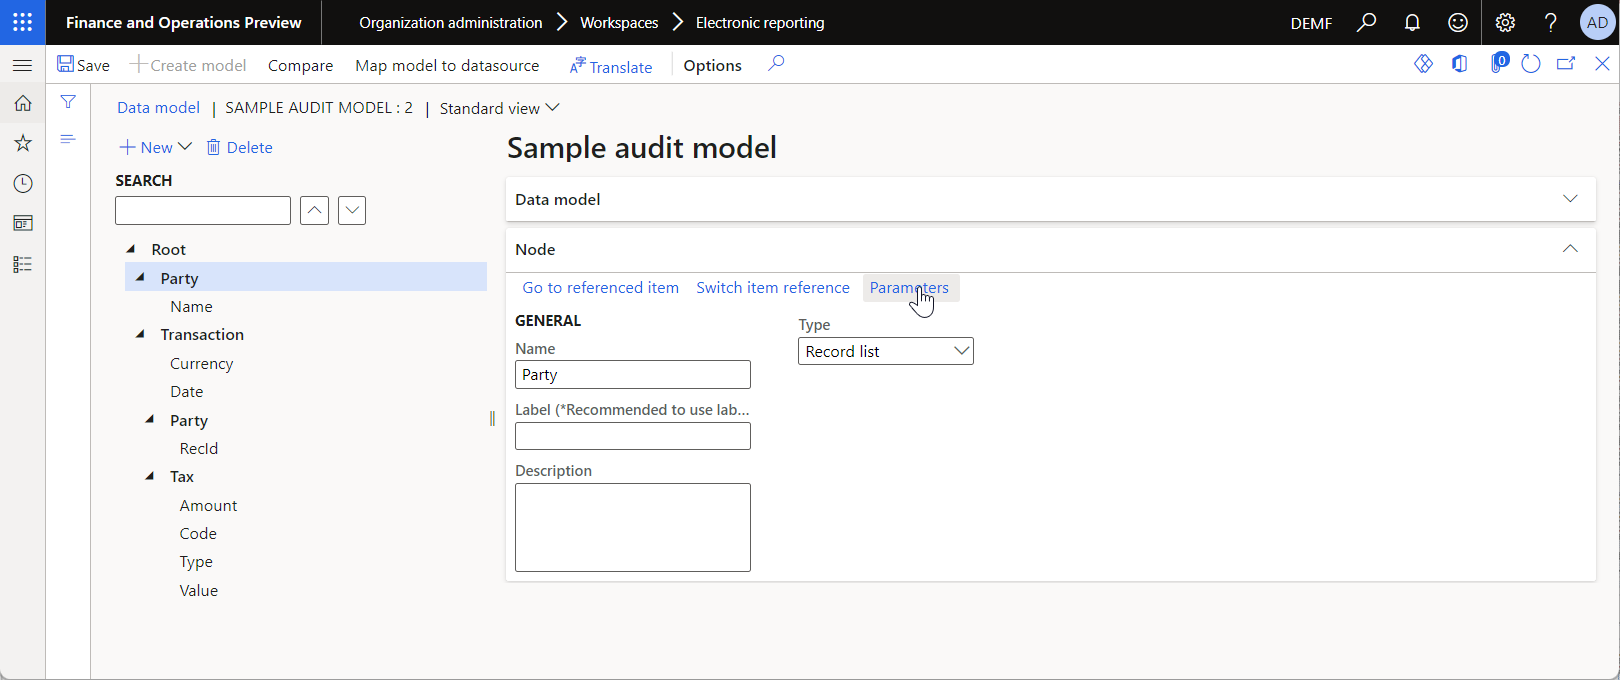
On the Data model page, make sure that the
Rootfield is selected, and then select New.In the drop-down dialog box, follow these steps:
- In the New node as field group, select the Child of an active node option.
- In the Name field, enter Party.
- In the Item type field, select Record list.
- Select Add to finish adding the new field.
Make sure that the
Root.Partyfield is selected, and then, on the Node tab, select Parameters.In the Parameters dialog box, follow these steps:
- On the Parameters tab, select New.
- In the Name field, enter PartyRefRecId.
- In the Type field, select Int64.
- Select the List checkbox.
- Select OK to finish entering the parameters.
Note
You just configured the
Root.Partydata model field as a field that is called when a value is provided in the PartyRefRecId parameter. This value must be present in the list of records that contain aValuefield of the Int64 data type.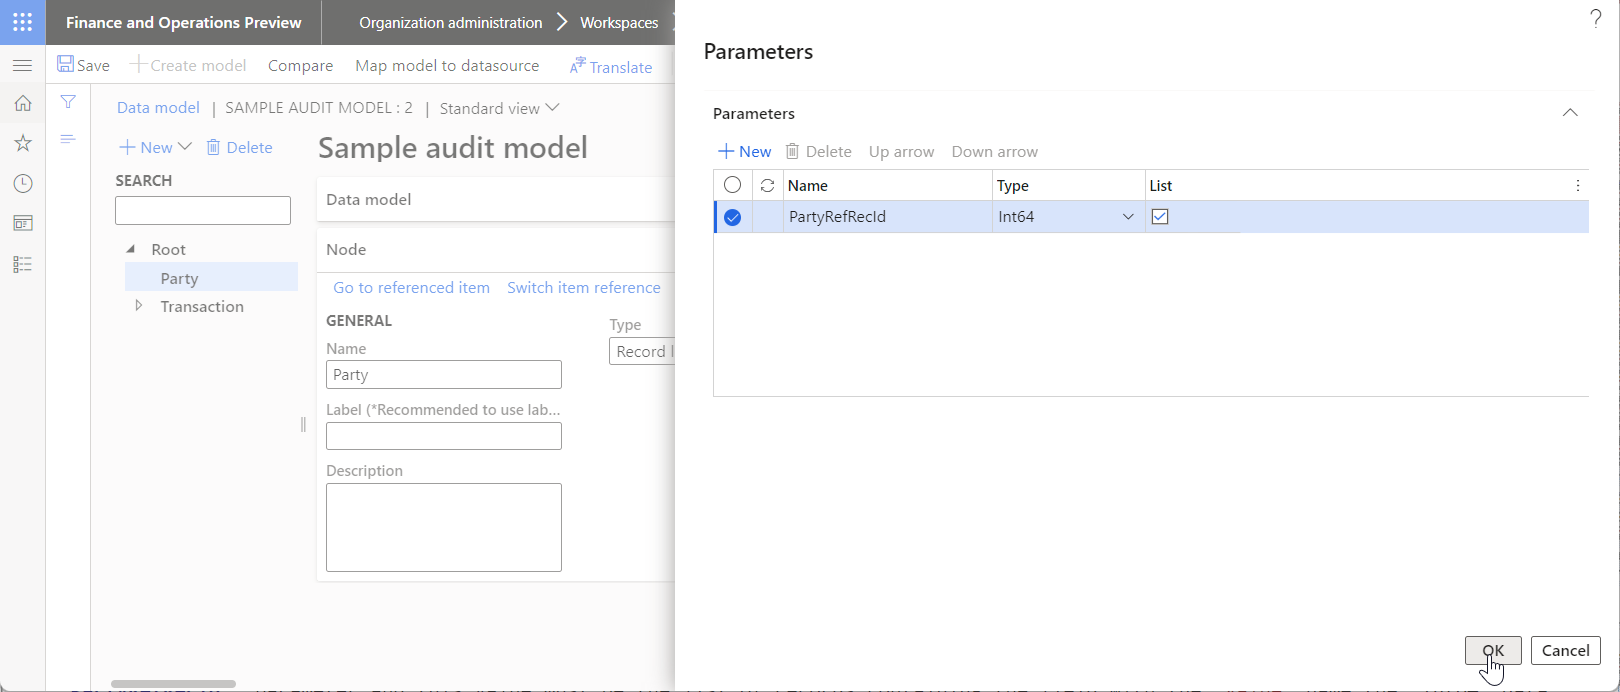
Make sure that the
Root.Partyfield is still selected, and then select New.In the drop-down dialog box, follow these steps:
- In the New node as field group, select the Child of an active node option.
- In the Name field, enter Name.
- In the Item type field, select String.
- Select Add to finish adding the new field.
Select Save, and close the Data model page.
On the Versions FastTab, for version 2, select Change status > Complete. Then select OK.
Note
Your data model changes are stored in the second revision of the Sample audit model data model component that is located in the second version of the Sample audit model ER configuration.
Adjust the imported model mapping
On the Configurations page, in the configurations tree in the left pane, expand Sample audit model.
Select Sample audit model mapping, and then, on the Versions FastTab, select the second mapping version that is based on the first data model version (version 1.2), and that has a status of Draft.
Select Rebase.
In the Target version field, leave version 2 of the Sample audit model base model.
Select OK to rebase and align your model mapping with recent data model changes.
Notice that the version number of your editable model mapping has changed from 1.2 to 2.2 to indicate that the second model version is currently used as a base.
Select Designer.
On the Model to datasource mapping page, select Designer for the current model mapping.
Follow these steps to add a new data source to access the
DirPartyTableapplication table:- In the Data source type pane, select Dynamics 365 for Operations > Table records.
- In the Data sources pane, select Add root.
- In the Name field, enter PartyTable.
- In the Table field, enter DirPartyTable.
- Select OK to finish adding the new data source.
Follow these steps to add a new data source to request
DirPartyTablerecords, based on the provided list of record identification codes:In the Data source type pane, select General > Empty container.
In the Data sources pane, select Add root.
In the Name field, enter Data.
Select OK to finish adding the new data source.
In the Data sources pane, select the Data data source.
In the Data source type pane, select Functions > Calculated field.
In the Data sources pane, select Add.
In the Name field, enter DirParty.
Select Edit formula.
On the Formula designer page, select Parameters.
In the Parameters dialog box, follow these steps:
- On the Parameters tab, select New.
- In the Name field, enter DirPartyId.
- In the Type field, select Int64.
- Select the List checkbox.
- Select OK.
Note
You just configured this calculated field so that it will accept, at runtime, the argument of a single parameter that is configured as a record list that has a single
Valuefield of the Int64 type.In the Formula field, enter the following expression:
FILTER(PartyTable, VALUEINLARGE(PartyTable.RecId, DirPartyId, DirPartyId.Value))Note
You just configured the
DirPartycalculated field to fetch onlyDirPartyTablerecords where the record identification codes are included in theDirPartyIdlist that is provided as an argument when theDirPartyfield is called.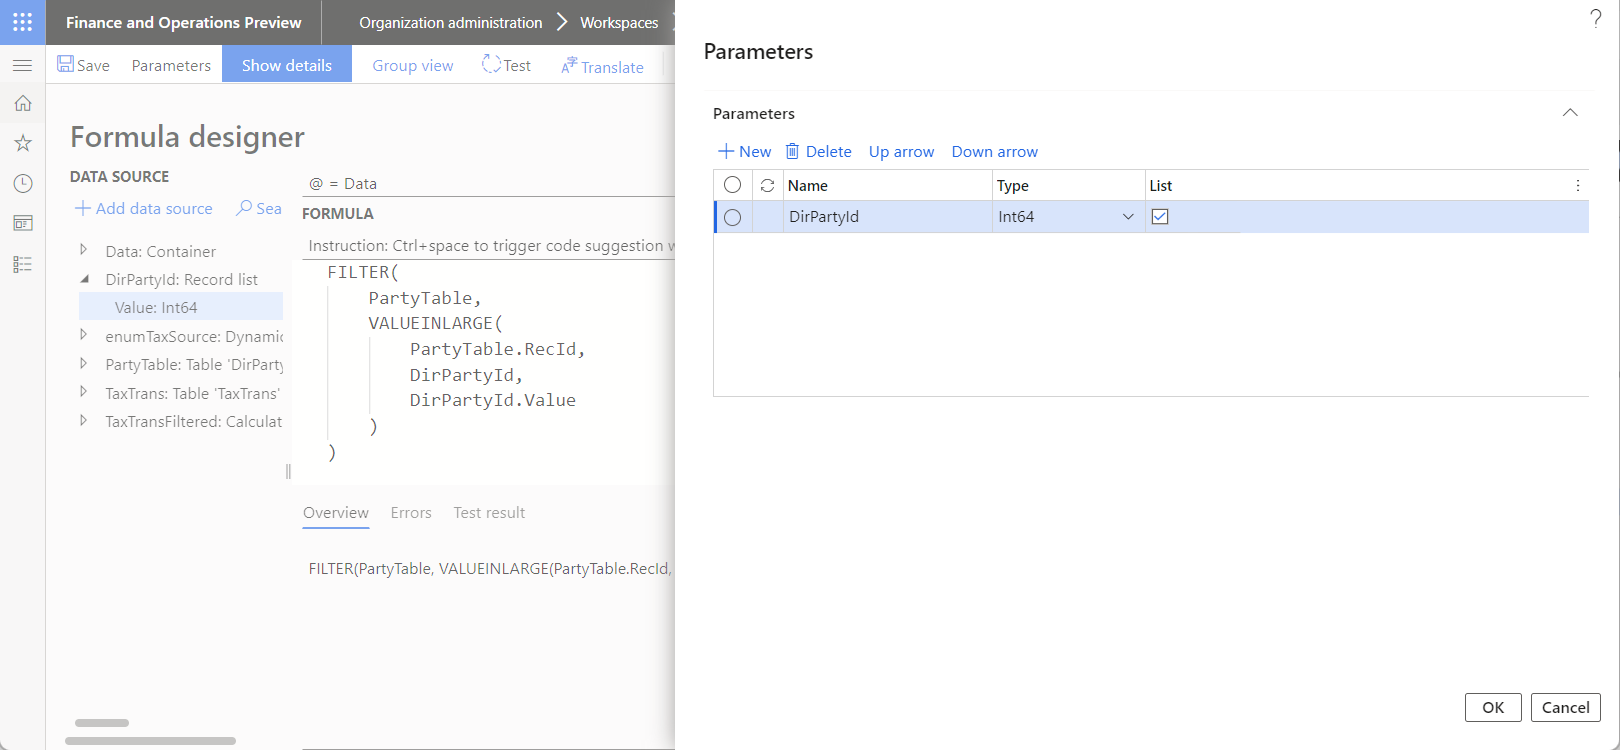
Select Save, and close the Formula designer page.
Select Save, and then select OK to finish adding the new data source.
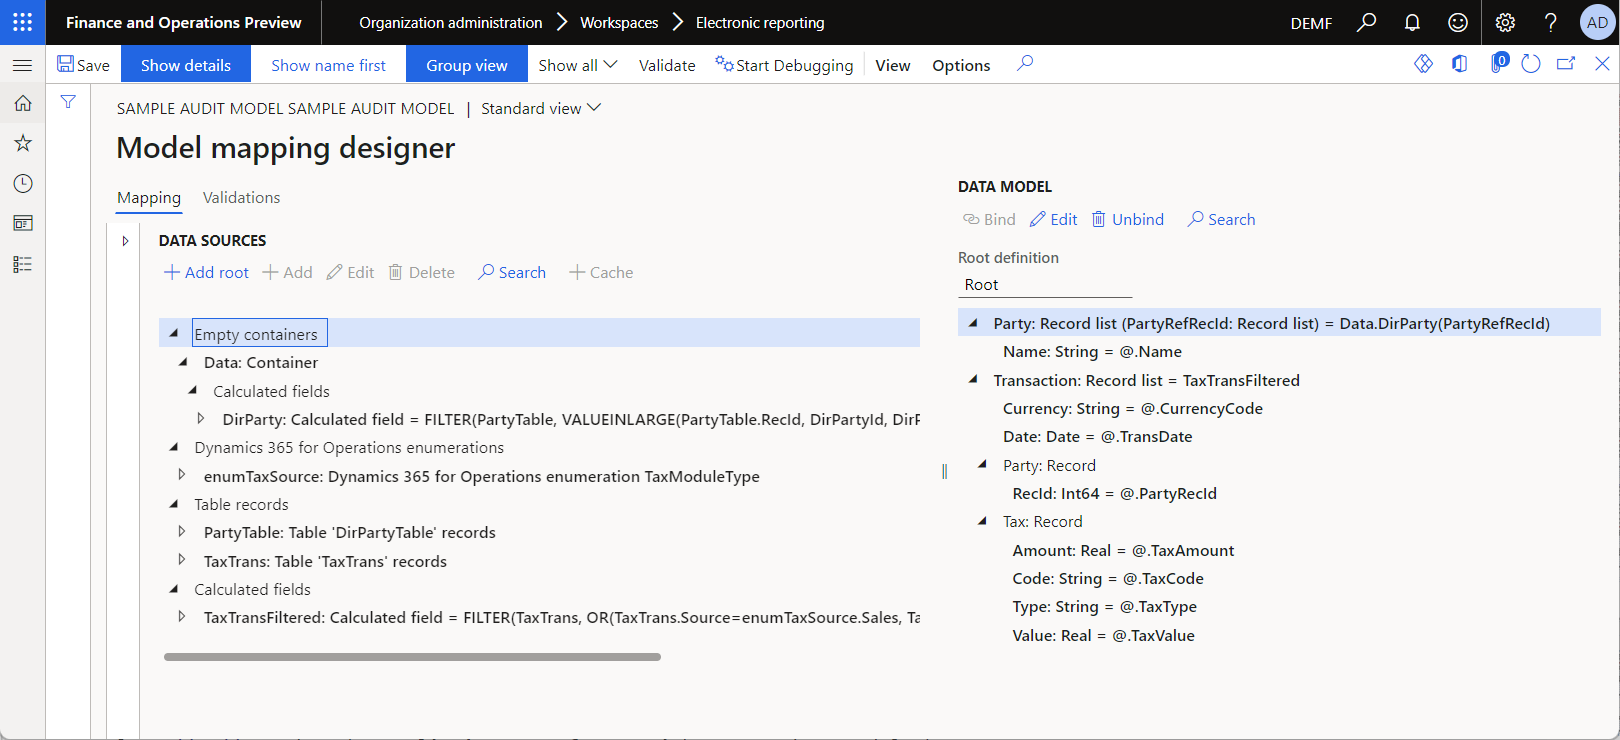
Follow these steps to bind the new data source to the new data model field, so that the data model is used to expose party names:
In the Data model pane, select the
Root.Partydata model field.In the Data model pane, select Edit.
On the Formula designer page, in the Formula field, enter the expression
Data.DirParty(PartyRefRecId).Select Save, and close the Formula designer page.
Note
You just configured the binding to call the configured
Data.DirPartydata source and provide the list of record identification codes that will be specified in the format when theRoot.Partydata model field is called.In the Data model pane, select the
Root.Party.Namedata model field.In the Data model pane, select Edit.
On the Formula designer page, in the Data source pane, expand Data > DirParty, and select Name.
Select Add data source.
Select Save, and close the Formula designer page.
Select Save, and close the Model mapping designer page.
Close the Model to datasource mapping page.
On the Versions FastTab, for version 2.2, select Change status > Complete. Then select OK.
Adjust the imported format
On the Configurations page, select Sample audit format.
On the Versions FastTab, select version 1.2 that has a status of Draft.
Select Rebase.
In the Target version field, leave version 2 of the Sample audit model base model.
Select OK to rebase and align your format with the recent data model changes.
Select Designer.
On the Format designer page, in the format structure tree in the left pane, select Expand/Collapse.
Follow these steps to add a new format element to collect record identification codes of parties whose transactions are presented on generated reports.
- In the format structure tree, select the Report.Row.Trans sequence element.
- Select Add.
- In the Add dialog box, select Data source > Item.
- In the Component properties dialog box, in the Name field, enter Id.
- In the Data type field, select Int64.
- Select OK.
Note
A Data source > Item element can be used to perform internal calculations and data transformation only in the scope of the running format. Therefore, by adding this format element, you don't change the content of a generated document.
Follow these steps to add new format elements to enter party names on generated reports:
- Select the Report.Row sequence element.
- Select Add.
- In the Add dialog box, select Text > Sequence.
- In the Component properties dialog box, in the Name field, enter Party.
- Select OK.
- Select the Report.Row.Party sequence element.
- Select Add.
- In the Add dialog box, select Text > String.
- In the Component properties dialog box, in the Name field, enter Name.
- Select OK.
Follow these steps to add a new data source to collect record identification codes of parties whose transactions are presented on generated reports:
- On the Mapping tab, select Add root.
- In the Add data source dialog box, select Functions > Data collection.
- In the 'Data collection' data source properties dialog box, in the Name field, enter PartyIds.
- In the Item type field, select Int64.
- Select OK.
Follow these steps to add a new binding to collect record identification codes of parties whose transactions are presented on generated reports:
- In the format structure tree, select the Report.Row.Trans.Id data item element.
- Select Edit formula.
- On the Formula designer page, enter the expression
PartyIds.Collect(model.Transaction.Party.RecId). - Select Save, and close the Formula designer page.
Follow these steps to add new bindings to enter party names on generated reports:
- In the format structure tree, select the Report.Party sequence element.
- Select Edit formula.
- On the Formula designer page, enter the expression
model.Party(PartyIds.Result). - Select Save, and close the Formula designer page.
- In the format structure tree, select the Report.Party.Name sequence element.
- On the Mapping tab, select the
model.Party.Namedata model field. - Select Bind.

Select Save, and close the Format designer page.
Close the Model to datasource mapping page.
On the Versions FastTab, for version 2.2, select Change status > Complete. Then select OK.
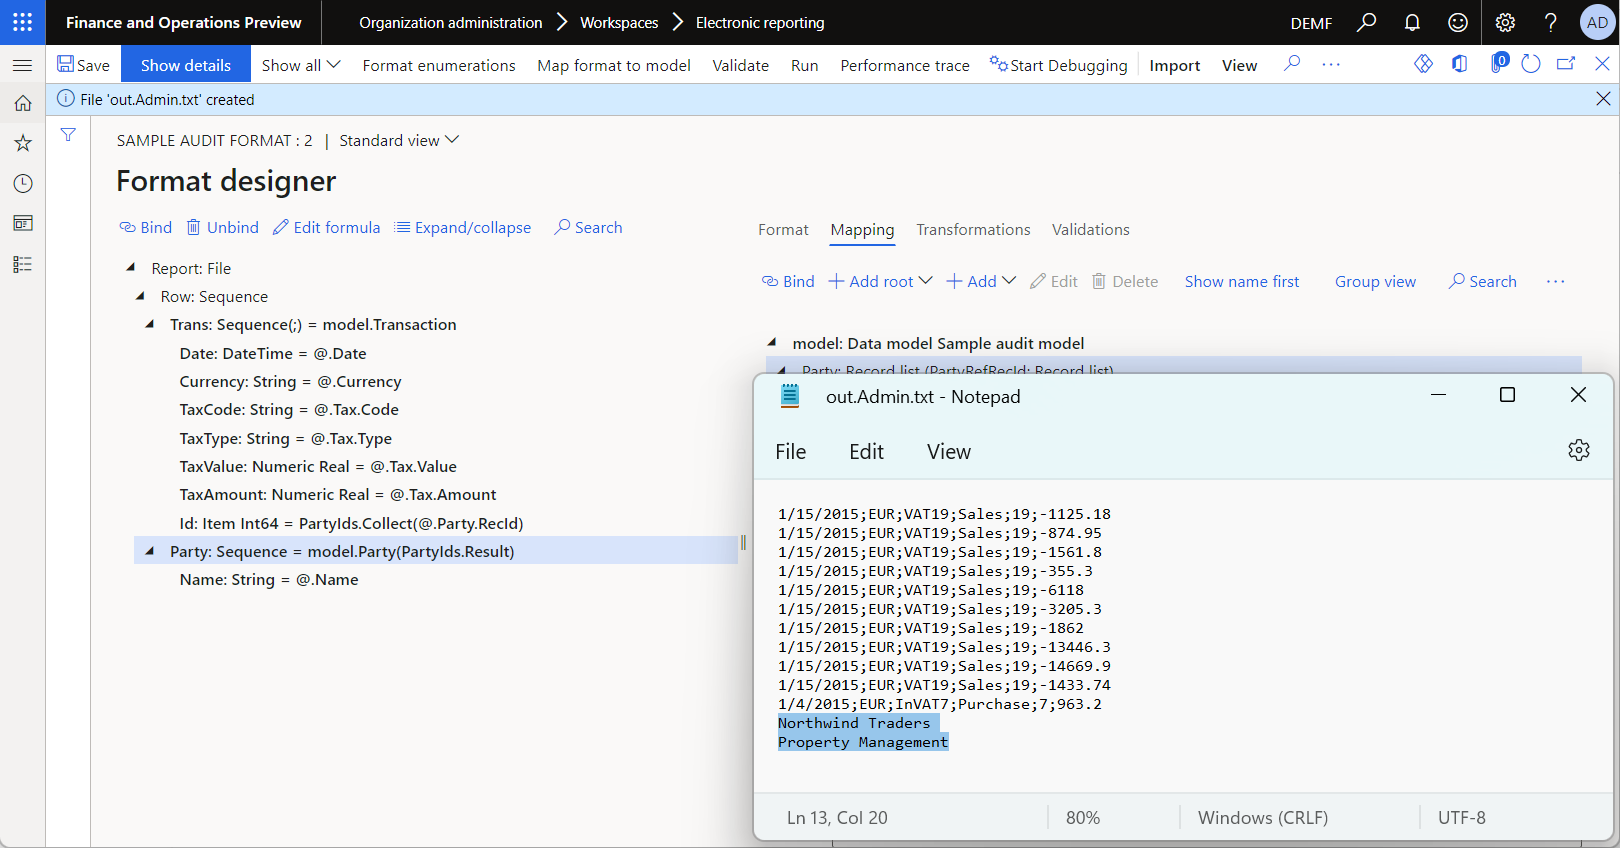
Run the adjusted format
On the Configurations page, select Sample audit format, and then, on the Action Pane, select Run.
In the Electronic report parameters dialog box, on the Records to include tab, select Filter.
Specify the conditions to select tax transactions of the PIV-110000004 and INV-10000001 vouchers.
Select OK.
Select OK.
Review the generated document that contains tax transactions of the selected vouchers and the names of the corresponding customer and vendor.
Go to Accounts payable > Vendors > All vendors, and review the details of the selected PIV-110000004 voucher, including the vendor name.
Go to Accounts receivable > Customers > All customers, and review the details of the selected INV-10000001 voucher, including the customer name.
For more details about this execution of the ER solution, use the ER built-in performance trace parser.